Table of Contents >> Show >> Hide
- Why Make a Paper Blaster-Style Craft?
- Materials You Will Need
- Before You Start: Choose Your Paper Prop Style
- Step-by-Step: How to Make the Paper Craft
- Design Tips for a Better-Looking Result
- Common Mistakes to Avoid
- Fun Ways to Customize the Craft
- How This Project Supports Creativity and Learning
- Where a Paper Prop Works Best
- Experience and Creative Inspiration: What Building This Kind of Paper Craft Feels Like
- Conclusion
- SEO Tags
If you came here hoping for a paper craft project with a little action-movie energy, you are in the right place. If you came here hoping to turn your desk into a tiny action-hero training ground, also yes. But let’s keep things firmly in the world of harmless fun. This guide walks you through how to make a paper gun craft that looks impressive, feels satisfying to build, and works beautifully as a prop, decoration, costume accessory, or creative rainy-day project. No projectiles. No dangerous mechanics. Just folds, shapes, tape, and a little imagination.
Paper crafting has been popular for decades because it is affordable, beginner-friendly, and wildly flexible. With a few basic supplies, you can turn flat sheets into surprisingly detailed 3D objects. A paper blaster-style prop is especially fun because it lets you practice structure, symmetry, and design without needing expensive tools. It is part origami, part model-making, and part excuse to tell yourself, “This is art,” while you cover the table in paper scraps.
In this guide, you will learn the materials you need, a simple step-by-step process, ways to customize the final look, common mistakes to avoid, and creative ideas for using your finished paper prop. Whether you are a parent looking for a safer craft project, a student working on a costume, or a hobbyist who simply enjoys building things out of paper, this project can be both fun and practical.
Why Make a Paper Blaster-Style Craft?
There are plenty of reasons people love this kind of paper build. First, it is inexpensive. Standard printer paper, construction paper, cardstock, glue, and tape are easy to find in most homes, classrooms, and craft drawers. Second, it is customizable. You can create a sci-fi blaster, a comic-book style prop, a retro ray gun, or a sleek minimalist design. Third, it is safer than any version designed to launch anything at all, which makes it more suitable for kids, school projects, and costume events.
It is also a surprisingly good project for learning design basics. You will practice rolling tubes, reinforcing paper shapes, aligning pieces, and thinking in three dimensions. If you have ever built a paper airplane, folded a paper crane, or made a cardboard robot helmet that looked better in your imagination than in real life, this project fits right into that creative family.
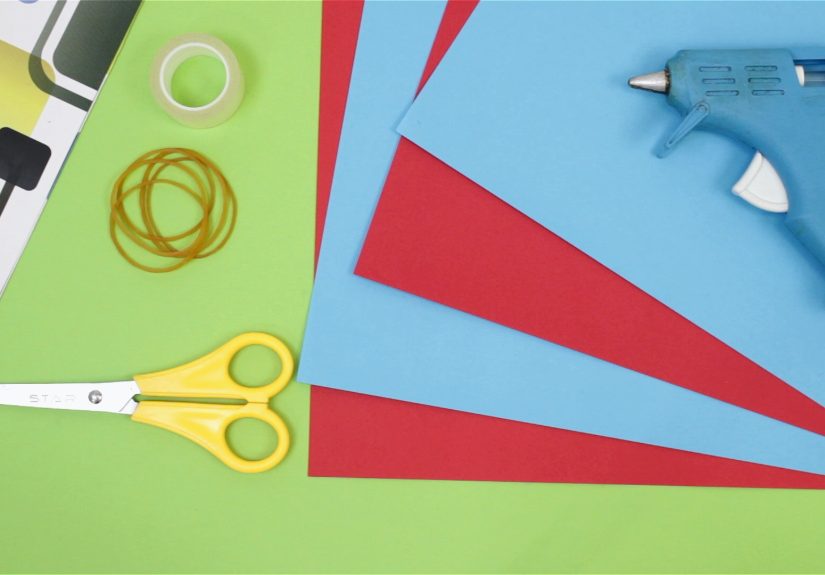
Materials You Will Need
Basic Supplies
- 8–12 sheets of printer paper or cardstock
- Scissors
- Tape or paper glue
- Ruler
- Pencil
- Markers, crayons, or paint for decoration
Optional Supplies for Better Results
- Hot glue gun for adult-supervised crafting
- Black or silver paper for a cleaner finish
- Cardboard scraps for extra support
- Craft knife for advanced users
- Sticker sheets or metallic tape for details
Cardstock usually gives you a sturdier prop, while regular printer paper is easier to roll and fold. If you want the final craft to survive more than one dramatic “pew pew” moment in the living room, cardstock is your friend.
Before You Start: Choose Your Paper Prop Style
Before cutting anything, decide what type of paper prop you want to build. This keeps the project focused and makes the final result look intentional instead of “I taped several tubes together and called it modern art.”
Simple Style
A basic handheld prop with a barrel shape, body, and grip. This is ideal for beginners.
Sci-Fi Style
Add angular shapes, layered panels, and bright colors for a futuristic look. Great for costumes and themed parties.
Retro Ray Gun Style
Use curves, circles, and metallic colors for a playful vintage vibe.
Cartoon Style
Make it oversized and exaggerated with bold outlines. This version works especially well for school plays and photo booths.
Step-by-Step: How to Make the Paper Craft
Step 1: Make the Main Body Tube
Take one sheet of paper and roll it lengthwise around a pencil or marker to form a firm tube. Secure the edge with tape or glue. This will be the main body of your craft. If you want it thicker, wrap another sheet around it. The goal is to create a stable center piece that can support the other parts.
Try to keep the roll tight and even. Loose rolls can collapse, and wobbly paper tubes are the craft equivalent of building a skyscraper on gelatin.
Step 2: Create the Front Barrel Piece
Roll a second tube that is slightly narrower or shorter than the main body. Attach it to the front end of the main body. You can place it directly in line for a classic look or layer it on top for a more stylized design. Reinforce the connection with extra tape inside and outside the joint.
If you want a more polished appearance, cut a paper ring and wrap it around the connection point like a sleeve. This hides seams and makes the build look more finished.
Step 3: Build the Handle
Fold a sheet of paper into a long rectangular strip, then fold again until it becomes thick and sturdy. Bend it slightly into a grip shape and attach it underneath the main body at an angle. If you want extra strength, sandwich a small piece of cardboard inside the folded handle before taping it shut.
The handle is one of the most important structural elements, so do not rush it. A floppy handle can turn a cool prop into something that looks like it had a difficult morning.
Step 4: Add a Top Layer or Slide Shape
Cut a rectangular strip of paper, fold the long edges inward, and tape it along the top of the main body. This gives the craft a layered, dimensional look. In a sci-fi version, you can stack two or three top layers of slightly different sizes for more detail.
Step 5: Shape the Front and Back Ends
Use small folded paper pieces to cap the front and back openings. You can keep them flat, rounded, or angular depending on the look you want. Even simple caps make the project feel more complete and less like a collection of paper pasta tubes.
Step 6: Reinforce the Weak Points
Check all attachment points, especially the handle and front barrel. Add extra strips of tape or paper wraps around joints. If you are using glue, allow enough drying time before moving on to decoration.
Step 7: Decorate the Surface
Now comes the fun part. Use markers, metallic paper, paint, or stickers to add lines, buttons, vents, stripes, or fictional control panels. This is where your craft goes from “interesting folded object” to “Hey, that actually looks cool.”
For a clean finish, cover visible tape with matching paper strips. You can also wrap large sections in colored paper instead of coloring directly on white paper.
Design Tips for a Better-Looking Result
Keep the Shape Balanced
If the front is too large and the handle is too small, the prop can look awkward. Step back every few minutes and check the overall silhouette.
Use Repetition
Repeated details like stripes, circular accents, or panel lines make the design feel intentional. Consistency goes a long way.
Layer Thin Pieces
Adding small paper shapes on top of the base structure creates depth. Even a few raised details can make the craft look more realistic or more stylized, depending on your design goal.
Choose a Color Theme
Black and silver looks sleek. Bright red and blue feels comic-book inspired. Neon green and gray screams sci-fi. Pick two or three colors and stick with them.
Common Mistakes to Avoid
Using Paper That Is Too Thin
Very thin paper tears easily and struggles to hold shape. If regular paper is all you have, double it up in important areas.
Skipping Reinforcement
If you only tape the pieces once and call it a day, the craft may sag or separate. Reinforcement is not glamorous, but neither is your prop falling apart during a costume photo.
Overdecorating Too Early
Build first, decorate second. Drawing all over a piece before you know where it goes can lead to smudges, misplaced details, and mild artistic regret.
Making the Handle Too Narrow
A handle that is too thin can feel weak and awkward to hold. Give it enough width for both comfort and structure.
Fun Ways to Customize the Craft
- Add a paper scope on top for a toy gadget look
- Use glow-in-the-dark stickers for a space-themed design
- Create matching paper holsters or belt accessories for costumes
- Make a set of mini props for a themed party table display
- Design a comic-book style version with exaggerated shapes and bold outlines
You can also scale the design up or down. A larger version works well as a stage prop, while a smaller version can be part of a decorative display, party centerpiece, or cosplay accessory.
How This Project Supports Creativity and Learning
This paper craft is more than a way to pass time. It teaches patience, planning, hand-eye coordination, and creative problem-solving. Kids can explore shape and structure. Adults can enjoy a low-cost hobby project that feels satisfying to complete. Teachers and parents can use it to talk about design, safety, and imaginative play without crossing into anything harmful.
Paper crafting also encourages experimentation. Maybe your first version looks a little lopsided. Fine. That is called “prototype energy.” Your second version will almost always be better because you will understand where the structure needs more support and where the design can be cleaner.
Where a Paper Prop Works Best
A harmless paper blaster-style craft can be useful in more places than you might think. It works for costume parties, cosplay, school theater, photography props, themed birthday events, and handmade decorations. It can also be part of a larger craft project, like a cardboard robot outfit or a homemade comic-book display.
Because it does not launch anything, it is easier to adapt for settings where safety matters. It becomes a design object instead of a device, which opens up more creative possibilities.
Experience and Creative Inspiration: What Building This Kind of Paper Craft Feels Like
One of the most interesting things about making a paper prop like this is how quickly it shifts from a simple craft into a personal design experiment. At first, you are just rolling tubes and folding rectangles. Nothing about it seems especially dramatic. Then suddenly the shape starts to emerge. The handle lines up. The top layer clicks into place. You add a few decorative stripes or a metallic paper panel, and your pile of office supplies transforms into something with character. That moment is part of the appeal.
For many people, projects like this tap into the same joy as building model kits, folding origami, or making cardboard forts as kids. There is a hands-on satisfaction in creating a three-dimensional object out of materials so ordinary that they usually spend their lives as shopping lists, homework, or printer jams. The process feels playful and practical at the same time. It is crafting, but with a little cinematic flair.
There is also a surprisingly relaxing side to it. Measuring, folding, trimming, and aligning pieces requires just enough concentration to keep your brain busy without becoming stressful. It is the kind of project that works well on a weekend afternoon, at a classroom craft table, or during a family activity night. You do not need elite art-school skills. You just need patience, basic supplies, and a willingness to adjust when your first idea turns out slightly crooked. Which, to be fair, is a sentence that could describe half of life.
People who enjoy cosplay or themed events often find that paper prop building is a great starting point before moving on to foam, cardboard, or more advanced materials. It helps you understand shape, proportion, and visual storytelling. A longer front barrel can make the design feel futuristic. A rounded body can make it feel retro. Bold outlines and bright colors can make it feel animated or comic-inspired. You start thinking not just about what you are building, but what mood it creates.
Another rewarding part of the experience is customization. No two paper props need to look the same. One builder might prefer a polished sci-fi look with silver accents and sharp panel lines. Another might create a cartoon version with oversized details and playful colors. Some people even build matching accessories, like paper badges, utility belts, or cardboard armor pieces. Once you make one successful prop, your brain starts pitching sequels.
This kind of project can also become a surprisingly memorable group activity. Families can divide the steps, with one person rolling tubes, another drawing decorative pieces, and someone else handling assembly. In classrooms or clubs, it can become a design challenge: who can make the most creative harmless prop using only paper and tape? The fun comes not from making something functional in a dangerous sense, but from seeing how imaginative and polished you can make it.
In the end, the real experience of making a paper blaster-style craft is about creativity, patience, and transformation. A flat sheet becomes a structure. A rough idea becomes a finished object. And you end up with something that feels a little silly, a little clever, and a lot more impressive than anyone expects from a stack of paper. That is the charm. It is simple, safe, and just theatrical enough to make you grin when you are done.
Conclusion
Learning how to make a paper gun craft that does not shoot is a fun way to combine creativity, structure, and style in one accessible project. With basic materials, a clear design plan, and a little patience, you can build a prop that looks detailed and feels satisfying to finish. Whether you choose a sci-fi look, a retro ray gun theme, or a playful cartoon style, the key is to focus on sturdy construction, neat layering, and thoughtful decoration.
Best of all, this version keeps the project safe and versatile. It works for costumes, displays, classrooms, party decor, and imaginative crafting without crossing into anything harmful. That makes it a better fit for families, schools, hobbyists, and anyone who wants the fun of the build without the risk. In other words, all the creativity, none of the chaos.


