Table of Contents >> Show >> Hide
- Quick Table of Contents
- Before You Start: Sourcing, Safety, and Sanity
- 1) Classic Reclaimed Shiplap (But Make It Grown-Up)
- 2) Barnwood “Calm Chaos” Horizontal Planks
- 3) Vertical Planking to Fake Higher Ceilings
- 4) Herringbone or Chevron Using Reclaimed Flooring
- 5) Modern Reclaimed Slat Wall (Warm, Sleek, Slightly Fancy)
- 6) Patchwork Mosaic Wall (The “Quilt” of Wood Walls)
- 7) Half-Wall Wainscoting in Reclaimed Boards
- 8) Whitewashed or Limewashed Reclaimed Wood
- 9) Reclaimed Wood Headboard Wall With Integrated Lighting
- 10) Frame-and-Fill Panels (Reclaimed Wood Inside Picture Frames)
- Finishing & Maintenance That Won’t Ruin the Patina
- Conclusion
- Real-World Experiences: What It’s Actually Like to Live With One
- SEO Tags (JSON)
Reclaimed wood walls are the design equivalent of showing up to a party in a vintage leather jacket: instantly cooler,
a little mysterious, and somehow they make everything around them look more expensive.
Whether your vibe is “modern cabin,” “loft with feelings,” or “I just want one wall that doesn’t look like builder beige,”
a reclaimed wood feature wall adds warmth, texture, and a storysometimes literally, depending on how chatty your lumber is.
Below are 10 reclaimed wood wall ideas (from classic rustic to “is that a recording studio?” modern), plus practical tips
on sourcing, planning, installing, and finishingwithout turning your living room into a sawdust-themed escape room.
Quick Table of Contents
- Before You Start: Sourcing, Safety, and Sanity
- Classic Reclaimed Shiplap (But Make It Grown-Up)
- Barnwood “Calm Chaos” Horizontal Planks
- Vertical Planking to Fake Higher Ceilings
- Herringbone or Chevron Using Reclaimed Flooring
- Modern Reclaimed Slat Wall (Warm, Sleek, Slightly Fancy)
- Patchwork Mosaic Wall (The “Quilt” of Wood Walls)
- Half-Wall Wainscoting in Reclaimed Boards
- Whitewashed or Limewashed Reclaimed Wood
- Reclaimed Wood Headboard Wall With Integrated Lighting
- Frame-and-Fill Panels (Reclaimed Wood Inside Picture Frames)
- Finishing & Maintenance That Won’t Ruin the Patina
- Conclusion
- Real-World Experiences: What It’s Actually Like to Live With One
- SEO Tags (JSON)
Before You Start: Sourcing, Safety, and Sanity
Where to find reclaimed wood (without buying a haunted ship deck)
- Architectural salvage + reuse stores (great character; inspect carefully).
- Reclaimed lumber dealers (more consistent milling; higher price, lower drama).
- Reuse nonprofits + home improvement thrift stores (treasure-hunt energy; go often).
- Old flooring & fence boards (best for patterns; check thickness and flatness).
Safety checklist (quick, not scaryjust smart)
-
If the wood is painted or came from a very old building: treat it like it might involve lead.
Don’t sand painted surfaces casually. Test or get a pro opinion if you’re unsure. - De-nail and de-metal: hidden nails love to sacrifice your saw blades. Use a metal detector if you can.
- Let the wood acclimate: bring it into the room (ideally 48 hours) so it adjusts to temperature and humidity.
-
Dust control: cut outdoors when possible, use a shop vac attachment, and wear a proper mask/respirator.
“I’ll just do one quick cut” is how dust becomes a lifestyle.
Design decision that changes everything: rustic or refined?
Reclaimed wood can read cozy and rustic (knots, nail holes, saw marks) or tailored and modern (clean lines,
consistent tones, matte finishes). Decide where you want to land on that spectrum before you start. Otherwise you’ll end up
with a wall that says, “I’m modern!” while whispering, “but also… barn.”
1) Classic Reclaimed Shiplap (But Make It Grown-Up)
Reclaimed shiplap is the gateway wood wall: approachable, timeless, and it plays well with almost any style.
Use it behind a sofa, in an entry, or as a bedroom accent wall. The reclaimed twist is in the variationsubtle shifts in tone,
old nailheads, and little “imperfections” that make the wall feel like it has lived a life.
Make it look intentional
- Paint the wall behind it a darker shade (charcoal or black) so any tiny gaps disappear visually.
- Choose a seam strategy: tight seams for a cleaner look, or visible gaps for a more rustic effect.
- Keep the decor simple: let the wall texture do the talking.
2) Barnwood “Calm Chaos” Horizontal Planks
If you want maximum character with minimum fuss, go for mixed-width reclaimed boards installed horizontally.
This style works beautifully in living rooms, dining rooms, and hallwaysanywhere you want “wow” without being precious.
The key is to embrace variation while controlling the overall palette (warm browns, weathered grays, or a blend that still feels cohesive).
Pro tip: balance the randomness
- Dry-lay on the floor first to distribute knots and color variation evenly.
- Stagger joints so seams don’t stack like a brick wall’s boring cousin.
- Mix lengths to avoid a “striped” look.
3) Vertical Planking to Fake Higher Ceilings
Want your room to feel taller without negotiating with physics? Install reclaimed boards vertically.
This is especially good for small bedrooms, powder rooms, and narrow entryways. Vertical lines pull the eye upward,
and the wall reads more architecturallike you planned the whole room around it (even if you absolutely did not).
Where it shines
- Behind a bed as a modern-rustic headboard backdrop.
- In a small office to add texture on video calls (tasteful flex).
- On short walls where horizontal boards might look squat.
4) Herringbone or Chevron Using Reclaimed Flooring
Reclaimed flooring on a wall is a high-impact move that looks custom and expensivebecause it kind of is.
Herringbone feels classic and “European apartment energy,” while chevron reads more graphic and modern.
This is a great choice behind a dining banquette, in a bedroom, or as a dramatic entry focal point.
How to keep it from looking like a craft project
- Use consistent thickness (flooring helps here) so the surface stays flat.
- Pick a centerline and work outward to keep the pattern symmetrical.
- Limit the palette (too many tones can look busy fast).
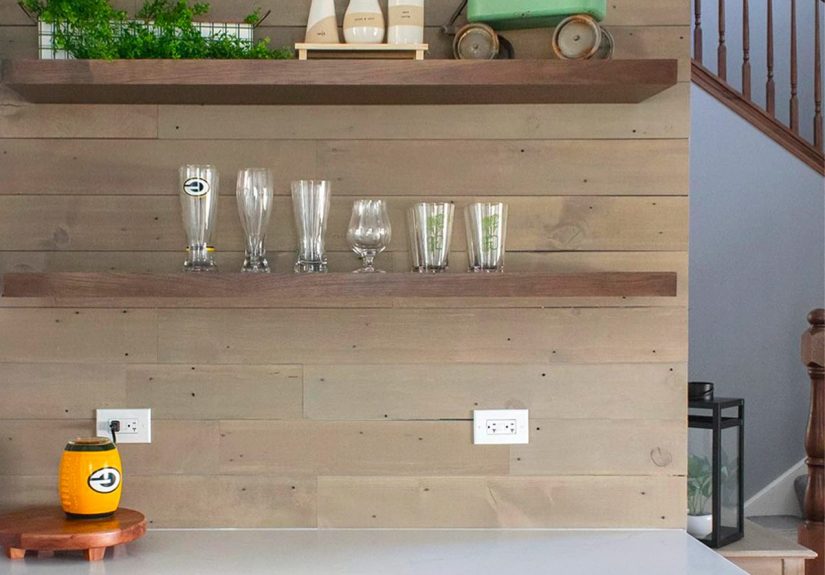
5) Modern Reclaimed Slat Wall (Warm, Sleek, Slightly Fancy)
Reclaimed wood doesn’t have to be rustic. A slat wall made from reclaimed strips (or reclaimed-look slat panels) feels
modern, clean, and architectural. Bonus: it can improve perceived acoustics by breaking up sound reflections, which is why
it’s popular behind TVs, in offices, and in open-plan living rooms.
Design upgrades
- Add a black backing (painted wall or felt) for depth and contrast.
- Float shelves or cabinetry over the slats for a built-in look.
- Use consistent spacingslat walls are “measured and calm,” not “free-range.”
6) Patchwork Mosaic Wall (The “Quilt” of Wood Walls)
This one is for maximalists, artists, and anyone who sees a pile of scraps and thinks, “Yes, a masterpiece.”
Create a patchwork reclaimed wood wall using pieces of different lengths (and even different species), arranged like a mosaic.
The trick is to repeat tones so it feels curated, not chaotic.
Keep it classy
- Choose a color story (warm, cool, or neutral) and stick to it.
- Use a grid guideline so the “random” placement still aligns.
- Seal it if it’s in a high-touch zone (kids + splinters is not the vibe).
7) Half-Wall Wainscoting in Reclaimed Boards
Reclaimed wood wainscoting is the perfect compromise when you want texture, but you also want your room to feel airy.
Cover the lower third (or half) of the wall with reclaimed boards, then paint the upper wall a clean color.
It’s great in dining rooms, staircases, mudrooms, and bathrooms (outside direct splash zones).
Why it works
- It protects walls in high-traffic areas.
- It adds character without overpowering the room.
- It plays well with modern furniture (hello, “modern farmhouse” without the cliché overload).
8) Whitewashed or Limewashed Reclaimed Wood
If your reclaimed wood is looking a little too “hunting lodge,” whitewashing is your brightness cheat code.
You keep the grain and texture, but the overall effect feels lighterperfect for coastal, Scandinavian, and modern rustic spaces.
Limewash-style effects can look especially soft and matte.
How to get the look
- Test on a scrap first: reclaimed wood absorbs finishes unpredictably (it has trust issues).
- Wipe-back method: apply a thinned paint or wash, then wipe to reveal grain.
- Topcoat if needed: especially in kitchens, hallways, or kid zones.
9) Reclaimed Wood Headboard Wall With Integrated Lighting
Turn the wall behind your bed into a functional feature by adding reclaimed wood plus lighting.
Think: a wood-clad panel that extends wider than the bed, with sconces or pendant drops mounted through the surface.
This gives “boutique hotel” energy without requiring boutique hotel budgets.
Little details that feel big
- Run the wood past the nightstands so it looks custom.
- Use warm lighting to enhance wood tones and avoid a gloomy cave vibe.
- Plan wiring early: measure fixture locations before installing boards.
10) Frame-and-Fill Panels (Reclaimed Wood Inside Picture Frames)
Want reclaimed wood texture with a more polished, architectural finish? Add simple trim “frames” on the wall and fill the
inside with reclaimed boards. The result looks like custom panelingstructured, upscale, and surprisingly adaptable to modern homes.
It’s especially good for offices, dining rooms, and formal living spaces that need warmth without looking too rugged.
Style options
- Go tone-on-tone: paint the trim and leave the wood natural.
- Go bold: dark stain inside frames with light-painted trim for contrast.
- Vary direction: vertical boards in one frame, horizontal in the next, for subtle movement.
Finishing & Maintenance That Won’t Ruin the Patina
Reclaimed wood’s whole charm is its “been places” look, so finishing is about protection without erasing personality.
Not every wall needs a finish, but these situations usually do:
- High-touch areas (staircases, kids’ rooms, tight hallways)
- Grease/moisture zones (kitchen-adjacent walls, breakfast nooks)
- Anything splinter-prone (rough boards with raised grain)
Finish choices (plain-English version)
- Matte water-based polyurethane: good protection, less ambering, modern feel.
- Hardwax oil: natural look and feel; great for a “touchable” surface.
- Penetrating oils (like tung oil): emphasize grain; requires patience and proper curing.
- Seal-only approach: if you love the raw look, a low-sheen seal can help reduce dusting and splinters.
Maintenance
- Dust with a microfiber cloth (avoid snagging on rough grain).
- Spot-clean gently with a barely damp clothdon’t soak the wood.
- Recoat when needed in high-wear areas (you’ll see dull spots or feel roughness).
Conclusion
The best reclaimed wood wall idea is the one that matches how you actually live.
If you want a weekend DIY win, reclaimed shiplap or horizontal planks are forgiving and timeless.
If you want something that looks truly custom, go herringbone, slats, or frame-and-fill panels.
And if your heart beats faster at the sight of leftovers and offcuts, the patchwork mosaic wall is calling your name.
Whatever you choose, focus on three things: a cohesive palette, thoughtful layout, and a finish level that fits your space.
Do that, and your wall won’t just be “wood on drywall”it’ll be the reason guests say, “Okay, wow… where did you get that?”
Real-World Experiences: What It’s Actually Like to Live With One
Here’s the part people don’t always tell you in the dreamy before-and-after photos: a reclaimed wood wall is a relationship.
A good one! But stillthere are quirks, habits, and a little learning curve. Based on what homeowners and DIYers commonly run into,
these are the most “real life” moments you can expect once the wall is up and the tools are finally back in the garage.
First, you’ll notice how much the room’s lighting matters. Reclaimed wood is basically a texture amplifier.
Morning light makes grain pop and highlights every saw mark like it’s telling you a story. Night lighting can go either cozy or cave-like,
depending on bulb temperature and fixture placement. People often end up swapping bulbs to a warmer tone, adding a floor lamp,
or installing a dimmer just to make the wood glow instead of sulk.
Second, there’s the “dust and splinter reality check.” Rough-sawn boards can shed a little dust at first,
and if the surface is very textured, it can snag microfiber cloths or sweaters that brush against it.
Many folks find that a low-sheen sealer (even if they originally wanted “raw and rustic”) makes the wall easier to live with
especially in hallways, kids’ rooms, or anywhere that gets accidental shoulder-checks during laundry day.
Third, you’ll discover that “reclaimed” sometimes means “inconsistent.” That’s part of the charm, but it also shows up in tiny ways:
a board that isn’t perfectly straight, a seam that wants to open a hair in winter, or a knot that looks different depending on humidity.
Most people who love their reclaimed wood wall learn to embrace these as personality traits, not defects.
(Think: laugh lines, but for lumber.)
If you used wood with lots of color variation, you may also experience the “decor domino effect.”
The wall becomes the star, and suddenly the throw pillows look suspiciously bland, the rug feels a little too timid,
and you’re rearranging art because “the wall already has enough going on.” The practical lesson: once the wall is installed,
give yourself a week before you buy anything else. Live with it. Let the room settle. Let your brain stop auditioning every lamp you own.
Finally, there’s the emotional side: a reclaimed wood wall has a way of making a house feel more lived-in and intentional.
People often describe the room as warmer, calmer, and more “finished,” even if they didn’t change anything else.
That’s the secret power of texture. It adds depth without needing a dozen decorative objects, and it hides minor wall imperfections
better than paint ever will. You may not get fewer problems in life, but you’ll get a better backdrop for dealing with themand honestly,
we’ll take the win.


