Table of Contents >> Show >> Hide
- Quick Supplies Checklist (a.k.a. Your Bow Tool Belt)
- Before You Start: 6 Tiny Tricks That Make Any Bow Look Expensive
- 1) The Classic Ribbon Bow (Fast “Bunny Ears,” Zero Drama)
- 2) The Rosette Bow (A “Fancy Flower” That’s Secretly Easy)
- 3) The Layered Loop Bow (Big Volume, Minimal Effort)
- 4) The Pom-Pom Bow (Puffy, Festive, and Weirdly Satisfying)
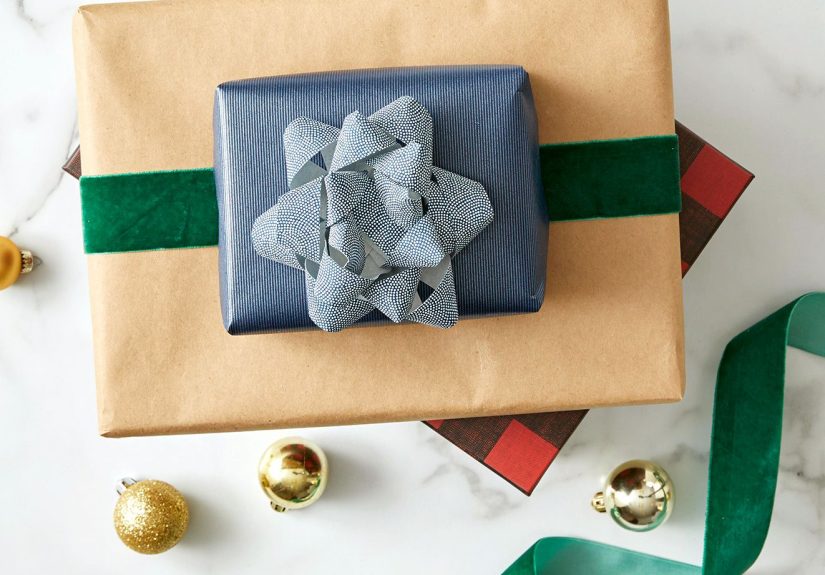
- 5) The Paper Bow (Crisp, Cute, and Perfect for Pattern Lovers)
- Fast Pairings: Match the Bow to the Gift Like a Wrapping Wizard
- Troubleshooting: Bow Emergencies and How to Save Them
- Extra : Real-Life Bow Experiences (a.k.a. Lessons Learned the Glittery Way)
- Conclusion
You know that moment when you’ve wrapped a gift beautifully… and then topped it with a sad, floppy ribbon situation that looks like it lost a fight with a ceiling fan? Same. The good news: you don’t need a bow-making PhD (or a craft room that smells like hot glue and ambition). With a few common suppliesribbon, paper, scissors, and the determination of someone who refuses to pay $7.99 for a pre-made bowyou can make homemade bows that look store-bought in minutes.
This guide walks you through five fast, reliable DIY gift bowsclassic ribbon, rosette, layered, pom-pom, and paperplus pro-level tricks for crisp loops, neat tails, and “How did you DO that?” results. And because real life happens, we’ll also cover what to do when your bow comes out lopsided (hint: you’re not broken; the ribbon is).
Quick Supplies Checklist (a.k.a. Your Bow Tool Belt)
- Ribbon: satin, grosgrain, velvet, wired ribbon, or even curling ribbon
- Paper: wrapping paper, cardstock, scrapbook paper, or kraft paper
- Scissors: sharp for paper; ribbon scissors if you have them (but regular ones can behave if you ask nicely)
- Adhesives: double-sided tape, clear tape, glue dots, or hot glue (optional)
- Fasteners: floral wire, twist ties, pipe cleaner, or thin string/twine
- Optional “fancy”: stapler, bone folder, ruler, and a small clip to hold the center
Before You Start: 6 Tiny Tricks That Make Any Bow Look Expensive
1) Pick the right ribbon width for the box
Big boxes need bigger loops. A narrow ribbon on a large gift can look like it’s whispering instead of celebrating. As a quick rule: for shoe-box size gifts, try 1″ to 2″ ribbon; for small jewelry boxes, 3/8″ to 7/8″ is usually perfect.
2) Wired ribbon is “training wheels,” and that’s a compliment
Wired ribbon holds its shape, fluffs easily, and forgives mistakes. If you want instant volume, this is the shortcut.
3) Don’t fight the spoolpre-shape your loops
Ribbon loves to curl the way it was stored. Run it gently between your fingers to relax it before you start looping. Less spring-back = cleaner bow.
4) The center needs a firm grip
Most bow disasters happen because the middle isn’t cinched tightly enough. Use wire, a pipe cleaner, or a tight knot. Secure center first; perfect later.
5) Notched tails are instant polish
Fold the ribbon tail in half lengthwise, then cut a diagonal from the outer edge toward the fold. Open it up andboomprofessional V-notch.
6) Fluff like you mean it
A bow isn’t finished until you pull, separate, and balance the loops. Think of it like styling hair: it looks weird halfway through, and then suddenly it works.
1) The Classic Ribbon Bow (Fast “Bunny Ears,” Zero Drama)
This is the dependable bow you can make in under two minutes. It works with most ribbons, looks clean on any package, and doesn’t require complicated folding math. If you’re new to making gift bows by hand, start here.
Best for
- Any size gift, especially boxes and gift bags
- Last-minute wrapping when guests are already in the driveway
Time
1–3 minutes
How to make it
- Cut ribbon: Start with about 24–36 inches for a medium bow (more for bigger loops).
- Make two loops: Form two “bunny ears” with equal-sized loops and tails.
- Cross and tuck: Cross the right loop over the left. Push the right loop behind and through the opening, like tying a shoelace.
- Cinch the center: Pull the loops outward (not the tails first) to tighten the knot neatly.
- Balance and trim: Adjust loop sizes, straighten tails, then trim or notch the ends.
Common mistakes (and quick fixes)
- Loops uneven: Pinch the center, slide the knot slightly, and re-tighten while holding the loop sizes you want.
- Knot looks bulky: Use thinner ribbon or tie once, flatten, then tighten again slowly.
- Tails twist: Before tightening, make sure tails lie flat and aren’t spiraling like a confused linguine.
2) The Rosette Bow (A “Fancy Flower” That’s Secretly Easy)
A rosette bow looks like a ribbon flower. It’s perfect when you want something more decorative than a classic bowwithout spending 20 minutes making a “craft” that ends with you whispering, “Why did I start this?”
Best for
- Small to medium gifts, wine bottles, hostess gifts
- When you want a “boutique shop” vibe
Time
3–6 minutes
How to make it
- Cut ribbon: About 30–45 inches for a medium rosette.
- Create a spiral coil: Roll the ribbon into a flat spiral (like a cinnamon roll, but less delicious).
- Pinch the base: Keep the spiral snug and pinch the underside so it doesn’t unroll.
- Secure the center: Use a glue dot, hot glue, or a small piece of tape on the underside to lock the coil.
- Shape petals: Slightly lift and separate the outer layers so it looks more flower-like.
- Attach: Tape or glue-dot it onto the gift, or tie it onto twine for a rustic look.
Make it look extra good
- Use satin or velvet ribbon for soft, petal-like edges.
- Mix two ribbons: one solid + one patterned, rolled together for a two-tone rosette.
3) The Layered Loop Bow (Big Volume, Minimal Effort)
This is the bow you use when you want “wow” without “why.” Layered bows stack loops so the top looks full and dimensional. Wired ribbon makes this almost unfairly easy, but you can do it with regular ribbon too.
Best for
- Medium to large gifts
- Holiday gifts, birthdays, and anything that needs a little drama (the good kind)
Time
4–8 minutes
How to make it
- Wrap and stack loops: Make a figure-eight by forming a loop on the left, then a loop on the right, stacking them at the center.
- Keep building: Add 4–8 loops total (more loops = more volume). Try to keep loop sizes similar.
- Cinch: Pinch the center tightly. Wrap floral wire or a pipe cleaner around the middle and twist firmly.
- Add tails: Cut two tails and secure them under the wire wrap, or leave long tails from your original ribbon if you planned ahead.
- Fluff: Separate loops, rotate them evenly around the center, and pull them into a rounded shape.
Pro tip: cheat with two widths
Use a wider ribbon for the bottom loops and a narrower ribbon on top. You’ll get a layered “designer” look without actually being a designer.
4) The Pom-Pom Bow (Puffy, Festive, and Weirdly Satisfying)
Pom-pom bows are those fluffy, poofy bows that look like a party. You can make them from ribbon or even tissue paper for a soft, cloud-like topper. They’re great when you want volume fast and you don’t mind doing a little fluffing (which, honestly, is most of the job).
Best for
- Big gifts and holiday presents
- Gift bags, baskets, and “I went all out” moments
Time
5–10 minutes
Option A: Ribbon Pom-Pom Bow
- Make a ribbon ring: Wrap ribbon around your hand or a small box 6–10 times, then slide it off carefully.
- Cinch the center: Wrap wire tightly around the middle and twist.
- Snip loops: Cut through the loops on both ends so you have lots of ribbon strands.
- Fluff and fan: Pull strands outward and separate them until it looks full and round.
- Attach: Use the wire ends to twist onto a ribbon band or tape to the gift.
Option B: Tissue Paper Pom-Pom “Bow Topper”
- Stack sheets: Layer 6–10 sheets of tissue paper (more sheets = fuller puff).
- Accordion fold: Fold back and forth in 1-inch sections like a paper fan.
- Tie the center: Wrap wire or string around the middle tightly.
- Round the ends: Trim the ends into rounded edges (or points if you like a spiky look).
- Fluff slowly: Separate each layer gently, pulling toward the center, until it becomes a pom-pom.
- Set it like a bow: Place on top of the gift and secure with tape or the string ends.
If it tears, you didn’t fail
Tissue paper tears if you look at it with judgment. If a sheet rips, keep fluffingoften it hides inside the puff. Worst case, call it “textured.”
5) The Paper Bow (Crisp, Cute, and Perfect for Pattern Lovers)
Paper bows are the clean, graphic cousin of ribbon bows. They’re especially great when your wrapping paper is gorgeous and you want the topper to match. Bonus: paper bows store flat, so you can make a few ahead of time and feel wildly prepared.
Best for
- Small to medium gifts
- Modern wrapping styles, matching patterns, and gift tags
Time
6–12 minutes (faster once you’ve made one)
How to make it
- Cut strips: Cut two paper strips (same width), one longer than the other. Example: 10″ and 8″ long, each about 1″ wide.
- Form loops: Bring each strip’s ends inward to meet in the center, creating two loops. Tape or glue them down at the center.
- Stack: Place the smaller loop piece on top of the bigger one and secure at the center.
- Add tails: Cut a third strip for tails and notch the ends. Tape it to the back of the bow.
- Wrap the center: Cut a small strip and wrap it around the center to hide tape and create a “knot” look.
- Attach: Use double-sided tape, glue dots, or a small foam square for extra lift.
Paper bow upgrades
- Use cardstock for sturdier loops.
- Add a tiny tag or a wax seal in the center for an “I absolutely have my life together” vibe.
- Try kraft paper + white paint pen doodles for a minimalist look.
Fast Pairings: Match the Bow to the Gift Like a Wrapping Wizard
- Jewelry / small boxes: Classic bow or paper bow (neat and proportional)
- Books: Paper bow (graphic) or rosette (soft accent)
- Bottles: Rosette bow on the neck + a simple tag
- Big holiday gifts: Layered loop bow or pom-pom bow (maximum cheer)
- Gift bags: Pom-pom topper or classic bow tied to the handle
Troubleshooting: Bow Emergencies and How to Save Them
My bow keeps slipping
Switch to grosgrain or wired ribbon, or add a tiny piece of double-sided tape under the knot to “anchor” the center. Some ribbons are just slippery little gremlins.
My loops are flat
Pull the loops outward and upward, then pinch the center while you shape. Wired ribbon helps. If using regular ribbon, make slightly larger loops than you think you need they tend to settle smaller.
My bow is too small for the gift
Turn it into a “cluster” topper: make two smaller bows and stack them. People will assume you did it on purpose. (Because you did. Obviously.)
My paper bow pops open
Use stronger adhesive (glue dots or hot glue) and hold the center for a few seconds. Paper has opinions; you need to out-stubborn it.
Extra : Real-Life Bow Experiences (a.k.a. Lessons Learned the Glittery Way)
The first time I tried to make homemade bows for gifts, I approached it like any reasonable person: with confidence, zero planning, and a pair of scissors that had previously been used to open snack bags. The result was a ribbon bow that looked less like a celebration and more like a small accident. That’s when I learned the first rule of DIY gift wrapping: the bow is not an accessoryit’s the headline. If the bow looks great, the wrap job can be “fine” and everyone will still be impressed.
One holiday season, I decided I’d be “that person” who makes every topper by hand. Lovely idea. Then reality showed up: I had a stack of presents, three different wrapping papers, and exactly one ribbon that didn’t match anything. So I pivoted. I started making paper bows out of leftover wrap and cardstock, and suddenly the whole pile looked coordinatedlike I had a plan all along. Paper bows became my secret weapon for last-minute elegance. They’re especially satisfying because they’re crisp and graphic, and they don’t do that annoying ribbon thing where one loop stands up and the other gives up on life.
The biggest “aha” moment came when I stopped trying to make one perfect, massive bow and started making smaller bows in layers. Two medium bows stacked together often look fuller than one big bow that’s fighting gravity. This also rescued me the year I ran out of ribbon halfway through a layered loop bow. I made a second bow from a narrower ribbon, stacked it on top, and everyone thought it was intentional. If you take nothing else from this: stacking solves problems. It’s true in gift wrapping and also in pancakes.
Pom-pom bows taught me patience. The first time I tried a tissue paper pom-pom topper, I pulled too hard and tore a layer clean off. I stared at it like it had betrayed me personally. But after fluffing the remaining layers, it still looked greatjust a little “airy.” Now I fluff slowly, one sheet at a time, like I’m handling a dramatic feather boa. And I keep extra tissue sheets nearby because the craft gods enjoy a backup plan.
Rosette bows became my go-to for hostess gifts and bottle necks. They’re quick, they look fancy, and they’re easy to attach. The trick is securing the underside well so the coil doesn’t relax and unroll. If the rosette is behaving, it looks like a boutique flower topper. If it isn’t, it looks like a ribbon cinnamon roll that’s trying to escape. I now add one decisive glue dot underneath and call it “structural integrity.”
After enough gift-wrapping seasons, I’ve learned that homemade bows aren’t about perfectionthey’re about control. You control the size, the color, the texture, and the style. And once you can whip up a bow in a couple minutes, you stop settling for the sad, crinkled, store-bought leftovers at the bottom of the bag. You become the person who says, casually, “Oh, I just made it.” Which is a deeply satisfying sentence, even if you made it while standing at the kitchen counter at midnight.
Conclusion
Homemade gift bows don’t have to be time-consuming or complicated. With a few basic supplies and the right technique, you can make five standout toppersclassic ribbon, rosette, layered loop, pom-pom, and paper bowsthat level up any gift in minutes. Keep a small “bow kit” with ribbon, tape, and wire, and you’ll be ready to turn even simple wrapping into something that looks thoughtful, polished, and just the right amount of extra.


