Table of Contents >> Show >> Hide
- Before You Repair Anything: Figure Out What’s Actually Peeling
- Tools and Materials You’ll Use Again and Again
- Way #1: Fix the Root Cause (Because Plaster Doesn’t Peel Out of Boredom)
- Way #2: Scrape, Feather, and Patch Small Peeling Areas (Best for Minor Flaking)
- Way #3: Use a Bonding Agent to Make Old Plaster Stick Again (For Dusty, Chalky, or “Nothing Bonds Here” Walls)
- Way #4: Reattach Loose Plaster with Plaster Washers (For Hollow/Drummy Spots)
- Way #5: Inject Adhesive Behind Delaminated Plaster (For Larger Loose Areas Where You Want Fewer Fasteners Showing)
- Way #6: Skim Coat or Overlay the Wall (For Widespread Peeling, Ugly Texture, or “I Can’t Look at This Another Day”)
- Common Mistakes That Make Plaster Repairs Fail (So You Don’t Repeat the Internet’s Greatest Hits)
- When to Call a Pro
- Conclusion
- Field Notes: 500+ Words of Real-World Experience with Peeling Plaster Walls
Peeling plaster walls are the home’s way of saying, “Hey… remember me? I’m a hundred years old and I’m tired.”
The good news: most peeling, flaking, or “mysteriously crunchy” plaster can be repaired without turning your house into a full-time renovation reality show.
The better news: with the right prep, your repair can last for yearsnot just until the next humid day.
This guide walks you through six reliable ways to repair peeling plaster walls, from quick fixes for minor flaking to
“this wall needs a hug and a strategy” repairs for loose, delaminating plaster. Along the way, you’ll learn what causes plaster to peel,
what materials actually stick, and how to avoid the most common DIY mistakes (including the classic: sanding forever and still seeing every ridge).
Before You Repair Anything: Figure Out What’s Actually Peeling
“Peeling plaster” can mean a few different problems, and each one has a different best fix:
- Peeling paint on top of plaster (paint film loses adhesion, usually from moisture, poor prep, or incompatible layers).
- Loose finish coat (the thin top layer of plaster is separating from the base/brown coat).
- Plaster delamination from lath (the plaster has lost its “keys” behind the lath and is pulling away, sounding hollow).
- Chalky, dusty, or crumbly surface (aged lime/gypsum plaster or old repairs that won’t bond until consolidated).
Two quick diagnostic tricks
-
The tap test: Knock gently with your knuckles. A solid area sounds dull and firm.
A loose section sounds hollow or “drummy.” -
The edge test: Scrape a peeling area. If only paint is coming off, you’re mostly in paint-prep territory.
If powdery plaster or layers of plaster lift, you’re in plaster-repair territory.
Safety note for older homes (please read, even if you’re brave)
If your home was built before 1978, assume some painted surfaces may contain lead until proven otherwise.
Disturbing old paintespecially sanding or scrapingcan create hazardous dust. If kids or pregnant people are in the home,
take extra precautions and consider hiring a certified pro for major disturbance work. [1][2]
Tools and Materials You’ll Use Again and Again
You don’t need a truck full of specialty tools, but the right basics make repairs cleaner and longer-lasting:
- Drop cloths, painter’s tape, dust control (shop vac, plastic sheeting)
- Scraper/putty knives, utility knife, wire brush
- Sanding sponge or pole sander (plus a vacuum attachment if you’re fancy)
- Setting-type compound (often called “hot mud”) and/or plaster patch
- Mesh tape (for cracks and transitions), fiberglass mesh for larger patches
- PVA bonding agent or plaster bonder, plus quality primer
- Plaster washers + screws (for loose plaster), drill/driver
- Skim-coating tools: wide knife, trowel, hawk (optional but helpful)
Way #1: Fix the Root Cause (Because Plaster Doesn’t Peel Out of Boredom)
If you only repair the surface, but ignore the cause, you’re basically repainting over a leaky roof and hoping the sky “learns manners.”
Plaster commonly peels because of moisture, movement, or bad adhesion layers.
Common causes to look for
- Water intrusion: roof leaks, window flashing failures, plumbing leaks, damp basements.
- Condensation and humidity: bathrooms without exhaust fans, kitchens with poor venting, unconditioned spaces.
- Salts/efflorescence on masonry-backed plaster: can break adhesion over time.
- Building movement: settling, vibration, loose lath, or past structural shifts.
- Incompatible paint layers: glossy paint or wallpaper paste residue preventing bonding.
What to do before any patching
- Stop active leaks and let the wall dry fully (days to weeks depending on severity).
- Improve ventilation (bath fan, dehumidifier, HVAC balance) so the problem doesn’t return.
- If the wall feels soft, smells musty, or shows widespread staining, consider professional assessment before sealing it in.
Think of this step as “repairing the environment.” Once the wall is dry and stable, the repair materials can actually do their job.
Way #2: Scrape, Feather, and Patch Small Peeling Areas (Best for Minor Flaking)
If the plaster itself is basically solid and you’re dealing with small areas of peeling paint or thin surface flaking, you can often repair
it with careful prep and a layered patch. The secret isn’t magicit’s getting to a stable edge.
Steps that work (and don’t rely on good luck)
- Protect the room. Cover floors, tape off trim, control dust.
- Remove all loose material. Scrape until you reach edges that don’t lift when you press with a putty knife.
- Feather the perimeter. Sand lightly so the transition isn’t a visible “repair island.”
- Clean thoroughly. Vacuum dust; wipe with a damp cloth and let dry.
-
Patch in thin layers. Use a plaster patch or a setting-type compound for strength.
For shallow imperfections, a finishing compound can work as the final layer. - Sand lightly and prime. Primer matters because patched areas are more porous than surrounding paint.
Pro tip
If you patch with a very soft, lightweight finishing compound only, it may dent easily. A stronger base layer (setting-type)
under a thin finish coat is often more durable. [6][11][12]
Way #3: Use a Bonding Agent to Make Old Plaster Stick Again (For Dusty, Chalky, or “Nothing Bonds Here” Walls)
Some plaster walls don’t peel because they’re dramatically failingthey peel because the surface has become dusty, chalky, or contaminated
from decades of paint layers, wallpaper adhesive, and time. If your wall leaves a fine powder on your hand, patching directly is like trying to
glue something to flour.
When a bonder is the right move
- You scrape and the surface turns to powder.
- Old paint layers are stubbornly glossy or previously wallpapered areas won’t accept patch compound evenly.
- You plan to skim coat and want better adhesion across a large area.
How to do it
- Clean and degloss as needed. Remove wallpaper residue; lightly sand glossy paint.
- Apply a bonding agent/bonder. Follow the product directionscoverage and dry time matter.
- Patch or skim while the bonding window is right. Some products want the next coat applied while tacky; others want full dry.
Bonding agents (often PVA-based) are commonly used to help new plaster or patching material bond to old surfaces,
especially when resurfacing previously painted areas. [6][7][8]
Way #4: Reattach Loose Plaster with Plaster Washers (For Hollow/Drummy Spots)
If your wall sounds hollow or moves when you press it, you likely have plaster separating from the lath. This is a structural adhesion problem,
not a cosmetic one. In other words: spackle won’t fix a wall that’s not attached.
Plaster washers are thin, wide discs that spread the holding force of a screw so you can snug plaster back against lath without the screw head
punching straight through. Think of them as snowshoes for your fasteners.
Best use cases
- Loose plaster on walls or ceilings where the surface is intact but detached.
- Areas with multiple hairline cracks and slight bulging.
- Repairs where you want a strong mechanical connection before patching.
How to do it (in practical, not mythical, terms)
- Locate framing or solid backing. Mark studs/joists if possible.
- Pre-drill if needed. This helps prevent additional cracking.
- Add washers and screws. Tighten gradually until the plaster is snugdon’t overtighten and crush it.
- Stabilize cracks. Use mesh tape where needed, then apply a setting-type compound over washers.
- Feather and finish. Apply a final coat, sand lightly, then prime.
This approach is widely recommended for reattaching loose plaster before finishing the surface. [3][9]
Way #5: Inject Adhesive Behind Delaminated Plaster (For Larger Loose Areas Where You Want Fewer Fasteners Showing)
Sometimes you have a broader delaminated areaespecially on older lath-and-plaster wallswhere washers alone would require a polka-dot pattern
of fasteners. Adhesive injection can help re-bond plaster to lath or substrate, often paired with temporary mechanical support (washers/screws)
while the adhesive cures.
When to consider adhesive injection
- Large sections sound hollow but the plaster face is mostly intact.
- You want a more “integrated” repair that restores adhesion, not just surface strength.
- The wall has historical value and you’re trying to preserve original plaster.
Typical method (high-level, because product directions rule)
- Drill small access holes. Pattern around the loose area so adhesive can spread behind the plaster.
- Clean out dust. Vacuum holes so adhesive bonds to something real, not a dust bunny colony.
- Inject adhesive per instructions. Use a product designed for plaster reattachment or a system intended for this purpose.
- Clamp with washers/screws. Lightly snug to hold the plaster flat while curing.
- Patch, skim, and prime. Fill holes, reinforce cracks, then finish like a standard repair.
Preservation-focused guidance often combines adhesive injection with plaster washers to re-secure loose plaster,
especially where keys have failed. [4][5]
Way #6: Skim Coat or Overlay the Wall (For Widespread Peeling, Ugly Texture, or “I Can’t Look at This Another Day”)
If peeling or flaking is widespreadbut the wall can be stabilizedskimming can give you a fresh, paint-ready surface without tearing everything out.
If the plaster is too far gone (multiple failed layers, extensive loss, or recurring delamination), an overlay with drywall may be the cleaner,
more predictable route.
Option A: Skim coat (resurface)
A skim coat is a thin, continuous layer applied over the wall to smooth out repairs, hide crazing, and unify texture.
Success depends heavily on surface prep and bonding.
- Prep: remove loose areas, clean, repair major cracks/voids first.
- Bonding: apply a bonder/primer suited for plaster resurfacing.
- Coats: two thin coats beat one heavy coat (less sagging, fewer trowel ridges).
- Finish: sand lightly, then prime before painting so sheen and absorption are consistent.
Veneer plaster and resurfacing systems often rely on bonding agents to ensure proper adhesion over previously painted or repaired surfaces. [7][8][10]
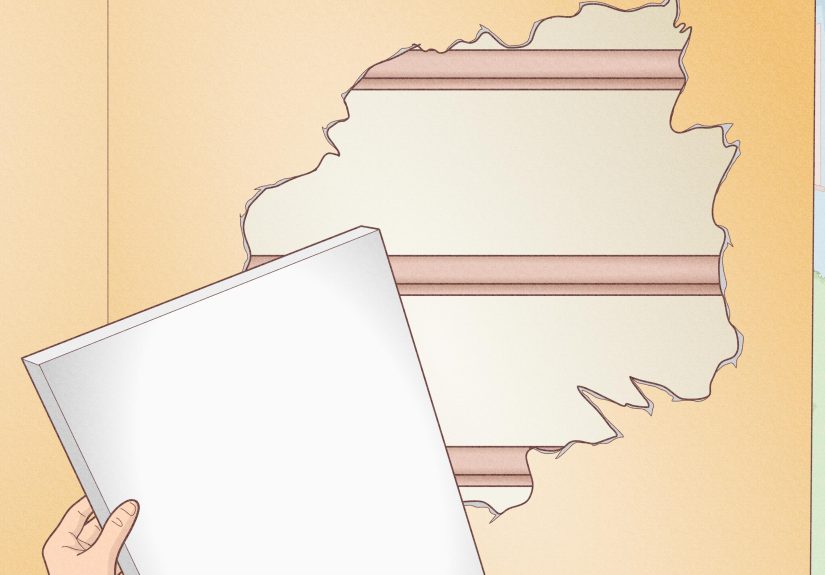
Option B: Drywall overlay (cover)
If the wall has extensive failure or you want a guaranteed flat plane, a drywall overlay can be a practical solutionespecially in non-historic spaces.
You can attach thin drywall to framing or furring, then tape, mud, and finish like new construction.
- Best for: severe deterioration, repeated repairs, or walls that are wavy beyond reasonable skim-coating.
- Watch for: trim thickness changes around doors/windows and electrical box extensions.
Common Mistakes That Make Plaster Repairs Fail (So You Don’t Repeat the Internet’s Greatest Hits)
- Leaving loose edges: If it moves now, it will move lateronly louder.
- Skipping primer: Patch areas flash through paint and peel sooner.
- Using the wrong compound: Super-soft finish mud alone can dent; strong base + thin finish is often better.
- Over-sanding: It’s easy to sand away your work (and your will to live). Aim for “smooth enough,” not “museum marble.”
- Ignoring moisture: The wall will re-peel as a hobby.
When to Call a Pro
DIY plaster repair is totally doable, but consider professional help if:
- The plaster is failing across multiple rooms or ceilings (safety + time).
- You suspect lead paint and the project involves heavy disturbance. [1][2]
- Moisture problems are ongoing or hidden in walls.
- You want true lime plaster restoration in a historic home (matching materials matters).
Conclusion
Peeling plaster walls can look like a disaster, but most repairs boil down to a simple formula:
stabilize what’s loose, bond what’s dusty, rebuild what’s missing, and prime like you mean it.
Choose the repair method that matches the failureminor flaking gets scrape-and-patch, hollow areas need reattachment,
and widespread ugliness may deserve a skim coat or overlay.
And remember: plaster isn’t “fragile”it’s just honest. It tells you exactly what’s wrong, sometimes loudly, usually in flakes.
Fix the cause, use the right bonding strategy, and your walls can go back to looking smooth, calm, and totally unconcerned with your existence.
Field Notes: 500+ Words of Real-World Experience with Peeling Plaster Walls
People tend to imagine plaster repair as one heroic Saturday with a putty knife and a triumphant “before/after” photo. In real houses, it’s usually
more like a mini-series: Season 1: Discovery. Season 2: Dust. Season 3: Why is it still cracking? If you’ve never dealt with peeling plaster,
here are some practical patterns homeowners and remodelers consistently reportplus what usually works.
Experience #1: The bathroom wall that “mysteriously” peels every winter.
A common scenario: a 1940s or 1920s bathroom with plaster walls and glossy paint layers. The paint starts peeling near the shower or above the baseboard.
Many people scrape and repaintonly to watch the same area peel again. The fix that actually sticks usually starts with moisture control:
running the fan longer, adding a better fan, reducing condensation, and letting the wall fully dry. Once humidity stops bullying the wall,
the repair becomes predictable: scrape to stable edges, patch thinly, prime, and repaint. The humor here is that the wall wasn’t being dramatic;
it was just tired of being wet.
Experience #2: The “solid” wall that sounds hollow in one spot.
This is the classic “drummy tap test” moment. Someone notices hairline cracks, patches them, paints, and then sees cracks returnbecause the plaster
was never properly attached. When they finally press the wall, it moves slightly. The best results usually come from reattachment first:
plaster washers (sometimes paired with adhesive injection for larger areas), then patching and skim-coating to blend.
Homeowners often say the turning point was realizing they weren’t repairing a crack; they were repairing a connection.
Experience #3: The wall that turns to chalk under your fingers.
Older plaster can become dusty or friable at the surface, especially after repeated repainting, wallpapering, and stripping.
A frequent frustration: patch compound seems to “float” and later flakes off in sheets. What changed the outcome in many cases was adding a bonding step:
cleaning thoroughly, consolidating with a bonding agent/bonder, and only then patching or skimming. It feels like an “extra step,”
but it’s usually the difference between a repair that lasts and a repair that becomes tomorrow’s sanding project.
Experience #4: The patch that looks perfect… until paint.
Lots of repairs fail the moment paint hits themnot because the patch is wrong, but because the surface absorption is uneven.
Painted plaster, bare patch, old primer, new compound: they all soak paint differently, so the finish flashes and highlights every transition.
The fix that consistently improves results is a good primer coat (sometimes two), especially over patched and skim-coated areas.
People who skip primer often end up repainting anyway, so primer isn’t “extra”it’s just earlier.
Experience #5: The repair that takes forever because the wall isn’t flat.
Plaster walls in older homes can be wavy. That’s not a moral failing; it’s just history. Many DIYers get stuck trying to make a small patch
match a wall that was never perfectly flat. The solution is often to feather wider than you think (so the transition disappears),
or commit to a full skim coat if there are multiple repairs across the wall. Some people find overlay drywall faster when the wall is a
patchwork quilt of old failuresespecially if the room isn’t historically sensitive.
Experience #6: The “I’ll just sand it more” trap.
Sanding can fix minor ridges, but it can also erase your progress, especially with softer finishing compounds.
The best plaster finishers often rely more on technique than sanding: thin coats, longer strokes, and letting the knife do the smoothing.
DIYers who eventually “get it” usually say the same thing: using a stronger base fill, then a thin finish coat, reduced how much sanding
they neededand dramatically reduced how much dust their house produced. (Because nothing says “home improvement” like finding fine white powder
in a drawer you never opened.)
If there’s a single lesson that shows up in almost every peeling plaster story, it’s this:
your repair is only as good as the surface beneath it. Stabilize loose plaster, bond dusty plaster, manage moisture,
and prime like you’re setting the stage for a performancebecause you are. The final paint job is the applause, and you want it to last.


