Table of Contents >> Show >> Hide
- What “pinning” a sticker actually does
- Quick prep: What counts as a “sticker” on Snapchat?
- How to pin stickers to Snapchat videos (step-by-step)
- Pinning tips that make tracking look scary-good
- Troubleshooting: When your sticker won’t stay put
- How to make a custom sticker on Snapchat (Scissors tool)
- Make your custom stickers look clean (instead of “I tried”)
- Bonus: “Custom stickers” that aren’t cutouts (but still feel custom)
- Common pinning use-cases (with specific examples)
- Conclusion: Your stickers, but make them cinematic
- Creator experiences: what people learn after pinning stickers “for real”
- SEO tags (JSON)
Snapchat stickers are the digital equivalent of putting googly eyes on everything you own: unnecessary, delightful,
and somehow emotionally essential. And when you pin (aka “attach”) a sticker to a moving object in a video,
Snapchat turns into a tiny motion-tracking studiono film degree required, no timeline editor needed, and no one has
to know you recorded the video while hiding in your car for “better lighting.”
This guide walks you through two fan-favorite skills:
(1) pinning stickers to Snapchat videos so they follow motion, and
(2) making custom stickers (cutouts) you can reuse laterplus fixes when your sticker decides to
drift into the void like it’s auditioning for a space documentary.
What “pinning” a sticker actually does
When you pin a sticker, you’re telling Snapchat: “See this object? Please pretend my sticker is glued to it.”
Snapchat then tries to track that object’s movement, rotation, and size changes over time.
When it works, it’s magic. When it doesn’t, it’s still comedy.
Quick prep: What counts as a “sticker” on Snapchat?
In Snapchat-land, “sticker” can mean a bunch of things you place on top of your Snap. The most common ones:
- Snapchat stickers (the built-in packs)
- Emoji (classic, reliable, emotionally expressive)
- GIF stickers (animated stickers pulled from searchable libraries)
- Bitmoji stickers (if you’ve connected Bitmoji)
- Info stickers like time, temperature, and location-style elements
- Your custom stickers (cutouts you make with the Scissors tool)
Pinning works best with stickers that have clear edges and an object in the video with strong contrast (more on that
later).
How to pin stickers to Snapchat videos (step-by-step)
Step 1: Record a video Snap
Open Snapchat and record a video like you normally would. Keep it simple at first: one subject, decent lighting,
and movement that’s not “rollercoaster POV.”
Step 2: Go to the editing/preview screen
After recording, you’ll land on the preview screen where Snapchat lets you add overlays (stickers, text, drawings,
etc.). This is Sticker Centralpopulation: you.
Step 3: Add a sticker (or emoji/GIF/Bitmoji)
- Tap the Sticker icon to open the sticker drawer.
- Select the sticker you want.
- Drag it into position.
- Pinch to resize and rotate so it looks intentional (or intentionally unhingedyour choice).
Step 4: Pin (attach) the sticker to an object
Here’s the move that makes the magic happen:
- Press and hold the sticker on the video.
- The video may pause while you’re placing it (that’s normal and helpful).
- Drag the sticker onto the object you want it to follow (a face, skateboard, coffee cup, pet,
suspiciously charismatic houseplant, etc.). - Release to pin.
If your sticker is pinned correctly, it should move with the object when the video plays.
Step 5: Preview and adjust (the “don’t post too fast” step)
Play the video back and watch the sticker’s behavior:
- If it follows smoothly: congrats, you’re basically a visual effects artist now.
- If it drifts: you probably pinned it to a low-contrast area or the movement is too fast/blurred.
- If it jitters: the object might be changing shape (hands and hair are chaos), or lighting is uneven.
Step 6: Move, re-pin, or delete
Need to fix it?
- To reposition: press and drag the sticker to a new spot.
- To re-pin: press and hold again, drag onto the object, release.
- To delete: press and hold, then drag to the trash icon when it appears.
Pinning tips that make tracking look scary-good
1) Pick the right “anchor” object
Snapchat tracking tends to work best on objects that are:
- High contrast (dark object on light background or vice versa)
- Not too shiny (glare can confuse tracking)
- Not too blurry (motion blur is tracking kryptonite)
- Consistently visible (if it leaves frame, sticker may get lost)
2) Pin when the object is easiest to “see”
If your video loops while you edit, wait until the best frame shows the object clearlythen pin right then.
Pinning on a blurry frame is like giving directions using interpretive dance.
3) Keep sticker size realistic
A sticker that’s roughly proportional to the object tends to track more convincingly than a massive sticker covering
half the screen (unless you’re going for “giant floating pizza,” which is always defensible).
4) Use simple shapes for first attempts
Emojis, small labels, and clean-edged stickers usually track better than super detailed GIFs with lots of visual noise.
5) Don’t fight physics (or your phone camera)
Fast spins, low light, and shaky hands can break tracking. If the clip looks like it was filmed during an earthquake,
your sticker will probably panic.
Troubleshooting: When your sticker won’t stay put
Sticker won’t pin at all
- Update Snapchat (features can vary by version).
- Try a different sticker type (emoji vs GIF vs Bitmoji) to see what behaves best.
- Re-record with better light so Snapchat can detect edges.
Sticker pins, but drifts off the object
- Re-pin on a frame where the object is sharp and centered.
- Choose an object with clear contrast from its background.
- Avoid pinning to hair, hands, screens with glare, or anything changing shape rapidly.
Sticker jitters or “vibrates”
- Stabilize the camera (two hands, elbows in, breathe like a calm documentary filmmaker).
- Use a smaller sticker and pin it to a stable area of the subject.
Sticker disappears behind something
Snapchat sticker pinning is not full Hollywood occlusion tracking. In many cases, the sticker is simply layered on
top of the video. If you want realistic “behind-the-object” effects, you’ll usually need more advanced editors.
How to make a custom sticker on Snapchat (Scissors tool)
Custom stickers are the secret sauce: you can cut out something from your Snap (a face, a sneaker, a sign, your dog
mid-zoomies) and reuse it later. It’s like building your own sticker pack, except you don’t have to draw anything,
and your art teacher can’t grade you.
Method: Classic cutout sticker (fast + built-in)
- Take a photo or video Snap.
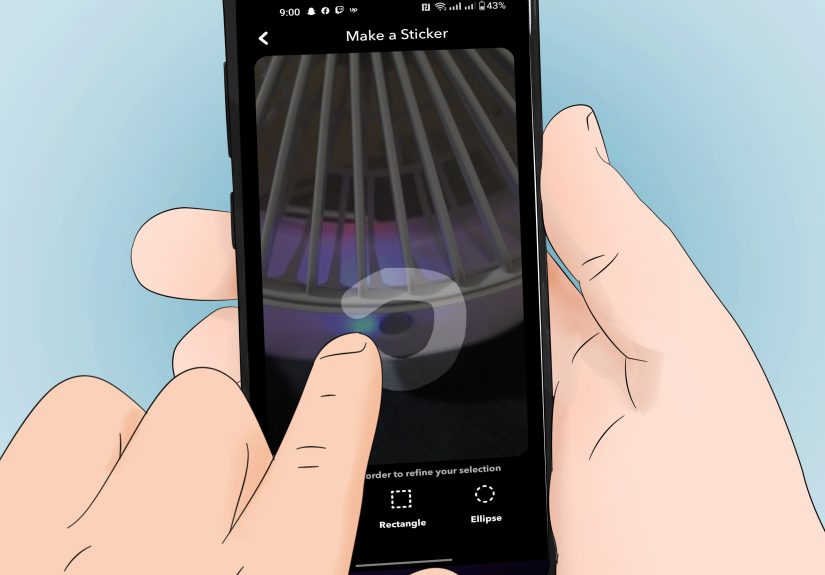
- On the preview/edit screen, tap the Scissors icon.
- Use your finger to outline the object you want to turn into a sticker.
- Lift your fingerSnapchat creates the sticker and drops it onto your Snap.
- Drag, resize, and rotate it like any other sticker.
Where your custom stickers live (so you can reuse them)
Snapchat saves stickers you make with Scissors in your sticker drawer. When you’re editing a new Snap:
- Tap the Sticker icon to open the sticker drawer.
- Look for the section/tab associated with Scissors (this is where your cutouts appear).
- Tap one to add it againlike a greatest-hits album of your own nonsense.
How to delete a custom sticker (when your library gets… emotionally cluttered)
If you’ve created 47 nearly identical stickers of your friend blinking, you can remove them:
- Press and hold the sticker, then drag it to the trash while editing a Snap (for removing it from
that Snap). - To remove a saved custom sticker from your collection, open your custom sticker section and use the delete/trash
gesture available there (exact UI can vary by device/version).
Make your custom stickers look clean (instead of “I tried”)
1) Choose a subject with clear edges
Custom cutouts look best when the subject stands out. Think: someone wearing a bold color, an object against a simple
wall, a pet against a couch (pets are never truly still, but we love them anyway).
2) Trace like you’re outlining a crime scene
Go slowly around corners. If you cut too tight, you’ll clip details. If you cut too wide, you’ll grab background
chunks and your sticker will look like it’s wearing a messy halo. (Some halos are fashionable. Most are not.)
3) Cheat for better cutouts
If Snapchat struggles to detect the edges, try improving contrast before cutting:
- Zoom in a bit before you trace.
- Record in brighter light (soft daylight is your friend).
- If you’re making cutouts from saved images, choose ones with cleaner backgrounds.
4) Build a reusable “personal sticker pack”
Once you know how to make custom stickers, you can create themed sets you reuse all the time:
- Reaction pack: your friend’s “bruh” face, your dramatic gasp, the dog side-eye.
- Local pack: your favorite coffee shop sign, a city landmark, your team jersey number.
- Event pack: birthday crown cutout, confetti sticker, “OMG” speech bubble.
- Work-safe pack: polite thumbs-up, “On my way,” “Running late,” and a tiny stress cloud.
Bonus: “Custom stickers” that aren’t cutouts (but still feel custom)
If you want more personalization without tracing:
-
GIF stickers: search by keywords (your inside joke, the vibe, the current emotional weather).
Great for fast reactions. -
Bitmoji stickers: connect Bitmoji to Snapchat and you’ll unlock a huge library of personalized
stickers featuring your avatar. -
Info stickers: add time/temp/location elements for contextespecially useful for Stories and
travel Snaps.
Common pinning use-cases (with specific examples)
Example 1: Name tag that follows your friend
- Record a short clip of your friend walking into frame.
- Add a sticker (or emoji badge).
- Press and hold the sticker, drag it onto your friend’s shirt area, release.
- Now your label follows them like a VIP credential.
Example 2: Crown that stays on a pet’s head (best effort)
Pets are fast and unpredictable, so keep the clip short and bright. Pin the crown when the head is clearly visible.
If it slips, that’s not failurethat’s “comedic realism.”
Example 3: “This thing is important” arrow that tracks movement
Great for showing off a new pair of shoes, a skateboard trick, or a DIY project. Use a simple arrow sticker and pin
it to the object right when it’s centered and sharp.
Conclusion: Your stickers, but make them cinematic
Pinning stickers is one of those Snapchat features that feels like a party trick until you use it wellthen it looks
surprisingly pro. The formula is simple: record a clean clip, choose a sticker with clear edges, press-and-hold to
pin, and preview before sending. Add custom stickers with the Scissors tool and you’ve basically built your own
mini brand kitexcept it’s made of your friends’ faces and your dog’s chaos.
Now go forth and attach stickers to moving objects responsibly. (Or irresponsibly. But like, in a fun way.)
Creator experiences: what people learn after pinning stickers “for real”
The first time someone tries to pin a sticker, the expectation is usually: “Snapchat will perfectly track my
friend’s face as they sprint through a dimly lit party while I film from across the room.” The reality is more like:
“My sticker tried its best, got overwhelmed, and emotionally relocated to the nearest wall.” That gap between
expectation and reality is where the best creator lessons live.
One of the most common “aha” moments is realizing that pinning is less about the sticker and more about the
camera work. People who get the cleanest results tend to do boring-but-effective things: they hold
the phone steadier, record slightly shorter clips, and choose moments where the subject is crisp and well-lit. In
other words, the sticker isn’t doing all the workyou’re quietly helping it succeed. Think of it like walking a dog:
you can’t control the chaos, but you can pick a route with fewer squirrels.
Another lesson is that pinning looks most impressive when it’s used with restraint. Creators often start by pinning
enormous GIFs that cover the entire subject, which makes drift more noticeable. Then they discover the sweet spot:
smaller stickers used as “accent” elements. A tiny sparkle pinned to a ring, a subtle label pinned to a new product,
or a small emoji pinned to a basketball as it bouncesthese look cleaner because the viewer’s eye reads them as
intentional details, not a full-screen effect that has to be flawless.
People also learn to pin to the right kind of motion. Smooth movement (walking, panning, gentle
turns) tends to track better than chaotic movement (fast spins, hair whipping, hands waving, strobe lighting, and
anything involving glitter). When someone gets a drift problem, they often fix it by changing the target: pinning to
a shirt logo instead of hair, a skateboard deck instead of a spinning wheel, or a backpack instead of a swinging arm.
The sticker doesn’t need a “cool” objectit needs an object Snapchat can recognize consistently.
Custom stickers add their own learning curve. At first, many cutouts look a little roughedges clipped, background
accidentally included, or the subject outlined like a hurried crime-scene chalk drawing. Over time, creators develop
a style: they pick higher-contrast subjects, trace more slowly, and sometimes lean into the imperfections because
“slightly janky” can actually feel more authentic. The fun part is that custom stickers become a personal language.
Friend groups end up with recurring cutoutsone friend’s iconic expression, a specific pet pose, a weird object from
a tripthat show up in Snaps like inside jokes you can paste.
Eventually, the most experienced sticker-pinners use the feature like storytelling. They’ll pin a label to a friend
for a running gag, use a custom sticker as a “character” that appears in multiple Snaps, or pin arrows and captions
to guide attention in a short sequence. The result feels less like random decoration and more like a mini editfast,
visual, and very Snapchat. The takeaway from all these experiences is simple: pinning stickers isn’t about perfect
tracking. It’s about choosing the right moment, the right target, and just enough sticker energy to make the joke
land.


