Table of Contents >> Show >> Hide
- Why Save Candle Jars in the First Place?
- Before You Start: A Few Smart Safety Checks
- Best Ways to Remove Wax from Candle Jars
- Methods You Should Probably Skip
- How to Clean Candle Jars After the Wax Is Gone
- How to Upcycle Candle Jars in Stylish, Useful Ways
- Can You Reuse Leftover Candle Wax?
- Common Mistakes People Make with Candle Jars
- Real-Life Experience: What Actually Happens When You Try This at Home
- Conclusion
There comes a moment in every candle lover’s life when the wick gives up, the wax puddle looks smug, and the jar is still way too pretty to toss. You stare at it like, “We had a good run, but I am not emotionally prepared to throw away this frosted glass masterpiece.” The good news: you do not have to. Learning how to remove wax and upcycle candle jars is easy, practical, and surprisingly satisfying.
With the right method, you can clean out leftover wax, rescue the container, and give it a second act as a planter, desk organizer, bathroom storage jar, match holder, or even a brand-new candle vessel. It is a small home project with a big reward: less waste, more usefulness, and one less excuse for that cluttered cabinet full of “pretty things I might use someday.” Today is their day.
Why Save Candle Jars in the First Place?
Empty candle jars are basically the overachievers of household packaging. They are usually sturdy, attractive, and designed to look good sitting out in the open. Unlike random takeout containers that scream “leftover noodles,” candle jars often look polished enough to belong on a vanity, shelf, or coffee table.
Upcycling candle jars is also a smart way to cut waste without turning your life into a full-time sustainability seminar. Instead of buying another small storage container, bud vase, or brush cup, you can reuse something you already own. That makes this project budget-friendly, eco-conscious, and very satisfying for people who enjoy the phrase “I made this work” a little too much.
Before You Start: A Few Smart Safety Checks
Before you attack that last half-inch of wax like a home-improvement hero, slow down and inspect the jar. Not every candle container is a forever jar.
- Do not keep burning a container candle once about 1/2 inch of wax remains.
- Check the jar for cracks, chips, or weak spots before reusing it.
- If the jar has glitter, glued-on decorations, paint, or delicate labels, skip the oven method.
- Never pour wax down the sink. It cools, hardens, and turns your plumbing into an angry science project.
- Do not use water to extinguish a burning candle, and do not move the jar while the wax is still liquid.
One more thing: if you are planning to use the jar around food later, be cautious. Many candle jars retain fragrance, residue, or soot even after a good cleaning. They are better suited to storage, decor, crafts, and plant use than to holding snacks.
Best Ways to Remove Wax from Candle Jars
There is no single best method for every candle jar. The right technique depends on how much wax is left, how delicate the jar is, and how patient you are feeling that day. Here are the methods that actually make sense.
1. The Freezer Method: Best for Easy, Low-Mess Removal
If you want the least dramatic option, the freezer method is your friend. Wax contracts when it gets cold, so it often loosens from the sides of the container and pops out with minimal effort.
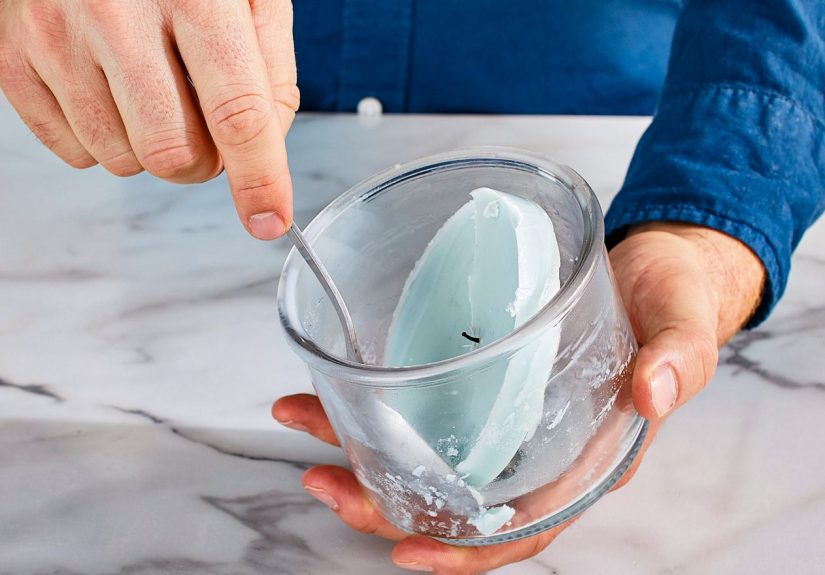
How to do it: Place the candle jar in the freezer for several hours or overnight. Once the wax is fully hardened, remove the jar, turn it upside down, and tap or gently coax the wax out with a spoon or butter knife. If a small bit stays stuck, lift one edge carefully and it should come free.
Why it works: It is clean, simple, and great for jars with only a little wax left. It is also ideal if you do not feel like dealing with boiling water before coffee.
Best for: Small amounts of leftover wax, wide-mouth jars, and people who enjoy making tomorrow handle today’s problem.
2. The Boiling Water Method: Best for Wide-Mouth Jars
This is one of the most popular ways to remove wax from candle jars, and for good reason. Hot water melts the wax, which floats to the top as it cools. It is very satisfying in a “look, science!” sort of way.
How to do it: Set the candle jar on a towel or potholder. Carefully pour boiling water into the jar, leaving a little space at the top. The wax will melt and rise. Let everything cool completely, then lift out the wax disk and strain the water carefully without letting wax bits slip into the drain.
Why it works: It is effective, uses no special tools, and can handle stubborn wax at the bottom of the jar.
Best for: Wide-mouth glass jars and anyone who likes practical methods that feel a little bit magical.
3. The Oven Method: Best for Cleaning Several Jars at Once
If you somehow have a candle graveyard on your kitchen counter, the oven method can save time. It is especially helpful when you want to clean multiple jars in one round.
How to do it: Preheat the oven to a low temperature, around 200 degrees Fahrenheit. Line a baking sheet with aluminum foil. Remove labels if possible, then place the jars upside down on the tray. After about 15 minutes, the wax should melt and pool onto the foil. Carefully remove the tray, let the jars cool slightly, then wash them with warm soapy water.
Why it works: It is efficient and handles several jars at once.
Best for: Plain glass or ceramic jars without decorations, and people with a growing collection of “I’ll clean those later” candle vessels.
Important note: Stay nearby. This is not a “set it and wander off to reorganize the linen closet” situation.
4. The Hair Dryer or Warm Water Bath Method: Best for Stubborn Residue
Sometimes the wax is not thick enough to pop out cleanly, but it is still annoyingly glued to the sides or bottom. That is where gentle heat comes in.
How to do it: Hold the jar with an oven mitt and warm the bottom and sides using a hair dryer on a medium or warm setting. Once the wax softens, wipe it out with paper towels or lift it with a spoon or butter knife. You can also place the jar in a bath of very hot water and let the heat slowly loosen the wax.
Why it works: It gives you control and is perfect for finishing off stubborn remnants after another method has done most of the work.
Best for: Thin layers of leftover wax, labels you want to preserve, and jars that are too delicate for harsher treatment.
Methods You Should Probably Skip
Yes, there are plenty of internet hacks. No, not all of them deserve your trust.
- Do not pour wax down the drain. It hardens and can clog plumbing.
- Do not jab aggressively with sharp tools. Scratching or weakening glass is a bad trade for saving a jar.
- Be careful with microwaves. Many candle jars contain metal wick tabs, which makes this method riskier than it is worth.
- Do not reuse cracked jars around heat. Pretty is not a substitute for structurally sound.
How to Clean Candle Jars After the Wax Is Gone
Once the wax is out, the jar still may have residue, soot, sticker glue, or a lingering scent that says “vanilla teakwood forever.” The final cleaning step matters.
Basic Cleaning
Wash the jar with warm water, dish soap, and a sponge or cloth. If the opening is narrow, use a bottle brush to reach the bottom. Dry it thoroughly before storing anything inside.
For Sticky Labels and Glue
If label residue remains, use an adhesive remover and wipe clean. Then wash the jar again so the surface is smooth and ready for reuse.
For Soot or Oily Film
A second wash usually does the trick. The goal is simple: no wax, no grease, no mystery smudges.
How to Upcycle Candle Jars in Stylish, Useful Ways
Now for the fun part. Once you know how to remove wax and upcycle candle jars, you start seeing empty vessels as tiny home upgrades instead of trash.
1. Bathroom Storage
Use clean jars for cotton swabs, cotton balls, hair ties, Band-Aids, bath salts, or makeup brushes. Matching candle jars make a bathroom look instantly more put together, like you totally have your life in order.
2. Desk Organizers
Paper clips, rubber bands, pens, thumbtacks, and charging cords all look better when they live in a nice glass jar instead of rolling around a drawer like tiny rebels.
3. Match Holders
A small candle jar filled with wooden matches looks charming on a shelf or mantel. If the jar has a lid, even better. It becomes practical and decorative at the same time.
4. Mini Planters and Propagation Stations
Small jars are perfect for propagating pothos or philodendron cuttings in water. They also work well as planters for succulents, though drainage matters. Add a layer of rocks or use the jar as a cachepot around a nursery plant if you want less mess.
5. Flower Vases
Short candle jars are ideal for bud vases or tiny arrangements. A few stems from the yard suddenly look intentional instead of “I broke this off a bush while walking by.”
6. Craft and Sewing Storage
Buttons, beads, ribbons, clips, paint brushes, and thread all fit beautifully in upcycled candle jars. This is one of the easiest ways to turn clutter into something that looks curated.
7. Gift Containers
Fill a jar with tea bags, wrapped candy, bath salts, or small beauty items and add ribbon. Suddenly your upcycled candle jar becomes a thoughtful gift container that looks much more expensive than it is.
8. Make a New Candle
If you have leftover wax from similar scents and colors, you can melt and combine it into a new candle. Add a fresh wick, pour carefully, and let it set fully. It is a practical way to use every last bit without letting old wax go to waste.
Can You Reuse Leftover Candle Wax?
Absolutely, as long as you are realistic about the result. Leftover wax can be melted and reused for a homemade candle, wax melts, or simple DIY projects. The best results usually come from combining waxes with similar scent families and colors. Mixing smoky cedar with sugary birthday cake may produce a fragrance best described as “confusing.”
If you are making a new candle, use a clean heat-safe jar and a fresh wick. Let the wax cool at room temperature before moving the container. It is not professional candle-making wizardry, but it is a practical and low-waste way to use what you already have.
Common Mistakes People Make with Candle Jars
- Burning the candle too long and overheating the container.
- Trying to remove wax with sharp knives and too much enthusiasm.
- Ignoring label glue and calling it “rustic.”
- Using heavily scented jars for food storage.
- Picking one wax-removal method and treating it like a religion instead of choosing the right one for the jar.
Real-Life Experience: What Actually Happens When You Try This at Home
Here is the part nobody tells you when they show a perfectly cleaned candle jar on a spotless countertop: real-life candle cleanup is rarely a one-step miracle. Usually, it starts with optimism, then a little confusion, then a brief moment of standing in your kitchen holding a half-frozen jar and wondering why you ever got emotionally attached to bergamot amber.
In practice, the freezer method is the easiest place to start, especially if there is not much wax left. It feels almost suspiciously simple. You put the jar in the freezer, forget about it, come back later, and the wax often pops out in one neat piece. That is the dream scenario. The more realistic version is that 85 percent comes out beautifully, while one stubborn circle of wax clings to the bottom like it has signed a lease. That is when the hair dryer becomes the cleanup crew.
The boiling water method feels the most dramatic and the most rewarding. Watching wax rise to the top is weirdly satisfying, like a tiny home-science demonstration happening in your mug-sized glass cylinder. But it also requires patience. If you rush and pour too soon, you get floating wax bits, slippery residue, and the sudden realization that you now care deeply about not ruining your sink drain. This method works best when you let everything cool completely and accept that “completely” means longer than you want it to.
The oven method is excellent for batch cleaning, but only when you are paying attention. It is the kind of task that makes you feel incredibly efficient for about 12 minutes. You line the tray, set out the jars, and imagine yourself as the kind of person who always reuses beautiful containers. Then you remember labels exist, wax drips fast, and oven mitts are not optional. Still, when it works, it really works. Several dead candles become several clean jars in one round, which is deeply satisfying if you have accumulated a small candle museum over winter.
As for upcycling, the best ideas are usually the least complicated. A candle jar holding cotton swabs on a bathroom shelf looks polished. A smoky glass jar filled with pens on a desk looks intentional. A tiny amber jar with matchsticks next to a lamp looks like you either have impeccable styling instincts or accidentally copied a very expensive boutique hotel. Either way, it works.
The funniest part of reusing candle jars is how quickly it becomes a habit. At first, you save one because it is too pretty to throw away. Then another. Then suddenly you are evaluating every finished candle based on future career potential. “You, little matte-black jar, are going to hold paper clips.” “You, fancy ceramic number, are clearly destined for a succulent.” It is practical, a little ridiculous, and honestly one of the easiest ways to make your home feel more organized without buying a single new container.
So yes, removing wax takes a little effort. But once you do it a couple of times, it becomes one of those useful household skills that feels oddly empowering. You are not just cleaning a jar. You are rescuing a good container from the trash and giving it a second life. Not bad for something that started as a puddle of leftover wax and a burnt wick.
Conclusion
Knowing how to remove wax and upcycle candle jars is one of those small home skills that pays off immediately. You save money, reduce waste, and end up with containers that can organize, decorate, and simplify your space. Whether you use the freezer, boiling water, oven, or hair dryer method, the goal is the same: get the wax out safely, clean the jar well, and put it back to work.
The next time a candle burns down to its last half-inch, do not toss the jar without a second thought. Clean it, reuse it, and let that beautiful vessel earn its keep. After all, if a candle jar has already survived hours of flame, it deserves a better ending than the trash can.


