Table of Contents >> Show >> Hide
- What Is Cob Construction?
- Step 1: Understand Your Local Building Rules
- Step 2: Choose the Right Site
- Step 3: Test Your Soil
- Step 4: Gather Materials and Tools
- Step 5: Design the Building Before You Mix
- Step 6: Build a Strong, Dry Foundation
- Step 7: Mix the Cob
- Step 8: Build the Walls in Lifts
- Step 9: Install Doors, Windows, and Utilities
- Step 10: Add the Roof Early
- Step 11: Dry, Trim, and Shape the Walls
- Step 12: Apply Plaster and Finish Coats
- Common Cob Building Mistakes to Avoid
- Real-World Experiences: What Building With Cob Teaches You
- Conclusion: Is Cob Building Right for You?
- SEO Tags
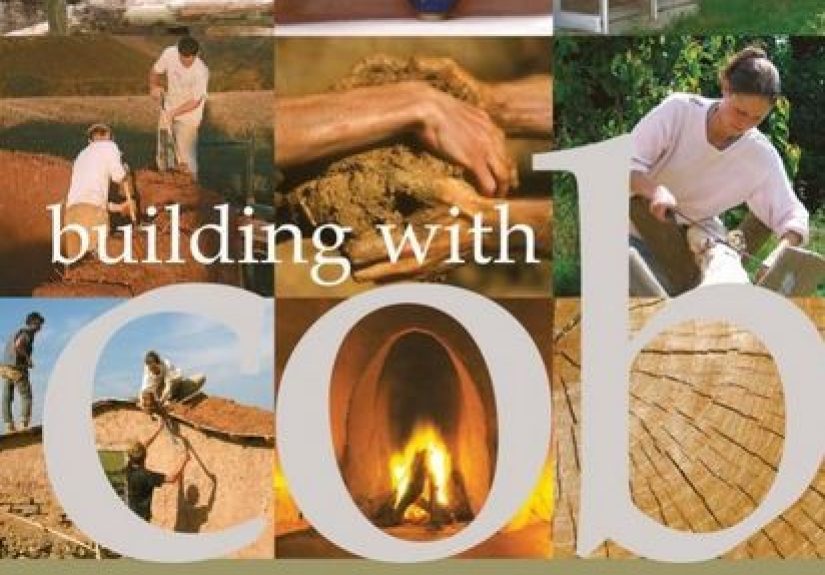
Building with cob sounds like something invented by a friendly wizard who owns too many buckets. In reality, cob construction is one of the oldest, most practical, and most surprisingly beautiful natural building methods in the world. It uses a simple mixture of clay-rich soil, sand, straw, and water to create thick, sculptural walls that can feel warm, grounded, and wonderfully human.
Unlike conventional stick-frame construction, cob is not about stacking identical pieces from a store shelf. It is about shaping a building directly from earth. The result can be a tiny garden studio, a backyard oven, a cottage, a meditation hut, or, with the right design team and local approvals, a permitted home. Cob is durable when protected from water, flexible in design, and deeply satisfying for people who like the idea of building something with their own hands instead of simply pointing at a catalog and hoping the delivery truck survives the driveway.
This step-by-step guide explains how cob building works, what materials you need, how to plan the structure, and what mistakes to avoid before your dream cottage becomes a mud sculpture with commitment issues.
What Is Cob Construction?
Cob is a monolithic earthen building material made from clay-rich soil, sand, straw, and water. “Monolithic” means the wall is built as one continuous mass rather than as separate bricks or blocks. Think of it as adobe’s free-spirited cousin: adobe is usually formed into sun-dried bricks, while cob is mixed and sculpted directly into walls.
A good cob mix is strong because each ingredient has a job. Clay acts as the binder, sand provides compressive strength and reduces shrinkage, straw adds tensile strength, and water makes the whole mixture workable. When the wall dries, the material becomes solid, heavy, and surprisingly tough. Cob can be carved, shaped, patched, and finished with earthen or lime-based plasters.
Why People Choose Cob
People are drawn to cob for several reasons. It uses abundant natural materials, often sourced close to the building site. It creates thick walls with excellent thermal mass, which can help stabilize indoor temperatures when paired with smart passive solar design. It also allows curves, niches, built-in benches, rounded windows, and organic shapes that would make drywall quietly jealous.
Cob is not the right choice for every project. It is labor-intensive, slow to dry, and vulnerable to long-term moisture problems if poorly designed. But for the right site and builder, cob offers a low-tech, creative, and environmentally thoughtful way to build.
Step 1: Understand Your Local Building Rules
Before you touch a shovel, call your local building department. Cob construction has gained more formal recognition in the United States, especially with the inclusion of cob construction provisions in the International Residential Code as an appendix. However, building codes are adopted and enforced locally, which means one county may welcome your cob studio while another may stare at your plans as if you submitted a recipe for lasagna.
If you are building a small non-habitable structure, such as a garden shed, outdoor kitchen, or cob oven, the rules may be simpler. If you are building a dwelling, you may need engineered drawings, structural calculations, energy compliance documentation, foundation details, and inspections. In seismic, flood-prone, hurricane-prone, or high-moisture regions, professional design help is not optional; it is common sense wearing a hard hat.
Smart Permitting Tips
Bring clear drawings, material specifications, wall sections, roof details, and drainage plans to your building department. Use professional language. Instead of saying, “I want to build a magical mud cottage,” say, “I am proposing a monolithic adobe wall system with code-compliant foundation, roof, electrical, plumbing, and moisture-control details.” Same dream, fewer raised eyebrows.
Step 2: Choose the Right Site
Cob loves a good hat and good boots. In builder language, that means a protective roof and a dry foundation. Site selection should focus on drainage, sun exposure, soil quality, access, and local climate.
A good cob site should sit above surrounding grade, shed water away from the building, and avoid areas where water pools after storms. If the land is flat, plan for swales, French drains, sloped grading, or other drainage solutions. Moisture is the great enemy of earthen buildings. Rain from above, groundwater from below, and splashback from the sides can all damage walls over time.
Consider Sun, Wind, and Comfort
Cob walls have high thermal mass, which means they absorb and release heat slowly. In many climates, this works best when combined with passive solar design: south-facing windows in colder regions, shaded openings in hot regions, and roof overhangs sized for seasonal sun angles. In cold climates, cob alone may not provide enough insulation, so many builders use hybrid wall systems, exterior insulation, or cob for interior thermal mass rather than the entire building envelope.
Step 3: Test Your Soil
Not all dirt deserves a promotion to building material. The best cob soil contains enough clay to bind the mix but not so much that the wall shrinks and cracks excessively. Too much clay creates cracking. Too much silt or organic matter weakens the cob. Too much sand without enough clay makes the mix crumbly.
Start with a jar test. Fill a clear jar about one-third full with soil, add water, shake it well, and let it settle. Sand drops first, silt settles next, and clay remains suspended longest before forming a top layer. This gives you a rough idea of your soil composition.
Make Test Bricks
The most useful test is a small batch test. Mix different ratios of clay-rich soil, sand, straw, and water, then form bricks or patties. Let them dry fully. Drop them, scratch them, break them, and observe cracking. A good test brick should dry hard, resist crumbling, and show minimal shrinkage. If it breaks like a stale cookie, adjust the recipe.
Many builders start with a sand-heavy mix and add just enough clay-rich soil to bind it. The exact ratio depends on your local materials, which is why testing matters more than memorizing a universal recipe.
Step 4: Gather Materials and Tools
The basic cob ingredients are simple: clay-rich soil, sharp sand, clean straw, and water. Sharp sand is usually better than rounded beach sand because angular particles interlock more effectively. Straw should be dry, strong, and free from mold. Water should be clean enough that you would not be nervous using it in a garden.
Useful Tools for Cob Building
You do not need a fancy tool collection, but you do need sturdy basics. Common cob tools include tarps for mixing, buckets, shovels, wheelbarrows, garden forks, a tamper, levels, string lines, masonry tools, pruning saws for trimming straw, and good gloves. For larger projects, a mortar mixer, tractor, or mechanical mixing system can save an heroic amount of leg work.
Foot mixing on a tarp is traditional and effective for small batches. It also gives you a workout that makes the gym look suspiciously overcomplicated. For bigger buildings, plan a realistic labor strategy. Cob is forgiving, but it is not weightless.
Step 5: Design the Building Before You Mix
Cob rewards careful design. Because the walls are thick and heavy, your plan should account for foundation size, roof loads, window placement, door frames, plumbing, wiring, and drying time. Sketch the building from above and from the side. Mark wall thickness, openings, roof overhangs, built-in furniture, and utility paths.
Keep the Shape Simple at First
Curves are one of cob’s great pleasures, but beginners should avoid making every wall look like it was drawn by a dancing noodle. Simple rounded corners, modest spans, and compact layouts are easier to build and easier to roof. Round or oval structures can perform well, but roof framing and furniture layout still need practical planning.
Remember that cob walls take up space. A wall that is 18 to 24 inches thick will make the interior smaller than the exterior footprint suggests. That thickness can be charming, especially with deep window seats, but it should be included in the design from day one.
Step 6: Build a Strong, Dry Foundation
The foundation is where many cob projects succeed or fail. Cob should not sit directly on wet soil. It needs a raised, durable base that prevents capillary moisture from wicking into the wall and protects the lower wall from splashback.
Common foundation materials include stone, urbanite, concrete, rubble trench systems, or reinforced concrete depending on local code and engineering requirements. The key is to create a stable footing below frost depth where required, provide drainage, and raise the cob wall well above grade.
Add a Capillary Break
A capillary break is a moisture barrier between the foundation and the cob wall. Depending on the design, this may include stone, waterproof membrane, metal flashing, or other approved materials. The goal is simple: water should not climb from the ground into the wall like an ambitious little sponge.
Build the foundation wider than the cob wall and make sure it is level, stable, and properly drained. Sloping the surrounding grade away from the building is just as important as the wall itself.
Step 7: Mix the Cob
To mix cob by foot, spread sand and clay-rich soil on a tarp. Add water slowly and mix until the material begins to bind. Fold the tarp over the mix repeatedly, stomp it, twist it, and test the consistency. Then add straw in stages and continue mixing until the fibers are evenly distributed.
The finished cob should feel like stiff bread dough, not soup and not powder. It should hold together when formed into a ball. If it slumps, it is too wet. If it falls apart, it may need more clay or water. If it cracks badly as it dries, it may need more sand or fiber.
The Cob Loaf Test
Make a loaf-sized lump and set it on the ground. It should hold its shape without oozing flat. Pick it up and drop it from waist height. A good mix may deform slightly but should not explode into sad confetti. This quick test helps you catch problems before you build them permanently into the wall.
Step 8: Build the Walls in Lifts
Cob walls are built in layers, often called lifts. Place handfuls or forkfuls of cob onto the foundation, pressing each new piece firmly into the previous one. Use your thumbs, heels of your hands, or a small stick to knit the layers together. The goal is not to stack blobs; it is to create one continuous wall mass.
Build evenly around the structure rather than raising one wall to full height while the others lag behind. This helps the building settle and dry more uniformly. Keep checking wall thickness, plumb, and alignment. Cob gives you freedom, but freedom still appreciates a level.
Let Each Lift Firm Up
If you build too high too fast, wet cob can slump under its own weight. Let each lift firm up before adding more. Drying time depends on weather, wall thickness, humidity, and ventilation. In warm, dry conditions, you may build faster. In damp weather, patience becomes part of the tool kit.
Step 9: Install Doors, Windows, and Utilities
Door and window frames should be sturdy, well-braced, and installed as the wall rises. Cob shrinks slightly as it dries, so openings need careful detailing. Use anchors, keyways, or embedded wooden “deadmen” where appropriate to tie frames into the wall. Keep wood protected from moisture and avoid trapping water where cob meets trim.
Plan utilities before the walls are complete. Electrical conduit, plumbing sleeves, and fixture blocking can be embedded or routed through channels, depending on your design and code requirements. For permitted dwellings, licensed professionals may need to handle electrical and plumbing work.
Design Deep Window Reveals
Cob walls create beautiful deep window openings. Slope exterior sills so water drains away from the glass and wall. Add drip edges where needed. On the interior, deep sills can become shelves, reading spots, or places where houseplants gather to gossip.
Step 10: Add the Roof Early
A cob building needs a roof with generous overhangs. The roof protects walls from rain, snow, and intense sun. In many projects, builders install a temporary roof or complete the permanent roof as soon as the walls can support the next stage of construction.
The roof system must be designed for local loads, including snow, wind, and seismic conditions. Cob walls can support significant compressive weight, but roof connections need proper detailing. A bond beam or top plate may be used to distribute loads and connect the roof to the wall system.
Think “Big Hat”
The old natural-building saying is that earthen buildings need “good boots and a good hat.” The foundation is the boots. The roof is the hat. A wide-brimmed roof overhang protects the wall from splashback and wind-driven rain. Tiny overhangs may look modern, but cob prefers practical fashion.
Step 11: Dry, Trim, and Shape the Walls
As the walls dry, you can trim bulges, refine curves, carve niches, and shape built-in benches or shelves. Use a saw, machete, trowel, or scraping tool while the cob is firm but not rock hard. This stage is where cob becomes artistic. You can soften corners, add sculpted details, and make the building feel custom in a way that standard construction rarely allows.
Do not rush full drying. Thick cob walls can contain moisture long after the surface feels dry. Good airflow helps. Avoid sealing wet cob behind impermeable coatings, which can trap moisture and cause deterioration.
Step 12: Apply Plaster and Finish Coats
Cob walls are usually finished with earthen plaster, lime plaster, or another breathable finish. Breathability matters because earthen walls need to release moisture vapor. Cement stucco is generally a poor match for traditional earthen walls because it can trap moisture and is often too rigid for the substrate.
An earthen plaster may include clay, sand, fiber, and sometimes flour paste or other natural binders. Lime plaster offers stronger weather resistance for exterior surfaces when properly applied and maintained. The best finish depends on your climate, exposure, and maintenance plan.
Maintain the Exterior
No finish lasts forever. Inspect exterior plaster regularly, especially after storms and freeze-thaw cycles. Repair cracks early. Keep gutters working, splashback controlled, and vegetation away from walls. Cob is durable, but it likes an owner who notices things before they become expensive things.
Common Cob Building Mistakes to Avoid
Building Without Drainage
Poor drainage is one of the fastest ways to damage a cob structure. Grade the site properly, use foundation drains where needed, and keep water moving away from the walls.
Using the Wrong Soil Mix
Guessing the mix can lead to cracking, crumbling, or weak walls. Make test bricks and adjust the recipe before full construction begins.
Skipping Code Conversations
Even if you are building naturally, you still need to build legally. Talk with local officials early, especially for habitable structures.
Forgetting Insulation Needs
Cob has excellent thermal mass but relatively low insulation value. In cold climates, a cob-only exterior wall may not meet energy requirements without additional strategies.
Rushing the Drying Process
Thick earthen walls need time. Building too quickly, plastering too soon, or closing the building before moisture escapes can create long-term problems.
Real-World Experiences: What Building With Cob Teaches You
Anyone who has spent a full day building with cob learns something very quickly: earth is heavy, water is sneaky, and enthusiasm should be scheduled with snack breaks. Cob building looks romantic in photos, and it can be romantic in real life, but it is also physical work. A single batch may not seem like much until you have mixed, lifted, carried, and sculpted it under the afternoon sun. By 4 p.m., even the most poetic builder may start referring to the wall as “that muddy beast.”
One of the best experiences in cob construction is learning to trust your hands. At first, beginners often ask, “Is this mix right?” every few minutes. After a while, they begin to feel the answer. A good cob mix has body. It stretches slightly when pulled, holds together when tossed, and accepts straw without becoming hairy soup. That tactile learning is part of the magic. Cob is not just measured; it is felt.
Another lesson is that teamwork matters. Cob building is easier and more enjoyable with a crew. One person can screen soil, another can add sand, two can mix on the tarp, and others can carry cob to the wall. The rhythm becomes almost musical: stomp, fold, turn, laugh, repeat. Community builds are popular for a reason. People who would never volunteer to hang drywall may happily spend a weekend stomping mud, especially if lunch is good.
Design flexibility is another memorable part of the process. With conventional materials, changing a wall niche or adding a curved bench can feel like a small negotiation with an accountant. With cob, you can often shape features as you go. Want a rounded shelf near the entry? Add cob. Want a window seat deep enough for a book and a cup of coffee? Shape it into the wall. Want a tiny alcove for keys, candles, or one dramatic ceramic frog? Cob says yes, within structural reason.
The less glamorous experience is moisture management. Builders quickly learn to watch the weather. A surprise storm can turn an uncovered wall into a stress test. Tarps become precious. Roof overhangs become heroic. Gutters earn respect. Cob teaches humility because the material is simple, but the building science is not. Water always needs a path, and if you do not provide one, it will improvise badly.
Finally, cob building changes how people think about homes. The process is slower than conventional construction, but that slowness creates attention. You notice the sun angle, the slope of the land, the texture of soil, and the comfort of a curved wall against your shoulder. A cob building is not just assembled; it is grown by hand, layer by layer. That experience can be tiring, messy, and occasionally ridiculous, but it is also deeply satisfying. When the wall finally dries and the plaster glows in the evening light, you understand why people keep returning to this ancient method. It feels less like you built on the land and more like you built with it.
Conclusion: Is Cob Building Right for You?
Building with cob is practical, creative, and deeply rewarding when done with careful planning. The process begins long before mixing mud: you need to understand local codes, choose a dry site, test your soil, design for climate, and create a strong foundation. From there, cob construction becomes a hands-on journey of mixing, sculpting, drying, roofing, and finishing.
Cob is not a shortcut. It requires patience, labor, and respect for moisture control. It may also require engineers, permits, and hybrid design strategies, especially for full-time homes. But for builders who want a natural, beautiful, low-impact structure with personality, cob offers something rare in modern construction: a chance to shape your walls by hand and create a building that feels alive before anyone even moves in.
Start small if you are new. Build a cob bench, garden wall, or outdoor oven before attempting a cottage. Learn the material. Make mistakes on a project that does not include plumbing, mortgage paperwork, or your mother-in-law’s guest room. With knowledge, patience, and a roof that knows how to do its job, cob can be a strong and stunning way to build.


