Table of Contents >> Show >> Hide
- Why Before-and-After Furniture Makeovers Are So Addictive
- How to Spot Furniture with Makeover Potential
- The No-Fail Formula for Furniture Makeovers: Prep, Prime, Paint, Protect
- Popular Before-and-After Furniture Makeover Ideas
- Budget, Time, and Skill Level: What to Expect
- Common Furniture Makeover Mistakes (and How to Avoid Them)
- How to Photograph Your Furniture Makeovers Like a Pro
- Real-Life Lessons and Experiences from Furniture Makeovers
- Ready to Create Your Own Before-and-After?
If you’ve ever fallen down a rabbit hole of before-and-after photos, you already know the truth: nothing is more satisfying than watching a sad, scuffed piece of furniture glow up into a stylish showstopper. A great furniture makeover feels like magicbut it’s actually a mix of smart planning, simple tools, and a little paint under your fingernails.
From thrift-store dressers to grandma’s hand-me-down nightstands, creative furniture flips are one of the easiest ways to refresh your home without blowing your budget. Even better, they’re eco-friendly. Instead of sending old pieces to the landfill, you’re upcycling them into something that fits your style right now.
In this guide, we’ll walk through how to spot makeover-worthy pieces, the basic steps of transforming them, and real-life ideas that look like they came straight out of a makeover show. By the end, you’ll feel ready to tackle your own impressive before-and-after furniture projectscamera-ready “after” pics included.
Why Before-and-After Furniture Makeovers Are So Addictive
Before-and-after furniture makeovers hit all the right notes: they’re visual, practical, and emotional. Here’s why people can’t get enough of them:
- Instant gratification (well, almost). You can take a chipped dresser and, in a weekend, turn it into a piece that looks designer-level.
- Budget-friendly style. Many dramatic flips are done for under $100, especially if you reuse hardware, shop sales, or work with what you have on hand.
- Sustainable decorating. Upcycling furniture keeps usable pieces out of landfills and reduces the demand for fast, low-quality furniture.
- Personal expression. A makeover lets you play with bold paint colors, patterned wallpaper, stencils, or new hardware so your furniture feels uniquely “you.”
Design sites and home magazines consistently highlight dramatic furniture rehabsthink thrifted dressers with faux-granite tops, wallpapered drawer fronts, or boho-painted vanitiesbecause they show what’s possible with a little know-how and creativity.
How to Spot Furniture with Makeover Potential
Not every curbside find is worth the effort. Before you drag a piece home (or up three flights of stairs), give it a quick reality check. Use this simple checklist:
1. Check the “bones” of the piece
- Sturdy frame: Gently rock it. If it wobbles a bit, that’s usually fixable. If it feels like it might collapse, skip it unless you love a challenge.
- Material: Solid wood is ideal, but veneers and high-quality MDF can also be great candidates if they’re in decent shape.
- Drawers and doors: Make sure drawers slide, doors close, and hinges aren’t completely destroyed. Minor issues are normal; total dysfunction is a warning sign.
2. Look for damage you can actually fix
- Cosmetic issues: Scratches, water rings, dull stain, chipped paint, and outdated hardware are all solvable with sanding, painting, or refinishing.
- Structural issues: Loose joints, missing trim, or broken legs can often be repaired with wood glue, clamps, screws, or replacement parts.
- Red flags: Strong odors, extensive mold, or deep structural rot are usually not worth your time (or your lungs).
3. Imagine the “after” before you commit
Ask yourself:
- Could this dresser look modern with new pulls and a warmer stain?
- Would this basic coffee table look chic painted black with a matte topcoat?
- Could this dated vanity be refreshed with a deep green color and brushed brass hardware?
If you can picture a stylish “after” in your home, you’re halfway there.
The No-Fail Formula for Furniture Makeovers: Prep, Prime, Paint, Protect
Most dramatic before-and-after furniture makeovers follow the same basic framework. One popular approach often recommended by DIY pros is the “4 Ps” method: Prep, Prime, Paint, Protect. It keeps you from skipping the boring but essential steps that make the difference between a pro-looking finish and a flaky mess.
1. Prep: Clean, Repair, and Sand
This is where most people cut cornersand regret it later. Start by:
- Removing hardware and drawers. Label them so everything goes back where it belongs.
- Cleaning thoroughly. Use a degreaser or a mix of mild soap and water to remove wax, oils, and grime.
- Repairing damage. Fill chips and deep scratches with wood filler, clamp loose joints, and glue anything wobbly.
- Sanding the surface. A light sanding creates “tooth” so primer and paint can stick. For heavily finished or glossy pieces, sand more thoroughly.
2. Prime: Give Your Paint Something to Grip
Primer is your best friendespecially on glossy, dark, or previously stained pieces. A good bonding primer helps block stains and prevents tannins from bleeding through light-colored paint. For laminate or slick surfaces, primer is non-negotiable if you want the finish to last.
3. Paint: Choose the Right Formula and Technique
For furniture makeovers, people commonly use:
- Acrylic/latex furniture paint: Durable and easy to work with.
- Chalk-style paint: Great for a soft, matte, vintage look and usually forgiving on brush strokes.
- Spray paint: Perfect for small pieces, metal legs, or intricate detailsjust work in thin coats.
Apply multiple thin coats rather than one thick one, and always follow the manufacturer’s dry times. A small foam roller is great for flat surfaces; use a high-quality brush for details and edges.
4. Protect: Seal Your Hard Work
Once the paint has fully dried, add a protective topcoat so everyday life doesn’t ruin your masterpiece. Common options include:
- Water-based polyurethane: Durable, with a range of sheens from matte to gloss.
- Furniture wax: Ideal for chalk-style finishes; it leaves a soft, velvety sheen.
- Oil-based poly: Extremely durable but can yellow over time and has stronger fumes.
Lightly sand between coats of poly with very fine-grit sandpaper for the smoothest finish.
Popular Before-and-After Furniture Makeover Ideas
Once you know the basics, the fun part begins: deciding how to transform your piece. Here are some makeover styles that consistently deliver impressive results.
1. Painted Dressers That Look Designer
Dressers are makeover superstars because they offer lots of surface area for creativity. Some popular approaches include:
- Greige body + darker legs: A soft greige on the main body with slightly darker legs and modern pulls gives a thrifted dresser a high-end, custom feel.
- Faux-stone or faux-granite tops: Using countertop transformation kits, DIYers have turned plain wood tops into what looks like stone for a fraction of the cost.
- Art-covered or wallpapered fronts: Adhering a large poster or wallpaper to drawer fronts creates a “wow” moment every time you walk into the room.
- Ombre dressers: Painting drawers in gradually shifting shades of the same color is a clever way to make a dated piece look modern and playful.
2. Statement Chairs and Reupholstered Finds
Old dining chairs and accent chairs often have beautiful frames hiding under tired fabric or orange varnish. Try this combo for a showstopping after:
- Sand and refinish the wood frame in a warmer, modern stain or paint it black for a bold contrast.
- Replace the dated upholstery with a textured neutral, a classic stripe, or a fun print.
- Add trim or decorative tacks around the seat for a custom, “boutique” finish.
Even one upgraded chair can instantly elevate a corner or reading nook.
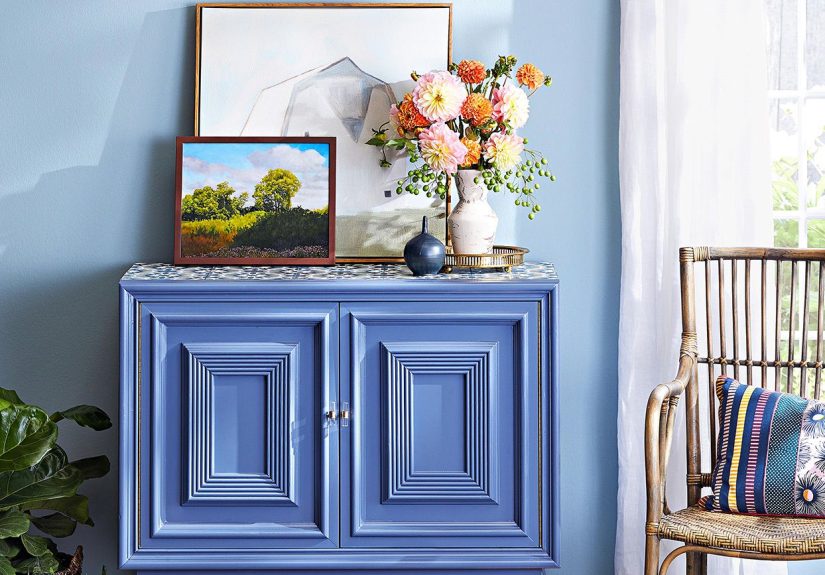
3. Colorful Wicker and Rattan Refreshes
Wicker and rattan pieces can look tired and dingy after years of use, but they take paint beautifully when prepped with a good primer. To refresh them:
- Vacuum or brush away dust and debris.
- Use a spray primer or an all-in-one paint-and-primer formula designed for outdoor use.
- Spray from multiple angles to reach all the nooks and crannies and avoid drips with light, sweeping passes.
Soft white, sage green, or navy can turn a once-dated wicker chair into a coastal or cottage-style statement piece.
4. Bathroom Vanities and Built-Ins
Bathroom and hallway built-ins are often solid but bland. Instead of replacing them, many homeowners are:
- Painting vanities in deep, saturated hues like teal, charcoal, or forest green.
- Swapping basic knobs for brass, black, or mixed-metal hardware.
- Updating counters with new tops or creative, budget-friendly kits.
A vanity makeover can completely change the mood of a bathroom without any major plumbing changes.
Budget, Time, and Skill Level: What to Expect
One of the reasons before-and-after furniture makeovers are so popular is that they’re flexible. You can pick projects that match your budget and experience.
Estimated costs
- Small projects (stools, side tables): $20–$50 for paint, primer, and a basic brush or roller set.
- Medium projects (nightstands, chairs, small dressers): $40–$100 depending on supplies and hardware.
- Larger projects (big dressers, vanities, wardrobes): $75–$200+ if you’re adding specialty finishes, new hardware, or additional materials.
Time commitment
- Simple paint-only flips can be done in a weekend if you account for drying time.
- Stripping, staining, and sealing wood can take several days to a week, depending on how many coats you apply and how long you let them cure.
If you’re new, start with a small piece in a low-pressure spot (like a side table for a guest room). You’ll learn the process without stressing over every tiny brush stroke.
Common Furniture Makeover Mistakes (and How to Avoid Them)
Even experienced DIYers run into issues occasionally. Here are some of the most common pitfalls and how to dodge them:
1. Skipping prep
The problem: Paint scratches off easily, peels, or chips within weeks.
The fix: Always clean, lightly sand, and prime. Even if the piece “looks” clean, years of wax and oils are sitting on the surface.
2. Using the wrong paint
The problem: Sticky, tacky surfaces that never seem to fully cure.
The fix: Choose paints formulated for furniture or trim, and avoid ultra-cheap formulas. Follow instructions for dry and cure times.
3. Rushing dry times
The problem: Fingerprints, smudges, or impressions from objects placed on the surface too soon.
The fix: Let each coat of paint and topcoat dry completely. It may feel dry to the touch in a couple of hours but can take days to fully cure.
4. Forgetting hardware and details
The problem: A beautifully painted piece still feels “off” because the old hardware doesn’t match the new style.
The fix: Either spray-paint or replace hardware for a cohesive finish. Don’t underestimate how much fresh knobs, pulls, and hinges elevate the final look.
How to Photograph Your Furniture Makeovers Like a Pro
If you’re going to all this effort, you definitely want good before-and-after photos. A few quick tricks make a huge difference:
- Keep the angle consistent. Take “before” and “after” photos from the same spot and height for a more dramatic comparison.
- Use natural light. Shoot near a window or in a bright room during the day. Turn off harsh overhead lights that cast odd shadows.
- Declutter the background. Remove distractions so your furniture is the star of the show.
- Add simple styling. A plant, a lamp, or a stack of books can help people imagine the piece in a real room.
Real-Life Lessons and Experiences from Furniture Makeovers
Furniture makeovers look effortless in curated photos, but behind every “perfect” after shot are plenty of small victories, mistakes, and learning moments. Here are experience-based insights that can help you feel more confident and realistic about your own projects.
Start small, then level up
Many DIYers who now confidently refinish dressers, vanities, and built-ins started with something tiny: a wobbly side table, a basic stool, or a plain bookshelf. Those first projects are where you figure out how your favorite paint behaves, how long you really need to let topcoats dry in your climate, and how much sanding you’re willing to do without losing your patience.
Think of those starter pieces like practice canvases. They may not end up in your living room forever, but the skills you gain from them absolutely will.
Every piece teaches you something new
One dresser might teach you the importance of labeling drawers before removing them. Another might show you that certain stains bleed through paint unless you use a stain-blocking primer. An old chair may convince you that reupholstering curved corners is a two-cup-of-coffee kind of job.
Instead of seeing hiccups as failures, treat them as notes for next time. Keep a mental (or actual) list: which primer you liked best, which brush gave you the smoothest finish, and which brand of hardware felt too flimsy. Over time, you’ll build your own personal “playbook” for furniture flips.
Expect the “ugly middle” phase
Almost every makeover has a stage where you question all your life choices. The piece is half-sanded, the primer looks streaky, the color feels wrong in the evening lightthis is the “ugly middle.” It happens to everyone.
The key is to push through that stage instead of abandoning the project. Once the second or third coat goes on and the hardware is reinstalled, the piece almost always looks dramatically better. Knowing this in advance makes it easier to keep going when you’re tempted to call it a flop.
Supplies matter more than you think
At first, it’s tempting to buy the cheapest brushes and random paint you find on clearance. After a few makeovers, you’ll notice that the right tools are absolutely worth it. Good-quality brushes shed less, leave fewer brush marks, and are easier to clean. A reliable sander saves your shoulders and speeds up prep work. A better roller sleeve can make your finish look more professional.
You don’t have to buy the most expensive products, but upgrading a few essentials after a couple of projects can make the process smoother and more enjoyable.
Give your pieces time to cure before heavy use
One hard-earned lesson many DIYers share: just because a piece is “dry” doesn’t mean it’s ready for daily abuse. Setting a heavy lamp on a freshly painted dresser or stacking books on a newly finished shelf too soon can leave permanent marks.
Whenever possible, let your furniture cure in a low-traffic area for several days or even a couple of weeks before loading it up. This small bit of patience helps protect the time and effort you put into the makeover.
Your style will evolveand that’s a good thing
Maybe you start with bold, bright colors on every piece, then slowly shift toward softer neutrals with subtle details. Or perhaps you begin with heavily distressed finishes and later decide you prefer cleaner lines and smoother surfaces. That evolution is part of the fun.
Don’t be afraid to repaint or re-refinish a piece down the road. Furniture makeovers are surprisingly forgiving. You’re allowed to change your mind, try new trends, and refine your look as your home and tastes grow.
The real payoff: a home that feels personal
At the end of the day, the biggest reward of creative furniture makeovers isn’t just saving moneythough that’s a huge perk. It’s walking into a room and seeing pieces that tell a story: the dresser you rescued from the curb, the coffee table you refinished on a long weekend, the vanity you painted the exact shade you couldn’t find in stores.
Those before-and-after transformations turn your home into more than just a collection of things. They make it a reflection of your creativity, patience, and personality. And once you complete your first satisfying furniture flip, don’t be surprised if you start looking at every old piece you see and thinking, “I bet I could make that amazing.”
Ready to Create Your Own Before-and-After?
Impressive furniture makeovers aren’t reserved for TV designers or full-time DIY pros. With a solid process (prep, prime, paint, protect), realistic expectations, and a willingness to learn as you go, you can turn outdated, worn-out pieces into standout stars in your home.
So grab that dusty dresser, the chipped coffee table, or the vanity that’s been bugging you for years. Take your “before” photo, roll out a drop cloth, and start your own creative journey. The “after” is closer than you think.


