Table of Contents >> Show >> Hide
- Why This DIY Christmas Jar Works So Well
- Supplies You Will Need
- How to Make a Gingerbread Man Christmas Candy/Cookie Jar
- Best Design Ideas for a Gingerbread Man Cookie Jar
- Mistakes to Avoid
- Where to Use Your DIY Christmas Candy Jar
- Experience Notes: What This Project Is Really Like in Real Life
- Final Thoughts
- SEO Tags
Note: This project is meant to be adorable, practical, and giftable. For best results, decorate only the outside of the jar, keep the rim and interior clean, and place unwrapped cookies or candy only in food-safe areas. If you want the simplest option, tuck treats into clear bags before placing them inside the finished jar.
Some Christmas crafts are elegant. Some are sentimental. And some are so ridiculously cute that you forgive them for taking over your kitchen counter like they own the deed. This easy DIY gingerbread man Christmas candy/cookie jar belongs proudly in that third category.
If you love holiday decor that looks sweet enough to nibble but still earns its keep, this project checks every festive box. It is decorative, useful, beginner-friendly, budget-friendly, and delightfully charming. Even better, it can hold actual treats instead of just sitting there looking decorative and emotionally unavailable.
A gingerbread man candy jar or cookie jar brings together a few things people love about Christmas decorating: warm brown tones, white “icing” details, playful red-and-green accents, and that nostalgic bakery-window feeling that makes everyone suddenly believe cinnamon is a personality trait. Whether you place it on a kitchen counter, coffee bar, entryway table, or holiday dessert station, it adds instant cheer with very little drama.
In this guide, you will learn how to make a gingerbread man Christmas jar with simple supplies, smart design choices, and practical tips for keeping the finished piece pretty and functional. We will also cover styling ideas, common mistakes, and a longer section on real-life crafting experiences so your jar does not end up looking like a melted cookie with commitment issues.
Why This DIY Christmas Jar Works So Well
The best holiday DIY ideas do two jobs at once: they look festive and they solve a problem. This one does exactly that. A Christmas candy jar keeps peppermints, wrapped chocolates, mini cookies, dog treats, tea bags, or tiny gifts in one tidy place while also acting as seasonal decor.
The gingerbread man theme works especially well because it is instantly recognizable. You do not need advanced art skills to pull it off. A round or wide-mouthed glass jar already gives you the base shape. Add a warm cookie-colored finish, a simple face, white icing-style lines, a bow, and a few candy-inspired details, and suddenly your plain storage jar looks like it came straight from a holiday bakery display.
Another reason this project is popular is flexibility. You can make it farmhouse, vintage, whimsical, bright, neutral, kid-friendly, or gift-ready. Want a classic gingerbread look? Use brown, white, and red. Want something softer and more current? Add blush pink, creamy ivory, and a dusting of faux sugar sparkle. Want it to scream “North Pole but make it organized”? Add striped ribbon, faux peppermint embellishments, and a label tag tied around the neck.
Supplies You Will Need
One of the biggest selling points of this easy DIY Christmas jar is that the supply list stays refreshingly sane. You do not need a workshop, a power tool collection, or the patience of a museum conservator.
Basic Materials
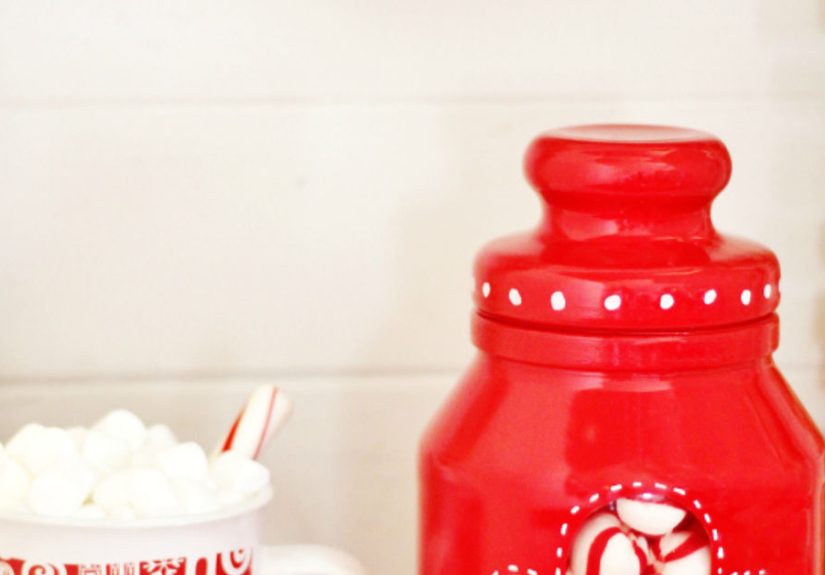
1 clean glass jar with lid, preferably wide-mouth or cookie-jar style
Brown craft paint, glass paint, chalk paint, or multi-surface acrylic paint
White paint pen or small detail brush with white paint
Black paint pen or fine-tip marker for the eyes and smile
Red or green ribbon, twine, or mini bow
Optional embellishments such as faux candy buttons, tiny pom-poms, peppermint picks, mini bells, or holiday tags
Paintbrushes or sponge applicators
Rubbing alcohol or glass cleaner for prep
Paper towels or lint-free cloth
Clear treat bags if storing cookies or candy inside
Optional Upgrades
Puffy paint for raised icing details
Matte sealer for the exterior only
Faux greenery sprig for the lid or neck
Battery-operated fairy lights for display use only
Personalized gift tag
Choose a jar that feels sturdy and roomy. A classic Mason jar works beautifully, but an apothecary-style cookie jar also gives a more decorative finish. If you are making this as a gift, think about what will go inside before you choose the size. Nobody wants to receive a festive jar that can hold exactly three peppermints and one crushed life dream.
How to Make a Gingerbread Man Christmas Candy/Cookie Jar
Step 1: Clean the Jar Properly
Start with a fully clean, dry jar. Remove labels, wash away any residue, and wipe the outside with rubbing alcohol or glass cleaner. This step matters more than people think. Paint and adhesive do not love grease, fingerprints, or mystery smudges. Clean glass gives you a smoother finish and helps your decoration stay put through the holiday season.
Step 2: Paint the Exterior in a Gingerbread Color
Use brown paint on the outside only. A warm medium brown works best because it resembles classic gingerbread without turning muddy. If the paint looks streaky after the first coat, congratulations, your jar is normal. Let it dry and add a second coat. Many jars look noticeably better after two or three thin layers than one thick, impatient one.
If you prefer a more rustic look, use chalk paint and lightly distress the edges once dry. If you want a smoother and slightly glossier finish, use a glass or multi-surface paint. For a softer, bakery-inspired style, mix a little tan or cream into the brown so the color feels more cookie than dark chocolate.
Step 3: Add the Gingerbread Face
Now the jar gets its personality. Use black paint or a paint pen to create two simple eyes and a curved smile. Keep the expression cheerful and minimal. Tiny dot eyes and a curved grin work better than trying to paint a full cartoon masterpiece on rounded glass. This is a cookie character, not a streaming platform mascot.
Add pink or red cheeks if you want a sweeter look. Small circles made with a sponge dabber or cotton swab can soften the face and make the jar feel more playful.
Step 4: Create the Icing Details
This is the magic step. White “icing” lines instantly transform brown glass into a gingerbread-inspired design. Paint scalloped borders near the top and bottom of the jar, plus swirls, zigzags, dots, or faux frosting squiggles around the face. You can also add icing cuffs, a wavy smile trim, or little lace-like borders.
A white paint pen makes this easier for beginners, while puffy paint adds dimension if you want a raised icing effect. Keep the design balanced. Too little detail and the jar can look plain. Too much detail and it starts looking like frosting had a nervous breakdown.
Step 5: Dress Up the Lid
The lid deserves a festive moment too. Paint it red, green, white, or metallic gold, depending on your overall style. Tie ribbon around the rim or neck of the jar, add a bow, and tuck in a sprig of faux greenery, cinnamon sticks, or a peppermint ornament. If your jar will mainly hold cookies on the counter, keep the top decorations modest so opening and closing the lid stays easy.
For a classic gingerbread man look, add two faux candy “buttons” on the front or glue a tiny bow tie under the face. Just keep glued embellishments on the outside only.
Step 6: Let Everything Cure Before Filling
This is where impatient crafters lose the plot. Let the jar dry completely before adding candy or cookies. Even if the paint feels dry to the touch, a longer cure time helps prevent smudges, fingerprints, or accidental decoration transfer. The jar should look finished before it starts its second career as holiday treat storage.
Step 7: Fill and Style the Jar
Once dry, fill the jar with wrapped candies, peppermint bark pieces in cellophane bags, mini gingerbread cookies, biscotti, marshmallows, tea sachets, or snack mixes. If you are gifting homemade cookies, clear treat bags inside the jar make the presentation cleaner and more food-conscious. If the jar is mostly decorative, fill it with faux cookies, ornaments, or fairy lights instead.
Best Design Ideas for a Gingerbread Man Cookie Jar
Classic Gingerbread Bakery Style
Use warm brown paint, bright white icing trim, red buttons, and a striped ribbon. Fill with peppermint candies or mini gingerbread cookies for a traditional holiday look.
Neutral Farmhouse Christmas Style
Choose soft brown, ivory, muted red, and natural jute twine. Add wood beads or a kraft paper tag. This version looks right at home next to cutting boards, brass accents, and evergreen stems.
Whimsical Candyland Style
Add bright candy colors, faux gumdrop accents, oversized bows, and extra icing swirls. This is ideal for family kitchens, classroom displays, or holiday party tables where subtlety has politely left the room.
Vintage-Inspired Christmas Style
Try muted tones, tiny bells, old-fashioned plaid ribbon, and a lightly distressed finish. This version feels cozy, nostalgic, and wonderfully old-school without looking dusty or fussy.
Mistakes to Avoid
Painting the food-contact area: Keep paint, sealer, and glue away from the interior and the area where lips, hands, or food may touch frequently. This is especially important if the jar will hold unwrapped treats.
Using too many decorations: It is easy to go from charming to chaotic. A few standout details beat twenty tiny ones fighting for attention.
Skipping surface prep: Dirty glass makes paint adhesion weaker. Clean first, decorate second, celebrate third.
Choosing the wrong jar size: Tiny jars look cute but can be frustratingly impractical. Think about storage capacity before decorating.
Not matching the jar to your Christmas style: A bright candy jar is adorable, but it may feel out of place in a minimalist kitchen unless you intentionally balance it with the rest of your decor.
Where to Use Your DIY Christmas Candy Jar
This project is surprisingly versatile. Place it on a cookie station during a holiday party, on a kitchen shelf beside a hot cocoa bar, near the coffee maker for sweetener packets, in an entryway for wrapped mints, or on a teacher’s desk as a cheerful seasonal gift. It also works beautifully as a neighbor gift, hostess gift, office exchange present, or stocking stuffer container.
If you are decorating for Christmas on a budget, make a set of two or three jars in slightly different sizes. Grouped together, they create a styled display that looks more expensive than it really is. Holiday decorating loves a good illusion. That is why one garland can apparently solve every emotional problem in December.
Experience Notes: What This Project Is Really Like in Real Life
One reason people fall for this easy DIY gingerbread man Christmas candy/cookie jar is that it feels achievable on a weeknight. It does not demand a giant setup, and it does not punish you for being a normal person with limited time, limited space, and one paintbrush you forgot to wash last time. In real-life crafting, that matters. A lot of holiday projects look wonderful in photos and then become mildly hostile the second you actually try them. This one is friendlier.
The first experience many crafters mention is how quickly the jar starts looking festive. The transformation is almost suspiciously fast. At the beginning, it is just a plain glass container. Then you add a warm brown coat, a smile, a few white icing squiggles, and suddenly it has a personality. That quick visual payoff makes the project satisfying even for beginners who usually avoid holiday crafts because they assume everything requires advanced talent and suspiciously steady hands.
Another common experience is that the jar tends to spark ideas while you are making it. You begin with one simple cookie jar, and five minutes later your brain is planning a matching cocoa canister, a peppermint treat jar, and an entire gingerbread-themed kitchen vignette. Holiday crafting has a way of doing that. It starts with “I will make one cute thing,” and ends with you emotionally committed to a color palette.
Families also tend to love this project because it is easy to divide into simple tasks. One person can clean the jar, another can paint the base coat, another can add the face, and the detail-loving member of the group can handle the icing lines like they were born for this exact moment. It is one of those crafts that feels collaborative without becoming chaotic. That said, if children are helping, the finished face may range from adorable to “gingerbread man who has seen things.” Both outcomes are valid Christmas memories.
There is also a practical pleasure in making something seasonal that does not become useless on December 26. A gingerbread jar can hold wrapped candy through the holidays, then transition into cookie storage, tea bags, dog treats, or pantry odds and ends. Many DIY decorations are fun for a month and awkward after that. This one earns its shelf space.
People who give these jars as gifts often say the jar itself becomes part of the present rather than just the packaging. That is a huge advantage. Instead of handing someone a disposable tin or plastic container, you give them something they can refill and reuse. It feels thoughtful, especially when the contents match the theme. Ginger snaps, cinnamon candies, mini shortbread cookies, or hot cocoa packets all make the gift feel intentional rather than random.
There is also something nostalgic about the finished result. Even when the design is simple, a gingerbread-inspired jar tends to tap into childhood Christmas memories: cookie decorating, candy displays, paper snowflakes, warm kitchens, and the annual realization that holiday ribbon somehow multiplies in drawers when nobody is looking. The project feels handmade in the best way. Not messy or unfinished, just warm and personal.
Finally, the biggest real-life lesson is this: perfection is not the point. Slightly uneven icing lines often make the jar look more charming, not less. A hand-painted smile has more personality than something machine-perfect. Holiday decor works best when it feels alive, relaxed, and welcoming. So if your gingerbread man ends up a little quirky, excellent. So do most of us by late December.
Final Thoughts
An easy DIY gingerbread man Christmas candy/cookie jar is one of those rare holiday projects that delivers charm, usefulness, and giftability in one cheerful package. It is simple enough for beginners, customizable enough for serious decorators, and festive enough to make any countertop look like it has better holiday manners.
Whether you make one for your own kitchen or a whole batch for gifts, the secret is not perfection. It is personality. Use a clean jar, keep your materials food-conscious, choose details that fit your holiday style, and let the finished piece bring a little warmth to the season. Christmas decorating does not always need to be grand. Sometimes all it takes is a smiling gingerbread face, a handful of candy, and a jar that finally found its destiny.


