Table of Contents >> Show >> Hide
- Why Cedar Is a Smart Fence Material
- Before You Build: Planning That Saves Time, Money, and Regret
- Tools and Materials Checklist
- Step-by-Step: How to Build a Cedar Fence
- Step 1: Lay out the fence line
- Step 2: Mark post locations
- Step 3: Dig post holes to the right depth and width
- Step 4: Set posts (concrete vs. gravel) and get them plumb
- Step 5: Establish a consistent fence height
- Step 6: Attach rails (stringers)
- Step 7: Install cedar pickets/boards
- Optional upgrade: board-on-board
- Step 8: Build and hang a gate that doesn’t sag
- Pro Tips for a Cedar Fence That Stays Straight
- Finishing and Maintenance: Keep Cedar Looking Its Best
- Common Mistakes (So You Don’t Rebuild It “For Character”)
- Cost and Time: A Quick Reality Check
- of Real-World Cedar Fence Experience (Without the Fairy Tale)
- Conclusion
A cedar fence is the backyard equivalent of showing up to a cookout with homemade brownies: it looks impressive, it smells amazing,
and it makes everyone assume you’ve got your life together. Cedar is naturally rot-resistant, handles weather better than many woods,
and ages into that classic silvery-gray if you let it. Build it right, and you’ll have a fence that’s sturdy, straight, and far less
likely to become a “leaning fence of suburban disappointment” after the first big storm.
This guide walks you through the whole projectplanning, materials, post setting, rails, pickets, gates, finishing, and the real-world
stuff DIYers learn the hard way. We’ll keep it practical, a little funny, and very focused on building a cedar fence that lasts.
Why Cedar Is a Smart Fence Material
Cedar (often Western red cedar) is popular for fences because it has natural oils and tannins that help it resist decay and insects.
It’s also lighter than many hardwoods, easy to cut, and takes stain well. Compared with cheaper woods, cedar usually stays more stable
outdoorsmeaning fewer weird warps and twists that turn your crisp fence line into modern art.
Pick the right cedar for the job
Not all cedar boards are created equal. Fence pickets are commonly available in cedar, but pay attention to quality and straightness.
When you’re sorting through boards, look for pieces that are relatively straight, with fewer large knotsespecially if you’re building
a privacy fence where every bow and twist will show up like a bad haircut in bright sunlight.
Before You Build: Planning That Saves Time, Money, and Regret
1) Confirm property lines, rules, and permits
Start with the boring stuff that prevents expensive drama later: verify your property line and check local rules. Many cities (and
plenty of HOAs) regulate fence height, setbacks, and the “finished side” orientation. If you’re replacing an old fence, don’t assume
the old one was placed correctlypast homeowners have made bold choices.
2) Call 811 before digging
Before you dig post holes, contact 811 (the “call before you dig” service) so underground utilities can be marked. Fence projects
absolutely count. This step is fast, free, and dramatically reduces the chance of turning your DIY weekend into an emergency situation.
3) Choose a fence style that fits your yard
Cedar works for almost any style. Your choice affects privacy, airflow, cost, and how much you’ll notice imperfect boards.
- Privacy fence (side-by-side pickets): Great screening, straightforward build.
- Board-on-board: More privacy (covers gaps), looks premium, costs more materials.
- Shadowbox: Alternating boards on each sidegood airflow, attractive from both sides.
- Picket fence: Classic curb appeal; usually shorter and less material-heavy.
4) Measure and build a materials plan (with a real example)
Measure your fence runs in linear feet. Then plan posts, rails, and pickets based on spacing and style. A common approach is spacing
posts just under 8 feet apart to support standard rail lengths and help prevent sagging.
Example: 100 linear feet of 6-foot cedar privacy fence (no gate, straight run)
- Post spacing: about 8 feet on center (adjust for corners, slope, and wind exposure)
- Number of spans: 100 ÷ 8 = 12.5 → plan 13 spans
- Number of posts: spans + 1 = 14 posts
- Rails: for a 6-foot fence, use 3 rails per span → 13 spans × 3 = 39 rails (commonly 2x4x8)
- Pickets: if you use a 5.5-inch-wide picket with a 1/2-inch gap, you cover ~6 inches per picket → ~2 pickets per foot → ~200 pickets
- Fasteners: exterior-grade screws or nails rated for outdoor use (details below)
- Concrete or gravel: depends on your soil and method (also below)
If you’re adding a gate, plan for extra posts (often heavier) and additional framing lumber. Gates are where fences go to test your
patience, so give them the structural respect they deserve.
Tools and Materials Checklist
Tools
- Measuring tape, marking paint/stakes
- String line and line level (or a laser level if you’re fancy)
- Post hole digger and/or power auger
- Shovel and digging bar (for rocks and stubborn soil)
- 4-foot level
- Circular saw or miter saw
- Drill/driver (impact driver recommended)
- Hammer or nail gun (optional, but speed is nice)
- Clamps (helpful for gate assembly)
- Safety glasses, hearing protection, gloves
Materials
- Posts: 4×4 is common; 6×6 is great for corners and gates
- Rails/stringers: usually 2×4 (cedar or pressure-treated, depending on preference)
- Cedar pickets/boards: choose straight pieces
- Fasteners: exterior-rated and compatible with cedar (see the fastener note below)
- Concrete mix and water or crushed gravel (depending on method)
- Gate hardware: hinges, latch, handle, optional wheel or anti-sag kit
- Finish: penetrating stain/sealer (optional but recommended)
Fastener note: cedar and “mystery stains”
Cedar’s natural tannins can react with some metals and cause black streaks or premature corrosion. To avoid that, use stainless steel
fasteners (a top choice), or high-quality hot-dip galvanized fasteners rated for outdoor use. Avoid cheap, thin coatingscedar tends
to “tell on them” over time.
Step-by-Step: How to Build a Cedar Fence
Step 1: Lay out the fence line
Mark corners and endpoints using stakes. Run string lines between stakes to visualize the fence line and keep it straight. If your
fence changes direction, mark each corner clearly and plan post locations from those points.
If you’re working on a slope, decide whether you’ll rack (follow the slope with pickets) or step
(keep sections level and step down). Stepping looks crisp but takes more layout work.
Step 2: Mark post locations
Starting at one end, mark post centers along the string line. Many DIY builds use spacing just under 8 feet (for 8-foot rails), but
6 feet can be better in high winds or if you want extra stiffness. Mark gate openings carefully, accounting for hardware clearance
and post thickness.
Step 3: Dig post holes to the right depth and width
Post holes are where strong fences are born. A common guideline is burying about one-third of the post length
underground, with the bottom of the post below the frost line in cold climates to reduce frost heave. As a practical example, a
6-foot fence often uses 8-foot posts, with roughly 2 feet undergroundsometimes more, depending on frost depth and soil.
Hole width matters too. A widely used approach is making the hole diameter about three times the post width (so for
a 4×4 post, around a 12-inch diameter hole). Wider holes give more room for concrete or properly compacted gravel.
Step 4: Set posts (concrete vs. gravel) and get them plumb
You’ll typically choose one of two post-setting methods. Both can work; the “best” choice depends on your soil, climate, and how
permanent you want the install to be.
-
Concrete-set posts: Often preferred for loose or sandy soil, tall privacy fences, or very windy areas. When using
concrete, keep the post plumb, brace it, and follow the bag instructions for mixing/pouring. Shape the top of the concrete so it
slopes away from the post to shed water. -
Compacted crushed gravel: Popular for drainage and easier future replacement. The key is using crushed gravel
(not smooth river rock) and compacting in layers so it locks in tight.
Whichever method you choose, take your time here. Use a level on at least two sides of the post, brace the post firmly, and keep your
post tops roughly consistent. Let concrete cure per product instructions before putting stress on posts (like hanging rails).
Step 5: Establish a consistent fence height
Once posts are set, pick a reference point for height. You can run a string line across the tops (or use a laser) and mark cut lines
so your fence doesn’t look like it was designed by a sleep-deprived squirrel. Trim post tops as needed.
Step 6: Attach rails (stringers)
Rails connect posts and support your pickets. For a typical 6-foot privacy fence, three rails are common: top, middle, and bottom.
Keep the bottom rail elevated so it’s not hugging the soil (soil contact invites rot and messy weed trimmers).
- Typical rail placement for 6-foot pickets: bottom rail about 9–12 inches above ground, top rail several inches below the picket top, middle rail centered
- Fastening: use exterior-rated screws; pre-drill if boards are prone to splitting
- Keep things straight: check level as you go, especially on long runs
Step 7: Install cedar pickets/boards
This is the satisfying partthe fence finally looks like a fence. Start at one end and keep everything plumb. If you’re installing
side-by-side pickets, use a spacer block to maintain consistent gaps. If you want maximum privacy, install pickets tight (but remember
wood moves with humidity; perfectly tight today can become “surprise gaps” later).
For a clean finish:
- Set pickets 1–2 inches above ground to reduce moisture wicking and rot risk.
- Use a level on the first few pickets and re-check every few boards so small errors don’t snowball.
- Use stainless or high-quality hot-dip galvanized fasteners to minimize staining and corrosion.
- If you’re using screws, don’t overdrive themcedar is softer, and “oops” is permanent.
Optional upgrade: board-on-board
Board-on-board fences stagger boards so they overlap gaps, improving privacy and making the fence look substantial. The tradeoff is
higher cost and more time. A common approach is installing a first layer with even spacing, then centering the second layer boards over
the gaps.
Step 8: Build and hang a gate that doesn’t sag
Gates fail when they’re treated like a fence panel with hinges. Build a proper frametypically with 2x4sand include a diagonal brace
to resist sag. A classic rule: the diagonal brace should run from the bottom hinge side up toward the latch side, so
the brace helps carry the load back to the hinges.
Use sturdy hinges rated for gate weight, and consider an anti-sag kit or tension cable for wider gates. If you’re doing a driveway
gate, plan heavier posts (often 6×6), deeper footings, and premium hardware. This is not the place to bargain-hunt.
Pro Tips for a Cedar Fence That Stays Straight
Use stronger posts at corners and gates
Corners and gate posts carry more force. Upgrading those locations to 6×6 posts can help prevent wobble and long-term leaning.
Adapt your post depth to climate and soil
In freeze-thaw climates, posts that aren’t deep enough can heave over time. In sandy soil, you may need larger holes and more robust
anchoring. In heavy clay, water can sit around postscareful grading and proper installation matter more than ever.
Don’t trap wood against the ground
The fastest way to shorten a fence’s life is to let wood sit in constant moisture. Keep pickets off the soil and avoid building
features that create “water cups” where rain can linger.
Keep hardware cedar-friendly
If you want your cedar to stay looking sharp, use corrosion-resistant fasteners and hardware. Cedar’s chemistry can cause staining with
the wrong metal. If you’re near the coast, choose higher corrosion resistance (stainless is your friend).
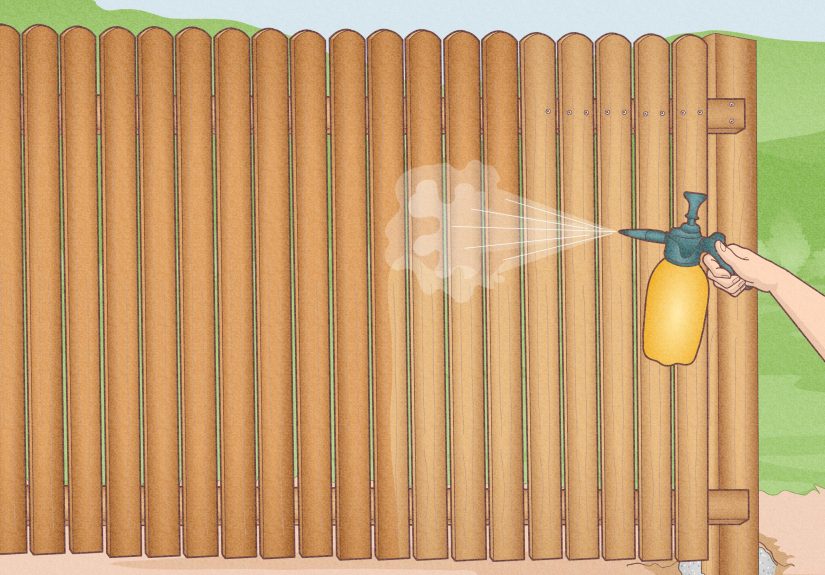
Finishing and Maintenance: Keep Cedar Looking Its Best
Cedar can be left unfinished to weather naturally into a silver-gray. If you prefer the warm cedar color (or want extra water resistance),
use a quality exterior stain or sealer. Penetrating stains are popular because they soak in rather than forming a thick film that peels.
Maintenance basics
- Rinse dirt and pollen off seasonally; gentle cleaning beats aggressive pressure washing.
- Reapply stain/sealer as recommended by the product (often every couple of years, depending on exposure).
- Watch gates and latches: small adjustments early can prevent bigger problems later.
Common Mistakes (So You Don’t Rebuild It “For Character”)
- Skipping layout: A straight string line is cheaper than therapy.
- Posts not plumb: Even a small lean gets worse across a long run.
- Rails too close to soil: Moisture + time = rot.
- Wrong fasteners: Black streaks and corrosion are not “rustic charm.”
- Gate built too lightly: Gates are moving partsbuild them like they matter (because they do).
Cost and Time: A Quick Reality Check
Cedar costs more than bargain lumber, but it often pays back in durability and looks. Your total cost depends on height, style,
post-setting method, and hardware. DIY can save a lot, but the tradeoff is time: digging and setting posts is usually the biggest
effort. Plan the project in phaseslayout and holes first, posts next, rails and pickets after.
of Real-World Cedar Fence Experience (Without the Fairy Tale)
If you ask a bunch of homeowners what building a cedar fence is like, you’ll hear a consistent theme: the fence itself isn’t hard,
but the little decisions add up. The most common “wish I knew” moment starts before the first hole: layout. People often
underestimate how much time it takes to confirm the line is straight, square corners, and account for slopes. A fence that is off by
even an inch every few sections can look obviously crooked by the time you reach the end of the run. The fix is simplestring line,
careful marking, and frequent checksbut it’s also the part DIYers are tempted to rush because it doesn’t “look like progress.”
Another frequent lesson: the ground is never as cooperative as it looks. Soil can change dramatically within the same yardsoft and
diggable in one spot, then suddenly rocky enough to make you consider learning a new hobby. Many DIYers recommend budgeting extra time
(and maybe renting a power auger) if you’re doing more than a handful of posts. Even with an auger, you may still need a digging bar
for roots and rocks, and a plan for where all that displaced dirt is going to live while you work.
Fasteners are also a “learn it once” moment. Cedar is forgiving to cut and handle, but it’s picky about metal. Homeowners who use
whatever fasteners were already in the garage sometimes end up with dark streaks around nails or screws. The fixusing stainless or
proper hot-dip galvanized fastenersfeels boring at the store and brilliant a year later when the fence still looks clean.
Gates deserve their own paragraph of wisdom. DIY gates often sag because people build them like a mini fence panel instead of a framed
door. The homeowners who end up happiest are the ones who overbuild the gate: stronger posts, deeper set, quality hinges, and a proper
brace or anti-sag kit. They also leave a little clearance for seasonal movement, because wood expands and contracts. A gate that swings
perfectly in April can scrape in August if you leave no room for nature’s mood swings.
Finally, the biggest “experience-based” takeaway is pacing. Most DIYers who enjoy the project break it into stages: one day for layout
and marking, one day for digging, one day for setting posts, then rails and pickets after posts are solid. That pacing keeps you from
making tired mistakeslike setting a post slightly out of plumb because you’re racing sunset. A cedar fence rewards patience: if you
build the skeleton straight and strong, the rest goes smoother, looks better, and lasts longer.
Conclusion
Building a cedar fence is a classic DIY project that’s equal parts planning, digging, and satisfaction. Start by confirming rules and
property lines, call 811 before you dig, and choose a fence style that matches your goals. Set posts correctly (depth and plumb matter
more than almost anything), install rails level and consistent, then hang cedar pickets with clean spacing and the right fasteners.
Finish it if you want to preserve color, and maintain it lightly over time. Do those things, and your cedar fence won’t just look good
on day oneit’ll keep looking good when your neighbors are on fence number two.


