Table of Contents >> Show >> Hide
- What the Quick Access Toolbar Does (And Why It’s Worth Your Time)
- The Fastest Way to Customize the QAT (30 Seconds or Less)
- The “Control Room” Method: Add Anything via Word Options
- Make It Faster with Keyboard Shortcuts (Yes, the QAT Has Its Own)
- Move, Show, Hide, and Label the QAT (Because Preferences Exist)
- Back It Up: Export and Import Your QAT (Save Your Future Self)
- Troubleshooting on Windows 7: When the QAT Misbehaves
- Smart QAT Setups (Steal These Like a Professional)
- Real-World Experiences and Lessons (Extra Notes That Make Customizing “Stick”)
- Conclusion
If you’re using Windows 7, you already know it’s basically the “comfort food” of operating systems: familiar, steady, and still floating around plenty of offices. Pair it with Microsoft Word, and you’ve got a powerful setupespecially if you stop making the Ribbon do all the heavy lifting.
Enter the Quick Access Toolbar (QAT): that small row of icons near the top-left of Word. It’s like giving Word a “favorites bar,” so your most-used commands are always one click awayno matter what tab you’re on. Customize it once, and you’ll wonder how you ever lived without it (right next to the people who still print emails “just in case”).
What the Quick Access Toolbar Does (And Why It’s Worth Your Time)
The QAT is designed to stay visible all the time. By default, it usually includes Save, Undo, and Redo/Repeat. Nicebut basic. The real magic is that you can add the commands you use constantly, like:
- Print Preview / Print (because “Let me just check margins…” is a daily ritual)
- Paste Special (for people who don’t trust formattingand are correct not to)
- Format Painter, Styles, or Track Changes
- Insert Table, Hyperlink, or Page Break
On Windows 7, Word’s interface depends more on your Word version than the operating system. The steps below cover the most common Windows 7 combinations:
- Word 2007 (Office Button menu)
- Word 2010 / 2013 (File tab → Options)
The Fastest Way to Customize the QAT (30 Seconds or Less)
When a command is already visible on the Ribbon, adding it to the QAT is delightfully simple:
- Find the command on the Ribbon (example: Track Changes on the Review tab).
- Right-click the command.
- Select Add to Quick Access Toolbar.
To remove a command:
- Right-click the icon on the Quick Access Toolbar.
- Select Remove from Quick Access Toolbar.
There’s also a tiny drop-down arrow at the end of the QAT. Click it to quickly toggle common commands on/off (like Quick Print), or choose More Commands… for the full control room.
The “Control Room” Method: Add Anything via Word Options
This is where you go when you want commands that aren’t sitting on the Ribbonor when you want the QAT arranged like a professional cockpit instead of a junk drawer.
Word 2010 / Word 2013 on Windows 7
- Click File.
- Click Options.
- Select Quick Access Toolbar on the left.
Word 2007 on Windows 7
- Click the Office Button (top-left round button).
- Click Word Options.
- Find the section for customizing toolbars (Word 2007 typically labels this under customization options).
Once you’re in the QAT customization screen, you’ll usually see two big lists:
- Choose commands from (left side)
- Customize Quick Access Toolbar (right side = what’s currently on your QAT)
Pick Better Command Lists (Popular Commands Is Just the Warm-Up)
That “Choose commands from” dropdown is important. If you can’t find what you want, switch views:
- Popular Commands – quick picks, not comprehensive
- Commands Not in the Ribbon – hidden gems
- All Commands – the everything-bagel option
- File Tab – adds Backstage items like Print or Open to the QAT
Add Commands the Right Way (So They Actually Help)
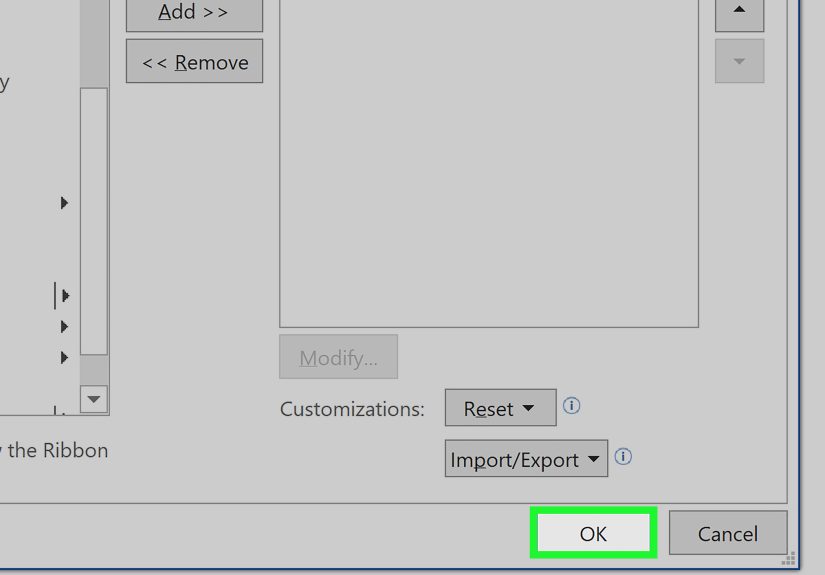
- Choose a list from Choose commands from.
- Click a command you want.
- Click Add >>.
- Use Move Up / Move Down to put it where your hand expects it to be.
- Click OK.
Example setup: If you regularly create PDFs (or print to PDF), you can add Print or related File-tab commands to the QAT so you don’t have to detour through menus every time.
Organize Like a Pro: Add Separators (No More Icon Soup)
Separators let you group commands so your QAT isn’t a single long row of mystery symbols.
- In Choose commands from, pick Popular Commands or All Commands.
- Find Separator.
- Click Add >>.
- Move it into position between groups.
Tip: Think in groups: “Document actions” (New/Open/Save/Print), “Editing” (Paste Special/Format Painter), “Review” (Track Changes/Comments).
Customize for All Documents vs. One Special Project
In many Word versions, you can choose whether your QAT changes apply to:
- All documents (your default environment)
- Only the current document (useful for a special workflow)
- A specific template (great for teamsconsistent tools every time)
If you have one document type that’s “special” (like a legal template, a thesis format, or a company report), a document/template-specific QAT can keep you from cluttering your everyday toolbar.
Make It Faster with Keyboard Shortcuts (Yes, the QAT Has Its Own)
Here’s the underrated superpower: the QAT can be triggered with your keyboard.
- Press Alt.
- You’ll see numbers appear over QAT commands.
- Press the number to run that command (for example, Alt + 1 triggers the first QAT button).
This is why command order matters. If you put your most-used action in slot #1 or #2, you’ve basically created a custom shortcut without memorizing anything complicated.
Move, Show, Hide, and Label the QAT (Because Preferences Exist)
Some people like the QAT above the Ribbon. Others like it below. Word lets you choose:
- Click the QAT drop-down arrow
- Select Show Below the Ribbon or Show Above the Ribbon
In many versions of Word, you can also hide the QAT completely (not recommended unless you enjoy unnecessary clicking). If you’re using labels (words next to icons), Word typically requires the QAT to be positioned below the Ribbon for label toggles.
Back It Up: Export and Import Your QAT (Save Your Future Self)
If you ever migrate to another computeror Word suddenly forgets who it isexporting your customizations is a lifesaver.
- Go to File → Options → Quick Access Toolbar.
- Click Import/Export.
- Select Export all customizations.
- Save the file somewhere safe (cloud storage is ideal).
To restore later, use Import/Export → Import customization file. One important warning: importing usually overwrites existing toolbar/ribbon customizations, so export your current setup first if you might want to undo the import.
Troubleshooting on Windows 7: When the QAT Misbehaves
Problem: The Quick Access Toolbar Disappeared
Try these quick fixes:
- Right-click the Ribbon area and choose Show Quick Access Toolbar (if available).
- Go to File → Options → Quick Access Toolbar and make sure it’s set to show (and pick Above/Below Ribbon as needed).
Problem: The Toolbar Is a Mess (Or You Want a Fresh Start)
Reset just the QAT (so you don’t nuke everything else):
- File → Options → Quick Access Toolbar
- Click Reset
- Select Reset only Quick Access Toolbar
Problem: Commands Don’t Seem to “Work”
Some commands only activate in certain contexts. For example, you might add something successfully but it’s grayed out until you’re in the right situation (like having text selected, being in a table, or working in a specific view). If a button seems useless, it might just be waiting for the right momentlike a cat pretending it didn’t want attention.
Smart QAT Setups (Steal These Like a Professional)
Everyday Writing Setup (Students, Writers, Bloggers)
- Save
- Undo / Redo
- Print Preview
- Paste Special
- Styles Pane
- Heading 1 / Heading 2 (if available as commands)
- Insert Hyperlink
Office Power-User Setup (Reports, Admin, Data-Heavy Docs)
- Save
- Quick Print
- Format Painter
- Paste Special
- Show/Hide 
- Paragraph Spacing controls (if available)
- Insert Table
Editing & Review Setup (Legal, Compliance, Collaboration)
- Track Changes
- New Comment
- Accept Change
- Reject Change
- Previous / Next Comment
- Document Inspector (if available)
Real-World Experiences and Lessons (Extra Notes That Make Customizing “Stick”)
People usually start customizing the Quick Access Toolbar for one reason: they’re tired of hunting. That’s the origin story. The “I can’t keep clicking through five tabs just to do the same three actions” moment. On Windows 7 machinesespecially older office setupsWord often becomes a daily tool for repetitive work: invoices, meeting minutes, forms, letters, reports, templates, and those documents that somehow get renamed “FINAL_FINAL2_REALLYFINAL.docx.”
A common experience is that the first customization attempt goes a little wild. Someone adds fifteen commands in a burst of productivity… and then realizes the QAT turned into a tiny icon parade. The lesson most users learn fast: the QAT is best when it’s small and intentional. If you can’t quickly spot what you want, you’ve recreated the problemjust in a new location.
Another frequent “aha” moment comes from putting commands in a keyboard-friendly order. Once users discover that pressing Alt assigns numbers to the QAT, the toolbar stops being just a mouse shortcut and becomes a speed system. In real workflows, people tend to place their top action in slot #1 (like Paste Special, Track Changes, or Print Preview). The result is a simple habit: Alt + 1 becomes muscle memory. It’s not fancy, but it’s powerfulespecially in Word environments where custom macros and complex shortcuts aren’t practical for everyone.
Teams also run into the “my toolbar is different than your toolbar” problem. One person says, “Click the little icon up top,” and another person says, “I don’t have that.” That’s where exporting and importing customizations becomes a real-world win. In many offices, the QAT setup becomes part of onboardingright alongside setting the default printer and explaining why the break room microwave smells like regret. Sharing a standard QAT layout can reduce training time and keep everyone using the same tools consistently.
One more pattern shows up often: document-specific toolbars. For example, someone who writes contracts or academic papers might build a special QAT for that document templatecommands like styles, heading tools, references, or review buttonswhile keeping their everyday toolbar clean. This approach usually feels “next level” to users at first, but it’s incredibly practical. It prevents your standard QAT from turning into a dumping ground and keeps specialized commands where they belong: with the documents that actually need them.
Finally, there’s the classic Windows 7 reality: computers get replaced, profiles get reset, and sometimes Word just decides to forget your preferences. Users who’ve been burned once tend to become backup believers. Exporting your customizations is the small step that saves you from rebuilding everything laterespecially if your toolbar layout is tied to your daily speed. Think of it as a seatbelt for your productivity: you don’t appreciate it until you really, really need it.
Conclusion
Customizing the Quick Access Toolbar in Microsoft Word on Windows 7 is one of the simplest upgrades you can make to your daily workflow. Start small, add only what you use constantly, group commands with separators, and order your favorites so keyboard shortcuts become effortless. Once your QAT matches your work style, Word stops feeling like a mazeand starts feeling like a tool you actually control.


