Table of Contents >> Show >> Hide
- Before You Start: A 30-Second Safety + Fabric Check
- What You’ll Need
- Why This Works (A Tiny Bit of Laundry Science)
- How to Dry Jeans Quickly with an Iron: 6 Steps
- Step 1: Remove Excess Water First (This Is Where You “Win Time”)
- Step 2: Set Up a “Moisture Exit Plan” (Towel Under + Towel Over)
- Step 3: Choose the Right Heat + Steam Settings
- Step 4: Start with the Thick Zones (Waistband, Pockets, Yoke)
- Step 5: Dry the Legs in Lanes (Think “Denim Lawn Mowing,” Not Random Ironing)
- Step 6: Finish-Dry, Cool, and Check the “Sneaky Damp Spots”
- Common Mistakes (And How to Avoid Them)
- How Long Does It Take, Really?
- Denim-Saving Extras (Optional, But Helpful)
- FAQ
- Real-World Experiences: What It’s Like to Actually Do This (And Why It’s Worth Knowing)
- Wrap-Up
You know that moment: you have one pair of jeans that fits exactly right, and of course it’s the pair that’s still wet when you need to leave.
The dryer is busy (or broken, or “eating socks again”), and air-drying denim moves at the speed of a glacier.
The good news: with the right setup, an iron can safely take jeans from damp-and-doomed to wearable in a surprisingly short time.
This guide shows you a fast, fabric-friendly way to dry jeans quickly with an iron using a towel-assisted method that pulls moisture out as you press.
You’ll also get denim-specific tips so you don’t end up with shiny patches, scorched seams, or that “why do my pockets feel like swamps?” problem.
Before You Start: A 30-Second Safety + Fabric Check
Irons are basically handheld “hot plates with opinions.” Keep things safe and keep your jeans looking good with these quick checks:
- Read the care label inside your jeans. Look for ironing symbols (dots) and any “do not iron” notes.
- Stretch denim needs gentler heat: If your jeans have elastane/spandex (common in skinny or “comfort stretch” fits), use a lower temperature and avoid lingering on one spot.
- Never iron dripping-wet jeans: You want damp, not sopping. Dripping water + electricity is a bad combo.
- Protect your skin: Steam burns happen fast. Keep hands clear of the soleplate and steam vents.
- Protect your surfaces: Use an ironing board or a thick towel on a sturdy table. (Not your lap. Not the couch. Not the bed without a barrier.)
What You’ll Need
- An iron (steam iron works best, but a dry iron can still do the job)
- Two clean, dry towels (bath towel + hand towel is a great combo)
- An ironing board (or a firm table protected with a thick towel)
- A hanger or drying rack for the final “cool and finish” phase
- Optional: spray bottle with water (or use your iron’s steam), distilled water for the iron, and a thin pressing cloth (like a cotton pillowcase)
Why This Works (A Tiny Bit of Laundry Science)
Denim is thick, tightly woven, and loves holding onto waterespecially around seams, hems, pockets, and the waistband.
When you apply heat, that trapped moisture wants to evaporate. The trick is giving it somewhere to go.
A dry towel acts like a moisture sponge, absorbing dampness as it’s pushed out of the fabric.
Pressing in sections also prevents that classic denim issue: the outside feels “fine,” but the inner layers are still damp.
How to Dry Jeans Quickly with an Iron: 6 Steps
Step 1: Remove Excess Water First (This Is Where You “Win Time”)
If your jeans are coming straight from the washer, do one more high-spin cycle if you can.
If they’re already out, grab a dry bath towel and do the towel roll:
- Lay a dry towel flat.
- Spread the jeans on top (flatten thick areas like pockets).
- Roll the towel and jeans together into a tight “burrito.”
- Press down firmly along the roll (kneel gently or lean with your body weight).
Unroll and feel the denim. Your goal: damp jeans that don’t drip when you squeeze. If they’re still very wet, repeat with a second dry towel.
Step 2: Set Up a “Moisture Exit Plan” (Towel Under + Towel Over)
Put a dry towel on your ironing board (or on your protected table). This towel becomes your moisture absorber.
Turn the jeans inside out to reduce shiny marks on the outside and to protect the dye finish.
Smooth the jeans flat on the towelno bunching, no folded-over legs.
Now place a second dry towel or thin pressing cloth on top of the section you’re ironing.
This does two things: it protects the fabric from direct heat and helps trap-and-transfer moisture into the towel instead of back into the room.
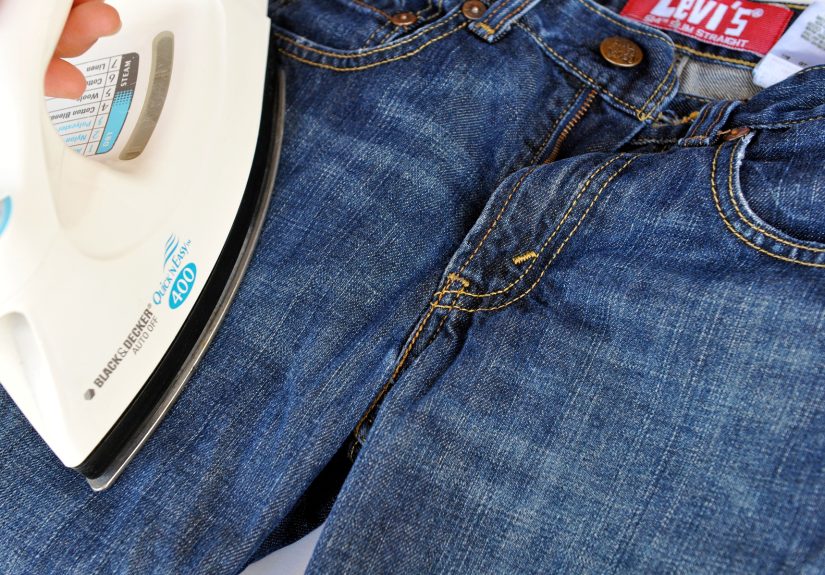
Step 3: Choose the Right Heat + Steam Settings
Most jeans are mostly cotton, so they can typically handle higher heat than synthetics.
But “mostly cotton” is doing a lot of emotional labor herecheck the label.
- 100% cotton denim: medium-high to high heat with steam is usually fine.
- Stretch denim: use medium heat; rely on steam and the towel method rather than max temperature.
- If you’re unsure: start lower and increase gradually. It’s easier to add heat than to un-scorch a seam.
Fill the iron with water if you’ll use steam (distilled water helps prevent mineral buildup and staining).
Let the iron fully heat up before you start.
Step 4: Start with the Thick Zones (Waistband, Pockets, Yoke)
Thick areas hold water longest, so hit them first while your towels are at maximum absorbency.
Work section by section:
- Lay the waistband flat. Cover with your top towel/press cloth.
- Press, don’t scrub: place the iron down for 5–10 seconds, lift, move, repeat.
- Do the pockets (front and back), then the seat area (yoke) and fly zone.
If your top towel starts feeling damp, swap it for a dry one. A wet towel can’t absorb muchlike a sponge that’s already had a long day.
Step 5: Dry the Legs in Lanes (Think “Denim Lawn Mowing,” Not Random Ironing)
Now move to the legs. This is where method beats enthusiasm.
- Flatten one leg completelyno folds, no ridges.
- Cover with the top towel/press cloth.
- Press in long lanes from thigh to hem, lifting the iron between placements.
- Pay extra attention to seams and hems (they’re basically tiny denim reservoirs).
Flip and repeat for the other leg. Then turn the jeans right-side out and do a quick pass on the exterior if needed
(still using a pressing cloth if you’re worried about shine).
Step 6: Finish-Dry, Cool, and Check the “Sneaky Damp Spots”
The jeans may feel dry on the surface but still hold moisture in hidden layers.
Here’s how to finish strong:
- Hang the jeans on a hanger or drying rack immediately after ironing.
- Let them cool for 5–10 minutes. Cooling helps moisture finish evaporating instead of re-condensing in the fabric.
- Do a quick “damp spot check”: pinch the waistband, inner thighs, pocket bags, and hems.
- If anything feels cool/damp, spot-press that area again with a dry towel barrier.
Once they feel consistently dry, you’re good to go. If you’re putting them on right away, make sure there’s no lingering dampnessdenim doesn’t “air out” kindly once it’s trapped against skin.
Common Mistakes (And How to Avoid Them)
Holding the iron in one spot too long
Denim can scorch, especially on seams. Use the press-and-lift method instead of leaving the iron parked like it’s waiting for a tow truck.
Skipping the towel barrier
Direct ironing can create shiny patches and concentrates heat on dye-rich areas. A towel or pressing cloth protects the finish and improves moisture transfer.
Trying to “dry” soaking jeans with steam alone
Steam helps, but it’s not magic. If the jeans are too wet, you’ll spend longer and risk water spots. Remove water first with spin + towel roll.
Overheating stretch denim
Elastane blends don’t love extreme heat. Use medium heat, more towel absorption, and shorter press times.
How Long Does It Take, Really?
It depends on how wet the jeans are and how heavy the denim is. As a practical rule:
- Lightly damp jeans (post-spin + towel roll): often 10–20 minutes of ironing + 5–10 minutes hanging
- Very damp jeans: 20–35 minutes (and you’ll swap towels at least once)
- Thick/raw denim: longerfocus on spot-drying key areas if you’re in a rush
If you only have five minutes, prioritize: waistband + pockets + upper thighs + hems. Those are the areas that feel the most uncomfortable if they’re still damp.
Denim-Saving Extras (Optional, But Helpful)
Use airflow for the “last mile”
After ironing, hanging the jeans near a fan (or in a breezy room) helps any remaining moisture leave fasterespecially in thick seams.
Keep the iron clean
A dirty soleplate can leave marks on fabric. If your iron has residue, clean it before you start so your “quick dry” doesn’t become a “why is there a mystery streak?” situation.
FAQ
Can I dry jeans with an iron if I don’t have steam?
Yes. The towel method still works. You may need a slightly longer press time and you can lightly mist the towel (not the jeans) with water if you need extra wrinkle release.
Will ironing shrink my jeans?
Brief pressing usually won’t shrink denim, but prolonged high heat can. Stick to the care label, keep the iron moving, and avoid baking the waistband and seams.
Is this okay for dark jeans?
Yesjust iron inside out and use a pressing cloth to protect the dye finish and reduce shine.
What if my jeans still smell “laundry-damp” after drying?
That smell usually means moisture is still trapped somewhere (often pockets or thick seams). Spot-press those areas again and hang the jeans with airflow for a few minutes.
Real-World Experiences: What It’s Like to Actually Do This (And Why It’s Worth Knowing)
Most people try this method for the first time in a very specific emotional state: mild panic.
It’s usually the morning of something importantschool, work, an appointment, a tripwhen you discover your jeans are still damp because you washed them “late last night,”
which is a phrase that always sounds responsible until it isn’t.
The first surprise is how much time you save just by doing the towel roll. People often skip it because it feels like an extra step,
but it’s the step that makes the rest possible. Once you’ve rolled the jeans and pressed them in a towel, the denim stops feeling like a wet sponge and starts feeling like “workable damp.”
That’s when the iron becomes a finisher instead of an all-day therapist.
The second surprise is where jeans hold water. Almost everyone expects the legs to be the problem, then discovers the pockets are secretly running a tiny indoor pool.
Pocket bags can stay damp even when the outside looks dry, which is why starting with the waistband and pockets feels almost unfairly effective.
You’ll press the pocket area, lift the towel, and think, “Oh. So that’s where the moisture has been living.”
Another common experience: learning the difference between ironing and pressing.
Jeans don’t need aggressive back-and-forth scrubbing. They respond better to “press, lift, move” like you’re stamping out moisture in calm, organized sections.
People who try to speed-run the process by sliding the iron around usually end up with damp seams and a towel that’s wet in exactly the wrong places.
If you’re working with stretch jeans, the experience is a little different. You’ll notice they warm up faster and can get shiny quicker,
so you naturally become more carefullower heat, more pressing cloth, shorter contact time.
The upside is that stretch denim often feels wearable sooner because it doesn’t stay stiff the way heavy cotton denim can.
The most satisfying moment is the “cool-down hang.” After you’ve ironed, hanging the jeans for a few minutes feels like cheating,
because the last bits of moisture vanish while you do something elsepack a bag, make coffee, or stare at your closet wondering why laundry is a recurring plotline in your life.
When you put the jeans on and they feel dry all the way through (no cold waistband, no damp hems), it’s a small victory that makes you feel like you just unlocked a secret adult skill.
And honestly, that’s why this method is worth knowing: it’s not something you want to do every week, but it’s a lifesaver when timing is tight.
It turns “I have nothing to wear” into “I have jeans in 20 minutes,” which is basically the laundry version of a superhero origin storyminus the cape and plus a lot more towels.
Wrap-Up
To dry jeans fast, you don’t need a miracleyou need a plan: remove water first, press with towel barriers, use the right heat,
focus on thick zones, then hang to finish-dry. Once you’ve done it once, you’ll have a reliable “backup move” for every future laundry emergency.


