Table of Contents >> Show >> Hide
- Why a Chromebook microphone stops working
- How to fix mic not working on Chromebook
- 1. Make sure the mic is not physically switched off
- 2. Check the microphone volume in Quick Settings
- 3. Confirm the correct input device is selected
- 4. Restart the app or website that needs the mic
- 5. Allow microphone access in ChromeOS Privacy controls
- 6. Check the website’s microphone permission
- 7. Recheck permissions inside the app itself
- 8. Unplug and reconnect external microphones or headsets
- 9. Disconnect and reconnect Bluetooth audio devices
- 10. Test the microphone before blaming the microphone
- 11. Restart your Chromebook
- 12. Update ChromeOS
- 13. Disable noise cancellation or audio extras temporarily
- 14. Use Safety Reset to disable extensions and reset problem settings
- 15. Perform a hardware reset
- 16. Powerwash, recover ChromeOS, or contact your admin or manufacturer
- Quick troubleshooting checklist
- How to prevent Chromebook microphone issues in the future
- Final thoughts
- Real-world experiences: what this problem often looks like
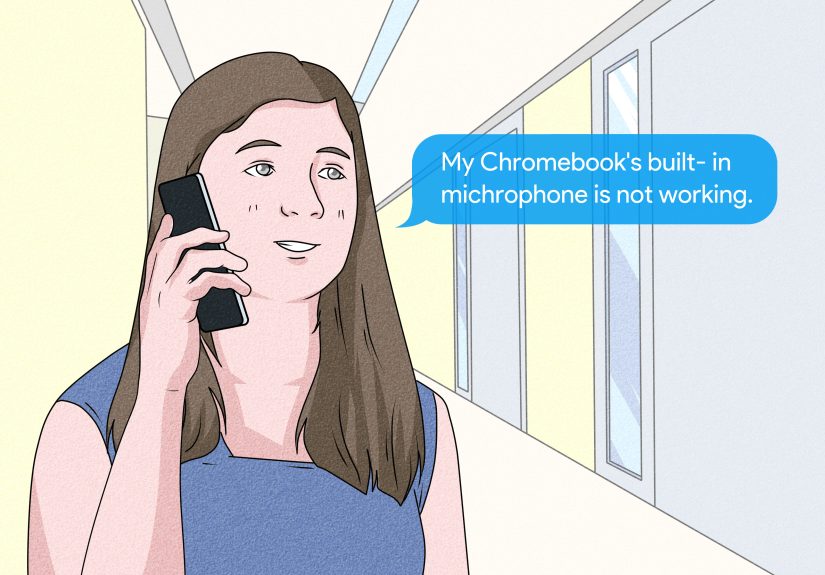
If your mic is not working on Chromebook, take a breath. Your laptop is probably not plotting against your next class, meeting, or voice note. In most cases, a Chromebook microphone issue comes down to one of a few usual suspects: permissions, the wrong input device, a muted mic, a buggy app, or a ChromeOS hiccup that needs a gentle nudge instead of a dramatic meltdown.
The good news? You usually do not need to jump straight to factory reset mode and start saying goodbye to your downloads folder. This guide walks you through 16 easy solutions, from the two-second checks to the “fine, now we get serious” fixes. Whether your built-in mic stopped working in Google Meet, your headset mic vanished into the digital void, or Zoom is acting like you joined the call from inside a potato, these steps can help.
Let’s get your Chromebook microphone working again before your next call turns into a very awkward mime performance.
Why a Chromebook microphone stops working
Before we dive into fixes, it helps to know what can go wrong. A Chromebook mic not working issue usually falls into one of these buckets:
- The microphone is muted or the input volume is too low.
- ChromeOS privacy controls are blocking all mic access.
- A website or app does not have permission to use the microphone.
- Your Chromebook is using the wrong input source, such as a headset mic you forgot was connected.
- A Bluetooth or USB mic is connected poorly or not selected.
- An app, browser tab, extension, or system bug is interfering.
- Your Chromebook is managed by a school or workplace and some settings are restricted.
- In rarer cases, the microphone hardware itself may be failing.
How to fix mic not working on Chromebook
Start at the top and work your way down. The early fixes are quick. The later ones are more advanced, but still manageable.
1. Make sure the mic is not physically switched off
Some Chromebooks now include a physical microphone privacy switch or a quick privacy toggle. If that switch is off, your mic is off everywhere. Not in one app. Not on one website. Everywhere.
Check the side of the device, the keyboard row, or the Quick Settings area. If you recently tapped a microphone icon while rushing into a meeting, congratulations, you may have solved your own mystery.
2. Check the microphone volume in Quick Settings
A muted or nearly muted input level is one of the sneakiest causes of Chromebook microphone problems. Your mic may technically be “on” but set so low it only records the emotional damage.
Open the bottom-right corner of the screen, select the time, then open Audio settings. Under Input, make sure the microphone volume is turned up. If the mic icon is muted, unmute it.
This is especially important after switching between built-in audio, USB headsets, or Bluetooth earbuds.
3. Confirm the correct input device is selected
Your Chromebook can use more than one microphone. That sounds helpful until it picks the wrong one.
If you have a headset, earbuds, USB microphone, dock, webcam, or Bluetooth device connected, ChromeOS may decide that device is the default input. Open Settings > Device > Audio or use Quick Settings to review the input source. Make sure your intended microphone has the active checkmark.
Sometimes the fix is as simple as switching from External Microphone back to Internal Microphone, or the other way around.
4. Restart the app or website that needs the mic
Apps get weird. Tabs get weird. Browsers get weird. This is not a moral failure. It is technology.
If your microphone is not working in one app only, close the app completely and reopen it. If it is a website, close the tab and load it again. Many microphone permissions and input changes do not fully apply until the page or app refreshes.
This fix is surprisingly effective for Google Meet, Zoom Web App, Discord, online recorders, and speech-to-text tools.
5. Allow microphone access in ChromeOS Privacy controls
Chromebooks now have system-level privacy controls for camera and microphone. If Microphone access is turned off here, apps and services cannot use the mic at all.
Go to Settings > Privacy and security > Privacy controls. Turn on Microphone access. Then review which apps are allowed, blocked, or set to ask each time.
If this setting is off, even a website you already allowed may still act like your mic does not exist.
6. Check the website’s microphone permission
If the problem only happens on one site, the site may be blocked from using your mic. This is common after you click “Block” once and forget about it forever.
Open the website, click the site information icon next to the address bar, and look for Microphone. Set it to Allow. Then reload the page.
You can also go to Chrome Settings > Privacy and security > Site settings > Microphone and remove blocked sites or change permissions there.
7. Recheck permissions inside the app itself
Some apps have their own audio settings on top of ChromeOS settings. So yes, you may have to say “allow the mic” twice. Computers love paperwork.
In Google Meet, open the audio settings and make sure the right microphone is selected. In Zoom, you can test the mic and switch inputs from the audio menu. In recording apps, look for an input selector, mute icon, or a “test microphone” option.
If your mic works in one app but not another, the app’s own settings are a prime suspect.
8. Unplug and reconnect external microphones or headsets
If you use a USB mic, wired headset, or combo audio jack device, unplug it and plug it back in. Then check whether ChromeOS detects it as the active input.
A loose connection, a partially seated plug, or a cranky adapter can make the system detect audio output but not microphone input. That is the classic “I can hear them, but they can’t hear me” problem.
If you are using a USB microphone, try another port if your Chromebook supports it. If you are using a wired headset, inspect the cable and jack for dust, wobble, or visible damage.
9. Disconnect and reconnect Bluetooth audio devices
Bluetooth headsets are convenient right up until they become tiny wireless chaos goblins.
If your Chromebook microphone is not working with Bluetooth earbuds or a headset, turn Bluetooth off and back on, then reconnect the device. After reconnecting, go back to audio settings and confirm that the Bluetooth device is selected for input.
If the sound still fails, unpair the device and pair it again from scratch. Also make sure another nearby device has not stolen the headset connection. Your phone loves to do this at the worst possible moment.
10. Test the microphone before blaming the microphone
Testing helps you figure out whether the problem is system-wide or tied to one app. That matters, because it can save you from doing ten unnecessary fixes and one dramatic sigh.
On many Chromebooks, you can use Settings > Device > Audio and run a mic test. On Chromebook Plus models, the video call panel includes a mic test and indicator. In Google Meet, the pre-join screen also lets you test whether the mic bar moves when you speak.
If the mic bar moves in Meet but not in your recording app, the system is probably fine and the app is the problem. If no test detects your voice, keep going.
11. Restart your Chromebook
Yes, this old chestnut still works. A restart can clear temporary bugs, reload audio services, and reset glitchy app behavior.
Shut the Chromebook down fully instead of just closing the lid. Wait a few seconds, power it back on, and test the mic again.
This is one of the most boring fixes on the list, which is exactly why people skip it. And then they spend 40 minutes doing everything else first.
12. Update ChromeOS
If the mic stopped working after a bug, compatibility issue, or partial system hiccup, a ChromeOS update may fix it.
Go to Settings > About ChromeOS and check for updates. Install any available update, restart the device, and test the microphone again.
Keeping ChromeOS current also helps with support for newer USB microphones, Bluetooth accessories, privacy controls, and video call features.
13. Disable noise cancellation or audio extras temporarily
Noise cancellation is usually helpful. Sometimes, though, it gets a little too enthusiastic and decides your actual voice is suspicious.
In Chromebook audio settings, if you see Noise cancellation or another audio enhancement setting, turn it off for a test. Some devices also offer Bluetooth audio improvement features that can affect how the mic behaves.
If your voice sounds distant, choppy, or missing only in certain apps, this quick toggle is worth trying.
14. Use Safety Reset to disable extensions and reset problem settings
Extensions can interfere with site permissions, audio capture, privacy settings, and browser behavior. If your Chromebook mic issue appears mostly in the browser, a Safety Reset is a smart middle step before a full reset.
Go to Settings > System preferences > Reset > Safety reset. This disables extensions and resets certain settings to safe defaults without wiping your local data and apps.
Think of it as telling your Chromebook to stop being creative and return to the basics.
15. Perform a hardware reset
If the problem feels system-wide and stubborn, try a hardware reset. On most Chromebooks, turn the device off, then press and hold Refresh and tap Power. Release Refresh when the Chromebook starts.
This can help if audio hardware is not initializing correctly after sleep, after an update, or after accessory switching. It is more serious than a restart, but less drastic than a factory reset.
Just remember that Google recommends using a hard reset only after simpler fixes have failed.
16. Powerwash, recover ChromeOS, or contact your admin or manufacturer
If nothing else works, it is time for the bigger guns.
Try a Powerwash
A Powerwash returns the Chromebook to factory settings. It can fix deeper software problems, but it also erases local data. Back up anything important first.
Try ChromeOS recovery
If the operating system is badly corrupted, recovery reinstalls ChromeOS. This is more involved, but it is the right move when the microphone problem appears alongside broader system weirdness.
Check if the Chromebook is managed
If this is a school or work Chromebook, your administrator may control or restrict microphone behavior. If settings are grayed out, guest mode is disabled, or permissions refuse to stick, check whether the device is managed and contact your admin.
Consider hardware failure
If the built-in mic fails every test, external microphones work fine, and software fixes do nothing, the internal microphone may be physically damaged. At that point, contacting the manufacturer or a repair service makes more sense than fighting the device like it owes you rent.
Quick troubleshooting checklist
If you are in a hurry, here is the short version:
- Check the physical mic switch.
- Turn up the input volume.
- Select the right microphone.
- Refresh the site or reopen the app.
- Turn on Microphone access in Privacy controls.
- Allow the site to use the mic.
- Reconnect USB, wired, or Bluetooth devices.
- Test the mic in Meet or Audio settings.
- Restart your Chromebook.
- Update ChromeOS.
- Try Safety Reset.
- Use hardware reset, Powerwash, or recovery if needed.
How to prevent Chromebook microphone issues in the future
Once your mic is working again, a few habits can help keep it that way:
- Review mic permissions when joining a new site or app.
- Check the active input device before every important meeting.
- Keep ChromeOS updated.
- Disconnect unused Bluetooth audio devices.
- Use a quick mic test before interviews, classes, and presentations.
- Be careful with privacy toggles and extension overload.
Final thoughts
When your mic is not working on Chromebook, the cause is usually less dramatic than it feels in the moment. Most microphone issues come from one of three places: permissions, the wrong input source, or a temporary software glitch. That means most fixes are well within reach, even if you are not the sort of person who enjoys poking around in settings menus for fun.
Start with the easy wins: privacy controls, site permissions, audio input selection, and a restart. Then move on to updates, Safety Reset, and a hardware reset if needed. Save Powerwash and ChromeOS recovery for the end of the road.
With a little patience and maybe one mildly judgmental look at your Bluetooth earbuds, you can usually get your Chromebook microphone back in business.
Real-world experiences: what this problem often looks like
One of the most frustrating things about a Chromebook microphone issue is that it rarely fails in a clean, obvious way. Usually, it fails in a weird, half-working, deeply annoying way. Maybe your built-in mic works in Google Meet but not in Zoom. Maybe Zoom works, but your online recorder hears nothing. Maybe your headphones play audio perfectly, yet the mic on the same headset acts like it has gone on vacation without leaving a forwarding address.
A common experience is the “silent meeting panic.” You join a class or work call, everything seems normal, and then someone says, “We can’t hear you.” You unmute. Still nothing. You unmute harder, which sadly is not a real thing. Then you start clicking random icons with the focus of a game show contestant. In many cases, the issue turns out to be simple: the site was blocked from using the microphone, the input source switched to a Bluetooth device in another room, or the system-level mic access toggle was off.
Another classic Chromebook moment is the headset trap. You plug in a headset expecting everything to improve, and instead the Chromebook decides to use the wrong microphone. The built-in mic might stay active when you want the headset mic, or the reverse happens. This leads to audio that sounds muffled, distant, or missing completely. People often assume the mic is broken when the real problem is that ChromeOS quietly selected the wrong input device.
Students and remote workers also run into managed-device headaches. On a school Chromebook, some settings may be locked down by an administrator. That can make troubleshooting feel impossible because the usual menus either look different or refuse to cooperate. If that is your situation, do not waste an hour trying to outsmart the admin policies. That path leads only to stress and bad decisions.
There is also the post-update mystery. Everything worked yesterday, ChromeOS updated overnight, and now the microphone has stage fright. Sometimes the fix is just a restart, a fresh permission prompt, or a hardware reset. Other times, an accessory that worked before needs to be reselected or re-paired. That is irritating, yes, but it does not always mean your Chromebook is doomed.
The biggest lesson from real-world use is this: microphone issues on a Chromebook are usually fixable, but they reward a calm, methodical approach. Test one thing at a time. Check permissions before assuming hardware failure. Verify the active mic before blaming the app. And whenever possible, do a quick test before an important call. Future you will be grateful, and current you will spend a lot less time mouthing, “Can you hear me now?” into the void.


