Table of Contents >> Show >> Hide
- Quick Reality Check: Is a Buzzcut the Right DIY Cut?
- Choose Your Buzzcut Length (Guard Size Cheat Sheet)
- What You’ll Need (Don’t Skip This Part)
- Prep Like a Pro (5 Minutes That Saves You 50)
- Step-by-Step: How to Give Yourself a Buzzcut at Home
- Optional Upgrade: The Simple 3-2-1 Buzz (Still Beginner-Friendly)
- How to Clean Up Around the Ears and Neck (The “Looks Professional” Part)
- Aftercare: Don’t Ignore Your Scalp
- Clean and Maintain Your Clippers (So They Don’t Hate You Next Time)
- Troubleshooting: Fix the Most Common DIY Buzzcut Problems
- FAQ: Quick Answers Before You Pick Up the Clippers
- of Real Buzzcut Experiences (The Stuff Tutorials Don’t Always Tell You)
- Conclusion
A buzzcut is the haircut equivalent of a grilled cheese: simple, comforting, and surprisingly easy to mess up if you crank the heat and panic.
The good news? If you can move a clipper in a straight line and resist the urge to “just fix that one tiny spot” seventeen times, you can absolutely
give yourself a clean, even buzzcut at home.
This tutorial walks you through choosing a length, setting up your space, buzzing without stripes, cleaning up the edges, and avoiding the most common
DIY disasters. It’s beginner-friendly, realistic, and designed for real humansmeaning: you get a plan and a bailout strategy.
Quick Reality Check: Is a Buzzcut the Right DIY Cut?
If you want the easiest possible self-haircut, a uniform buzzcut is basically the champion. There’s no scissor work, no complicated blending, and no
trying to “match the left side to the right side” like you’re doing geometry with your head.
A buzzcut is also forgiving in a weird way: when everything is short and even, small mistakes become hard to see. And if you do go a little too short?
Congratulationsyou’ve discovered the ultimate “reset button” haircut.
Who should be extra cautious?
- First-timers with long hair: You can still do it, but you’ll want to reduce bulk first so your clippers don’t clog.
- Anyone with scalp bumps, moles, or sensitive skin: You’ll need a gentler approach, slower passes, and a guard to reduce snagging.
- If you’re under 18: Consider asking a parent/guardian or trusted adult to help with the neckline and around the earsthose are the trickiest angles.
Choose Your Buzzcut Length (Guard Size Cheat Sheet)
Buzzcut lengths are usually controlled by clipper guards (also called guide combs). Bigger number = more hair left behind. Smaller number = shorter cut.
For beginners, starting longer is the move. You can always go shorter; you can’t “put hair back on” unless you own a time machine.
Common guard sizes (approximate)
- #1: about 1/8 inch (3 mm)
- #2: about 1/4 inch (6 mm)
- #3: about 3/8 inch (10 mm)
- #4: about 1/2 inch (13 mm)
- #5: about 5/8 inch (16 mm)
- #6: about 3/4 inch (19 mm)
- #7: about 7/8 inch (22 mm)
- #8: about 1 inch (25 mm)
Easy, popular options
- Uniform buzz (beginner-easy): Same guard everywhere (try #3, #4, or #5 first).
- “3-2-1” buzz: #3 on top, #2 on sides/back, #1 at the edges for a clean frame.
- Super-short: #1 or #2 all over (harder to see mistakes, but less room to “blend”).
If you’re unsure, start with #4 or #5. Live with it for five minutes. If you want shorter, step down one guard at a time.
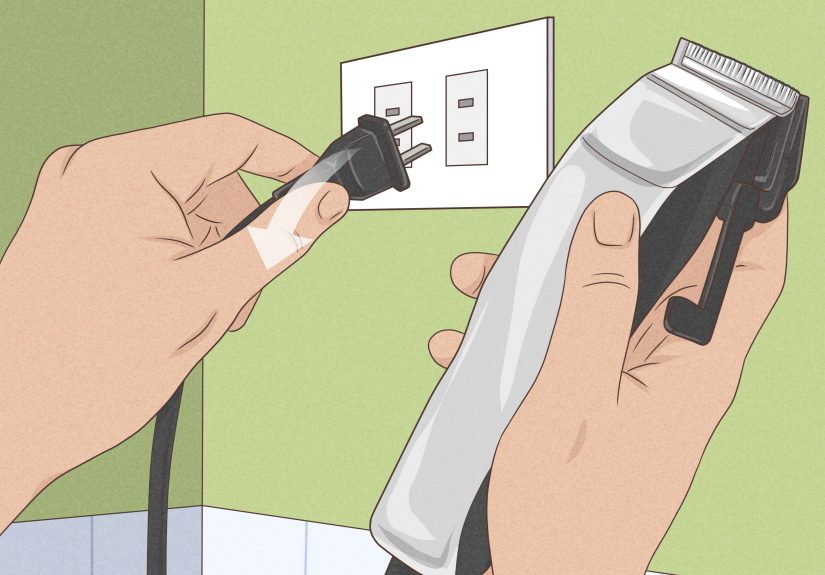
What You’ll Need (Don’t Skip This Part)
- Hair clippers (not a tiny beard trimmer as your main tool)
- Guards (at least #1–#5, ideally up to #8)
- Two mirrors (bathroom mirror + handheld mirror, or a three-way mirror if you have one)
- Comb and/or brush (to lift hair and remove loose clippings)
- Cape or old T-shirt + towel (hair clippings will find your socks otherwise)
- Good lighting (overhead + a lamp aimed at your head is ideal)
- Clipper brush + blade oil (for clean, smooth cutting and less irritation)
- Optional: small trimmer for edges, neck strip, aftershave balm or gentle moisturizer
Prep Like a Pro (5 Minutes That Saves You 50)
1) Wash and dry your hair
Clean hair cuts more evenly and won’t gum up your blades with product buildup. Dry hair is usually easiest for a first buzzcut because you can see the
direction your hair grows and spot uneven patches sooner.
2) Check your scalp and find your “grain”
Run your hand over your head to feel for bumps and identify how your hair grows (the “grain”). Most people have different growth directions at the crown
(the swirl in the back). Knowing that swirl is the difference between “smooth buzz” and “mysterious patch that refuses to cut.”
3) Set up your “inspection system”
Place the handheld mirror where you can see the back of your head in the main mirror. Do a test run: turn your head, check your angles, make sure you
can see your crown and neckline. If you can’t see it, you can’t fix itunless you enjoy surprise stripes.
4) If your hair is long, reduce bulk first
If your hair is more than a couple inches long, clip it down with a longer guard first (or have someone help you trim it shorter). Long hair can jam
clippers and turn your “easy buzz” into “why is my clipper making sad noises.”
Step-by-Step: How to Give Yourself a Buzzcut at Home
This method is designed to keep things even, calm, and stripe-free. The rule: slow, consistent passes, and check your work often.
Step 1: Start with the longest guard you’re willing to wear
Attach your chosen guard (example: #4). Turn the clipper on and let it reach full power. Keep the guard flat against your headthink “hug the scalp,”
not “graze it.”
Step 2: Buzz against the grain in neat lanes
- Sides first: Start at the sideburn area and move upward in a straight line.
- Back next: Begin at the nape and move up toward the crown.
- Top last: Work from front hairline back toward the crown.
Go against the direction of hair growth for a cleaner, more even cut. Use overlapping lanes like mowing a lawn: each pass slightly overlaps
the previous one so you don’t leave “uncut tracks.”
Step 3: Use the “C-scoop” at the curve of your head
As you approach the widest part of your head (often around the temples and parietal ridge), gently scoop the clipper away in a small “C” motion instead
of driving straight off the edge. This keeps you from digging in and creating harsh lines.
Step 4: Deal with the crown swirl patiently
The crown is where many DIY buzzcuts go to die. The fix is simple: change direction. Make a few passes from different angles (north-south, east-west, and
diagonals) until the swirl looks even. Don’t press harderjust adjust direction.
Step 5: Check, brush, check again
Turn off the clipper, brush off loose hair, and inspect in the mirror. You’re looking for:
- Shadows or darker patches (usually missed spots)
- “Tram lines” (parallel stripes from inconsistent overlap)
- Uneven crown area
Touch up using light passes. If you keep hacking at the same spot, you’ll create a dip. Think “polish,” not “excavate.”
Optional Upgrade: The Simple 3-2-1 Buzz (Still Beginner-Friendly)
If you want a little shape without committing to a complicated fade, the 3-2-1 approach is a nice middle ground.
- #3 on top: Buzz the whole top and crown evenly.
- #2 on sides/back: Buzz from the bottom up, stopping around the widest part of your head.
- #1 on edges: Tighten the perimeteraround ears, sideburns, and neckline.
The goal isn’t a barbershop fade. It’s a clean, intentional frame that looks sharper than “I just ran clippers randomly while thinking about pizza.”
How to Clean Up Around the Ears and Neck (The “Looks Professional” Part)
Edges around the ears
Fold your ear down gently with your free hand. Use the clipper with a shorter guard (or no guard if you’re experienced and careful) to clean the hair
right around the ear. Use tiny strokes and keep your wrist relaxed.
Neckline
For the neckline, you have two safe options:
- Natural neckline: Lightly clean stray hairs without carving a hard line. Easiest to maintain.
- Defined neckline: Create a neat line across the nape. Harder to do aloneget help if possible.
Pro tip: a defined neckline looks crisp for about five minutes, then hair grows and you’re back doing mirror gymnastics. Natural is often the low-stress win.
Aftercare: Don’t Ignore Your Scalp
A fresh buzz exposes your scalp more than you’re used to, which can mean dryness, irritation, or sun sensitivityespecially if you go short.
- Rinse and wash gently: Remove tiny clippings so they don’t itch for the next 48 hours.
- Moisturize lightly: A fragrance-free moisturizer can calm dryness and reduce irritation.
- Sun protection matters: If your scalp is newly exposed, wear a hat or use scalp-friendly sunscreen when outside.
Clean and Maintain Your Clippers (So They Don’t Hate You Next Time)
Clippers cut better, run cooler, and pull less when they’re clean and oiled. Translation: your scalp will thank you.
Post-cut clipper routine
- Unplug/turn off and remove the guard.
- Brush out hair from the blades and housing.
- Disinfect if you have a clipper spray (especially if multiple people use the same tools).
- Oil the blades with a few drops, then run the clipper briefly to distribute.
- Wipe excess oil and store dry.
Troubleshooting: Fix the Most Common DIY Buzzcut Problems
Problem: “I see stripes.”
Stripes usually come from not overlapping passes or changing pressure. Fix it by re-buzzing that area with the same guard using slower, overlapping lanes.
Keep the guard flat and let the clipper do the work.
Problem: “The crown looks darker.”
That swirl grows in multiple directions. Make passes from different angles (not harder pressure). The moment it evens out, stop.
Problem: “One side looks shorter.”
First, check lightingshadows lie. If it’s truly shorter, don’t chase it by shaving random spots. Even it out by gently buzzing the longer side with
controlled passes, then re-check.
Problem: “My scalp feels irritated.”
Irritation can come from dull/dirty blades, too much pressure, or going over the same area repeatedly. Rinse your scalp, apply a gentle moisturizer,
and next time: clean/oil blades, use fewer passes, and avoid pressing down.
FAQ: Quick Answers Before You Pick Up the Clippers
How often do I need to re-buzz?
Many people touch up every 1–2 weeks depending on how short they go and how fast their hair grows. If you like it super crisp, you’ll buzz more often.
Should I try a fade at home?
If this is your first time, keep it simple. A uniform buzz or a 3-2-1 is much safer than attempting a detailed fade solo.
What if I hate it?
The best and worst thing about a buzzcut is that it’s honest. If you hate it, hats are your friend for a bitand it grows faster than you think.
of Real Buzzcut Experiences (The Stuff Tutorials Don’t Always Tell You)
The first time I ever did an at-home buzzcut, I learned an important truth: the back of your head is a private island and you are not invited.
No matter how many mirrors you own, your arms will still feel like they were designed by a committee that hates ergonomics.
My biggest “aha” moment was realizing that most mistakes happen when you get confident too early. The first few passes feel amazinghair falls, your
clipper purrs, you start thinking, “Wow, I’m basically a barber.” That’s when you speed up, stop overlapping your passes, and accidentally create a
racing stripe that looks like you lost a bet.
Another lesson: start longer even if you think you want it short. I once jumped straight to a #2 because I wanted a clean, tight look.
It did look clean and tight… and also revealed that my crown has its own weather system. The swirl refused to cut evenly, so I kept going over it,
which made the area irritated and still not perfectly even. When I tried again later with a longer guard first, I could see what was happening and
adjust direction instead of applying “more pressure and hope.”
Mirror setup matters more than talent. The best DIY buzzcut I’ve ever had happened when I turned on every light in the room, placed a lamp behind me,
and used a handheld mirror that didn’t wobble like a shopping cart wheel. Suddenly, I could see the crown, the neckline, and the spot behind my right
ear that always gets missed. It wasn’t magic. It was visibility.
I also learned to stop “perfecting” after the cut. When your hair is super short, you can always find something to “fix.” But each extra pass removes
more hair, and hair doesn’t negotiate. Now I do a structured check: left side, right side, back, crown, topthen I’m done. If it looks 95% even, that’s
a win. The remaining 5% is usually lighting, anxiety, or both.
Finally: clean clippers are kinder clippers. The one time I didn’t brush and oil my blades afterward, the next buzz felt tuggy and hot, and my scalp
was not impressed. A two-minute cleanup routine is the difference between “smooth, easy cut” and “why is this thing trying to bite me?”
If you take only one experience-based tip from me, take this: go slower than you think you need to. A buzzcut is not a race. It’s a calm, repetitive
little projectand the calmer you are, the better it looks.
Conclusion
A great at-home buzzcut is mostly about process: start longer, buzz against the grain in overlapping lanes, respect the crown swirl, and clean up edges
with patience (and good lighting). Keep your clippers clean and oiled, protect your newly exposed scalp, and don’t chase “perfect” until your haircut
turns into a science experiment.
If you want the simplest win: go uniform with a #3–#5. If you want a little extra shape without stress: try the 3-2-1 method. Either way, you’ll end up
with a fresh, low-maintenance cutand the smug satisfaction of saying, “Yeah, I did it myself.”


