Table of Contents >> Show >> Hide
- What Makes a Great Grilled Burger (Besides Luck)?
- Ingredients & Gear You Actually Need
- Patty Prep: How to Form Burgers That Stay Juicy
- Grill Setup: Gas vs. Charcoal (Both Can Win)
- Step-by-Step: How to Grill Burger Patties (Without Drying Them Out)
- Burger Doneness: Temperature Targets (Plus the Safety Reality)
- Timing: How Long to Grill Burgers (A Practical Range)
- Cheese, Buns, and Toppings That Don’t Slide Off
- Common Burger-Grilling Mistakes (and How to Fix Them)
- Two Burger Styles Worth Knowing
- : Real-World Burger Grilling Experiences (So You Don’t Learn the Hard Way)
- Conclusion
Grilling a burger looks simpleuntil you serve a tray of hockey pucks with a side of regret. The good news?
You don’t need secret chef handshakes or a “smoke whisperer” certification. You need the right beef, a hot grill,
a thermometer (yes, really), and the self-control to stop smashing the patty like it owes you money.
This guide walks you through how to grill a burger that’s juicy, well-seared, and confidently cooked
whether you’re using a gas grill, charcoal grill, or a “borrowed” grill that’s seen some things.
What Makes a Great Grilled Burger (Besides Luck)?
A great grilled burger is all about contrast: a browned, savory crust on the outside and a juicy interior that
doesn’t run away the second you bite it. You’re chasing three things:
- Fat + beef flavor (don’t fear it; respect it)
- High heat for a fast sear (crust = happiness)
- Correct internal temp (confidence beats guessing)
Ingredients & Gear You Actually Need
The best ground beef for grilled burgers
For classic burgers, go with 80/20 ground chuck (that’s 80% lean, 20% fat). It’s the sweet spot:
juicy enough to stay tender, but not so fatty it turns your grill into a dramatic bonfire.
Seasoning: keep it simple, keep it timely
Salt and pepper are enough for a great burgerespecially if your beef is good. The key is when you salt:
season the outside of the patties right before they hit the grill. If you salt too early (or mix salt into the meat),
the texture can get tighter and less burger-like.
Tools that make you look like you know what you’re doing
- Instant-read thermometer (your future self will thank you)
- Sturdy metal spatula (thin edge = better flip)
- Tongs (for buns, cheese, and general grill drama management)
- Paper towels + high-heat oil (for oiling grates safely)
Patty Prep: How to Form Burgers That Stay Juicy
Step 1: Don’t overwork the meat
Treat ground beef like a shy cat: handle it gently or it will become tense and uncooperative.
Lightly form the meat into patties without kneading, packing, or “just one more squeeze for good luck.”
Step 2: Pick a smart size
A reliable all-purpose patty: 4–6 ounces, about 3/4-inch thick, and slightly wider than the bun
(it shrinks as it cooks). If you go too thick, you’ll burn the outside before the center is done; too thin and you’ll
get dry burgers fast.
Step 3: Make the dimple
Press a shallow indentation in the center of each patty with your thumb. This helps prevent the burger from puffing
up into a dome, so it cooks more evenly and stacks nicely.
Step 4: Keep patties cold until grilling
Cold patties hold their shape better and are easier to grill cleanly. Form them, place on a tray, and refrigerate
while you preheat the grill and prep toppings.
Grill Setup: Gas vs. Charcoal (Both Can Win)
Clean and preheat like you mean it
Preheat your grill so the grates are hot enough to sear. Then brush the grates clean. A hot, clean grate reduces
sticking and helps you get better browning.
Oil the grates (the safe way)
Skip spraying aerosol cooking spray into open flames (unless you enjoy surprise fireballs). Instead, dip a folded paper
towel in a high-smoke-point oil (canola, vegetable, grapeseed), hold it with tongs, and wipe the grates right before cooking.
Gas grill setup
Heat the grill to medium-high for searing. For more control, create a two-zone grill by leaving one burner
lower (or off) as a cooler “safe zone.” This is your escape hatch for flare-ups and thicker patties.
Charcoal grill setup (two-zone method)
Light a chimney of charcoal, wait until the coals are mostly gray with ash, then pile coals on one side of the grill.
That gives you a hot direct-heat zone and a cooler indirect-heat zone. Put the lid on to preheat the grates.
Step-by-Step: How to Grill Burger Patties (Without Drying Them Out)
-
Preheat the grill and prep a two-zone setup.
Aim for a hot side for searing and a cooler side for control. Clean and oil the grates. -
Season the patties right before grilling.
Salt and pepper both sides just before they hit the heat. -
Place burgers on the hot side and close the lid.
Put patties on the grill and resist the urge to poke them every 11 seconds. Closing the lid helps the burger cook
more evenly (especially on thicker patties). -
Let the first side sear until it releases easily.
If it sticks, it probably isn’t ready to flip. Once the crust forms, the patty releases more cleanly. -
Flip confidently (and don’t smash).
Flip the burger. Do not press it down with your spatulathis squeezes out fat and juices that you want inside the burger,
not sizzling in the flames. -
Add cheese after flipping.
Add a slice and close the lid for faster melting. If your grill has a cooler zone, you can finish with cheese there
to reduce flare-ups. -
Check internal temperature early, not late.
Insert the thermometer from the side into the center of the burger. Pull the burgers when they’re a few degrees under your target,
since temperature can rise slightly as they rest. -
Rest briefly, then toast buns.
Rest burgers 1–3 minutes. Toast buns cut-side down for 30–60 seconds until golden. -
Assemble fast and serve hot.
Burgers wait for nobody. Build your burger and eat while the crust is still crisp.
Burger Doneness: Temperature Targets (Plus the Safety Reality)
For food safety, ground beef should be cooked to 160°F internal temperature. If you choose to cook below that,
understand you’re trading safety margin for preferenceespecially with store-bought ground beef.
Quick temperature guide
| Doneness | Pull From Grill Around | Center Look/Feel |
|---|---|---|
| Medium-rare | 130–135°F | Warm pink center |
| Medium | 140–145°F | Pink, starting to firm |
| Medium-well | 150–155°F | Slightly pink, noticeably firmer |
| Well-done (USDA guidance) | 160°F | No pink, fully firm |
Don’t trust color
A burger can look “done” and still be under-temp, or look slightly pink and be fully safe. Color is not a thermometer.
If you want repeatable results, measure the temperature.
Timing: How Long to Grill Burgers (A Practical Range)
Grill time depends on patty thickness, grill heat, and whether you keep the lid closed. For a typical 3/4-inch patty on medium-high heat,
you’re often in the neighborhood of 6–10 minutes total, flipping once or as needed, and checking temperature.
The only “perfect” timing is the one that hits your target temp without burning the outside.
Cheese, Buns, and Toppings That Don’t Slide Off
Cheese tips
- Add cheese after the flip, then close the lid to melt.
- American melts like a dream; cheddar tastes big but can split if overheated.
- If flare-ups are aggressive, finish on the cool side with the lid closed.
Toast the buns (it’s not optional, it’s insurance)
Toasted buns add flavor, improve texture, and help protect the bread from becoming a sauce sponge.
Butter or mayo lightly on the cut side, then toast until golden.
Topping combos that always work
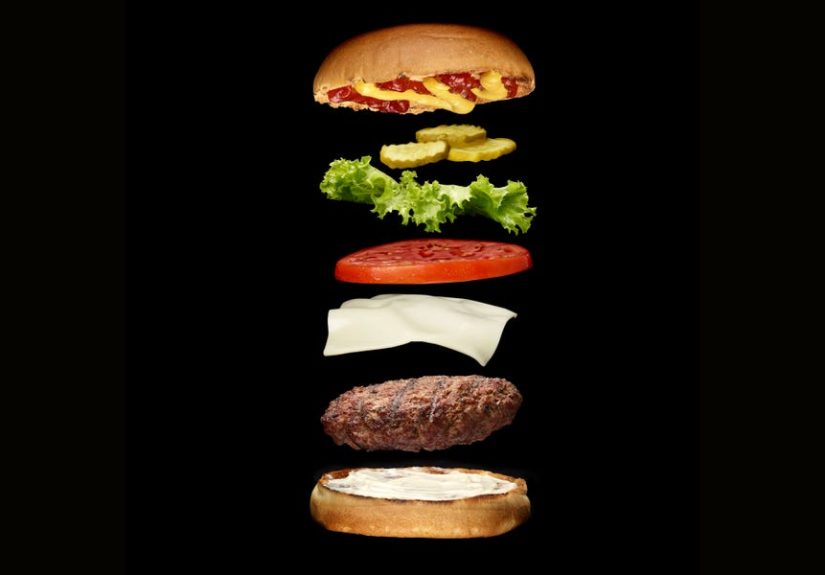
- Classic: lettuce, tomato, onion, pickles, ketchup + mustard
- BBQ vibe: cheddar, crispy onions, BBQ sauce, pickles
- Heat seeker: pepper jack, grilled jalapeños, chipotle mayo
- Breakfast burger: cheddar, bacon, fried egg (brunch chaos, in a good way)
Common Burger-Grilling Mistakes (and How to Fix Them)
“My burgers are dry.”
- Use 80/20 beef and don’t overwork the meat.
- Stop cooking by time alone; cook to temperature.
- Pull a few degrees early and rest briefly.
“They stick to the grill!”
- Preheat longer. Hot grates release better.
- Clean and oil grates right before cooking.
- Don’t flip too earlywait for crust to form.
“My burgers puff into meatballs.”
- Use the dimple trick in the center.
- Avoid packing patties too tightly.
“Flare-ups are turning my cookout into an action movie.”
- Use a two-zone fire and move burgers to the cooler side when flames spike.
- Trim excess dripping fat sources (or choose slightly thicker patties and manage heat).
- Keep the lid closed to control oxygenopen only when moving food.
Two Burger Styles Worth Knowing
1) The classic thick-ish backyard burger
Go 4–6 oz, 3/4-inch thick, dimpled, seasoned right before grilling. Sear on the hot side, finish to temperature,
melt cheese with lid closed, toast buns, serve immediately.
2) Smash burgers (yes, you can do these on a grill)
Put a cast-iron griddle or skillet on the grill grates and preheat until ripping hot. Roll beef into 2–3 oz balls,
place on the hot surface, smash once hard and thin, season, cook fast, flip, add cheese. This makes a thin,
crispy-edged burger with a big crust-to-juicy ratio. It’s the “more crunch, less patience” burger.
: Real-World Burger Grilling Experiences (So You Don’t Learn the Hard Way)
Every grill has a personality. Some run hot, some run moody, and some behave perfectlyright up until guests arrive.
That’s why the best “how to grill a burger” advice isn’t just technique; it’s what happens when reality shows up wearing flip-flops.
Experience #1: The Early-Flip Panic. The first time you grill burgers for a crowd, the silence between placing patties on the grate
and flipping them can feel like a suspense movie. People hover. You peek. You nudge. Then you try to flip and the burger says, “Nope,” and tears.
The fix is simple: let the crust form. When the surface browns properly, it releases. If you remember nothing else, remember this:
sticking usually means “not ready,” not “ruined.”
Experience #2: The Flare-Up Festival. Fat drips, flames jump, and suddenly you’re performing burger triage with tongs like a grill-room surgeon.
This is where two-zone cooking feels like a superpower. Sear on the hot side, then slide burgers to the cooler side when flames get dramatic.
You still get char and grill flavor, but you keep the burger from tasting like “campfire memories.”
Experience #3: The “I’ll Just Press It” Myth. There’s always someone who believes smashing burgers on the grill “seals in juices.”
It doesn’t. It squeezes them out. If you want a smash burger, smash once on a hot flat surface (cast iron) at the beginning.
If you want a thick burger, let it cook. Either way, pressing mid-cook is basically wringing out your burger like a sponge and calling it strategy.
Experience #4: The Thermometer Redemption Arc. A thermometer feels like overkilluntil it saves you from serving undercooked burgers
or turning them into dry, crumbly discs. The funniest part? The confidence it gives you. You stop guessing based on “how it feels,”
and you start pulling burgers at the perfect time. Suddenly you’re the calm one at the grill, and everyone else is asking,
“How do you always get them like this?”
Experience #5: The Bun Awakening. Toasting buns sounds like a tiny detail, but it changes the whole sandwich.
A toasted bun adds crunch, protects against sogginess, and makes the burger taste like it came from a place that charges extra for “artisan.”
It also buys you time: if the burgers need a minute to rest, you toast buns and look like you planned it that way.
In the end, grilling burgers is less about chasing perfection and more about stacking small wins: good beef, gentle handling, hot clean grates,
controlled heat, and temperature-based doneness. Do that, and the “best burger” compliments start showing up like clockworkno luck required.
Conclusion
If you want consistently great grilled burgers, focus on the basics that actually matter: choose 80/20 beef, form patties gently, dimple the center,
preheat and oil the grill grates, use two-zone heat for control, and cook to temperaturenot vibes. Add cheese after the flip, toast the buns,
and you’ll be turning out burgers that are juicy, flavorful, and worth the inevitable ketchup-on-shirt moment.


