Table of Contents >> Show >> Hide
- Why Build a Spice Rack Instead of Buying One?
- Best Spice Rack Style for Most Kitchens
- Materials You Will Need
- Tools You Will Need
- Step 1: Measure Your Space and Your Spice Jars
- Step 2: Choose a Simple Cut List
- Step 3: Cut and Sand the Wood
- Step 4: Dry Fit the Pieces
- Step 5: Attach the Shelves
- Step 6: Add Front Rails
- Step 7: Paint, Stain, or Seal
- Step 8: Mount the Spice Rack Safely
- Step 9: Organize the Spices
- Spice Rack Design Variations
- Common Mistakes to Avoid
- Maintenance Tips for a Homemade Spice Rack
- Real-Life Experience: What I Learned from Making a Spice Rack
- Conclusion
If your kitchen cabinet looks like a tiny tornado rolled through a cumin convention, it may be time to make a spice rack. A homemade spice rack is one of those wonderfully satisfying DIY projects that solves a real problem without requiring a contractor, a second mortgage, or the ability to pronounce “cardamom” correctly on the first try.
The beauty of learning how to make a spice rack is that the project can be simple, affordable, and completely customized to your kitchen. You can build a wall-mounted spice rack, a pantry door spice rack, a countertop shelf, a drawer insert, or even a narrow vertical rack for that awkward little gap beside the refrigerator. The goal is the same: keep spices visible, reachable, and organized so cooking feels less like a scavenger hunt and more like dinner.
This guide walks you through a beginner-friendly wooden spice rack design, plus smart variations, planning tips, measurements, finishing ideas, and practical experience from real kitchen use. No fluff, no overcomplicated wizardryjust wood, screws, labels, and a happier relationship with paprika.
Why Build a Spice Rack Instead of Buying One?
Buying a spice organizer is easy, but building one gives you control. Store-bought racks often assume your jars are all the same size, your cabinet is a standard width, and your kitchen has not been designed by someone who thought corners were a personality trait. A DIY spice rack lets you fit your exact space, whether that means mounting it inside a pantry door, setting it on the counter, or installing it on a blank wall near the stove.
A homemade spice rack also lets you choose the style. Want rustic farmhouse wood? Done. Clean white shelves? Easy. Natural pine with black labels? Very “I have my life together,” even if your junk drawer says otherwise. You can also make the shelves deeper for larger seasoning bottles, add rails to keep jars from falling, or create tiered levels so nothing hides behind the oregano like it owes rent.
Best Spice Rack Style for Most Kitchens
For most homes, the easiest and most useful design is a simple wall-mounted or pantry-door wooden spice rack with three narrow shelves and front rails. It is beginner-friendly, uses basic lumber, and works with standard spice jars. You do not need advanced woodworking tools, although a miter saw or circular saw makes cutting faster.
This design is compact enough for small kitchens but sturdy enough to hold everyday spices. If you rent or prefer not to drill into walls, you can adapt it into a countertop spice rack by adding a wider base. If you own your home and want maximum storage, you can mount it directly into wall studs or onto the inside of a pantry door.
Materials You Will Need
Before you start cutting wood like a weekend warrior with sawdust dreams, gather your supplies. For a basic three-shelf spice rack, you will need:
- One 1×4 board for the back or side supports
- One or two 1×3 boards for shelves
- One or two thin wood strips, dowels, or lattice pieces for front rails
- Wood screws or brad nails
- Wood glue
- Sandpaper in medium and fine grit
- Paint, stain, or food-safe clear finish
- Wall anchors, mounting screws, or cabinet-door hardware
- Labels or a label maker for the jars
Pine is affordable and easy to work with, making it a good choice for beginners. Poplar gives a smoother painted finish. Oak or maple looks beautiful stained, but costs more and can be harder to cut. Reclaimed wood can look fantastic, but check that it is clean, dry, and free from old chemicals, mystery stains, or anything that makes you say, “Hmm, that smells historical.”
Tools You Will Need
You can build a spice rack with basic tools. A measuring tape, pencil, saw, drill, clamps, and level will cover most of the project. A stud finder is useful if you are mounting the rack to a wall. A pocket hole jig is optional, but it creates strong hidden joints and gives the project a cleaner look.
If you do not own a saw, many home improvement stores can cut boards for you. Bring exact measurements, smile politely, and double-check the cuts before leaving. Wood has a funny way of becoming “almost right,” which in DIY language usually means “not right.”
Step 1: Measure Your Space and Your Spice Jars
The most important step in making a spice rack happens before you touch a saw. Measure the space where the rack will go. For a wall-mounted rack, measure the available width and height. For a pantry door spice rack, measure the inside panel and check that the door can still close after the rack and jars are installed. For a cabinet rack, measure depth carefully so the jars do not bump into shelves.
Next, measure your spice jars. Standard spice bottles are often about 1.5 to 2 inches wide and 4 to 5 inches tall, but brands vary. Larger seasoning containers, grinders, and specialty jars may need deeper shelves or taller spacing. A good beginner size is a rack about 16 to 20 inches wide, with shelves about 2.5 to 3.5 inches deep.
Step 2: Choose a Simple Cut List
For a three-shelf wall-mounted spice rack, use this sample cut list:
- Two side pieces: 18 inches long from a 1×4 board
- Three shelf pieces: 16 inches long from a 1×3 board
- Three front rails: 16 inches long from thin lattice strip or dowel
- One top or back support strip: 16 inches long, optional but helpful
This size usually holds 18 to 24 standard spice jars, depending on jar width. You can adjust the width to match your wall, pantry door, or cabinet. Just keep the shelf spans reasonable. If you go wider than about 24 inches, add a center support so the shelves do not sag over time.
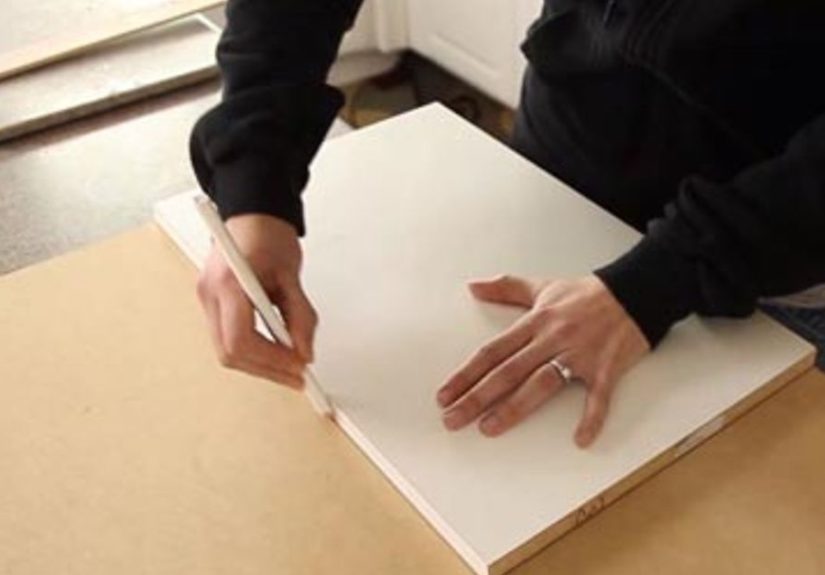
Step 3: Cut and Sand the Wood
Cut each board to length, then sand all surfaces and edges. Start with medium-grit sandpaper to smooth rough areas, then finish with fine-grit sandpaper for a softer touch. Pay special attention to the front edges because those are the parts your hands will touch most often.
Do not skip sanding. Unsanded wood has a way of making a simple spice rack feel like a porcupine with storage ambitions. Smooth wood also takes paint or stain more evenly, which makes the final project look intentional instead of “I built this during a commercial break.”
Step 4: Dry Fit the Pieces
Before adding glue or screws, lay the spice rack pieces on a flat surface and test the layout. Place the shelves between the two side pieces and set a few spice jars on them. Confirm that the vertical spacing works. Leave enough room above each shelf so you can remove jars without performing kitchen yoga.
A spacing of 5.5 to 6 inches between shelves works well for many standard spice jars. If you use taller jars, increase the spacing. If the rack will hold small uniform jars, you can tighten the spacing and add more shelves.
Step 5: Attach the Shelves
Apply a thin line of wood glue to the ends of each shelf. Clamp the shelf between the side pieces, keeping everything square. Drill pilot holes before driving screws, especially near board ends, because pilot holes help prevent splitting. Use two screws on each side of each shelf for a sturdy hold.
If you are using brad nails, glue becomes even more important because the nails mainly hold the pieces in place while the glue cures. Wipe away extra glue with a damp cloth before it dries. Dried glue can block stain, leaving pale blotches that scream, “I forgot to wipe this.”
Step 6: Add Front Rails
Front rails keep spice jars from sliding off the shelf when someone shuts a pantry door or reaches for chili powder with too much enthusiasm. Attach a thin strip of wood or a dowel across the front of each shelf. Position it about one-third to halfway up the height of a spice jar, depending on the jar shape.
For a clean look, use wood glue and small brad nails. For a rustic look, small screws can work well. Make sure the rails are straight and level. A crooked rail will not ruin the rack, but it will stare at you forever while you make pasta sauce.
Step 7: Paint, Stain, or Seal
Once the glue is dry, give the spice rack another light sanding. Then choose your finish. Paint is great for matching cabinets or trim. Stain highlights the wood grain and gives a warmer look. A clear protective finish works well if you like natural wood.
Because spice racks live in kitchens, they may encounter steam, oil, and the occasional splash from a tomato sauce incident. A sealed finish is easier to wipe clean than raw wood. Let the finish cure fully before adding spice jars, especially if the rack will be mounted in a warm area near the stove.
Step 8: Mount the Spice Rack Safely
If you are mounting the rack on a wall, use a level to mark the placement. Whenever possible, drive screws into wall studs for the strongest hold. If studs are not available in the right spot, use drywall anchors rated for more weight than the loaded rack. Remember that spice jars are small, but a full rack can still get heavy.
For a pantry door spice rack, use screws that are long enough to secure the rack but not so long that they poke through the front of the door. This is a surprisingly important detail unless you enjoy explaining why your pantry door now has tiny screw horns. Check door clearance before final mounting by holding the loaded rack in position and slowly closing the door.
Step 9: Organize the Spices
Once the rack is installed, the fun part begins. Sort your spices before loading them. Toss empty bottles, combine duplicates, and check freshness. Ground spices lose aroma faster than whole spices, so if something smells like dusty cardboard instead of food, it may be time to let it retire with dignity.
There are several ways to organize a spice rack. Alphabetical order is easy for families because everyone can find things. Cuisine-based grouping works well if you cook specific styles often, such as Italian herbs, baking spices, barbecue seasonings, and curry blends. Frequency-based organization is the most practical: everyday spices at eye level, occasional spices higher or lower.
Spice Rack Design Variations
Pantry Door Spice Rack
A pantry door spice rack is one of the best space-saving options. It uses vertical space that often goes ignored and keeps spices hidden when the door is closed. Keep the rack shallow so the door shuts easily. Add rails to every shelf because doors move, and spices are not known for their balance.
Countertop Spice Rack
A countertop spice rack is ideal for renters or anyone who wants a no-drill solution. Build the same shelf design, then add a wider base so it stands securely. Keep it away from direct heat and steam, because warmth and moisture can reduce spice quality.
Drawer Spice Rack
If you have a shallow drawer near your prep area, a slanted drawer insert can make spices easy to see. Instead of vertical shelves, build small angled risers that hold jars label-side up. This option looks tidy and keeps counters clear.
Magnetic Spice Rack
A magnetic spice rack can work on a refrigerator, metal backsplash, or magnetic board. Use lightweight containers and strong magnets. Label lids clearly. This design is stylish, but it is best for lighter spices rather than large glass jars.
Common Mistakes to Avoid
The first mistake is building before measuring. Spice jars vary more than people expect, and a shelf that is too shallow becomes a launchpad. Measure twice, cut once, and test with actual jars.
The second mistake is forgetting door clearance. Pantry door racks are excellent, but only if the door still closes. Check knobs, shelves, trim, and anything inside the pantry that may collide with the rack.
The third mistake is using weak mounting hardware. A loaded spice rack should be attached securely. Drywall anchors, studs, or proper cabinet-door screws matter. Gravity is undefeated, and it does not care how cute your labels are.
The fourth mistake is placing spices too close to heat. A rack beside the stove may be convenient, but heat and steam can shorten spice life. If possible, mount the rack near the prep zone but not directly above a burner.
Maintenance Tips for a Homemade Spice Rack
Wipe the rack every few weeks with a slightly damp cloth. Dust, oil, and tiny spice particles can build up faster than expected. If you use open shelving, remove jars occasionally and clean behind them.
Update labels whenever you refill jars. Add purchase dates or expiration dates if you decant spices into matching containers. This small habit prevents the classic pantry mystery: “Is this cinnamon from last Christmas or the Clinton administration?”
Review your spice collection every few months. Move frequently used jars to the easiest spots and send rarely used ones to the edges. A spice rack should support how you cook, not how an imaginary magazine kitchen thinks you cook.
Real-Life Experience: What I Learned from Making a Spice Rack
The first thing you learn when making a spice rack is that spices multiply when you are not looking. You begin the project thinking you own twelve jars. Then you empty the cabinet and discover thirty-seven, including three bottles of garlic powder, two unopened smoked paprikas, and one mysterious seasoning blend that appears to have followed you from a previous apartment.
My best experience with a DIY spice rack came from building one for the inside of a pantry door. The kitchen was small, cabinet space was precious, and the spice situation had become less “organized cooking zone” and more “aromatic avalanche.” Every time the cabinet opened, jars shuffled around like they were trying to escape. A door-mounted rack solved the problem immediately because it used space that had been doing absolutely nothing except holding paint.
The biggest lesson was to test the rack with real jars before final assembly. On paper, the spacing looked perfect. In real life, the taller grinder bottles needed extra clearance. I adjusted the bottom shelf to handle bigger containers and kept the top shelves for standard jars. That one small change made the rack far more useful. A spice rack should fit your habits, not force your habits to fit the rack.
Another lesson: rails are not optional on a door-mounted rack. The first test version had shelves but no front rail. It looked sleek for about six seconds. Then the door moved, and a jar of turmeric tried to begin a new life on the floor. After adding slim wooden rails, everything stayed in place. The rails also made the rack look more finished, which was a nice bonus.
Labeling mattered more than expected. Matching jars looked beautiful, but without labels, cooking turned into a guessing game. Is that cumin or coriander? Is that cayenne or paprika? One wrong shake and taco night becomes a suspense thriller. Clear labels on the front or lid make the rack easier for everyone to use. Alphabetical labels are especially helpful if more than one person cooks in the kitchen.
I also learned not to overbuild. A spice rack does not need to support bowling balls. It needs to hold small jars securely. Simple boards, glue, screws, and a good mounting method are enough. The cleaner the design, the easier it is to wipe down and reorganize.
The most satisfying part is the daily payoff. A homemade spice rack is not just a weekend project; it changes how the kitchen feels. You stop buying duplicate spices because you can finally see what you own. You cook faster because the jars are within reach. You waste less because old bottles are easier to spot. And yes, you may feel a tiny burst of pride every time someone opens the pantry and says, “Wait, you made that?”
The answer, of course, is yes. Say it casually. Pretend it was easy. Do not mention the turmeric incident unless you are among friends.
Conclusion
Learning how to make a spice rack is a practical DIY project that improves your kitchen immediately. With a few boards, basic tools, careful measurements, and secure mounting, you can build a custom organizer that fits your space and cooking style. Whether you choose a wall-mounted rack, pantry door rack, countertop shelf, drawer insert, or magnetic setup, the best spice rack is the one that makes your spices visible, accessible, and easy to maintain.
Start with your space, measure your jars, keep the design simple, and add thoughtful details like rails, labels, and a wipeable finish. The result is a kitchen upgrade that is affordable, attractive, and useful every single day. Also, it gives paprika a proper home, and frankly, paprika has waited long enough.


