Table of Contents >> Show >> Hide
- What “chunky” means (and why it looks pricey)
- Quick overview: 3 dollar store chunky candle holder projects
- Supplies (mix-and-match based on the project)
- Prep work (don’t skip thisprep is the “secret ingredient”)
- Project 1: Dollar Store Chunky Wood-Block Pillar Holder (plaster look)
- Project 2: Chunky Dollar Store Glass Hurricane Holder (centerpiece-ready)
- Project 3: Minimal Chunky Taper Holders (clean lines, fast build)
- Finishing tricks that make it look expensive (not “dollar store plus hope”)
- Safety note: candle holders should be cute and stable
- Styling ideas: where chunky candle holders look best
- FAQ: quick fixes and smart swaps
- Conclusion
- Real-world crafting experiences (what you’ll notice as you make these)
Walk into almost any home store and you’ll see it: chunky candle holders everywhere. Thick silhouettes, modern curves, “I cost $48 and I’m proud of it” energy. The good news? You can get the same look with dollar store supplies, a little glue, and the kind of confidence that comes from saying, “Yes, I made that,” while pretending you didn’t also get paint on your elbow.
This guide shows you three chunky candle holder builds you can do with budget findsplus the finishing tricks that make them look expensive, not “arts and crafts hour.” We’ll also cover candle safety (because your decor should glow, not go viral for the wrong reason).
What “chunky” means (and why it looks pricey)
“Chunky” decor usually has three things going for it:
- Bold mass: thicker bases, wider profiles, fewer delicate details.
- Simple geometry: cylinders, blocks, roundsclean and minimal.
- Matte or stone-like finishes: plaster, ceramic, limestone, or aged metal vibes.
That combo reads “designer” because it looks intentional and sculptural. You’re basically making small tabletop statues that also hold a candle. Functional art. Fancy words. Same budget.
Quick overview: 3 dollar store chunky candle holder projects
- Plaster-look wood-block pillar holder (the “Pottery Barn who?” option)
- Chunky glass hurricane holder (big impact centerpiece, still cheap)
- Simple modern taper holders (sleek silhouettes with easy upgrades)
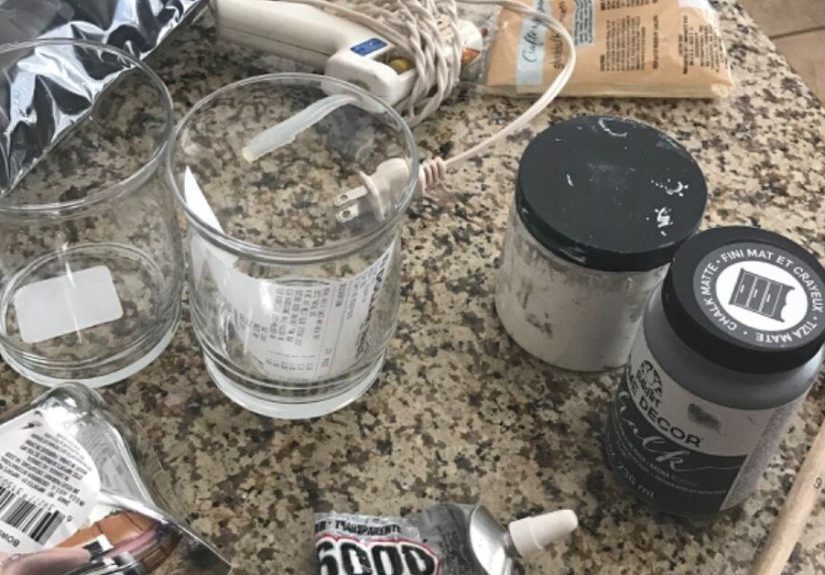
Supplies (mix-and-match based on the project)
Dollar store essentials
- Wood tumbling tower blocks (or small wood pieces)
- Glass cylinder vases, short jars, or candle holders
- Tea light holders (optional, for inserts)
- Craft paint (acrylic) or budget primer
- Hot glue sticks (or craft glue)
- Felt pads (for the bottom)
Upgrades that make it look high-end
- Lightweight spackle or joint compound (for plaster/stone texture)
- Chalky finish paint (matte, modern, forgiving)
- Fine sandpaper (120–220 grit)
- Gold/antique wax or metallic rub (for subtle “vintage metal” edges)
- Spray paint + primer (fast, even finish on glass/metal)
Tools you might already have
- Ruler or measuring tape
- Painter’s tape
- Craft knife
- Disposable gloves and a drop cloth (trust me)
Prep work (don’t skip thisprep is the “secret ingredient”)
- Clean everything: Glass should be grease-free so paint/primer sticks. Wood should be dust-free before painting.
- Dry fit first: Stack your shapes before gluing. Chunky looks best when it’s symmetrical or intentionally asymmetrical (not “oops I guessed”).
- Sand lightly: Knock down splinters on wood blocks. For glossy surfaces, a quick scuff helps coatings grip.
- Work in ventilation: Especially if you spray paint or use strong adhesives.
Project 1: Dollar Store Chunky Wood-Block Pillar Holder (plaster look)
Best for: pillar candles, LED candles, coffee tables, mantels
Look: modern plaster/stone pedestal
Time: 60–90 minutes + drying time
Skill level: beginner (with “I can spread frosting” energy)
Step 1: Choose your chunky shape
Here are three foolproof silhouettes:
- Classic pedestal: wide base + narrower middle + wide top
- Stacked blocks: offset layers like a mini sculpture
- Monolith: one thick “tower” with a flat candle platform
Step 2: Build the base with tumbling tower blocks
- Lay blocks on a flat surface and assemble your base shape.
- Glue the blocks together in layers. If using hot glue, work in small sections so it doesn’t cool before you press pieces together.
- Press firmly and let the structure set.
Design tip: Chunky looks best when the base is wider than the top. Think “stable and expensive,” not “tippy and dramatic.”
Step 3: Add a candle platform
For pillar candles, you want a flat top. Options:
- Glue on a wood square/rectangle made from blocks.
- Use a small wood round if you have one (even a craft-store round works).
- For LED candles, you can keep the platform slightly smallerstill looks intentional.
Step 4: Create the chunky plaster finish
This is the glow-up moment. Use lightweight spackle or joint compound like you’re icing a tiny cake.
- Use a plastic knife or old spoon to spread a thin coat over the entire structure.
- Leave subtle texturesmall ridges look like hand-troweled plaster.
- Let dry fully (check your product’s label; drying time varies by thickness).
- Lightly sand high spots so the shape looks crisp, not lumpy.
Step 5: Paint it like a high-end piece
- Modern plaster: warm white, ivory, greige, or sand.
- Stone look: base coat in taupe/gray, then dry-brush lighter tones.
- Black sculptural: matte black with subtle rubbed highlights on edges.
Step 6: Finish and protect
- Add felt pads underneath to protect surfaces and stop wobble.
- If you used chalky paint, consider sealing (wax or matte sealer) so it resists fingerprints.
Troubleshooting (because glue has opinions)
- Wobbly base: Sand the bottom on a flat surface; add felt pads to level.
- Cracks in plaster coat: Apply thinner layers; patch with a skim coat and repaint.
- Paint looks streaky: Two thin coats beat one thick coat every time.
Project 2: Chunky Dollar Store Glass Hurricane Holder (centerpiece-ready)
Best for: pillar candles, seasonal decor, dining tables
Look: thick glass “hurricane” vibe (without hurricane pricing)
Time: 30–60 minutes + drying time
What you’ll build
A wide, chunky base with a glass cylinder on toplike the expensive hurricane holders you see in catalogs. The trick is stacking glass pieces with a clean, symmetrical silhouette.
Step 1: Pick your glass pieces
Look for:
- A glass cylinder vase (taller = more dramatic)
- A short, wide glass or candle bowl for the base
- Optional: a tea light holder to act as a “socket” inside
Step 2: Create the stack
- Dry fit the base and cylinder. Center it carefully.
- Mark alignment with a small piece of painter’s tape.
- Glue the cylinder to the base. Use a strong clear-drying adhesive suitable for glass.
- Let cure fully before moving.
Step 3: Make it look designer (pick one finish)
- Frosted glass: Frosted spray finish gives a soft, upscale look.
- “Stoneware” vibe: Paint the base only in a matte neutral; keep the cylinder clear.
- Antique metal accents: Add a subtle metallic rub around the base rim or seams for a vintage touch.
Step 4: Style it so it looks intentional
- Add a pillar candle inside (or a flameless candle for worry-free glow).
- For seasonal styling, place small stones, faux moss, or ornaments around the candle base (not touching the flame).
- Group three hurricanes at different heights for the “I hire stylists” effect.
Project 3: Minimal Chunky Taper Holders (clean lines, fast build)
Best for: taper candles, dinner parties, mantle styling
Look: modern candlesticks with thick bases
Time: 45–75 minutes + drying time
Two easy base options
- Option A: Wood round + dowel (simple pedestal shape)
- Option B: Stacked blocks (modern geometric look)
Step-by-step: Wood round + “chunky stem”
- Glue a short dowel (or thick “stem” piece) onto a wood round base.
- For the taper socket, you can:
- Use a pre-made candle cup insert if you find one, or
- Create a snug opening with a small insert piece sized for your candle base.
- Prime if needed, then paint in a matte finish.
- Lightly distress edges for a vintage look, or keep it crisp for modern style.
Fast style upgrades
- Monochrome set: same color, different heights.
- Two-tone: neutral base + metallic top rim.
- Soft “aged” look: sand edges lightly after paint dries, then wax/seal.
Finishing tricks that make it look expensive (not “dollar store plus hope”)
1) Matte beats shiny (most of the time)
Chunky decor usually looks best in matte: chalky whites, warm neutrals, dusty clay tones, and soft black. Matte hides brush marks and gives that stoneware/plaster vibe.
2) Spray paint like a pro
If you spray paint, go for multiple light coats. Heavy coats create drips, runs, and regret. Keep consistent distance, use long passes, and let layers dry between coats.
3) Add “age” with gentle distressing
After paint dries, lightly sand raised edges and corners so the piece looks worn in the good waylike it has a backstory and maybe a tiny European apartment (even if it lives next to your TV remote).
4) Metallic rub = instant vintage
A tiny amount of metallic rub on edges can make a budget piece look like thrifted brass. Use a light handthis is a whisper, not a shout.
Safety note: candle holders should be cute and stable
Real candles are cozy, but they require grown-up rules. Keep these basics in mind:
- Keep candles on a stable, heat-resistant surface.
- Keep flames at least 12 inches away from anything that can burn (curtains, greenery, books, your very flammable “aesthetic”).
- Trim the wick before each burn (short wicks help reduce smoking and soot).
- Never leave candles unattended, and blow them out before you leave the room or go to sleep.
- Avoid drafts (fans, vents, open windows) so flames don’t flicker wildly.
- If you’re decorating around candles, keep decor away from the flameand consider flameless candles for worry-free styling.
Styling ideas: where chunky candle holders look best
- On a mantel: Pair two holders with a stack of books and a small vase.
- On a dining table: Use three heights down the center for a modern runner effect.
- In the bathroom (flameless recommended): Spa vibe without the risk.
- On a coffee table: A tray + one chunky holder + a small plant = instant “put together.”
FAQ: quick fixes and smart swaps
How do I make it look “chunky” if my pieces feel too small?
Widen the base. Add another layer of blocks, use a larger round, or build a platform that extends beyond the top. Chunky is more about silhouette than height.
What’s the easiest “stone” finish without special products?
Use a plaster-like coat (spackle/joint compound), then paint in warm whites and soft grays. Dry-brush lighter tones across texture for depth.
Can I use real candles on painted holders?
Yes, if the candle is stable and the flame is kept away from paint, decor, and anything flammable. For tight spaces or lots of styling elements, flameless candles are the safest choice.
How do I keep glue seams from showing?
For wood builds, cover seams with a thin coat of spackle/joint compound. For glass builds, align carefully and keep glue minimal; decorative bands or painted bases can visually “hide” seams.
Conclusion
Dollar store chunky candle holders are proof that you don’t need luxury prices to get luxury vibes. With smart shapes (wide bases!), simple materials, and a finish that leans matte and textured, you can build candle holders that look straight out of a catalogwhile your wallet quietly applauds.
Pick one project, make a set, and style them like a pro. Then do the most important step: turn on a cozy playlist, light a candle (safely), and enjoy the glow of knowing you just outsmarted the home decor markup.
Real-world crafting experiences (what you’ll notice as you make these)
The first “experience” most people have with dollar store chunky candle holders is the sudden realization that shape matters more than supplies. You can have the fanciest paint in the world, but if the silhouette is skinny or top-heavy, the finished piece still looks a little… uncertain. Once you build a wider base, the project clicks. Everything instantly reads more expensive because it looks grounded and intentional.
Another common moment: the plaster finish teaches patience. Spackle or joint compound feels like a cheat codesmear it on, let it dry, sand it back, and suddenly you’ve got that hand-troweled look people pay good money for. But it also has opinions about thickness. Too thick and it takes forever to dry; too thin and you don’t get the “chunky stone” vibe. Most makers find a sweet spot with two thinner coats, especially if they want crisp edges without cracks.
Painting is where “dollar store” can either disappear… or announce itself loudly. Brush marks and shiny paint can make a piece look crafty instead of sculptural. The experience many people report is that matte finishes feel forgiving: they hide tiny imperfections, make the texture look intentional, and photograph beautifully. The second lesson is that two thin coats are almost always faster than one thick coatbecause thick coats take longer to dry and tend to gum up detail.
Glass projects bring their own set of experiencesmainly, alignment. The first time you stack a cylinder on a base, you’ll probably move it one millimeter left, then one millimeter right, then stare at it from three angles like you’re hanging a museum painting. That’s normal. Using tape as a guide helps, and once it cures, the clean symmetry is worth the extra two minutes of fussing.
Finally, there’s the styling payoff. People often say the biggest surprise is how much more “designed” a room feels with just a few chunky pieces grouped together. A single candle holder can look random. A set of three at varying heights looks curated. Add a tray or a couple of stacked books and suddenly your space has that magazine-level structurewithout buying anything that requires “some assembly and emotional damage.”
The best part? These projects tend to get easier the second time. You start seeing candle holders as shapes you can build, not items you have to buy. And that’s the kind of DIY confidence that spills over into everything else (including the bold decision to repaint that old vase you’ve been ignoring since 2021).


