Table of Contents >> Show >> Hide
- What You’re Making (And Why Temperature Is Everything)
- Ingredients and Tools
- How to Make Hard Caramel Candies: 13 Steps
- Step 1: Prep your pan and workspace (before the sugar starts acting like a volcano)
- Step 2: Optional but smarttest your thermometer
- Step 3: Combine sugar, corn syrup, and water
- Step 4: Add your anti-crystal strategy
- Step 5: Clip on the thermometer and boil without stirring
- Step 6: Wash down the sides (only if needed)
- Step 7: Add butter (carefully) for that caramel vibe
- Step 8: Add warm-ish cream in a slow stream
- Step 9: Cook to the hard-crack range (300–310°F)
- Step 10: Do the cold-water test (your backup plan)
- Step 11: Remove from heat and add flavor + salt
- Step 12: Pour, shape, and (optionally) score
- Step 13: Cool completely, then break and store like you mean it
- Troubleshooting: Fix the Usual Candy Chaos
- Flavor Ideas (Because Plain Caramel Is Great, But Options Are Greater)
- Storage Tips: Keep the Snap
- Safety Notes (The “Please Keep Your Fingers” Section)
- Final Thoughts
- Real-World Experiences: What It’s Like Making Hard Caramel Candies at Home (Extra Notes + Lessons)
Hard caramel candies are basically the love child of “science experiment” and “sweet tooth,” and yessometimes they behave like a dramatic toddler.
The good news: once you understand temperature (and stop poking the bubbling sugar like it owes you money), you can make glossy, snap-crisp caramel candies that taste like the fancy ones in a shiny wrapper.
This guide walks you through a reliable, home-kitchen method that uses a candy thermometer (highly recommended), plus backup tricks like the cold-water test.
You’ll also get anti-crystallization tactics, flavor ideas, and storage tips so your candies stay crisp instead of turning into one sticky caramel boulder.
What You’re Making (And Why Temperature Is Everything)
“Hard caramel candy” lives in the hard-crack neighborhood: hot sugar syrup cooked to roughly 300–310°F so it sets into a glassy snap when cooled.
Caramel flavor comes from browning (caramelization) and/or butter/cream notesso you get that toasty, buttery vibe without ending up with chewy caramels.
Think of it like leveling up from “sweet” to “wow, that tastes expensive.” Your thermometer is the map. Your patience is the fuel. Your kitchen fan is… emotionally supportive.
Ingredients and Tools
Ingredients (Base Batch)
- 2 cups granulated sugar
- 3/4 cup light corn syrup (helps prevent crystallization)
- 1/2 cup water
- 4 tbsp unsalted butter
- 1/3 cup heavy cream (adds buttery caramel notes)
- 1/2 tsp fine salt (or more if you love salted caramel)
- 1–2 tsp vanilla extract (or candy flavoring oil)
- Optional: 1/8 tsp cream of tartar or 1 tsp lemon juice (extra insurance against crystals)
Tools
- Candy thermometer (clip-on or digital probe)
- Heavy-bottom saucepan (3–4 quart is ideal)
- Heatproof spatula or wooden spoon
- Pastry brush + water (for washing down sugar crystals)
- Silicone mat or lightly greased parchment on a sheet pan
- Silicone candy molds (optional, but gives the neatest pieces)
- Oven mitts (non-negotiablehot sugar is basically edible lava)
How to Make Hard Caramel Candies: 13 Steps
Step 1: Prep your pan and workspace (before the sugar starts acting like a volcano)
Line a rimmed baking sheet with a silicone mat or greased parchment. If using molds, set them on a tray for easy moving.
Clear counter space, set out your flavoring and salt, and keep oven mitts nearby.
Once the syrup hits the target temperature, you’ll have about twelve seconds to feel like a professional.
Step 2: Optional but smarttest your thermometer
If your thermometer clips or calibrates, do a quick check in boiling water. At sea level, boiling water is about 212°F (lower at higher altitude).
A small error can be the difference between “snap” and “sad taffy.”
Step 3: Combine sugar, corn syrup, and water
Add sugar, corn syrup, and water to the saucepan. Set over medium heat and stir gently just until the sugar dissolves.
Once it’s dissolved and the mixture begins to simmer, stop stirring like your life depends on it. (It kind of does. For texture, anyway.)
Step 4: Add your anti-crystal strategy
Corn syrup already helps prevent crystallization. If you want extra protection, add cream of tartar or a small amount of lemon juice now.
The goal: discourage sugar molecules from forming a gritty reunion tour along the side of the pot.
Step 5: Clip on the thermometer and boil without stirring
Increase heat to medium-high and bring to a steady boil. Clip your thermometer so the tip sits in the syrup without touching the bottom of the pan.
Do not stir. Stirring can splash syrup onto cooler surfaces, creating crystals that spread like gossip.
Step 6: Wash down the sides (only if needed)
If you see sugar crystals on the pot walls, dip a pastry brush in water and brush them down.
This is one of the few times you’re allowed to interfere with the drama.
Step 7: Add butter (carefully) for that caramel vibe
When the syrup is bubbling steadily and looks uniform, add butter in pieces. Expect vigorous bubbling for a moment.
Stir gently just until the butter melts in, then stop stirring again.
Step 8: Add warm-ish cream in a slow stream
This step boosts caramel flavor and gives you that rich “buttery hard caramel candy” character.
Warm the cream slightly (microwave 10–15 seconds) so it’s not ice-cold, then pour it in slowly while stirring carefully.
The mixture will bubble upthis is normal. Your job is to keep it in the pot and off your hands.
Step 9: Cook to the hard-crack range (300–310°F)
Continue boiling (no stirring) until the thermometer reads 300–310°F.
This temperature window is what sets the candy into a crisp, brittle snap.
Want deeper color and a toastier note? You can push slightly higher, but watch closelycaramel can go from “golden” to “campfire regret” fast.
Step 10: Do the cold-water test (your backup plan)
If you don’t trust your thermometeror you just like old-school confirmationdrop a tiny bit of syrup into a cup of cold water.
At hard-crack, it forms hard, brittle threads that snap when bent.
(Let it cool a few seconds before touching. Hot sugar is not a team player.)
Step 11: Remove from heat and add flavor + salt
Turn off the heat and carefully remove the pot. The temperature can continue rising briefly after you take it off the burner.
Wait for the bubbling to calm down, then stir in vanilla, salt, and any optional flavorings.
If using strong extracts or alcohol-based flavorings, add them off-heat to reduce scorching and aggressive steam.
Step 12: Pour, shape, and (optionally) score
Immediately pour into candy molds or onto your prepared sheet.
If pouring onto a sheet pan, let it cool for a minute or two, then score lines with an oiled knife or bench scraper while it’s still slightly pliable.
If you wait too long, it’ll shatter like glass (delicious glass, but still).
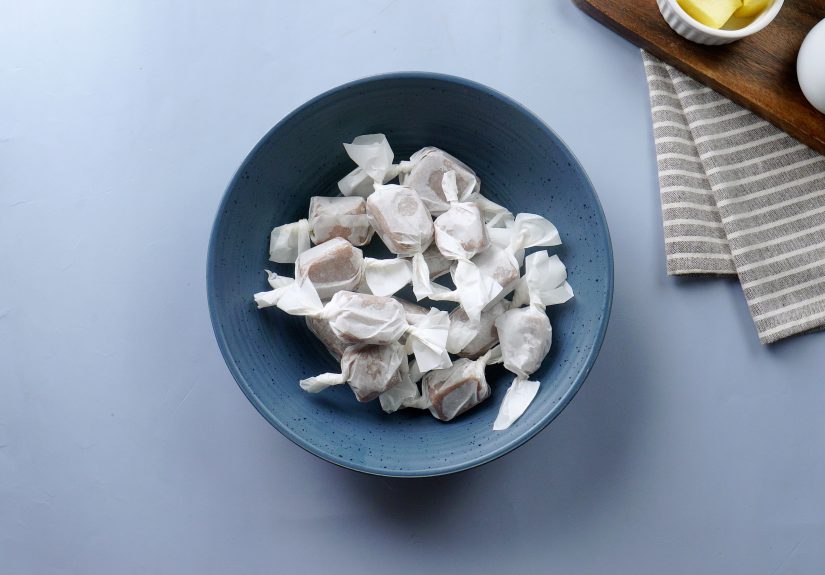
Step 13: Cool completely, then break and store like you mean it
Let the candy cool until fully hard. Break along score lines (or pop from molds).
Dust lightly with powdered sugar if you want extra anti-stick insurance.
Store in an airtight container in a cool, dry placehumidity is the sworn enemy of hard candy.
Troubleshooting: Fix the Usual Candy Chaos
“My candy is sticky or soft.”
- Cause: Under-cooked (didn’t reach hard-crack), or humidity got to it.
- Fix: Next batch, cook closer to 305–310°F and store airtight with a food-safe desiccant packet if your environment is humid.
“It’s grainy. Like edible sand.”
- Cause: Sugar crystallization (stirring after boiling, crystals on pot sides, or insufficient interfering agents).
- Fix: Don’t stir after boil begins, brush down crystals, and keep corn syrup (or add a small amount of acid/cream of tartar).
“It tastes burnt.”
- Cause: Temperature too high or uneven hot spots; caramel darkens quickly near the top end.
- Fix: Use a heavy-bottom pot, moderate heat, and pull earlier. Slightly lighter color often tastes better than “extra dark.”
“It has bubbles or looks cloudy.”
- Cause: Stirring too much, humidity, or rapid agitation after cooking.
- Fix: Stir minimally, pour smoothly, and cool in a dry area. Avoid making hard candy on very humid days if possible.
Flavor Ideas (Because Plain Caramel Is Great, But Options Are Greater)
- Salted vanilla: Add a pinch extra salt + vanilla (classic for a reason).
- Maple caramel: Swap vanilla for maple flavoring (or use maple extract carefully).
- Coffee caramel: Add espresso powder (very fine) or coffee flavoring oil.
- Spiced caramel: Cinnamon + a tiny pinch of cayenne for “warmth,” not pain.
- Butter-rum vibe: Use rum flavoring (not necessarily actual rum), plus a touch of extra butter.
Storage Tips: Keep the Snap
Hard candy is basically a moisture magnet. If it absorbs water from the air, it turns sticky and loses that clean crack.
Store pieces in an airtight container, away from heat and sunlight. If you live somewhere humid, consider adding a
food-safe desiccant packet (kept inside its packetnever loose beads) to help keep things dry.
Pro move: wrap individual pieces in wax paper if you’re gifting or stacking them.
It looks charming and prevents “caramel candy Jenga collapse.”
Safety Notes (The “Please Keep Your Fingers” Section)
- Hot sugar syrup can exceed 300°F. Treat it like hot oil: slow movements, mitts on, no distractions.
- Keep kids and pets out of the kitchen during the boiling and pouring stages.
- If you get syrup on your skin, cool the area under running cool water and don’t try to peel hardened sugar off aggressively.
Final Thoughts
Once you nail the hard-crack temperature, hard caramel candies stop feeling mysterious and start feeling inevitable.
You’ll get faster at spotting visual cues, learning how your stove behaves, and choosing flavors that make people say,
“Wait… you MADE these?”
And if a batch goes sideways? Congratulationsyou just earned an advanced degree in Sugar Management.
Make notes, adjust one thing, and try again. Candy-making rewards calm confidence… and mild obsession.
Real-World Experiences: What It’s Like Making Hard Caramel Candies at Home (Extra Notes + Lessons)
The first time most people make hard caramel candies, the biggest surprise isn’t the recipeit’s the speed.
Sugar is polite while dissolving, then it starts boiling and suddenly you’re in a live-action cooking show called
“Why Is This Bubbling So Loud?” The trick is setting up your workspace before the syrup gets close to the finish line.
When you’re hunting for vanilla at 305°F, you’re not “multitasking,” you’re “auditioning for chaos.”
Another common experience: the thermometer feels like it’s stuck for ages, then jumps quickly near the end.
That’s normalonce water content gets low, the temperature climbs faster.
Many home candy-makers learn (the spicy way) that “I’ll just step away for a second” is the unofficial motto of burnt caramel.
If you want a calmer finish, lower the heat slightly when you’re within about 15–20°F of your target.
You’ll gain a little control at the cost of a few extra minutes, which is a trade most sane people will accept.
Crystallization is the other classic rite of passage. You do everything right, and thengrainy candy.
What usually happened? Stirring after it started boiling, scraping the spoon on the side of the pot, or letting crystals hang out on the pot wall.
The “aha” moment is realizing that crystals are contagious: one little patch can encourage the entire pot to turn gritty.
People who start brushing down the sides (and stop stirring once the boil begins) almost always see immediate improvement in the next batch.
Then there’s the weather factor, which feels unfair until you accept that sugar cares about humidity more than your hair does.
On a dry day, you pour and cool and everything snaps perfectly. On a humid day, your beautiful candies can go slightly tacky,
or develop a cloudy look that screams “I absorbed the atmosphere.” This is why experienced candy-makers store hard candy airtight,
and why so many folks in humid climates swear by adding a food-safe desiccant packet in the container.
It’s not being extrait’s being realistic.
Flavoring is also more emotional than you’d expect. Vanilla is friendly. Peppermint is confident. Cinnamon oil is a dare.
A very common learning curve is that candy flavoring oils are potent, and extracts can cook off or taste harsh if added at the wrong moment.
Most people end up creating a “personal standard” batch after a few tries: one that hits their favorite level of toastiness, salt, and aroma.
And yes, you will probably make at least one batch that tastes like “slightly toasted sugar… with regret.”
That batch still teaches you where your stove runs hot and how quickly color deepens.
Finally, the most satisfying experience: hearing that first clean snap when you break the slab or pop a piece from a mold.
That sound is basically proof that you hit the hard-crack stage and won the day.
Once people get that snap consistently, they start experimentingadding flaky salt on top, swirling in espresso powder,
making tiny molded pieces for coffee service, or wrapping candies for gifts like a confectionery wizard.
The process goes from “intimidating” to “oddly relaxing,” which is a hilarious outcome for something that starts as boiling sugar lava.
But that’s the magic: with a thermometer, a plan, and a little respect for physics, hard caramel candies become a repeatable win.


