Table of Contents >> Show >> Hide
- What “Soap without Lye” Really Means
- Supplies You Need Before You Start
- How to Make Soap without Lye: Basic Method
- Recipe 1: Oatmeal Honey Comfort Soap
- Recipe 2: Lavender Shea Relaxation Bars
- Recipe 3: Citrus Aloe Fresh Start Soap
- Best Soap Bases for No-Lye-Handling Soap
- Common Mistakes to Avoid
- Can You Make Soap without Lye from Scratch?
- How to Store and Gift Homemade Soap
- Final Thoughts
- Real-Life Experiences with Making Soap without Lye
- SEO Tags
If you have ever typed “how to make soap without lye” into a search bar, welcome to the club. You, me, and half the internet have all had the same thought: There has to be an easier way than playing chemistry lab villain with goggles and a warning label. The good news is yes there is an easy way. The tiny plot twist is that true soap is always made with an alkali at some point. So when people say “soap without lye,” what they usually mean is soap you can make without handling lye yourself.
That is where melt-and-pour soap saves the day. The base has already been through saponification, so your job is the fun part: melt, scent, pour, and admire your handiwork like the domestic wizard you are. No lye measuring. No cure time. No waiting around like you are aging fine cheese in a basement.
In this guide, you will learn exactly how to make homemade soap without handling lye, plus three easy recipes that are beginner-friendly, gift-worthy, and realistic enough to work in an ordinary kitchen. We will also cover what ingredients to use, what mistakes to avoid, and how to make your bars look less “mysterious beige brick” and more “boutique spa energy.”
What “Soap without Lye” Really Means
Let’s clear up the biggest myth first. If you want a real bar of soap, lye is involved somewhere in the process. That is true whether the bar is handmade, commercial, fancy, rustic, or wrapped in paper that looks like it came from an artisanal market where everyone owns at least one linen apron.
But you do not need to handle lye to make soap at home. The easiest way is to use a premade melt-and-pour soap base. This base has already been properly made, and the lye has already done its job. You simply remelt the finished base and customize it with safe add-ins like fragrance, colloidal oatmeal, honey in very small amounts, or cosmetic colorants.
That makes melt-and-pour ideal for beginners, casual crafters, parents helping older kids with a supervised project, or anyone whose main goal is “make pretty soap, keep eyebrows intact.”
Supplies You Need Before You Start
All three recipes below use the same basic setup, which keeps things simple and budget-friendly.
Basic tools
- 1 microwave-safe bowl or heat-safe measuring cup
- Silicone soap mold
- Knife and cutting board
- Silicone spatula or spoon
- Small spray bottle with isopropyl alcohol for bubbles
- Kitchen scale or measuring spoons
- Plastic wrap or airtight wrapping for storage
Main ingredients
- Melt-and-pour soap base such as goat milk, shea butter, aloe vera, honey, or clear glycerin
- Skin-safe fragrance oil or essential oil
- Cosmetic-grade additives only
- Soap-safe colorants if you want color
Important ingredient rules
Do not use candle fragrance oils, random craft glitter, or food coloring from the baking aisle. Soap is not cake, even when it looks adorable enough to fool your relatives. Use ingredients labeled as skin-safe and soap-safe. Also, do not overload your base with extras. Too much oil, honey, or botanical matter can make the bars soft, sweaty, or sad.
How to Make Soap without Lye: Basic Method
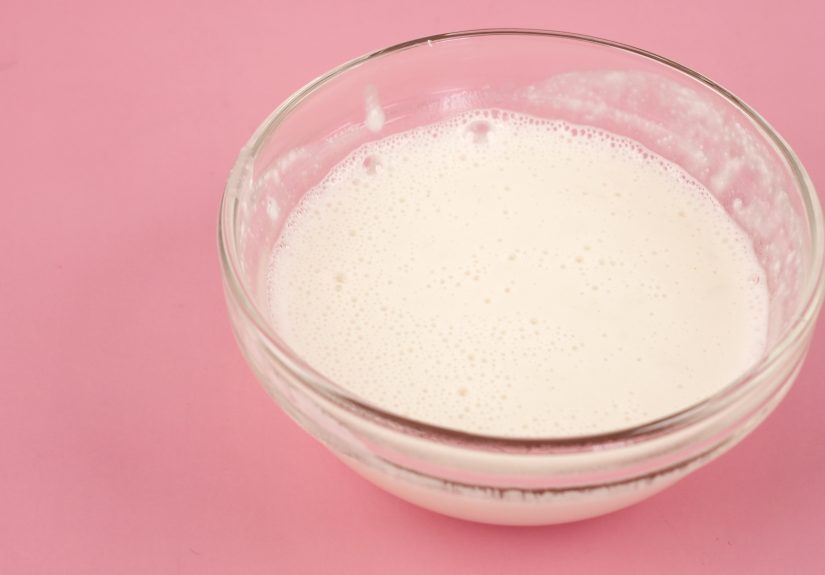
- Cut the base into small cubes. Smaller pieces melt more evenly and reduce the chance of overheating.
- Melt slowly. Microwave in short bursts, usually 20 to 30 seconds at a time, stirring between rounds. Do not let the base boil.
- Add fragrance and extras. Stir gently so you do not whip in lots of bubbles.
- Pour into molds. Tap the mold lightly on the counter.
- Spritz the surface with isopropyl alcohol. This helps pop bubbles on top.
- Let it cool and harden. Most bars are ready to unmold in a few hours, though some bases take longer.
- Wrap the bars. Melt-and-pour soap can attract moisture from the air, so wrapping helps prevent sweating.
Now for the fun part: the recipes.
Recipe 1: Oatmeal Honey Comfort Soap
This is the bar you make when you want something gentle, cozy, and a little farmhouse-chic without actually raising chickens. A goat milk or oatmeal base works beautifully here.
Ingredients
- 1 pound goat milk or oatmeal melt-and-pour soap base
- 1 teaspoon finely ground colloidal oatmeal
- 1/2 teaspoon honey
- 0.2 to 0.3 ounce skin-safe oatmeal, milk, honey, or vanilla fragrance oil
- Optional: a pinch of whole oats for decoration on top
Instructions
- Cut the soap base into cubes and melt it slowly in the microwave.
- When fully melted, stir in the colloidal oatmeal until smooth.
- Add the honey and fragrance oil. Stir gently but thoroughly.
- Pour into your silicone mold.
- If desired, sprinkle a tiny amount of oats on top for texture.
- Spritz with alcohol and let harden completely.
- Unmold and wrap tightly.
Why this recipe works
Colloidal oatmeal is a classic ingredient in gentle skin-care products, and it gives soap a soft, comforting feel. Honey adds a little marketing magic and a little humectant charm, but keep the amount small. More is not better here. More is “why is my soap sticky and acting dramatic?”
Recipe 2: Lavender Shea Relaxation Bars
If your idea of self-care is turning your shower into a five-minute spa before reality emails you again, this recipe is for you. Shea butter base gives the bars a creamy look and a smoother feel.
Ingredients
- 1 pound shea butter melt-and-pour soap base
- 0.2 to 0.3 ounce lavender fragrance oil or a skin-safe lavender essential oil blend
- 1 teaspoon dried lavender buds for decoration only
- Optional: a small amount of purple soap-safe colorant
Instructions
- Cut and melt the shea butter base in short intervals.
- Stir in the fragrance oil.
- If using color, add a tiny amount and mix well.
- Let the melted soap cool slightly so decorative buds do not all sink at once.
- Pour into molds and scatter a very light pinch of dried lavender on top.
- Spritz the surface with alcohol and allow the bars to harden.
- Wrap as soon as they are fully cool.
Why this recipe works
It is simple, elegant, and easy to gift. The key phrase here is light pinch. Too many dried botanicals can turn your soap into a bar-shaped bird feeder. Pretty, yes. Practical, not exactly.
Recipe 3: Citrus Aloe Fresh Start Soap
This one feels bright, clean, and cheerful like opening a window after deep cleaning one drawer and deciding you are basically a whole new person now.
Ingredients
- 1 pound aloe vera or clear melt-and-pour soap base
- 0.2 to 0.3 ounce lemon, orange, cucumber, or citrus-herbal skin-safe fragrance oil
- 1 teaspoon poppy seeds or jojoba beads for gentle visual texture
- Optional: yellow or green soap-safe colorant
Instructions
- Cube and melt the soap base carefully.
- Add fragrance and optional colorant.
- Let the mixture cool slightly, then stir in poppy seeds or jojoba beads.
- Pour into molds, spritz the tops with alcohol, and let harden fully.
- Unmold, wrap, and store in a cool, dry spot.
Why this recipe works
The aloe-style base gives a fresh, clean look, while the seeds or beads add visual interest without turning the bar into a kitchen scrubber. This recipe also photographs well, which matters if you plan to give bars as gifts or post them online with the confidence of someone who now casually says things like “small-batch body care.”
Best Soap Bases for No-Lye-Handling Soap
Not all melt-and-pour bases feel the same. Choosing the right one makes a difference.
Goat milk base
Great for creamy-looking bars and comforting everyday soap.
Shea butter base
Excellent when you want a richer-feeling bar with a smooth, opaque finish.
Clear glycerin base
Best for bright colors, embeds, and decorative soaps where you want translucent effects.
Honey base
Good for warm color and cozy “natural” appeal without needing to add much extra honey.
Aloe vera base
A nice choice for fresh, spa-style bars with a clean look.
Common Mistakes to Avoid
Overheating the base
If the base boils, it can become rubbery, cloudy, or harder to work with. Slow and steady wins the soap race.
Adding too much fragrance
More scent is not always better. Too much can affect lather, texture, and skin comfort. Always stay within supplier limits for the specific fragrance or essential oil.
Using too many extras
Oils, butters, honey, herbs, seeds, and powders all sound romantic until your soap stops behaving. Small amounts work best in melt-and-pour.
Not wrapping finished bars
Melt-and-pour soap often contains extra glycerin, which attracts moisture. That is why it can develop “sweat” or dew if left unwrapped.
Adding decorations too early
If the soap is very hot, heavy add-ins sink. Let the mixture cool slightly before adding exfoliants or suspended botanicals.
Can You Make Soap without Lye from Scratch?
If by “from scratch” you mean combining oils and turning them into a true bar of soap at home, then no not without lye. That chemical reaction is what makes soap soap. There are plant-based cleansers made from naturally soapy plants, but they are not the same as a classic solid soap bar.
So if your goal is a real handmade bar and zero lye handling, melt-and-pour is your best answer. It is practical, safe for beginners, and much more forgiving than cold process. In other words, it is the training wheels version except the wheels are cute and smell like lavender.
How to Store and Gift Homemade Soap
Once the bars are fully cool, wrap them in plastic wrap, shrink wrap, or another airtight material. Store them away from humidity, direct sun, and heat. If you are gifting them, add a simple paper band or box label with the scent and date made.
Homemade no-lye-handling soap also makes an easy handmade gift for birthdays, holidays, bridal showers, teacher gifts, and those moments when you need to look thoughtful without knitting a blanket.
Final Thoughts
Learning how to make soap without lye is really about learning how to make soap without handling lye yourself. That is an important distinction, and once you understand it, everything gets easier. Melt-and-pour soap gives you the freedom to experiment with colors, scents, textures, and ingredients without needing advanced soap-making skills.
Start with one pound of base, keep your add-ins modest, use skin-safe ingredients, and wrap the finished bars well. From there, you can make cozy oatmeal bars, spa-style lavender soap, bright citrus bars, and just about any beginner-friendly variation your imagination can dream up. Or at least any variation your mold collection can physically contain.
The best part is that the learning curve is gentle. Your first batch does not have to be perfect. It just has to be soap, smell nice, and not resemble a failed casserole. That is already a win.
Real-Life Experiences with Making Soap without Lye
One of the most common experiences people have with no-lye-handling soap is surprise not because the process is difficult, but because it is so much easier than expected. Many first-time makers assume homemade soap requires a full science setup, a dedicated workspace, and the emotional fortitude of a lab technician. Then they cut up a soap base, melt it, stir in a scent, and realize the whole thing feels more like a craft project with better-smelling results.
Another very typical experience is the “I added too much stuff because I got excited” phase. It starts innocently. A little honey seems good, so surely more honey is better. A spoonful of oats looks charming, so half a cup must be rustic and luxurious. Then the bar hardens with the personality of a granola brick, and a valuable lesson is learned. Most successful beginners figure out fairly quickly that melt-and-pour rewards restraint. A small amount of a good additive beats a chaotic handful of everything in the pantry.
People also notice how much temperature matters. When the base is too hot, fragrance can fade faster, bubbles appear more easily, and decorative ingredients sink like they are late for an appointment. When the soap cools just a bit before pouring, everything behaves better. That experience is why so many beginners go from “I am just trying this once” to “I now have opinions about pour temperature.” Craft hobbies escalate quickly.
Gift-giving is another recurring theme. Homemade soap has a way of looking far fancier than it is. Wrap a few bars neatly, add a simple label, and suddenly you seem like the kind of organized, serene person who definitely drinks tea from a ceramic mug near a sunny window. In reality, you may have made the bars while wearing mismatched socks and reheating coffee for the third time. The soap does not tell on you.
There is also a confidence boost that comes from mastering a useful little skill. Once someone makes one successful batch, they usually start imagining variations: a holiday bar, a floral spring bar, an unscented bar for sensitive skin, maybe even a whole set of guest soaps. The process feels approachable, creative, and genuinely satisfying. That is why melt-and-pour remains such a popular entry point into soap making. It gives people the experience of making something by hand without throwing them straight into the deep end of formulation chemistry.
And perhaps the best real-life lesson is this: the perfect first batch is not the goal. The goal is learning what your base does, how your scent behaves, and what kind of bar you actually enjoy using. Some people love creamy opaque bars. Others want clear jewel-toned soap that looks like candy but absolutely should not be eaten. Either way, the process gets better with practice, and the practice smells amazing.


