Table of Contents >> Show >> Hide
- Can You Paint a Radiator?
- Best Paint for Radiators
- Tools and Supplies You Will Need
- How to Paint a Radiator Step by Step
- Step 1: Turn the Radiator Off and Let It Cool
- Step 2: Protect the Room
- Step 3: Clean the Radiator Thoroughly
- Step 4: Remove Loose Paint and Rust
- Step 5: Sand the Surface Lightly
- Step 6: Prime Bare Metal or Rusty Areas
- Step 7: Apply the First Coat of Paint
- Step 8: Let It Dry, Then Apply a Second Coat
- Step 9: Let the Paint Cure Before Turning Heat Back On
- Brush vs. Spray: Which Method Is Better?
- Common Radiator Painting Mistakes to Avoid
- What Color Should You Paint a Radiator?
- How Long Does Radiator Paint Last?
- Real-World Experience: Lessons From Painting a Radiator
- Final Thoughts
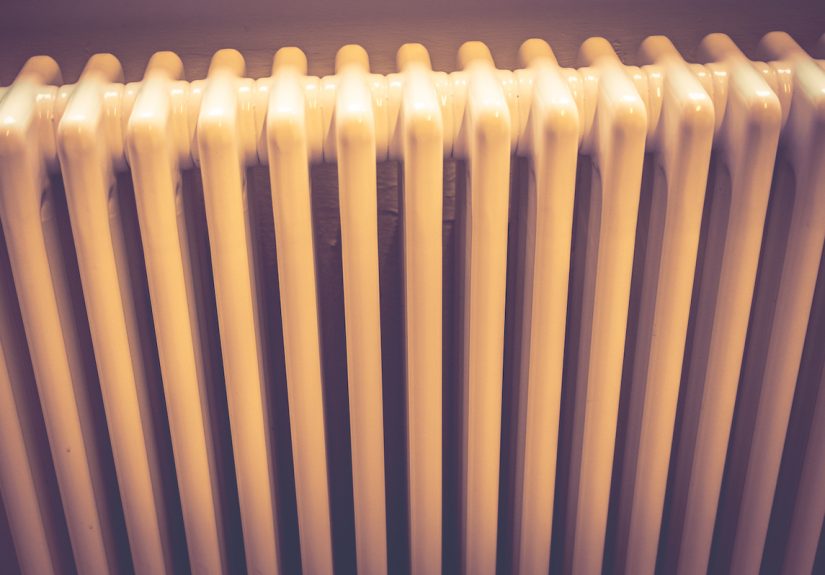
Painting a radiator is one of those home projects that looks suspiciously simpleright up until you notice the dust bunnies, the mystery flakes, the tiny gaps, and the back side of the radiator that seems to have been designed by someone who disliked paintbrushes. Still, good news: learning how to paint a radiator is very doable, even for a weekend DIYer who owns exactly one drop cloth and a heroic amount of optimism.
A fresh coat of paint can make an old radiator look clean, intentional, and even stylish. Whether you want a crisp white finish that blends into the wall, a moody black cast-iron statement piece, or a color that says “yes, my heating system has personality,” the secret is preparation. Radiators heat up, cool down, collect dust, and often have layers of old paint. That means the right cleaning, sanding, primer choice, and heat-tolerant paint matter more than rushing through the job.
This guide walks you through the safest, cleanest, and most reliable way to paint a radiator, including what supplies to use, how to prep the surface, how to avoid peeling paint, and what real-world mistakes to dodge before your radiator starts looking like a DIY crime scene.
Can You Paint a Radiator?
Yes, you can paint a radiator, and in many homes it is one of the easiest ways to refresh a room without replacing expensive heating equipment. The key is using paint that can handle heat and choosing a method that matches your radiator type. Cast-iron steam radiators, hot-water radiators, and metal baseboard-style radiator covers can all be painted, but they do not always need the exact same product.
Traditional cast-iron radiators can get hot enough that ordinary wall paint may soften, discolor, smell, blister, or peel over time. For that reason, a heat-resistant metal paint, direct-to-metal enamel, or high-heat spray paint is usually the safest choice. Some modern metal heater covers run cooler, but they still need a durable coating that bonds well to metal.
Before starting, check the condition of the existing finish. If the radiator has smooth, well-adhered paint, you may only need to clean, lightly sand, and repaint. If the paint is chipping, rusting, or layered like an archaeological dig, you will need more careful prep. And if your home was built before 1978, assume old paint may contain lead until testing proves otherwise. Do not sand or scrape suspected lead paint casually. That is not “vintage charm”; that is a health hazard wearing a cardigan.
Best Paint for Radiators
The best paint for a radiator is durable, heat tolerant, and suitable for metal. For many DIY projects, homeowners choose one of three options:
1. High-Heat Spray Paint
High-heat spray paint is popular for cast-iron radiators because it reaches curves, fins, and tight spaces more evenly than a brush. Spray paint can create a smooth factory-like finish, especially on ornate radiators. Look for a product labeled for metal and high temperatures. Many high-heat sprays are made for grills, stoves, engines, or heat-producing metal surfaces, but always confirm that the product is appropriate for indoor use before spraying inside.
2. Direct-to-Metal Enamel
Direct-to-metal enamel, often called DTM paint, is a strong choice when you prefer brushing or rolling. It is designed to bond to metal and often includes rust-inhibiting properties. A small brush, angled radiator brush, or mini roller can help you work around pipes and grooves. This option is especially helpful if you cannot remove the radiator and do not want to build a spray booth in your living room like a person with suspicious hobbies.
3. Heat-Resistant Interior Paint for Metal
Some premium interior paints can work on radiators if the radiator does not reach extreme temperatures and the manufacturer approves that use. This route is attractive when you want the radiator to match the wall color exactly. However, always read the label or product data sheet. “Looks good on a wall” does not automatically mean “loves being baked every winter.”
Tools and Supplies You Will Need
Before you start painting, gather your supplies. Radiator painting is much easier when you are not searching for painter’s tape with wet primer on your hands.
- Drop cloth or plastic sheeting
- Painter’s tape
- Mild detergent or degreasing cleaner
- Clean rags or microfiber cloths
- Vacuum with brush attachment
- Fine-grit sandpaper, sanding sponge, or steel wool
- Wire brush for rust spots
- Dust mask or respirator
- Safety glasses and gloves
- Rust-inhibiting primer, if needed
- High-heat spray paint or direct-to-metal enamel
- Small angled brush, radiator brush, or mini roller
- Cardboard or masking paper for overspray protection
If you are using spray paint, ventilation becomes especially important. Open windows, use fans to exhaust air safely, and follow the product label. Spraying indoors can create fumes and fine particles, so protect nearby walls, floors, curtains, furniture, and anything else you do not want wearing a surprise speckled outfit.
How to Paint a Radiator Step by Step
Step 1: Turn the Radiator Off and Let It Cool
Never paint a hot radiator. Heat can cause paint to dry too quickly, leaving streaks, bubbles, rough texture, or poor adhesion. Turn the radiator off and allow it to cool completely. If you have a steam or hot-water system, plan the project during mild weather or when the heating system can remain off long enough for the paint to cure.
This is not the time to test your speed-painting skills. A cool radiator gives paint a fair chance to level, bond, and dry correctly.
Step 2: Protect the Room
Place a drop cloth under and around the radiator. Use painter’s tape to protect the wall, baseboard, valves, pipes, and nearby trim. If you are spraying, go further: tape cardboard or masking paper behind the radiator and along both sides. Overspray travels farther than you think, much like glitter, gossip, and the smell of burnt popcorn.
If possible, pull the radiator slightly away from the wall only if it is designed to move safely. Do not force pipes or valves. For many homeowners, painting the visible front and sides is enough. The back can remain mostly untouched unless the radiator is removed for refinishing.
Step 3: Clean the Radiator Thoroughly
Radiators collect dust, lint, pet hair, grease, and general household weirdness. Paint will not bond well to dirt, so cleaning is not optional. Vacuum the radiator first using a brush attachment, working between fins and around pipes. Then wipe the surface with warm water and mild detergent. For greasy areas, use a gentle degreaser approved for painted metal.
After washing, wipe with clean water to remove cleaner residue and let the radiator dry completely. Moisture trapped under paint can lead to poor adhesion and rust, so patience here pays off.
Step 4: Remove Loose Paint and Rust
If the existing paint is peeling or flaking, remove only the loose material. Use a scraper gently, and follow with a wire brush on rusty spots. The goal is not to attack the radiator like you are restoring a shipwreck. The goal is to create a stable surface.
For homes built before 1978, test for lead paint before sanding or scraping. If lead is present or suspected, hire a lead-safe certified professional or follow approved lead-safe practices. Dry sanding old lead paint can release hazardous dust, and that is one DIY shortcut nobody should take.
Step 5: Sand the Surface Lightly
Light sanding helps dull glossy paint and smooth rough edges where old paint was removed. Use fine-grit sandpaper or a sanding sponge. You do not need to strip the radiator to bare metal unless the old coating is failing badly. A lightly scuffed, clean, dry surface is usually ideal.
After sanding, vacuum again and wipe the radiator with a tack cloth or slightly damp rag. Dust left behind can create bumps in the finish, and radiator bumps have a way of looking much larger once paint dries.
Step 6: Prime Bare Metal or Rusty Areas
Primer is not always required on a radiator that already has sound paint. However, primer is very useful on bare metal, rust spots, or uneven surfaces. Choose a rust-inhibiting metal primer that is compatible with your topcoat. Spot-prime small bare areas, or prime the entire radiator if the surface is patchy.
Allow the primer to dry according to the manufacturer’s instructions. Do not rush this step. Paint systems work best when each layer has the time it needs. Think of primer as the friend who does the unglamorous work so the topcoat can take all the credit.
Step 7: Apply the First Coat of Paint
If using spray paint, shake the can thoroughly and apply light, even coats. Hold the can the recommended distance from the surface, usually about 10 to 16 inches depending on the product. Spray in smooth passes, starting each pass slightly before the radiator and ending slightly after it. This helps prevent heavy spots and drips.
If brushing, use a small angled brush or radiator brush. Start with hard-to-reach areas, then paint the larger visible surfaces. Work with the shape of the radiator, following grooves and sections. Keep the coat thin. Thick paint may sag, collect in corners, or reduce detail on decorative cast iron.
Step 8: Let It Dry, Then Apply a Second Coat
Most radiators look better with two thin coats rather than one heavy coat. Let the first coat dry for the time listed on the paint label, then apply the second coat using the same method. Inspect from multiple angles because radiators love hiding missed spots in shadows.
Do not panic if the first coat looks slightly uneven. The second coat usually brings the finish together. If you see drips, wait until they dry, sand them smooth, and touch up lightly.
Step 9: Let the Paint Cure Before Turning Heat Back On
Dry paint and cured paint are not the same thing. Paint may feel dry to the touch within hours but still need longer to harden fully. Follow the product instructions before turning the radiator back on. When you do restore heat, start gradually if possible. Some new paint may release a mild odor during the first heating cycle, so ventilate the room.
If the smell is strong, persistent, or unusual, turn the radiator off and check the paint label again. The wrong paint on a hot surface can create problems beyond bad aesthetics.
Brush vs. Spray: Which Method Is Better?
Spray painting gives the smoothest finish and is excellent for detailed cast-iron radiators. It reaches curves and crevices without leaving brush marks. The downside is overspray, fumes, and a more serious room-protection job.
Brush painting is more controlled and often better for occupied homes, apartments, and quick refreshes. It is also easier when you cannot move the radiator or ventilate heavily. The tradeoff is that brush marks are more likely, especially if you overload the brush or work paint too long after it starts drying.
For most homeowners, the best method depends on the room. In an empty room under renovation, spraying may be worth it. In a finished bedroom with curtains, carpet, and a cat who supervises too closely, brushing may be the wiser choice.
Common Radiator Painting Mistakes to Avoid
Painting Over Dust
Dust ruins adhesion and texture. Clean first, paint later. This rule is boring, powerful, and frequently ignored.
Using Regular Wall Paint Without Checking Heat Tolerance
Some wall paints may work on cooler covers, but many are not designed for repeated heat cycles. Use paint approved for metal and heat exposure whenever possible.
Applying Paint Too Thickly
Thick coats can drip, wrinkle, or hide decorative details. Thin coats are stronger, smoother, and less dramatic in the bad way.
Skipping Rust Treatment
Paint does not magically cure rust. Remove loose rust and use a rust-inhibiting primer where needed.
Turning the Heat On Too Soon
Heat can interfere with curing and may cause odors or finish problems. Give the paint proper drying and curing time.
What Color Should You Paint a Radiator?
White is the classic radiator color because it looks clean and blends with trim or walls. Black, charcoal, bronze, and deep green can make a cast-iron radiator feel like a design feature instead of an apology from the plumbing system. Matching the wall color can help a radiator visually disappear, especially in small rooms.
Gloss and semi-gloss finishes are easier to clean, while satin finishes look softer and more modern. Very flat finishes may collect dust and show scuffs faster. If you have a beautiful old cast-iron radiator with decorative scrollwork, a satin or semi-gloss finish can highlight the details without making it look overly shiny.
How Long Does Radiator Paint Last?
A well-prepared radiator paint job can last for years. Longevity depends on heat exposure, paint quality, surface prep, humidity, and how much abuse the radiator gets. A radiator in a quiet dining room may stay pristine for a long time. One in a mudroom where boots, bags, and children collide with it daily may need touch-ups sooner.
The best way to extend the finish is simple: clean the radiator occasionally, keep moisture under control, fix rust early, and avoid using the radiator as a shelf for damp gloves, wet towels, or mysterious winter objects.
Real-World Experience: Lessons From Painting a Radiator
The first thing you learn when painting a radiator is that radiators are secretly three-dimensional puzzles. From the front, everything looks straightforward. Then you crouch down, look between the fins, and realize there are about forty tiny surfaces you did not emotionally prepare for. That is why the best experience-based advice is to slow down before opening the paint can. Spend more time cleaning, taping, and studying the radiator than you think you need. Once paint is wet, every missed dust clump becomes a tiny monument to impatience.
One practical trick is to use a flashlight before painting. Shine it across the surface from the side, not straight on. This reveals flakes, ridges, rust, and cobwebs that overhead lighting hides. A radiator can look clean in normal light and then suddenly reveal enough dust to knit a small sweater. Vacuuming with a brush attachment helps, but a narrow bottle brush or old toothbrush can be useful between tight sections.
Another lesson: do not underestimate how far spray paint travels. Even careful spraying can leave a fine mist on nearby floors or walls. If you spray indoors, protect more area than seems reasonable. Tape plastic or cardboard behind the radiator and cover the floor generously. Overspray is sneaky. It does not announce itself. It simply appears later on a baseboard, looking innocent and permanent.
If brushing, the biggest challenge is avoiding globs in corners. Dip only the tip of the brush, tap off excess paint, and use long, light strokes. For cast-iron radiators, start inside the grooves and work outward. For flat metal covers, a small foam roller can give a smoother finish on the front panel, while a brush handles edges and seams. Keep a dry brush nearby to feather out drips before they set.
Color choice also feels different in real life than it does on a paint chip. A dark radiator can look stunning, especially in a room with vintage trim or dramatic walls. But dark paint also makes the radiator more visually important. If the radiator is dented, uneven, or located in an awkward spot, a wall-matching color may be more forgiving. On the other hand, if your radiator has handsome old details, painting it a confident color can turn it into architectural jewelry. Yes, radiator jewelry is a thing now. We have decided.
The most satisfying moment comes after the second coat dries. Suddenly the radiator stops looking like an old utility object and starts looking intentional. The whole room feels cleaner. The trim looks sharper. Even the floor nearby seems to stand up straighter. That is the quiet magic of this project: it is not expensive, but it changes how finished a room feels.
Finally, give the paint time. The temptation to turn the heat back on immediately is strong, especially when the weather gets chilly. Resist it. Let the coating cure as directed, ventilate the room during the first heating cycle, and expect a slight new-paint odor at first. A little patience at the end helps prevent peeling, tackiness, and regretthe three least popular finishes in home improvement.
Final Thoughts
Painting a radiator is a small project with a surprisingly big payoff. With the right paint, careful cleaning, light sanding, smart priming, and thin coats, you can transform a tired radiator into a polished part of the room. The process is not complicated, but it does reward patience. Skip the prep and the finish may peel. Respect the prep and your radiator can look refreshed for years.
The best approach is simple: turn it off, let it cool, clean it deeply, sand safely, prime problem areas, apply heat-tolerant paint, and let everything cure before the radiator goes back to work. Do that, and your radiator will no longer look like it has been quietly holding a grudge since 1936.
Note: Always follow the paint manufacturer’s label instructions, especially for ventilation, drying time, heat resistance, and indoor use. If your radiator may have lead-based paint, test first and use lead-safe methods before disturbing the surface.


