Table of Contents >> Show >> Hide
If your old plaster wall looks like it lost a boxing match—cracked, sagging,
and missing chunks—don’t feel bad. Plaster has been doing heroic duty
in homes for more than a century. Instead of tearing everything out and slapping
up drywall, you can honor the house (and seriously upgrade durability) by
rebuilding the surface with a traditional three-coat plaster system.
In this guide, we’ll walk through what three-coat plaster is, when it’s worth
the effort, and how to rebuild a wall step by step from bare lath to silky
smooth finish. Think of it as a workout for your forearms and a spa day for
your walls.
What Is a Three-Coat Plaster Wall?
Before drywall took over, most interior walls in North American homes were
built with lath and plaster. Narrow wood laths were nailed across studs, and
plaster was applied in three layers:
-
Scratch coat: A thick, coarse base coat pressed into and
through the lath. It’s scratched with horizontal grooves to create a key
for the next layer. -
Brown coat: Another base coat that evens everything out and
brings the wall close to its final thickness. -
Finish coat: A thin, smooth top layer that you actually see
and paint. This is where the wall goes from “construction site” to “living room.”
Compared with thin modern finishes, a three-coat plaster wall is thick, dense,
and tough. It offers better sound control, good fire resistance, and a solid,
substantial feel under your knuckles when you give it a test knock.
When Is It Worth Rebuilding with Three-Coat Plaster?
Rebuilding a wall with a full three-coat system is overkill for tiny nail holes,
but it’s perfect when damage is more dramatic. Consider a full rebuild when:
- Large sections of plaster have fallen off, exposing the lath or even the studs.
-
Plaster has separated from the lath (you see bulges, hollow-sounding areas, or
cracks radiating from windows and doors). - Water damage has weakened the base coats beyond simple patching.
-
You’re restoring a historic or period home and want a faithful, long-lasting repair
instead of patchwork solutions.
If 10–20% of the wall is missing or unstable, rebuilding that portion with
three-coat plaster often gives a stronger, more seamless result than trying to
fake it with multiple layers of joint compound.
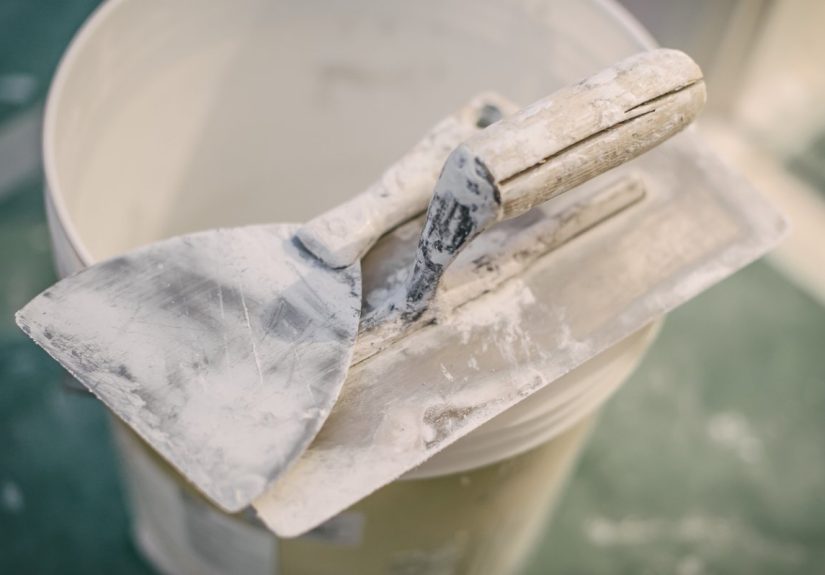
Tools and Materials You’ll Need
You don’t need a full plasterer’s truck, but you do need more than a paint roller
and a dream. Gather:
Basic tools
- Plasterer’s trowel and margin trowel
- Hawk or mud pan
- Straightedge or screed (a long, straight board or aluminum level)
- Plasterer’s float (rubber, sponge, or wood, depending on finish)
- Utility knife, cold chisel, and small pry bar
- Stiff brush and shop vacuum
- 5-gallon mixing bucket and heavy-duty drill with mixing paddle
Materials
- Basecoat plaster (gypsum or lime-based) for scratch and brown coats
- Finish plaster or a fine setting-type joint compound for the final coat
- Water and clean sand (if using traditional sanded mixes)
- Wood or metal lath, if sections of lath are missing
- Galvanized screws or nails to secure loose lath
- Bonding agent (for joining new plaster to sound existing plaster edges)
- Fiberglass mesh or plaster washers for stabilizing cracked but salvageable areas
As a rough guideline, many pros use a basecoat mix near a 3:1 ratio of sand to
gypsum basecoat by volume for the rough coats. Always follow the instructions on
your specific bag of plaster for working time and water amounts.
Step-by-Step: Rebuilding a Wall with Three-Coat Plaster
Step 1: Demo the Loose Stuff and Prep the Lath
Start by removing all loose, crumbling, or hollow-sounding plaster around the damaged
area. Use a hammer and cold chisel or a stiff putty knife to chip back to firm,
well-bonded material. Don’t be shy—it’s better to enlarge the repair than to
leave weak plaster hiding underneath.
Once the loose material is gone:
-
Tighten any wobbly wood lath with screws into the studs, or replace missing lath
strips. - Clean dust and debris with a stiff brush and vacuum.
-
Wet down very dry lath and the edges of existing plaster with a spray bottle so
new plaster doesn’t dry too fast and lose strength. - Brush or roll on bonding agent along the perimeter where new plaster will meet old.
At this stage, your wall will look worse before it looks better. That’s normal.
Just smile and tell visitors you’re going for an “industrial archeology” vibe.
Step 2: Apply the Scratch Coat
Mix your basecoat plaster to a smooth, peanut-butter-like consistency. Load some
onto your hawk, then transfer it to the wall with your trowel, pressing firmly so
it squeezes through the lath and forms mechanical “keys” on the backside.
Aim for roughly 3/8 inch of thickness. Once the area is covered and roughly level
with the surrounding lath, use a scarifier, notched trowel, or the edge of your
trowel to scratch horizontal grooves across the surface. These ridges give the
brown coat something to grab.
Let the scratch coat firm up. It should become hard enough that your thumb doesn’t
leave a dent, but not bone-dry and dusty. Depending on the product and humidity,
that might be a few hours to overnight. Lightly mist the surface if it dries
too quickly.
Step 3: Build Out the Brown Coat
The brown coat brings the wall close to its final thickness and straightens
everything out. Mix a fresh batch of basecoat plaster and apply another
3/8 inch or so over the scratch coat, filling in the grooves and extending
slightly beyond them.
Use your straightedge to “rod” the surface: slide the straightedge up the wall
with a gentle sawing motion, shaving off high spots and revealing low spots that
need more plaster. This is where walls go from lumpy to lovely.
After the brown coat has set enough to hold shape but is still damp, float the
surface with a wood or sponge float in circular motions. This closes small holes,
compresses the plaster, and leaves a slightly sandy texture that’s ideal for the
finish coat to bond to.
Allow the brown coat to cure as recommended—often at least 24 hours, sometimes
longer in cool or damp conditions. Avoid blasting it with dry heat, which can
cause cracking.
Step 4: Trowel on the Finish Coat
The finish coat is the thin, pretty layer that makes all your hard work look
intentional. Mix finish plaster or a fine setting-type compound to a creamy
consistency and apply a layer about 1/16 to 1/8 inch thick.
Work in manageable sections, laying on the plaster and then smoothing it with
long, light trowel strokes. Keep your trowel clean—a single dried crumb dragged
across the wall will leave a mark that you’ll see every time the light hits it.
As the surface begins to firm up, you can “polish” it by re-troweling with a
slightly dampened trowel. For a more traditional look that blends with old
plaster, don’t chase absolute perfection. A few gentle waves and trowel marks
are part of the charm.
Once fully dry, lightly sand any tiny imperfections, prime with a quality
primer designed for new plaster, and then paint. Stand back and enjoy the
wall that now looks like it’s always been there.
Pro Tips for Three-Coat Plaster Success
-
Control suction: Dampen but don’t soak the lath and existing
plaster. Too dry, and the wall steals water from your mix; too wet, and
the plaster may slide off. -
Mind the working time: Traditional plaster sets faster than
joint compound. Mix modest batches until you understand how quickly your
product stiffens. -
Blend joints carefully: Feather each coat a few inches onto
the old plaster. This avoids a visible ridge when light rakes across the wall. -
Use mesh on cracks and transitions: Fiberglass mesh embedded
in the brown coat helps prevent future cracking along old/new seams. -
Protect the room: Plaster work is messy. Cover floors, tape off
trim, and accept that some of it will still end up in your hair.
Frequently Asked Questions
Can I use joint compound instead of real plaster?
For small repairs, yes, joint compound can work fine. But for rebuilding missing
sections down to the lath, traditional basecoat plaster is stronger, sets harder,
and bonds better in thicker applications. You can still use joint compound as the
very top skim coat if you want a familiar sanding and finishing process.
How long does three-coat plaster take to cure?
Each coat has its own timetable. Scratch and brown coats usually need at least
a day each before adding the next layer, depending on temperature and humidity.
The finish coat should be allowed to dry completely—often several days—before
priming and painting. The wall may continue to harden for weeks, so treat it
gently at first.
Is three-coat plaster more expensive than drywall?
In pure dollars per square foot, yes, especially if you hire a pro. But for a
historic house or a showpiece room, the durability, sound performance, and
character of genuine plaster are hard to beat. Think of it as investing in a
finish that can easily outlast you if it’s cared for properly.
Real-World Lessons from Rebuilding Plaster Walls
Guides and diagrams are helpful, but three-coat plaster really teaches you as
you go. Here are some lived-in lessons from DIYers and pros who’ve wrestled
with old walls and won.
Lesson 1: The Wall Is Straighter Than You Think—Or Crooked on Purpose
Many older houses don’t have laser-straight walls, and that’s okay. When you
rebuild with three coats, you have the power to correct serious bows and bellies,
but you don’t have to erase every quirk. A common rookie mistake is trying to
make a single, small patch perfectly flat, only to realize that the surrounding
wall gently curves. Instead of fighting the whole room, follow the existing
plane and smooth your repair into that.
Lesson 2: Mix Less Than You Think You Need
The first time you mix plaster, it’s tempting to fill the bucket “to save time.”
Then the material starts to set while you’re still figuring out how to hold the
hawk and trowel without flinging blobs onto the cat. Most people find that smaller
batches are more forgiving. Your speed will increase as your technique improves,
and then you can scale up.
Lesson 3: Humidity Is Your Friend—To a Point
Dry, heated winter air can cause new plaster to dry too quickly and crack. A
slightly humid room actually helps coats cure more evenly and gain strength.
Some DIYers run a small humidifier or simply keep a door open to a more humid
part of the house. Just don’t turn the room into a sauna—plaster that stays
wet for too long can slump or take ages to firm up.
Lesson 4: Don’t Skip the “Ugly” Stage
There’s a moment after the scratch coat and again after the brown coat when you
may look at the wall and think, “I’ve made everything worse.” It’s rough, streaky,
and nothing like those glossy photos in renovation magazines. That’s normal.
Plaster is built in stages, and each coat has a job. Trust the process: once the
finish coat goes on and gets a coat of primer, the whole room feels transformed.
Lesson 5: Matching Old Texture Is an Art
Older plaster rarely has a perfectly smooth, machine-made texture. It might have
subtle trowel sweeps, a light sand swirl, or even a faint float pattern. Before
you do your final finish, take a flashlight and study un-damaged areas in the
same room. Then experiment on a scrap board or a small hidden section to see
how different trowel angles or float motions affect the texture. When you get
close, snap a quick photo and use it as your reference as you finish the visible
surfaces.
Lesson 6: The Payoff Is Bigger Than Just One Wall
Rebuilding a wall with three-coat plaster is physically demanding and a bit
technical, but it’s also incredibly satisfying. You’re not just hiding damage—
you’re recreating a traditional assembly designed to last decades. Once you
finish your first wall, you’ll start eyeing other tired surfaces in the house
with new confidence. And the next time someone taps the wall and says, “Wait,
this isn’t drywall?” you’ll get to smile and say, “Nope. It’s the real thing.”
If you take your time with each coat, pay attention to moisture and working time,
and embrace a little bit of old-house character, you can rebuild a plaster wall
that would make any restoration-loving expert proud.


