Table of Contents >> Show >> Hide
- Why Royal Icing Storage Matters
- The Quick Answer
- How to Store Royal Icing in 13 Steps
- Step 1: Know what kind of royal icing you made
- Step 2: Stop the air before it starts trouble
- Step 3: Use a truly airtight container
- Step 4: Press plastic wrap directly onto the surface
- Step 5: Label the color, consistency, and date
- Step 6: Store short-term batches the smart way
- Step 7: Refrigerate for longer storage
- Step 8: Freeze extra icing the right way
- Step 9: Thaw and warm it gently
- Step 10: Fix separation and consistency before decorating
- Step 11: Protect icing while you work
- Step 12: Let decorated cookies dry completely before storing
- Step 13: Store finished decorations and dried pieces separately
- Common Royal Icing Storage Mistakes
- Best Practices for Different Uses
- of Real-World Experience: What Bakers Usually Learn the Hard Way
- Conclusion
Royal icing is wonderful, dramatic, and just a tiny bit needy. It gives cookies that polished bakery look, dries with a clean finish, and makes even an average Tuesday feel suspiciously festive. But it also has one major personality trait: it absolutely hates being left out in the open. Air dries it out, humidity makes it moody, and poor storage can turn a silky batch into a crusty little tragedy.
If you have ever mixed a beautiful bowl of royal icing, stepped away for ten minutes, and returned to find a weird skin forming on top like it was auditioning for a science-fiction movie, you are not alone. The good news is that storing royal icing is not complicated. The better news is that it only takes a few smart habits to keep it smooth, usable, and ready for your next round of cookie decorating.
This guide breaks down exactly how to store royal icing in 13 clear steps, whether you are saving plain white icing, multiple colors, piping consistency, flood consistency, or fully decorated cookies. You will also find troubleshooting tips, real-life examples, and a practical section on what bakers usually learn the hard way. Let us save your icing before it becomes decorative cement.
Why Royal Icing Storage Matters
Royal icing is mostly sugar, but that does not mean it can be treated like a pantry rock. Its texture changes quickly when exposed to air, and the recipe base matters. Some batches are made with meringue powder, while others use egg whites or pasteurized egg whites. That difference can affect both food safety and storage time.
Good storage does four things at once: it prevents crusting, slows separation, protects consistency, and helps you avoid waste. It also saves time. Instead of mixing a fresh batch every time you want to decorate a dozen cookies, you can pull out what you already have, bring it back to life, and get straight to piping names, stars, flowers, or tiny snowflakes that make people say, “Wow, did you buy these?”
The Quick Answer
If you only need the fast version, here it is: store royal icing in an airtight container, press plastic wrap directly onto the surface, and keep it away from heat, light, and moisture. For short-term use, some recipes can sit at room temperature briefly. For longer storage, the refrigerator is usually the safer bet, especially for egg-white versions. For extra leftovers, freezing works well for plain icing in sealed bags. Decorated cookies should be fully dry before stacking or packing.
How to Store Royal Icing in 13 Steps
Step 1: Know what kind of royal icing you made
Before you store anything, figure out whether your icing was made with meringue powder, pasteurized egg whites, or another variation. This is not just baker trivia. It affects how long the icing keeps and where it should live. A meringue-powder royal icing is often more storage-friendly, while fresh egg-white versions usually need tighter food-safety habits and shorter timelines.
Example: if you made a big batch for weekend cookies using meringue powder, you may have more flexibility. If you used egg whites for a small custom order, it is smarter to refrigerate and use the icing sooner rather than later.
Step 2: Stop the air before it starts trouble
The number one enemy of royal icing is air exposure. The minute the surface meets open air, it starts forming a crust. That crust is annoying in a bowl and even worse in a piping bag because one tiny dried bit can clog your tip and ruin your clean line work.
As soon as you finish mixing, transfer the icing to storage containers or cover your working bowl properly. Do not tell yourself you will “just be back in a minute.” Royal icing hears that and chooses violence.
Step 3: Use a truly airtight container
Use a container with a secure lid, not a loosely covered bowl and not a piece of foil you vaguely trust. Small airtight containers are best because they reduce extra air space inside. If you have several colors, store them separately rather than piling them together in one giant mystery tub.
Clear containers are especially handy because you can see whether the icing has separated, darkened, or thickened without opening the lid every five seconds like a curious raccoon.
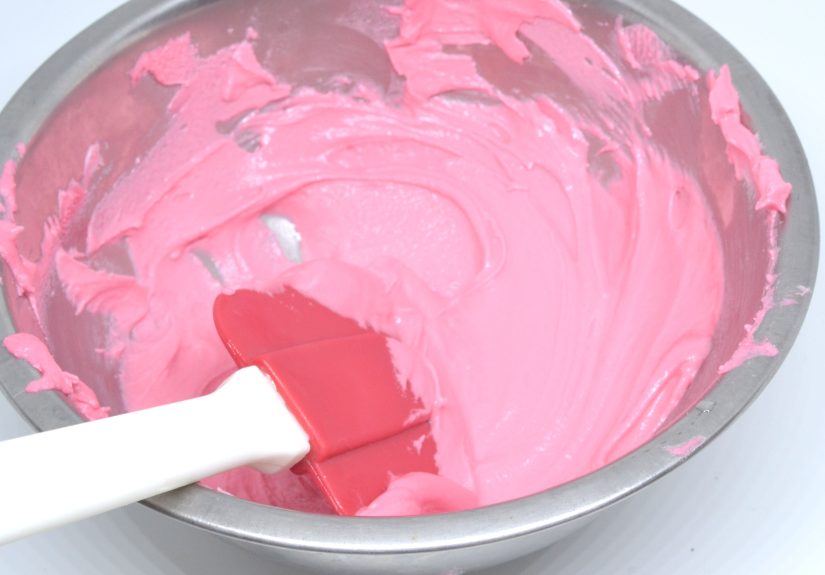
Step 4: Press plastic wrap directly onto the surface
This is the golden rule. After the icing goes into the container, press a piece of plastic wrap directly onto the surface before closing the lid. Not hovering above it. Not gently nearby. Right on the surface. That extra barrier helps prevent crusting and keeps the icing smoother.
If you skip this step, you may open the container later and find a dry layer on top. That layer does not magically disappear when stirred. It becomes little lumps, and little lumps are the sworn enemies of pretty cookies.
Step 5: Label the color, consistency, and date
Label every container or bag with three things: the color, the consistency, and the date. “Blue flood icing, April 11” is far more useful than “blue stuff?” written in panic. This matters even more when you are storing multiple shades or using both outline icing and flood icing.
Why it helps: flood icing may need a different refresh than piping icing, and darker colors sometimes deepen as they sit. A simple label keeps you from guessing later.
Step 6: Store short-term batches the smart way
If you plan to use the icing soon, short-term storage can be simple. Many bakers keep well-covered royal icing for a brief period at room temperature, especially when using meringue powder. The key words here are brief period and well covered. Cool room, no sun, no humid windowsill, and definitely not next to a warm oven that is still pumping out cookies like a champion.
This works well when you are decorating in stages on the same day or the next day and do not want the icing chilled.
Step 7: Refrigerate for longer storage
If you are storing royal icing for more than a short hold, refrigeration is usually the safest and most practical move. This is especially important for icing made with egg whites. A sealed container in the refrigerator gives you a better chance of preserving texture while reducing food-safety concerns.
Put the container toward the back of the fridge, where the temperature is more stable. Do not store it in the door, where it gets jostled and warmed every time someone opens the fridge looking for pickles, inspiration, or both.
Step 8: Freeze extra icing the right way
Have more leftover icing than ambition? Freeze it. Royal icing freezes well when packed correctly. Spoon it into freezer-safe zip-top bags, flatten the bags, push out as much air as possible, and seal tightly. Freeze each color separately so you are not thawing six shades of holiday cheer just to write one name on a cookie.
Flat bags also thaw faster and stack neatly. It is the freezer equivalent of being emotionally organized.
Step 9: Thaw and warm it gently
When you are ready to reuse frozen or refrigerated icing, do not shock it. Move frozen icing to the refrigerator first if possible, then bring it to room temperature. Once it has warmed a bit, stir or whisk gently to restore the texture.
Aggressive whipping is not always the answer. Too much beating can add air bubbles or make the icing lose some of its smooth, glossy finish. Think “coax back to life,” not “interrogate with a mixer.”
Step 10: Fix separation and consistency before decorating
Stored royal icing often separates a little. That is normal. Give it a slow stir or a gentle whisk. If it seems too thick, add water a few drops at a time. If it looks too loose, add a small amount of sifted confectioners’ sugar and mix again. Go slowly. Royal icing can move from perfect to soup faster than expected.
Example: if your flood icing sat overnight and now looks like glossy paste instead of flowing syrup, add a few drops of water, stir, and test the flow before adding more.
Step 11: Protect icing while you work
Storage does not end when the lid comes off. If you are decorating for an hour or more, cover bowls with plastic wrap or a damp towel between uses. Keep piping bags sealed at the top, and if you are working with several colors, only leave out what you actually need.
This step sounds small, but it saves a lot of frustration. Royal icing can start drying at the tip of a bag while you are busy admiring the first cookie like it belongs in a museum gift shop.
Step 12: Let decorated cookies dry completely before storing
If the icing on the cookie is not fully dry, storage turns into a smudge festival. Let decorated cookies dry until the surface is firm and no longer tacky. Depending on thickness, layering, and humidity, that may take several hours or overnight.
Once dry, store cookies in an airtight container. If you need layers, separate them with parchment or wax paper. If the decoration is highly detailed or raised, single-layer storage is safer.
Step 13: Store finished decorations and dried pieces separately
Royal icing flowers, plaques, letters, and other dried decorations deserve their own storage plan. Once fully hardened, keep them in an airtight container in a cool, dark, dry place. Avoid humidity, rough handling, and temperature swings. These pieces can last much longer than wet icing if protected properly.
One more thing: do not assume every finished item belongs in the freezer. Some dried royal icing decorations can become brittle, crack, or develop condensation issues after freezing and thawing. When in doubt, dry and protect rather than freeze and hope.
Common Royal Icing Storage Mistakes
- Leaving the bowl uncovered “just for a second.” Famous last words.
- Skipping plastic wrap on the surface.
- Using a container that is technically closed but not truly airtight.
- Adding too much water all at once when reviving stored icing.
- Stacking decorated cookies before they are fully dry.
- Forgetting to label colors and dates.
- Storing icing near heat, sunlight, or humidity.
Best Practices for Different Uses
For outline icing
Keep it slightly thicker and stir gently before reuse. If it has stiffened too much, adjust with tiny drops of water.
For flood icing
Use it sooner rather than later. Flood icing is more delicate and can separate faster than thicker piping icing.
For colored icing
Store each color in its own container or bag. Dark colors may deepen over time, so make them a shade lighter than your final target if storing ahead.
For cookie kits
If you are preparing a decorating kit, pack icing in sealed piping bags or squeeze bottles and keep everything clearly labeled. It looks professional and saves everyone from the “Which bag is white and which bag is pale gray?” guessing game.
of Real-World Experience: What Bakers Usually Learn the Hard Way
Ask a group of home bakers about royal icing storage and you will hear a pattern almost immediately. The first lesson is usually about air. Nearly everyone learns, sooner or later, that royal icing does not need much time to start misbehaving. A bowl left uncovered while cookies cool can develop a thin skin before you even notice it. At first, that skin seems harmless. Then you stir it in, load a piping bag, and discover that your line work now includes tiny clogs, random blobs, and one dramatic moment where the tip spits icing like it is offended by your technique.
The second common experience is overconfidence about “using it tomorrow.” Many people finish decorating, see a generous amount of icing left in the bowl, and assume it will be fine with a lid and a little optimism. The next day, they open it and find the texture thicker, slightly separated, or crusted around the edges. The icing is not ruined, but it is no longer ready to go. It needs gentle stirring, consistency testing, and sometimes a little repair work. That is why experienced bakers become almost weirdly devoted to pressing plastic wrap directly onto the surface. It looks fussy, but it saves the batch.
Another shared lesson involves color. Freshly mixed icing and rested icing are not always the same shade. Deep reds, blacks, navy blues, and forest greens often become richer after sitting. New decorators sometimes panic and keep adding gel color until the icing looks perfect immediately, only to discover the next day that the color has turned far darker than planned. Bakers who store icing often learn to mix dark shades a little early, let them rest, and then adjust if needed.
Humidity teaches its own course in humility. On dry days, royal icing can behave beautifully, drying on schedule and stacking neatly. On humid days, the same recipe may take longer to set, feel softer, or become sticky in storage. Many bakers only realize how much weather matters after making gorgeous cookies that look flawless at night and slightly tacky the next morning. After that, they stop blaming themselves for everything and start blaming the air, which is often deserved.
There is also the freezing lesson. People who freeze plain leftover icing in flat bags usually end up feeling brilliant. It is efficient, tidy, and surprisingly convenient. But people who freeze decorated cookies without proper drying, wrapping, or testing sometimes learn that what returns from the freezer is not always the same beauty that went in. Some cookies do fine. Others crack, spot, or attract condensation. Experience teaches caution, not fear.
In the end, most royal icing storage wisdom comes down to a few habits: seal it well, label it, protect it from air, respect humidity, and revive it gently. The bakers who look effortless are usually not magically gifted. They just made the mistakes earlier and now keep plastic wrap within arm’s reach like responsible adults with delicious priorities.
Conclusion
If you know how to store royal icing properly, you waste less, decorate faster, and get better-looking results. The secret is not glamorous. It is airtight containers, plastic wrap on the surface, careful temperature choices, and a little patience when reviving stored icing. Whether you are making holiday cookies, birthday favors, or a random Tuesday batch because your cutter drawer was calling your name, these 13 steps will help your icing stay smooth, workable, and worth keeping.


