Table of Contents >> Show >> Hide
- Why a Handmade Bow Instantly Upgrades a Gift
- What You Need Before You Start
- How to Tie a Gift Wrapping Bow: 6 Steps
- Step 1: Choose the Right Ribbon and Cut More Than You Think You Need
- Step 2: Find the Center and Make Your First Loop
- Step 3: Form the Second Loop to Match the First
- Step 4: Cross One Loop Over the Other and Tuck It Through
- Step 5: Tighten, Shape, and Fluff the Bow
- Step 6: Trim the Ends for a Clean, Professional Finish
- Best Ribbon Types for Gift Wrapping Bows
- Common Bow-Tying Mistakes to Avoid
- Easy Variations Once You Master the Basic Bow
- Real-Life Experiences With Gift Wrapping Bows
- Conclusion
- SEO Tags
Some gifts arrive in bags. Some gifts arrive in boxes. And some gifts arrive wearing a bow so charming that the recipient pauses for a full two seconds before tearing into it like a raccoon with a lottery ticket. That, dear reader, is the power of a well-tied gift wrapping bow.
If you have ever stared at a ribbon and thought, “I know this is supposed to become elegant somehow,” you are not alone. The good news is that learning how to tie a gift wrapping bow is not a secret passed down only to boutique gift wrappers and impossibly tidy grandmothers. It is a practical skill, it is surprisingly easy, and once you get it down, every present suddenly looks more thoughtful.
This guide breaks the process into six simple steps, with extra tips for making your bow look balanced, polished, and worthy of at least one dramatic gasp. Along the way, you will also learn which ribbon works best, what mistakes to avoid, and how to make the whole package look like you have your life together, even if your closet says otherwise.
Why a Handmade Bow Instantly Upgrades a Gift
A bow does more than sit there looking fancy. It creates a finished look. It helps define the center of the package, adds texture, and can make even plain paper feel intentional. Kraft paper with a satin ribbon? Chic. Solid wrapping paper with a grosgrain bow? Classic. A simple white box with a bold red bow? Suddenly it looks like it came from a very expensive store where the candles cost too much and still somehow smell amazing.
Handmade bows also give you control. You choose the size, the style, the ribbon type, and how dramatic you want the tails to be. You can go crisp and minimal or soft and romantic. Store-bought stick-on bows have their place, but a tied ribbon bow feels personal in a way that says, “Yes, I wrapped this myself, and yes, I deserve compliments.”
What You Need Before You Start
Before you begin, gather a few basics:
- Ribbon, preferably satin, grosgrain, or double-sided ribbon
- Sharp scissors
- A wrapped gift box or package
- Optional double-sided tape for extra hold
- Optional wire-edged ribbon if you want a fuller, more sculpted bow
For beginners, medium-width ribbon is the easiest to handle. Ribbon that is too narrow can look flimsy, while very wide ribbon may feel awkward until you get used to shaping loops. If the ribbon has a “right” and “wrong” side, pay attention while forming your loops so the pretty side stays visible.
How to Tie a Gift Wrapping Bow: 6 Steps
Step 1: Choose the Right Ribbon and Cut More Than You Think You Need
The first step is not technically glamorous, but it saves you from that tragic moment when the bow is almost perfect and the ribbon tails are the size of shoelaces. Start by choosing ribbon that suits the scale of your gift. A small jewelry box needs a more delicate ribbon, while a larger shirt or toy box can handle a wider, bolder option.
As a general rule, cut a length long enough to wrap around the gift and still leave enough ribbon to create two loops and two tails. When in doubt, give yourself extra length. Ribbon is much easier to trim than to magically extend through wishful thinking and emotional bargaining.
If you are tying the ribbon directly around the box, wrap it once horizontally and once vertically before tying at the top. If you are just creating a topper bow to attach later, cut a standalone piece long enough to form the full bow in your hands.
Step 2: Find the Center and Make Your First Loop
Hold the ribbon at the center point where you want the knot of the bow to sit. Then use one side of the ribbon to create a loop. Think of making one “bunny ear,” except this bunny has excellent taste and a holiday party to attend.
Pinch the base of the loop firmly between your thumb and forefinger. This pinch point is important because it keeps the loop from twisting and acts as the anchor for the rest of the bow. Decide how large you want the loop to be before moving on. For most gift boxes, medium loops look balanced and neat. Oversized loops can be beautiful too, but they work best when the box is large enough to support the drama.
Step 3: Form the Second Loop to Match the First
Now take the other side of the ribbon and create a second loop on the opposite side. Try to make it roughly the same size as the first. Do not panic if they are not identical right away. Almost no bow begins life looking symmetrical. Bows become beautiful during the adjustment stage, much like hair after a mildly concerning blow-dry.
Keep pinching the center where both loops meet. At this point, you should have two loops and two ribbon tails hanging down. The front side of the ribbon should still face outward if possible. If the ribbon twists, gently rotate it back before moving on.
Step 4: Cross One Loop Over the Other and Tuck It Through
This is the moment when the bow actually becomes a bow. Cross one loop over the other, just as you would when starting to tie shoelaces. Then tuck the top loop behind and through the opening in the middle.
As you pull it through, keep holding the center tightly so the loops do not collapse or twist into ribbon nonsense. Once the loop passes through, gently pull both loops outward. You will see the knot form in the center.
The trick here is to pull evenly. If you yank one side harder than the other, the bow can slide off-center or one loop can shrink dramatically. This is fixable, but it is easier to avoid by tightening slowly.
Step 5: Tighten, Shape, and Fluff the Bow
After the knot is formed, pull the loops until the center feels secure. Then adjust the loops and tails until they look balanced. This is the difference between “gift wrapped” and “gift wrapped with intent.”
Gently tug the loops to make them fuller. Straighten the tails so they hang evenly. If you are using wire-edged ribbon, bend and shape the loops to create more volume. If you are using satin or soft ribbon, smooth any wrinkles with your fingers and make sure both loops face upward instead of drooping sadly toward the table.
Do not skip this shaping step. Even a correctly tied bow can look sloppy if the loops are twisted or the tails are uneven. A ten-second adjustment can make the whole present look dramatically better.
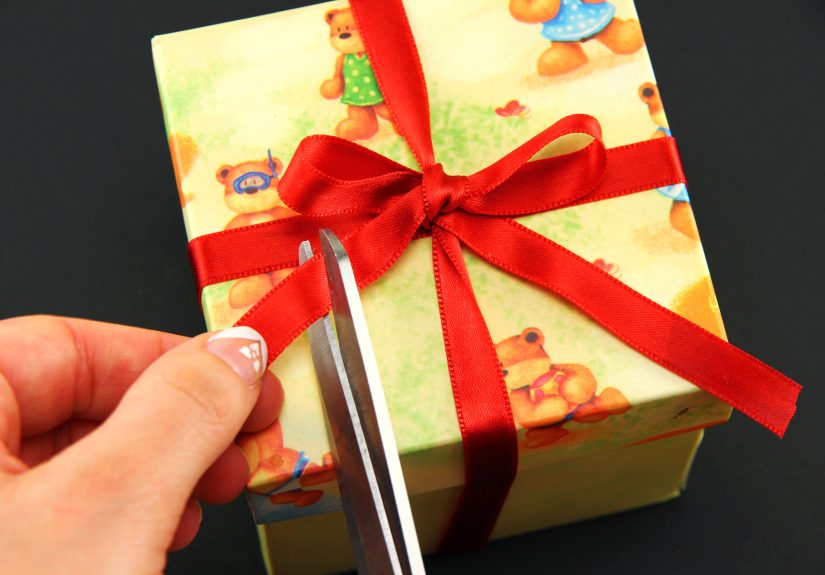
Step 6: Trim the Ends for a Clean, Professional Finish
Once you love the shape of the bow, trim the ribbon tails. You can cut them straight across for a modern look, angle them diagonally for something sleek, or create classic fishtail ends by folding the tail lengthwise and cutting from the folded edge upward toward the corners.
Fishtail ends are especially popular because they look polished without being fussy. Just make sure both tails are the same length. If one tail hangs much lower than the other, it can throw off the look of the entire package.
If the bow is tied directly onto the gift, you are done. If you made the bow separately, attach it securely to the package with double-sided tape, glue dots, or by tying it onto an existing ribbon band.
Best Ribbon Types for Gift Wrapping Bows
Not all ribbon behaves the same way, which explains why one bow looks movie-perfect and another looks like it lost an argument. Here is a quick breakdown:
Satin Ribbon
Satin ribbon is smooth, elegant, and ideal for classic gift wrapping. It works beautifully for simple bows, though it can be a little slippery if your knot is loose.
Grosgrain Ribbon
Grosgrain has a ribbed texture, which makes it easier to grip and shape. It is great for beginners and gives gifts a tailored, slightly structured look.
Wire-Edged Ribbon
This ribbon is excellent for fuller, puffier bows because the edges hold their shape. It is especially useful for large packages or decorative holiday gifts.
Curling Ribbon
Curling ribbon is fun, festive, and perfect when you want a playful look. It is less suited to the traditional two-loop bow but works wonderfully for curly gift toppers.
Common Bow-Tying Mistakes to Avoid
Even a simple bow can go rogue. Here are the mistakes people make most often:
- Using too little ribbon: Short ribbon creates tiny loops and awkward tails.
- Tightening too fast: Pulling too hard too soon can twist the loops.
- Ignoring symmetry: Uneven loops make the bow look accidental rather than styled.
- Cutting tails before shaping: Always fluff first, trim second.
- Choosing the wrong ribbon width: Match ribbon size to package size for balance.
If your first attempt looks odd, do not assume you are bad at bows. Usually the problem is either ribbon length or center tension. Fix those two things, and most bows improve immediately.
Easy Variations Once You Master the Basic Bow
Once you know how to tie a basic gift wrapping bow, you can branch out into slightly fancier territory without entering full craft-chaos mode.
The Double Bow
Layer a thinner ribbon over a wider one before tying. This adds texture and color contrast without much extra work.
The Puffy Bow
Use wire-edged ribbon and make larger loops, then fluff them outward for volume. This style works beautifully on holiday presents.
The Curly Bow Accent
Tie a standard bow, then add strands of curling ribbon underneath for extra movement and sparkle.
The Minimalist Flat Bow
Use a narrow ribbon and keep the loops small. This is perfect for modern wrapping styles or elegant adult gifts.
Real-Life Experiences With Gift Wrapping Bows
There is a funny thing that happens when you start paying attention to bows: you realize almost everyone has a ribbon story. Some people learned from a parent or grandparent who could wrap a present so beautifully it felt almost rude to open it. Others learned in a rush, five minutes before a birthday party, using wrinkled wrapping paper and scissors that could barely cut butter. Either way, bow-tying tends to become one of those tiny life skills that sticks with you.
One common experience is the “too-tight bow disaster.” You pull the loops hard, proud of your determination, only to watch one side shrink into a sad nub while the other becomes a floppy ribbon monster. Nearly everyone does this at first. The lesson is simple: bows respond better to patience than brute strength. A little tension is good. A wrestling match is not.
Another classic moment happens during the holidays, when someone decides at 11:30 p.m. that every gift should have matching bows. Suddenly the kitchen table becomes mission control. Ribbon spools roll onto the floor. Tape disappears into another dimension. Somebody uses fabric scissors on cardboard and earns a household lecture. Then, somewhere around gift number four, the hands finally learn the motion. Loop. Loop. Cross. Tuck. Tighten. Adjust. That is when bow-tying stops feeling like a craft and starts feeling like muscle memory.
People also discover that different gifts change the whole experience. A crisp shirt box is wonderfully cooperative. A soft sweater in tissue paper is less so. Oddly shaped packages can make even a nice bow look confused unless the ribbon is anchored properly. Many gift wrappers solve this by tying the ribbon around the box first, then building the bow on top, which keeps everything centered and stable.
There is also the emotional side of it. A handmade bow can turn a simple gift into something that feels carefully chosen. It tells the recipient that the presentation mattered too. This is especially noticeable with children, who often react before they even open the present. They see the color, the loops, the shine, and immediately decide the gift is magical. Adults may play it cooler, but not by much.
Some of the best bow experiences come from fixing mistakes. Maybe the loops were uneven, so you retied them smaller and the whole package looked cleaner. Maybe the satin ribbon kept slipping, so you switched to grosgrain and wondered why you had been making life harder for yourself. Maybe you added a little greenery sprig or gift tag under the knot and suddenly your bow looked intentional instead of merely present. Those small discoveries are what make people better gift wrappers over time.
In the end, tying a gift wrapping bow is one of those satisfying skills that combines practicality and charm. It is useful, easy to improve, and weirdly calming once you get the hang of it. Plus, when someone says, “Wow, this looks beautiful,” you get to nod modestly while fully knowing the bow did a lot of the heavy lifting.
Conclusion
Learning how to tie a gift wrapping bow in six steps is one of the quickest ways to make any present look more polished and personal. Start with enough ribbon, create two even loops, cross and tuck them carefully, then shape and trim the finished bow so it looks balanced. That is the whole secret. No wizardry. No boutique-level initiation ceremony. Just a simple technique that gets better every time you use it.
Once you master the basic version, you can experiment with ribbon textures, layered bows, curly accents, and seasonal details. But even the simplest handmade bow can transform a package from “I wrapped this” to “I wrapped this and absolutely expect admiration.” Which, honestly, is fair.


