Table of Contents >> Show >> Hide
- What a Miter Saw Actually Does (And Why It’s So Useful)
- Safety First: The “Keep-Your-Fingers” Checklist
- Set Up Your Miter Saw Like You Mean It
- How to Make Your First Cut (Step-by-Step)
- How to Use a Sliding Miter Saw (The “Out-Down-Back” Move)
- Dialing In Angles: Miter, Bevel, and Compound Cuts
- Common Projects and Exactly How to Cut Them
- How to Get Cleaner Cuts (Less Tear-Out, Less Drama)
- Stop Blocks and Repeat Cuts: The “Why Didn’t I Do This Earlier?” Trick
- Mistakes Beginners Make (So You Don’t Have To)
- Maintenance and Calibration: Keep It Cutting Like New
- Wrapping It Up: The “Pro” Formula
- Experience Notes From Real-World Cutting (About )
A miter saw is basically the “make-it-look-like-a-pro-did-it” machine of the DIY world. It takes boards that look
like they were cut by a beaver with a caffeine problem and turns them into crisp trim, clean picture frames, tidy
baseboards, and tight corners. But it’s also a spinning blade that doesn’t care how confident you feel todayso we
’ll do this the smart way: safe, accurate, and repeatable.
What a Miter Saw Actually Does (And Why It’s So Useful)
A miter saw is designed for crosscutscuts across the width of a board. Its superpower is making
those crosscuts at precise angles.
Key cut types (in plain English)
- Straight crosscut: A 90° cut (square end).
- Miter cut: The blade stays straight up-and-down, but the table turns left/right for angled cuts (think corners).
- Bevel cut: The table stays at 0°, but the blade tilts for an angled face cut.
- Compound cut: Both miter + bevel at the same time (trim and crown molding live here).
- Sliding crosscut: A sliding saw lets the head move forward/back so you can cut wider boards.
Safety First: The “Keep-Your-Fingers” Checklist
If you only read one section, read this one. Most miter saw injuries happen from rushing, awkward hand positions,
tiny offcuts, or trying to “just hold it real quick.” The saw will win that argument every time.
Personal protective gear that’s actually worth wearing
- Eye protection: Non-negotiable. Chips fly.
- Hearing protection: Miter saws are loud enough to make your ears file a complaint.
- Dust protection: Especially if you’re cutting MDF, treated lumber, or doing lots of cuts.
Operating rules that prevent most accidents
- Keep hands out of the “no-hands zone”: Many guides recommend keeping your fingers at least about 6 inches away from the blade path. If your hand would be closer, clamp the workpiece.
- Let the guard work: Don’t bypass it. A functioning lower guard should move freely and return automatically.
- Wait for a full stop: After the cut, keep the head down briefly and don’t lift until the blade stops spinning completely.
- Never “cross-arm” cut: Don’t hold the right side of the blade with your left hand (or vice versa). It’s awkward, unstable, and dangerous.
- Support long boards: If the board tips, it can pinch the blade or shift mid-cut.
- Don’t cut tiny pieces freehand: Use a clamp, a jig, or cut longer stock and trim down safely.
Set Up Your Miter Saw Like You Mean It
Great cuts start before you touch the trigger. A wobbly setup makes even an expensive saw cut like a budget horror
movie. Here’s how to set it up for clean, predictable results.
1) Mount it solidly
Bolt the saw to a sturdy bench or a proper miter saw stand. If it can rock, twist, or dance during a cut, your
angles will driftand your stress level will rise.
2) Check the blade (sharp, correct type, installed correctly)
Use a blade designed for your material. For woodworking, higher-tooth-count blades generally leave cleaner cuts
(great for trim), while lower tooth counts cut faster but rougher (fine for framing). A dull blade increases tear-out,
burning, and the chance of the workpiece shifting.
3) Confirm the saw is square
Even new saws can get knocked out of alignment in shipping. Before a real project cut:
- Set miter to 0° (or the 90° crosscut position).
- Set bevel to 0° (blade straight up).
- Use a speed square or combination square against the blade body (not the teeth) and fence.
- Make a test cut on scrap and check with a square.
If it’s off, consult your manual for fence, bevel stop, or miter detent adjustments. A small error at the saw becomes
a big gap at the cornerespecially on trim.
How to Make Your First Cut (Step-by-Step)
Let’s walk through a basic, safe crosscut. Do this a few times on scrap and you’ll feel confident fast.
Step 1: Mark the board
Measure, mark with a pencil, and if you want extra accuracy, “knife” the line lightly (utility knife) for a crisp edge.
Decide which side is the “keep” piece and which side is waste. (This prevents the classic “why is my board suddenly 3/8-inch shorter?” moment.)
Step 2: Place the board correctly
- Lay the board flat on the table.
- Press it firmly against the fence (this is your reference surface).
- Support long stock on both sides so it stays level.
Step 3: Clamp when needed
If the piece is short, narrow, tall, or would put your hand near the blade path, use the hold-down clamp or a quick clamp.
Clamping also helps prevent the workpiece from creeping during the cut.
Step 4: Dry-run the cut path
With the saw OFF, lower the blade slowly to see where it lands relative to your mark. This is where laser/shadow lines help,
but your eyes + a dry run still win for trustworthiness.
Step 5: Start the saw and let it reach full speed
Start the motor, pause a beat for full speed, then lower smoothly through the cutno slamming, no “drop cut” drama.
Step 6: Finish and pause
After the blade passes through, keep the head down briefly, release the trigger, and wait for the blade to stop completely
before lifting. This prevents offcuts from catching the blade on the way up.
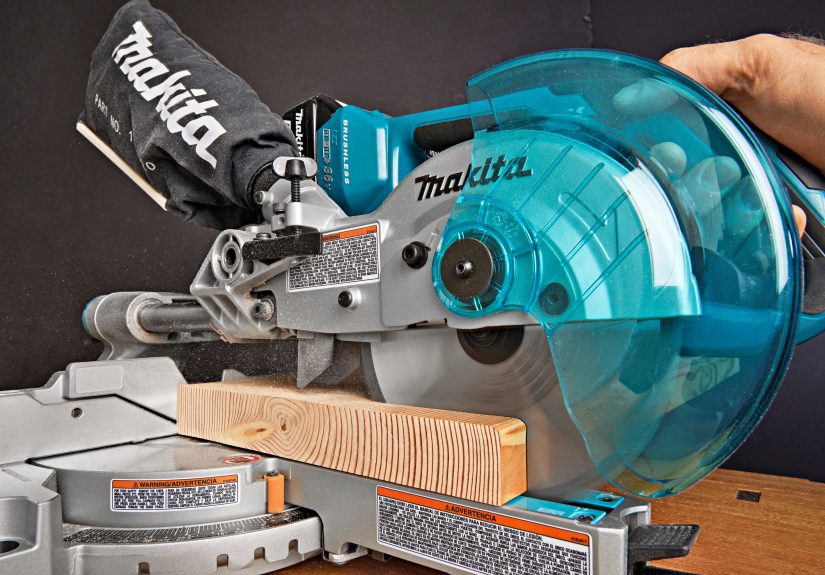
How to Use a Sliding Miter Saw (The “Out-Down-Back” Move)
Sliding saws cut wider boards, but they add one more way to make a mistake: pulling the spinning blade toward you like
you’re starting a lawnmower. Many manuals and tool educators recommend a safer sequence:
- Pull out: With the motor OFF, pull the saw head toward you (front of travel).
- Start: Power on and let it reach full speed.
- Down: Lower the blade into the workpiece.
- Back (push): Push the head back toward the fence to complete the cut.
Pushing through the cut helps keep the workpiece pressed against the fence and reduces the chance of a “climb” behavior
that can make the saw lurch. Translation: smoother cut, fewer surprises.
Dialing In Angles: Miter, Bevel, and Compound Cuts
Miter cuts (rotating the table)
Use miter cuts for cornerslike picture frames, door casing, and baseboard outside corners. Most saws have detents at common
angles (0°, 15°, 22.5°, 31.6°, 45°). Lock the table firmly before cutting.
Bevel cuts (tilting the blade)
Bevel cuts angle the face of the board. These are common for trim, joinery details, and some stair/handrail work.
Before you cut, do a clearance check: with the saw OFF, lower the head to ensure the blade and guard won’t collide with the fence.
Compound cuts (miter + bevel together)
Compound cuts are where miter saws earn their keepespecially for crown molding and complex trim. The trick is to test-fit
with scrap first and label pieces (“left inside,” “right outside”) so you don’t invent new words you can’t say in polite company.
Common Projects and Exactly How to Cut Them
1) Picture frame corners
- Set miter: 45° (left or right depending on the corner).
- Bevel: 0°
- Tip: Cut all four pieces with the same face up to keep the profile consistent.
2) Baseboards (simple outside corner)
- Typical miter: 45° for a perfect 90° corner (but walls are often not perfecttest fit).
- Pro tip: If your corner is “open,” adjust a degree or two and sneak up on the fit rather than forcing caulk to do structural engineering.
3) Crown molding (the famous brain-bender)
You have two common approaches:
- Upside-down and backward: Hold the crown against the fence at the same spring angle it will sit on the wall/ceiling, then cut your miters (often 45° for standard corners).
- Cut flat with compound angles: Lay the crown flat and use miter + bevel settings based on the molding’s spring angle (common spring angles include 38° and 45°). This method is consistent once set up, especially for repeat work.
Either way, do test cuts on short scrap pieces. Crown molding punishes optimism and rewards labeling.
How to Get Cleaner Cuts (Less Tear-Out, Less Drama)
Upgrade your cut quality with these habits
- Use the right blade: Higher tooth count for trim and finished edges; keep it sharp.
- Add a sacrificial fence: A simple wooden fence attached to your saw fence can reduce tear-out and support fibers right at the cut.
- Use a zero-clearance insert: Tight clearance around the blade supports the underside of the cut.
- Let the blade do the work: Forcing the cut increases vibration and splintering.
- Stabilize the work: Level support on both ends reduces pinching and shifting.
Stop Blocks and Repeat Cuts: The “Why Didn’t I Do This Earlier?” Trick
If you need ten pieces exactly 12 inches long, don’t measure ten times and hope your pencil behaves. Set a stop block:
- Clamp a straight scrap or stop system to your fence or support wing.
- Measure once from the blade to the stop (accounting for blade kerf if needed).
- Butt each board against the stop and cut.
This is how trim carpenters look magically consistent. It’s not magic. It’s laziness with excellent planning.
Mistakes Beginners Make (So You Don’t Have To)
- Cutting without checking square: Your “45°” corners won’t close if your “0°” isn’t true.
- Not locking the angle: A slightly loose miter lock = mystery angles.
- Grabbing offcuts too early: Wait for the blade to stop.
- Trying to cut pieces that are too short to hold safely: Use jigs/clamps or cut longer stock first.
- Pull-cutting on a slider: Start out front, cut down, push back through (don’t pull a spinning blade toward yourself).
- Ignoring support: Unsupported long boards tip, pinch, and ruin accuracy.
Maintenance and Calibration: Keep It Cutting Like New
A miter saw can stay accurate for a long time, but only if you treat it like a precision tool instead of a battlefield relic.
- Keep the blade sharp: Dull blades cause burning, tear-out, and wandering cuts.
- Clean pitch and resin: A gunked-up blade cuts hotter and rougher.
- Check fence alignment: If cuts aren’t square, tune the fence to the blade (and confirm the fence is straight).
- Verify bevel stops: Your 0° and 45° bevel stops should actually be 0° and 45°.
- Dust management: Use a shop vac if possible and keep the work area clear so scraps don’t interfere with the workpiece seating.
Wrapping It Up: The “Pro” Formula
Here’s the simple recipe for using a miter saw like you’ve been doing it for years:
stable setup + sharp blade + correct hand placement + slow, controlled cuts + test cuts for angles.
That’s it. Not complicatedjust consistent.
Experience Notes From Real-World Cutting (About )
Once you start using a miter saw regularly, you’ll notice something funny: the tool itself isn’t what makes your work
look “DIY” or “done-by-a-pro.” It’s all the little in-between momentshow you set the board down, how you support it,
whether you rush, and whether you treat “close enough” like a measurement unit.
One of the most common experiences people have is discovering that the first cut is rarely the problem. The second cut
is where reality shows up. The board shifts a hair because it wasn’t pressed firmly to the fence. The offcut bounces
because the blade was lifted too soon. Or the measurement is “perfect,” but your corner isn’t actually 90 degreesso
your two 45s produce a gap that stares at you like it pays rent.
That’s why seasoned DIYers tend to develop a few habits that look boring but save entire weekends. They keep a “scrap
bucket” of short test pieces right next to the saw so they can do quick trial cuts. They mark the waste side boldly,
because subtle pencil marks disappear the moment sawdust hits the scene. They get friendly with stop blocks, because
measuring the same length twelve times is just asking your tape measure to prank you.
Another very relatable moment: you’ll eventually cut a board with the “pretty side” facing the wrong direction and
wonder why the front edge chipped. That’s when you learn grain direction, blade quality, and tear-out prevention
aren’t “advanced woodworking”they’re just what happens when you care about the edge you’ll actually see. A sharper,
higher-tooth-count blade and a sacrificial fence feel like overkill… right up until your trim stops looking fuzzy.
If you work with trim or molding, you’ll also learn the power of labeling. Not “L” and “R” in tiny lettersbig, obvious
labels like “INSIDE LEFT” or “OUTSIDE RIGHT,” plus arrows showing which edge goes up. This sounds dramatic until you’re
holding a piece of crown molding upside down, backwards, at an angle, trying to remember which side was supposed to be
the ceiling. In that moment, labels are kindness.
Finally, there’s the patience factor. A miter saw rewards calm. When you slow down just a touchletting the motor hit
full speed, lowering the head smoothly, pausing until the blade stopsyou’ll see your cuts get cleaner and your
confidence get quieter (in a good way). And once you’ve had a few projects come together with tight corners and crisp
joints, you’ll understand the best “experience lesson” of all: accurate cutting isn’t a talent. It’s a routine.


