Table of Contents >> Show >> Hide
- What Is the Kilburn Shelf Bracket 200mm?
- Why “200mm” Matters (and Why It’s Not Just a Random Number)
- Strength and Load Rating: What “40 kg per Bracket” Really Means
- How Many Kilburn 200mm Brackets Do You Need?
- Where You Install Matters: Studs, Drywall, Masonry, and the Laws of Regret
- Installation Overview: A Clean, Confident Install (Without the Drama)
- Design Ideas: Making the Kilburn 200mm Bracket Look Like It Was Always Meant to Be There
- Care and Finish: Keeping Antique Brass Looking Intentionally Awesome
- Common Mistakes (and How to Avoid the Shelf of Shame)
- Quick FAQ
- Conclusion: The “Right Bracket” Is the One You Don’t Have to Think About Later
- Real-World Experiences: Living With the Kilburn Shelf Bracket 200mm
Some home upgrades shout. Others quietly flex. The Kilburn Shelf Bracket 200mm is firmly in the “quiet flex” category:
a bracket that looks like it belongs in a design magazine, but behaves like it belongs in a workshop. If you’ve ever installed a shelf that
looked great… right up until it started doing that slow-mo sag of despair, you already understand why bracket choice matters.
This guide breaks down what the Kilburn 200mm bracket is, what “200mm” actually means in real-life shelf decisions, how to install it without
inventing new swear words, and how to keep that beautiful brass finish looking intentionally aged (instead of “oops, I cleaned it wrong”).
What Is the Kilburn Shelf Bracket 200mm?
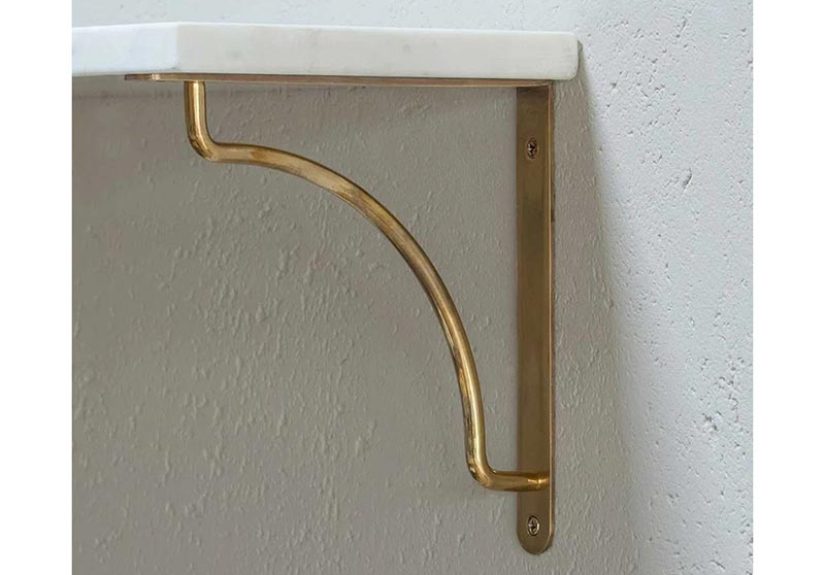
The Kilburn Shelf Bracket 200mm is a decorative, sturdy shelf support designed to hold practical loads (books, cookware, plant pots) while also
acting like hardware jewelry for your walls. It’s commonly described as solid brass with an Antique Brass finish that’s
aged and intended to develop patina over timea “living” finish that changes with use and environment. It’s typically sold individually,
includes matching fixings, and is also available in a smaller 150mm size. Importantly, it’s often listed with a 40 kg per bracket
support rating under appropriate conditions.
Why “200mm” Matters (and Why It’s Not Just a Random Number)
“200mm” is the bracket’s size categoryroughly about 7.9 inches. In shelf-bracket land, that number influences two big things:
shelf depth and how stable the shelf feels when you actually use it.
Depth: How Deep of a Shelf Works Best?
A common sizing guideline is to pick a bracket that’s slightly shorter than your shelf depth, and ideally supports at least
two-thirds of the shelf depth. So, a 200mm (about 8-inch) bracket is a natural match for shelves in the neighborhood of
10–12 inches deepdeep enough to be useful, not so deep that you’re basically installing a countertop at eye level.
Stability: The “Lean Test”
Real shelves aren’t museum exhibits. People rest elbows, shove books back, and scoot baskets around. A bracket that’s too short for the shelf depth
can make the front edge feel springy (aka: “Why does my shelf feel like a trampoline?”). The 200mm size tends to hit a sweet spot for everyday
storage shelves that still look light and refined.
Strength and Load Rating: What “40 kg per Bracket” Really Means
The phrase “supports 40 kg per bracket” sounds wonderfully confident, but shelves live in the real world, where walls vary and physics
never takes a day off. Think of that rating as the bracket’s potential under proper installation into solid structure, with suitable fasteners,
and sensible shelf design.
A Practical Way to Think About Load
- Bracket strength is only one part of the system.
- Wall strength (studs vs. drywall vs. masonry) often becomes the limiting factor.
- Fasteners and anchors can dramatically change what’s safe.
- Shelf material and span matter (a long shelf can bow even if the brackets don’t).
If you’re planning a “cookbook shelf” (translation: dense paper bricks), you want brackets anchored into studs when possible, and you’ll likely want
more than the minimum number of brackets. If you’re planning a “two plants and a candle” shelf, you’ve got far more margin.
How Many Kilburn 200mm Brackets Do You Need?
The minimum is always twoone at each end. After that, it’s about shelf length, shelf material, and load.
Simple Bracket Count Examples
- Up to ~24–36 inches: 2 brackets can work for light-to-moderate loads, but 3 feels sturdier for books or dishes.
- ~36–48 inches: 3 brackets is the “sleep well at night” choice for most uses.
- Over ~48 inches: Plan on 4+ brackets, especially if you’re storing heavier items.
Big-box guidance often suggests spacing brackets no more than 24 inches apart for light-to-medium loads, and tightening spacing for
heavier loads. That’s a great baseline because it keeps both the bracket load and shelf deflection under control.
Where You Install Matters: Studs, Drywall, Masonry, and the Laws of Regret
Studs: The Gold Standard
In many U.S. homes, wall studs are commonly spaced 16 inches apart (sometimes 24 inches), though older homes can be more “creative.”
Mounting into studs gives you the most reliable strength for shelves that will carry meaningful weight.
Drywall Without Studs: Anchors Are Not All Equal
If you can’t land on studs, you’re in anchor territory. Heavy-duty drywall anchors (like toggle bolts) can work well when chosen correctly and used
as directed. The key is to match the anchor to both the wall type and the expected loadthen keep expectations realistic. Drywall is not structural.
It is, at best, a cooperative bystander.
Masonry and Tile: Strong, but Technique-Sensitive
Brick and concrete can be excellent for shelvingif you drill correctly and use appropriate masonry anchors or screws. Tile requires extra care to
prevent cracking (and to avoid turning your backsplash into abstract art).
Installation Overview: A Clean, Confident Install (Without the Drama)
The general installation flow is consistent across reputable shelf-install guides: plan placement, find solid mounting points, mark level lines,
pre-drill, fasten brackets, then attach the shelf and verify level. The Kilburn-style instructions commonly specify a straightforward tool list
(drill, bits, screwdriver, spirit level) and emphasize careful marking and drilling.
Step-by-Step (Bracket-Style Shelves)
- Plan the shelf’s job: decor, books, cookware, or plants? This drives bracket count and spacing.
- Find structure: locate studs (best) or choose anchors rated for your wall type.
- Mark the height line: use a level. (Yes, this is the part everyone “eyeballs” and later regrets.)
- Position the first bracket: mark hole locations through the bracket.
- Pre-drill: drill pilot holes; for anchor installs, drill to the recommended diameter and depth for your specific anchors.
- Fasten securely: attach the bracket to the wall using appropriate screws/anchors; avoid over-tightening that can strip material.
- Repeat and level-check: set the next bracket(s), checking level across bracket tops before fully tightening.
- Attach the shelf: for wood shelves, screw the shelf to brackets; for stone shelves, use an appropriate contact adhesive method
recommended by the shelf manufacturer. - Final check: confirm level, tighten as needed, then load the shelf gradually.
Special Note on Shelf Materials
- Timber shelves: typically fastened from underneath into the shelf with short wood screws.
- Stone shelves: often secured with a strong contact adhesive or specialty tape/adhesive system designed for stone and load.
If you’re building a “forever shelf” (like a heavy stone slab over a coffee station), treat it like a small structural project: overbuild,
use quality anchors, and don’t guess on adhesive suitability.
Design Ideas: Making the Kilburn 200mm Bracket Look Like It Was Always Meant to Be There
A decorative bracket can either elevate a room or look like an afterthought. The trick is to make the bracket finish, shelf material, and wall color
feel intentionally connected.
Kitchen: Open Shelving That Doesn’t Feel Like “I Ran Out of Cabinets”
- Warm + classic: antique brass bracket + white oak shelf + creamy wall paint.
- Modern contrast: brass bracket + dark-stained walnut shelf + matte white backsplash.
- Workhorse setup: three brackets under a longer shelf for cookbooks, canisters, and your “I bake now” stand mixer dreams.
Bathroom: Small Depth, Big Payoff
Bathrooms often benefit from shelves that are useful but not bulky. A 200mm bracket works nicely for shelves that hold towels, baskets, and daily
essentialswithout sticking out so far that you feel like you’re dodging furniture while brushing your teeth.
Living Room: Styling That Survives Real Life
- Use two shelves stacked for a mini-library wall.
- Keep heavier items closer to brackets; lighter decor out toward the edges.
- Leave breathing room: shelves look better when they’re not packed like a junk drawer with ambition.
Home Office: The “I Need Storage But I Also Need Zoom Background Cred” Shelf
A solid shelf with a refined bracket can hold reference books, a printer, or storage boxeswhile still looking polished on camera.
Bonus: brass reads as warm and intentional, even when the rest of your desk is controlled chaos.
Care and Finish: Keeping Antique Brass Looking Intentionally Awesome
Antique brass finishes are often meant to patina over time, responding to moisture, air, and handling. That’s the point: it develops character.
If you want “perfectly unchanged,” antique finishes are basically telling you, politely, “wrong vibe.”
Everyday Care
- Use a mild detergent and a damp cloth.
- Avoid harsh chemical cleaners and aggressive abrasives that can scratch or strip finishes.
- Dry thoroughly after cleaningmoisture accelerates tarnish and spotting.
Cleaning Brass: When You Want Shine (or When You Accidentally Fingerprinted Everything)
For general brass cleaning, many expert sources recommend gentle methods and caution against harsh or abrasive cleaners. Some popular DIY approaches
use mild acids (like lemon or vinegar) and light abrasion, but these can also alter patinaso proceed carefully if you like the aged look.
For heavier tarnish, ketchup is frequently cited as a mild-acid option (yes, really).
If your goal is to preserve the bracket’s aged character, the safest move is simple: clean gently, avoid over-scrubbing, and let the finish do its
living-finish thing.
Common Mistakes (and How to Avoid the Shelf of Shame)
1) Using Too Few Brackets
Two brackets might hold a short shelf, but longer shelves need additional support. If you’re debating whether to add a bracket, that’s usually the
moment to add the bracket.
2) Mounting Only to Drywall for Heavy Loads
Drywall anchors can be effective, but they have limits and require correct selection and installation. For heavy loads, studs (or properly rated
masonry anchors in masonry) are the safer bet.
3) Ignoring Shelf Overhang and Leverage
Deep shelves and big overhangs increase leverage, which increases stress on fasteners and wall material. Choose a shelf depth that matches bracket
size and intended use.
4) Rushing the Leveling Step
A shelf that’s slightly out of level is one of those things you can’t unsee. Take the extra minute. Your future self will thank you (quietly, while
placing items that no longer slide to one side).
Quick FAQ
Is a 200mm bracket “big enough” for a kitchen shelf?
For many kitchen shelves in the 10–12 inch depth range, yes. If you want deeper shelves (or plan to store heavy items), consider adding brackets or
choosing a bracket size that better matches the shelf depth guideline.
How far apart should brackets be spaced?
A common guideline for light-to-medium loads is no more than 24 inches apart, with closer spacing for heavier loads. Shelf length,
shelf material, and wall structure all matter.
Do I need to hit studs?
For maximum strength, yesespecially for heavy shelves. If you can’t hit studs, use appropriately rated anchors for your wall type, and reduce the
load expectations accordingly.
Conclusion: The “Right Bracket” Is the One You Don’t Have to Think About Later
A good shelf bracket does two things at once: it disappears structurally (meaning it simply works), and it shows up aesthetically (meaning it looks
like it belongs). The Kilburn Shelf Bracket 200mm is designed to do exactly thatsupport a practical shelf, while adding warmth and character through
its brass finish and clean, classic lines.
Nail the basicsproper spacing, solid mounting, shelf depth that makes senseand you get a shelf that feels steady, looks intentional, and ages
gracefully. In other words: a shelf you’ll still like after the novelty wears off. Which is the highest compliment any piece of hardware can receive.
Real-World Experiences: Living With the Kilburn Shelf Bracket 200mm
Here’s what “real life” tends to look like once you actually install a 200mm decorative bracket shelfbecause the moment the drill goes back in the
drawer, the shelf starts auditioning for its new job title.
Experience #1: The Coffee Station Shelf That Becomes a Morning Ritual. A common first project is a single shelf above a coffee bar:
mugs, a canister of beans, maybe a small tray with sweeteners. With a 200mm bracket, the shelf depth often feels just rightdeep enough to hold a
standard mug without it teetering, but not so deep that it steals headroom or dominates the wall. The surprising part is how quickly the shelf turns
into a “set it and forget it” feature. You stop noticing it because it simply does its job, but guests notice it because the brass detail reads as
curated instead of purely utilitarian.
Experience #2: The Patina Story (a.k.a. “Why Does It Look Different Already?”). Antique brass finishes are meant to shift over time.
Early on, people sometimes panic when they see darkening near touch pointsaround the front curve, near where hands naturally steady items, or by
where you wipe dust most often. That’s not failure; that’s the finish doing what it’s supposed to do. The trick is deciding what you want: a uniform
look (clean gently and consistently) or a lived-in look (clean lightly and let time do its thing). Either can be beautifuljust don’t bounce between
“polish everything” and “never touch it” unless you enjoy unpredictable results.
Experience #3: The “I Installed It Perfectly… Why Is It Crooked?” Moment. This usually isn’t the bracket’s fault. Walls can be out of
plumb, shelves can have slight warps, and tile lines can create optical illusions that mess with your brain. The fix is almost always the same:
confirm bracket tops are level with an actual level (not vibes), then check that the shelf board itself is straight. If the shelf board is bowed,
flip it or replace it. A high-end bracket paired with a twisted board is like wearing a tuxedo with Crocstechnically allowed, emotionally confusing.
Experience #4: The Upgrade Cascade. Once one shelf looks good, you’ll want another. And then suddenly you’re matching finishes:
cabinet pulls, hooks, towel bars. This isn’t a problem. This is how design hobbies quietly take over a weekend. The Kilburn bracket’s appeal is that
it plays well with other warm metals and natural materials. It can look classic with oak, modern with walnut, and surprisingly crisp against painted
drywallespecially deep colors like navy, forest green, or charcoal.
Experience #5: The Load Reality Check. Many people start with “light decor” and end with “why are there 18 cookbooks up there?”
The shelf will tell you what it thinks about that decision. If it feels bouncy, add a bracket. If the shelf bows, add a bracket (and consider a
stiffer shelf material). If you used anchors and the shelf is now a mini-library, re-evaluate before gravity does it for you. The best real-world
lesson is simple: shelves reward overbuilding. Nobody has ever stared lovingly at a failed shelf and said, “Worth it.”
In the end, the most satisfying experience is the quiet one: you put things on the shelf, they stay there, the shelf looks great, and you never have
to think about it again. That’s the dream. That’s the bracket’s whole job. And when a bracket pulls that off while also looking like a design detail,
it’s not just hardwareit’s a small daily win.


