Table of Contents >> Show >> Hide
- The 10-Second Answer (Cheat Sheet)
- Meet the Three Contenders
- How to Choose the Right Filler (Without Overthinking It)
- Spackle vs Joint Compound: The Real Differences That Matter
- When Epoxy Is the Best Answer (And When It’s Overkill)
- Specific Examples: Picking the Winner for Common Repairs
- How to Use Each Product Like a Pro (Without Pretending to Be One)
- Common Mistakes (And How to Avoid the Pain)
- FAQ: The Questions Everyone Asks (Usually While Holding a Putty Knife)
- Bottom Line: Which One Is “Best”?
- Real-World Repair Stories & Lessons (So You Don’t Learn the Hard Way)
You’ve got a hole. The wall is judging you. And the hardware store aisle is… also judging you.
If you’ve ever stood in front of a shelf of tubs, buckets, sticks, and mystery-goos wondering,
“Why are there three different ways to fill a hole that I swear wasn’t there yesterday?”
welcome. Today we’re settling the debate: spackle vs. joint compound vs. epoxy.
The truth is: they’re all “fillers,” but they don’t behave the same. One dries fast and sands like a dream.
One is basically the MVP of drywall finishing. One is the strong, slightly intense friend that can fix
almost anything… if you don’t annoy it during cure time.
The 10-Second Answer (Cheat Sheet)
- Use spackle for small drywall dings, nail holes, tiny screw holes, and shallow dents.
- Use joint compound for drywall seams, bigger patches, feathering wide areas, and anything that needs tape.
- Use epoxy when you need strength, moisture resistance, or you’re repairing wood/metal/concretenot just drywall.
Now let’s get specific, because “small” means different things to different people. (So does “quick fix,”
but that’s a separate emotional journey.)
Meet the Three Contenders
1) Spackle: The Quick-Dry Cosmetic Surgeon
Spackle is typically a gypsum-based paste with bindersthicker than joint compound and made for
small repair jobs. Think: pinholes, nail holes, minor dents, little cracks that haven’t joined a union.
Many spackles dry quickly, often in under an hour depending on product, temperature, and humidity.
Best at: fast, clean, shallow repairs that you want to sand and paint without turning it into a weekend project.
Not great at: deep voids, wide gaps, or repairs that flex a lotunless you’re using a specialty spackle rated for that depth.
2) Joint Compound: The Drywall Workhorse (a.k.a. “Mud”)
Joint compound is what drywall finishers use to embed tape, smooth seams, and blend repairs so well
the wall looks like it was born that way. It’s usually thinner than spackle, spreads across a wider area,
and is designed for layering and feathering.
Joint compound comes in multiple types: all-purpose, topping, taping, and fast/setting options.
Ready-mix products are convenient and easy to work with, while setting compounds (“hot mud”) are
great when you need speed or humidity resistance.
Best at: drywall seams, taped repairs, larger patches, skim coats, and blending edges.
Not great at: sticking to lots of non-drywall surfaces (depending on product), or surviving heavy moisture without the right system.
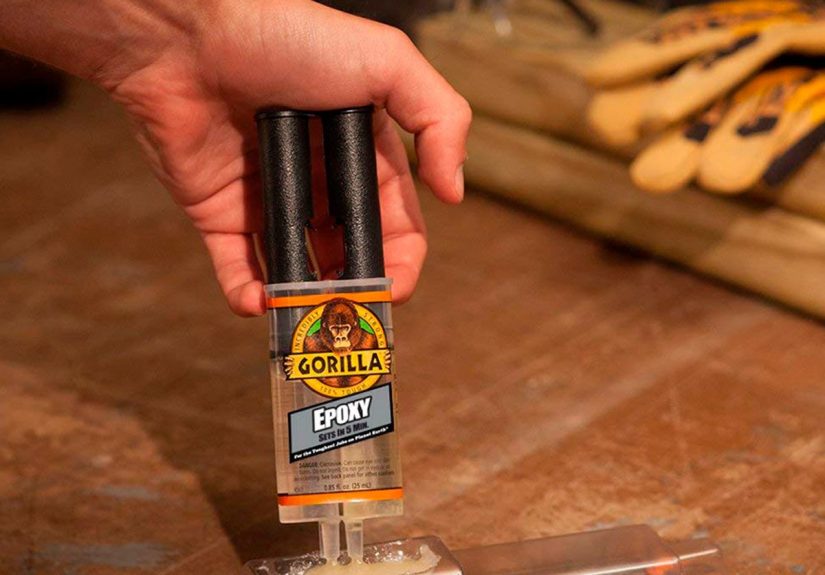
3) Epoxy: The “Hold My Beer” Fixer
Epoxy is a two-part system (resin + hardener) that cures via a chemical reaction into a tough, durable material.
Epoxy putties and fillers can bond to many surfaces and are often used for repairs where you need
strength, water resistance, or material rebuildingespecially in wood rot repair or
in places where a normal wall filler would crumble, shrink, or surrender.
If spackle is makeup and joint compound is a tailored suit, epoxy is a full-body cast: not always necessary,
but spectacular when you actually need it.
How to Choose the Right Filler (Without Overthinking It)
Step 1: Identify the Surface
Drywall (painted interior walls/ceilings):
- Small holes/dents: spackle
- Medium to large holes, cracks needing tape, patches: joint compound
- High-humidity areas or same-day multi-coat repairs: setting-type joint compound
Plaster walls (older homes):
- Hairline cracks and small chips: spackle or joint compound (often best with reinforcing steps)
- Recurring cracks: joint compound with appropriate tape/mesh and wider feathering
Wood (trim, doors, window sills, baseboards):
- Cosmetic dents that won’t take abuse: spackle can work for paint-grade trim
- Stripped screw holes, missing chunks, rot repair: epoxy wood filler/putty
Metal, concrete, masonry, fiberglass, ceramics:
- Cracks, chips, holes: epoxy putty is often the most reliable choice
Step 2: Match the Filler to the Hole Size (Practical, Not Perfect)
| Hole Type | Typical Cause | Best Filler | Why |
|---|---|---|---|
| Nail/pin holes | Picture hooks, brads | Spackle | Fast, minimal shrink, easy sanding |
| Small screw holes / tiny dents | Shelves, minor impacts | Spackle (or lightweight joint compound) | Quick, clean, good finish |
| Anchor holes (toggle/plastic anchors) | TV mounts, curtain rods | Joint compound (often 2 coats) | Better feathering and blending |
| Cracks > hairline | Settlement, seams moving | Joint compound + tape | Reinforcement prevents re-cracking |
| Holes 2–4 inches | Doorknob hits, accidents | Patch + joint compound | Needs structure + smooth finish |
| Holes > 4 inches | “I was moving furniture” | Drywall patch + tape + joint compound | Needs backing, tape, multi-coat blend |
| Rotted wood voids | Window trim, exterior rot | Two-part epoxy system | Rebuilds strength, resists moisture |
| Chipped concrete/metal | Garage, steps, tools | Epoxy putty | Bonds to tough surfaces, durable |
Spackle vs Joint Compound: The Real Differences That Matter
Drying Time vs. “Ready for Paint”
Spackle often dries faster than joint compound. Many products can be paint-ready quickly for small repairs,
but always check the label because humidity, thickness, and temperature can stretch dry times.
Joint compoundespecially ready-mixcommonly needs longer between coats, and big patches can require
overnight drying.
Shrinkage and Cracking
Joint compound tends to shrink more than spackle when applied thickly, which is why pros build repairs in
thin layers. Spackle is often more elastic thanks to binders, helping it hold shape in small repairs.
If you want fewer “surprise dimples,” thin coats are your friend no matter what product you use.
Sanding and Finish Quality
Spackle usually sands easily when used in small areas. Joint compound is also sandable, but a big patch
may generate a dust cloud large enough to qualify as weather. Setting-type joint compounds can be fantastic
for speed and fill, but some formulas get harder to sandso apply neatly and plan for less “fix it with sanding.”
When Epoxy Is the Best Answer (And When It’s Overkill)
Use Epoxy When You Need Strength or Moisture Resistance
- Rotted wood trim: Epoxy systems can be used to consolidate damaged fibers and rebuild missing sections.
- Stripped screw holes in doors/hinges: Epoxy putty can fill, cure, then be drilled for new screws.
- Non-drywall materials: Epoxy putties often bond to metal, concrete, masonry, fiberglass, and ceramics.
- Areas that get wet: Many epoxy putties are rated for wet or damp conditions (read product limits).
Skip Epoxy When You Just Need a Smooth Wall
Epoxy can be more expensive, less forgiving, and has a working time. For a basic nail hole in a living room wall,
epoxy is like using a sledgehammer to open a bag of chips: impressive, but you’ll regret the mess.
Specific Examples: Picking the Winner for Common Repairs
Example 1: A Dozen Nail Holes From a Gallery Wall
Pick: Spackle.
Why: Fast drying, minimal fuss, easy sanding. Use a putty knife, press it in, scrape flush, let it dry, sand lightly, paint.
Example 2: A Drywall Anchor Hole (The “Why Was This Here?” Special)
Pick: Joint compound (or a repair kit with mesh patch + compound).
Why: Anchor holes are often wider than they look. Joint compound feathers nicely so the repair disappears after paint.
Plan on at least two thin coats for a flatter finish.
Example 3: A Crack That Keeps Coming Back Like a Bad Sequel
Pick: Joint compound + tape (paper or fiberglass mesh, depending on the situation).
Why: Cracks often need reinforcement, not just filling. Tape bridges movement and helps prevent the crack from telegraphing through.
Example 4: Soft, Rotted Window Trim Outdoors
Pick: Two-part epoxy repair system.
Why: You’re not “filling a hole”you’re rebuilding material. Epoxy can bond and harden into a durable repair that can be shaped and painted.
Prep matters: remove loose rot, stabilize what remains, then rebuild in layers.
How to Use Each Product Like a Pro (Without Pretending to Be One)
How to Spackle a Small Hole (Best for Nail/Screw Holes)
- Clean the area: Remove loose paint and dust. A quick wipe helps adhesion.
- Press spackle into the hole: Use a putty knife (or your finger for tiny pinholes).
- Scrape flush: Less is more. A thin, smooth layer beats a thick blob every time.
- Let it dry: Follow the product’s labeldry times vary.
- Sand lightly: Use fine grit; don’t crater the wall around your repair.
- Prime if needed, then paint: Some spackles claim “no priming needed,” but primer can help avoid flashing on tricky paints.
How to Repair Drywall With Joint Compound (Medium to Large Repairs)
- Stabilize the edges: Cut away ragged drywall paper and loose material.
- If the crack is wide, tape it: Apply drywall tape, then cover with compound.
- First coat (embed/tack coat): Press compound into gaps, then smooth over tape.
- Second coat: Wider than the firstfeather outward to blend into the wall.
- Third coat (optional but beautiful): Even wider, ultra-thin. This is the “invisible repair” coat.
- Sand between coats (lightly): Knock down ridges; don’t sand through the tape.
- Prime and paint: Especially important if you’ve skimmed a larger area.
Pro move: For time-crunched jobs or humid conditions, consider a setting compound so you can recoat sooner and keep the project moving.
How to Use Epoxy Putty or Epoxy Wood Filler (Strength Repairs)
- Prep the surface: Remove loose, crumbly material. Clean off dust and oils.
- Mix correctly: Two-part systems need proper ratios. With putty sticks, knead until color is uniform.
- Press firmly into the void: Epoxy likes contactpack it in so it bonds well.
- Shape before it cures: The easiest sanding is the sanding you don’t have to do.
- Let it cure fully: “Hard” isn’t always “fully cured.” Follow the label for cure time.
- Sand, drill, or paint: Many epoxies are designed to be worked after curing, but timing matters.
Important reality check: Some epoxy products explicitly say they’re not for structural repairs or certain high-pressure applications.
Read labels like they’re a plot twist.
Common Mistakes (And How to Avoid the Pain)
Mistake: Overfilling and “Sanding Later”
Sanding later is how small repairs turn into large repairs. Apply thin coats and scrape smooth while wet.
Your lungs (and your vacuum) will thank you.
Mistake: Skipping Tape on Cracks
If a crack moves, filler alone is basically a temporary truce. Tape gives the repair reinforcement so it’s less likely to reappear.
Mistake: Painting Too Soon
Paint over damp compound and you may get bubbling, flashing, or a patch that looks like it’s wearing a slightly different shade of regret.
Wait for full dry/cure, then prime and paint.
Mistake: Using the Wrong Product for the Material
Joint compound is amazing… on drywall. Epoxy is amazing… for tough repairs. Spackle is amazing… for small fixes.
Match the product to the job and you’ll stop re-fixing the same spot every six months.
FAQ: The Questions Everyone Asks (Usually While Holding a Putty Knife)
Can I use joint compound instead of spackle?
Often, yesespecially for small wall repairs. Joint compound can fill small holes, but it may take longer to dry and may shrink more,
so you might need an extra coat.
Can I use spackle instead of joint compound?
Sometimes, but not for drywall finishing tasks like embedding tape, finishing seams, or skim coating large areas.
Spackle is for small repairs; joint compound is for the “make it seamless” work.
Is epoxy always waterproof?
Many epoxies are highly water-resistant, but not all are the same, and some have explicit limitations.
Always follow the product’s instructions for wet, damp, or outdoor use.
Why does my patch “flash” after painting?
Differences in porosity and texture can make patches show through paint. Priming helps. So does feathering wider and sanding smooth.
Matching wall texture (orange peel, knockdown, etc.) also matters.
Bottom Line: Which One Is “Best”?
The “best” filler depends on what you’re filling:
- Best for small drywall holes: Spackle
- Best for drywall patches and blending: Joint compound (ready-mix or setting-type, depending on conditions)
- Best for strength repairs and non-drywall materials: Epoxy
If you remember nothing else, remember this: holes don’t just need fillingthey need the right kind of filling.
(Just like donuts. And emotionally complicated group chats.)
Real-World Repair Stories & Lessons (So You Don’t Learn the Hard Way)
Below are the kinds of situations DIYers run into constantlyalong with what typically works best and why.
Consider this the “experience section” your future self wishes you had read before opening that tub and committing to it.
Story 1: The “Gallery Wall Era” and the 37 Tiny Holes
Someone decides to curate a photo wall. It looks great… until the “minimalist phase” hits and everything comes down.
The holes are tiny, but there are so many that you start to wonder if the wall is porous by design.
This is where spackle shines: quick application, quick dry, quick sand. The big lesson? Don’t glob it on.
When you apply spackle thickly over shallow holes, you create a raised “spackle island” that needs extra sanding.
Press it in, scrape it flush, and move on. If you’re repainting the whole wall, you can be slightly less precious.
If you’re only touching up paint, be more carefultexture and sheen differences are ruthless.
Story 2: The Drywall Anchor That Refuses to Leave (and Leaves a Crater)
You remove a shelf, and the anchor comes out like a tiny drywall grenade. The hole is no longer “small,”
it’s “small-ish,” which is the most dangerous category because it tricks people into using spackle when they
really need a better blend. Joint compound wins here because it feathers wider and hides edges better.
The most common mistake is trying to make it perfect in one coat. The compound shrinks a bit, you sand, paint,
and then the patch looks like a faint moon crater under certain lighting. Two thin coats (sometimes three)
is usually the difference between “fixed” and “what is that circle?”
Story 3: The Door Hinge Screw Holes That Keep Stripping Out
A door starts sagging, the hinge screws spin, and suddenly you’re living in a house where the door only closes
if you whisper encouragement to it. Spackle and joint compound are not the heroes herethis is a strength problem.
Epoxy putty (or an epoxy wood repair product) is often used for these “rebuild and re-drill” situations:
fill the stripped holes, let it cure, drill a pilot hole, and reinstall screws. The big lesson is timing:
shape epoxy while it’s workable, because once it cures, it’s not “soft filler,” it’s “new material.”
Also: keep the repair clean. Oil, dust, or loose fibers reduce bond strength.
Story 4: The Bathroom Patch That Keeps Bubbling Through Paint
Bathrooms are humidity gyms. If a repair was rushedpainted too soon, not primed, or made with the wrong product
you can get bubbling, peeling, or a patch that telegraphs through like a watermark.
Setting-type joint compound can be a smart choice for small drywall repairs in humid conditions because it sets
more reliably than air-drying mud when drying conditions are poor. The big lesson: prime your repair before painting,
especially in moisture-prone rooms. And if the wall has texture, don’t ignore itperfectly smooth patches on a lightly
textured wall will stand out forever, like a typo you can’t unsee.
In the end, “experience” usually boils down to three predictable truths:
(1) thin coats beat thick blobs, (2) reinforcement beats wishful thinking, and
(3) the right product saves you from doing the job twice.


