Table of Contents >> Show >> Hide
- What “cutting in around trim” really demands
- The winning shape: angled sash (a.k.a. angled trim) brush
- Bristles: the difference between “clean line” and “why is it fuzzy?”
- Handle style: your hand fatigue is real (and it affects your line)
- So what’s the best paint brush for cutting in around trim?
- Best overall for clean, fast cut lines: a premium 2.5-inch angled sash brush (stiffer synthetic blend)
- Best for tight spaces (and small hands, or small patience): a 2-inch short-handle angled brush
- Best for ultra-smooth trim finishes: softer nylon brush (great for doors and cabinets)
- Best budget approach: a decent 2-inch angled trim brush (but don’t go bargain-bin cheap)
- How to choose the right cutting-in brush (quick checklist)
- Technique: how to cut in around trim without losing your mind
- Prep around trim: boring steps that create beautiful lines
- Brush care: how to make one great brush last for years
- Common cutting-in problems (and quick fixes)
- Quick recommendations recap
- of real-world experience: what actually changes your cut lines
- SEO tags (JSON)
Cutting in around trim is one of those home-improvement skills that feels like it should be easyuntil you’re crouched next to a baseboard,
trying to paint a razor-straight line while your brush enthusiastically attempts modern art.
The good news: the “best brush” choice is less mysterious than the paint aisle wants you to believe.
For most DIYers using modern interior wall paint (aka latex/water-based), the sweet spot is a high-quality 2 to 2.5-inch angled sash brush
with a tipped-and-tapered synthetic bristle blend. That’s the tool that turns wobbly edges into “did you hire a pro?” results.
In this guide, we’ll break down what actually matters (shape, bristles, stiffness, and handle control), recommend reliable brush types for different situations,
and share practical cutting-in technique you can use immediatelyno gimmicks, no mystical wrist flick passed down by secret painter monks.
What “cutting in around trim” really demands
Cutting in is painting a clean border where two surfaces meetmost commonly where the wall meets door casings, window trim, baseboards, or crown molding.
Unlike rolling big open wall areas, cutting in is a precision task. Your brush needs to do three things at once:
- Hold enough paint to make a smooth line without stopping every six inches.
- Release paint evenly so the edge doesn’t blob, drip, or “skip.”
- Stay controllable so your line goes where you wantnot where your forearm twitches.
That’s why the best paint brush for cutting in around trim isn’t necessarily the most expensive brush,
the biggest brush, or the one with the most patriotic packaging. It’s the one designed for edging control.
The winning shape: angled sash (a.k.a. angled trim) brush
If you only remember one thing, make it this: use an angled sash brush.
The angled bristles create a natural “point” for edging, and the wider heel of the brush carries paint so you don’t dry-brush your way into frustration.
A sash brush is also easier to steer along trim profiles and into corners than a flat wall brush.
Best all-around size for trim edges
For most interior cutting-in work, a 2-inch to 2.5-inch angled sash brush is the Goldilocks zone:
wide enough to hold paint, narrow enough to control. Many paint brands and pro guides specifically call out a 2.5-inch angled sash
as a go-to size for cutting in.
Bristles: the difference between “clean line” and “why is it fuzzy?”
Bristles aren’t just hairthey’re engineering. The wrong bristle type can turn a careful cut line into a ragged edge, especially with thicker modern paints.
Here’s the practical breakdown for choosing the best brush for cutting in around trim.
For most interiors (latex/water-based paint): synthetic nylon/polyester blends
If you’re painting walls and trim in a typical home with water-based paints, you’ll usually get your best control from a
high-quality synthetic brush. Many top cutting-in brushes use a nylon/polyester blend:
nylon helps with smoothness and paint pickup, while polyester helps the brush keep its shape and edge controlespecially in warmer or more humid conditions.
When you want extra control (or thicker coatings): stiffer blends or “Chinex-style” filaments
If you’re using thicker coatings, low-VOC paint that feels a bit “draggy,” or you simply want a brush that holds a crisp edge longer,
look for a brush marketed as stiff or extra-stiff, often using durable synthetic filaments (commonly “Chinex-style”)
that maintain stiffness for control.
For oil-based paint or certain varnishes: natural bristle (when appropriate)
Oil-based coatings often behave best with a brush designed for oils (frequently natural bristle).
Many DIYers stick with water-based enamels today, but if you do use oil-based products, match the brush to the coating for smoother flow.
(And yes, cleaning is more of a projectconsider that your friendly warning label.)
Handle style: your hand fatigue is real (and it affects your line)
Cutting in is slow, controlled movement. A comfy, grippy handle can make the difference between steady results and the “my wrist hates me” spiral.
Two handle styles dominate:
- Standard-length handle: great for open areas, a familiar feel, often better leverage.
- Short “stubby” handle: excellent for tight spaces and detailed trim work (behind toilets, next to window stools, narrow returns).
If you paint a lot of trim, having one of each is surprisingly useful: standard handle for general cutting in,
short handle for awkward angles and cramped spaces.
So what’s the best paint brush for cutting in around trim?
The “best” brush depends on your paint type and the kind of trim work you’re doing. Here are reliable, real-world choices by category.
(No, you don’t need twelve brushes. But you also don’t need to suffer through a $1 mystery brush that sheds bristles like it’s molting.)
Best overall for clean, fast cut lines: a premium 2.5-inch angled sash brush (stiffer synthetic blend)
If you want one brush that cuts sharp lines around trim with less fuss, go with a 2.5-inch angled sash made for cut-in performance.
Brushes in this category are designed with tipped-and-tapered synthetic bristles that hold a crisp edge and release paint smoothly.
They’re especially helpful for cutting in walls tight to door casings or baseboards without leaving a chunky ridge.
Who it’s for: most DIYers painting interior walls, especially if you want fewer touch-ups and faster edging.
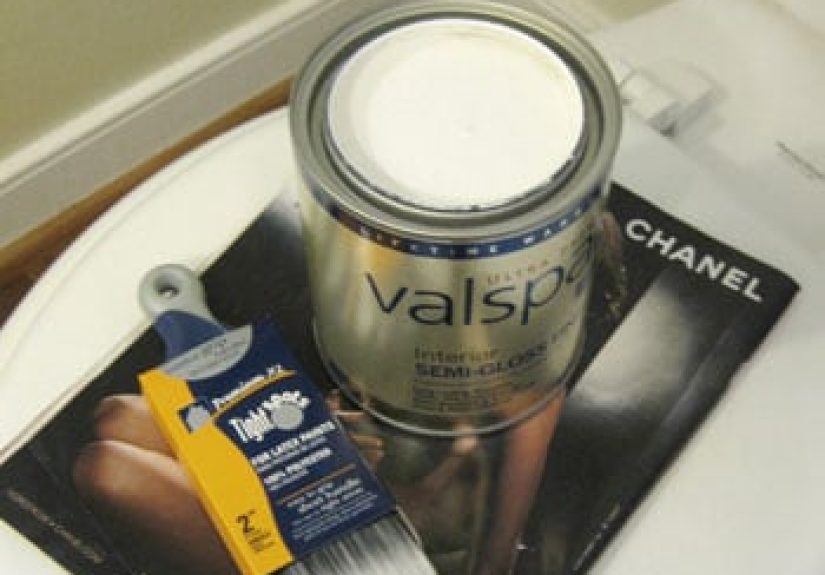
Best for tight spaces (and small hands, or small patience): a 2-inch short-handle angled brush
A short-handle 2-inch angled brush is a secret weapon for trim zones where a full-size handle bumps into everything.
The compact grip lets you “steer” with your fingers like a pencil, which can improve control around window trim corners and narrow baseboard runs.
Who it’s for: bathrooms, tight hallways, behind doors, and anywhere your elbow keeps hitting the wall.
Best for ultra-smooth trim finishes: softer nylon brush (great for doors and cabinets)
If you’re painting trim with a higher-sheen enamel (semi-gloss/gloss) and you care deeply about minimizing brush marks,
a slightly softer, high-quality nylon brush can help lay down a smoother finish.
The tradeoff is that softer bristles can feel less “laser guided” for brand-new cutters, so go slow and keep your brush loaded correctly.
Who it’s for: doors, cabinets, and trim where finish quality matters as much as the line.
Best budget approach: a decent 2-inch angled trim brush (but don’t go bargain-bin cheap)
You can absolutely get good results without buying a premium brushif the brush holds its shape and doesn’t shed.
A mid-priced angled trim brush from a major retailer is often “good enough” for a couple rooms.
Just inspect it: bristles should be straight, firmly set, and taperednot frayed like a stressed-out broom.
Who it’s for: one-time projects, rentals, or anyone who wants solid results without collecting brush “children.”
How to choose the right cutting-in brush (quick checklist)
- Shape: angled sash / angled trim
- Size: 2″ (tight spaces) or 2.5″ (best all-around control + capacity)
- Bristles: synthetic blend for latex; stiffer blend for thicker coatings; oil brush for oil-based products
- Build quality: secure ferrule, no loose bristles, tapered tips, comfortable handle
- Feel test: lightly flex the bristlesspringy is good; floppy is risky for crisp edges
Technique: how to cut in around trim without losing your mind
The brush mattersbut technique is the multiplier. Here’s a simple, repeatable method that works for baseboards, door casings, and crown molding.
Step 1: Load the brush correctly
Dip the brush about 1/2 to 1 inch into paint (not up to the ferrulepaint up there is basically a long-term relationship with regret).
Tap lightly to remove excess. You want a brush that’s loaded but not dripping.
Step 2: Start close, then sneak up on the line
Instead of slamming a fully loaded brush directly onto the edge, lay paint slightly away from the trim line first,
then use longer, lighter strokes to guide the paint right up to the edge. This reduces blobs and helps you keep a crisp border.
Step 3: Use the angled tip like a “rudder,” not a shovel
Hold the brush at a comfortable angle and let the bristles form a clean edge.
Apply gentle pressure so the bristles fan just a littleenough to carry paint smoothly, not enough to flood the trim.
Step 4: Keep a wet edge and work in short sections
Cut in in sections you can comfortably control (often 2 to 4 feet at a time).
Reload as soon as the line starts to look dry or “scratchy.”
A quality brush makes this easier because it releases paint evenly longer.
Step 5: Feather the outer edge for blending
If you’re rolling walls after cutting in, lightly feather the outer edge of your cut-in band so the roller can blend into it.
This helps avoid a visible “frame” where brush texture meets rolled texture.
Prep around trim: boring steps that create beautiful lines
Crisp cut lines aren’t just brush skillsthey’re also surface prep. Around trim, a few minutes of prep prevents hours of touch-ups:
- Clean: dust and grime near baseboards can ruin adhesion and smoothness.
- Repair: fill dings and nail holes; sand lightly for smooth trim edges.
- Caulk (when needed): a neat bead where trim meets wall can eliminate gaps that “catch” your brush.
- Tape (optional): tape can help in tricky spots, but solid cutting-in technique can often replace it.
If you’re painting baseboards, careful cleaning and light sanding can make the paint glide on more evenlyand that makes cutting in feel less like a wrestling match.
Brush care: how to make one great brush last for years
The fastest way to turn a great brush into a tragic brush is to “sort of rinse it” and toss it in a drawer.
Do this instead:
- Don’t let paint dry in the bristles. Clean as soon as you’re done for the day.
- Use the right cleaner. Soap and water for latex; appropriate solvent for oil-based products.
- Comb and reshape. A brush comb (or even a careful rinse + finger shaping) helps the bristles dry straight.
- Dry and store smart. Let it dry thoroughly, then store it so bristles aren’t crushed (many brushes come with a keeper sleeve).
A well-cared-for angled sash brush can handle multiple roomsand keep cutting clean lines long after the cheap brushes have turned into frayed mops.
Common cutting-in problems (and quick fixes)
Problem: My line looks wavy
Fix: switch to a 2.5″ angled sash for stability, slow down, and brace your hand.
Also check your brush: if bristles are splayed, you’re fighting the tool.
Problem: Paint bleeds onto the trim
Fix: reduce paint load, “sneak up” on the edge, and use lighter pressure near the line.
If the wall/trim joint has gaps, caulk first so paint can’t flow into a crevice.
Problem: Brush marks on trim
Fix: use a brush suited for smooth finishes (often softer nylon), don’t overwork paint as it sets, and maintain a wet edge.
Also consider paint choicesome enamels level better than others.
Problem: The brush drips
Fix: don’t dip too deep; tap off excess; avoid dragging a fully loaded brush directly along an edge.
Drips are usually a loading issue, not a life issue.
Quick recommendations recap
- Best all-around: Premium 2.5-inch angled sash, tipped-and-tapered synthetic blend
- Best for tight spaces: 2-inch short-handle angled brush
- Best for smooth enamel trim: high-quality nylon angled trim brush
- Best for thicker coatings / extra control: stiffer synthetic or “Chinex-style” brush
of real-world experience: what actually changes your cut lines
The first time I tried to cut in around baseboards, I treated the brush like a tiny mop and the wall like it owed me money.
Result: a line that looked like it was drawn during a mild earthquake.
The lesson wasn’t “try harder.” The lesson was: stop fighting physics.
The biggest upgrade I ever felt wasn’t switching paint brandsit was switching to a proper angled sash brush and learning to load it correctly.
With a cheap brush, the bristles bend in unpredictable ways, the tip won’t stay sharp, and you end up “correcting” over and over.
Every correction makes the edge thicker, the paint ridgier, and your mood spicier.
With a quality 2.5-inch angled sash brush, the bristles behave: they form a clean edge, hold paint longer, and release it evenly.
Suddenly you’re guiding paint instead of pleading with it.
The second biggest change was embracing the “sneak up on the line” approach.
When you jam a fully loaded brush directly into the corner where wall meets trim, paint has only two hobbies: blob and bleed.
So I started laying paint slightly away from the edge and then drawing it in with longer, calmer strokes.
It felt slower at first, but it was faster overall because I wasn’t doing ten minutes of touch-ups for every five minutes of cutting in.
Then there was the handle discovery: short-handle brushes look like toys until you use one behind a toilet or next to a window stool.
In tight spaces, a long handle turns into a lever you can’t control.
A stubby handle lets your fingers do the steering, which is exactly what you want for detail work.
Once I used a short-handle angled brush for tricky corners, I stopped blaming my “shaky hands” and started blaming my tool choicemuch more productive.
Another “wish I knew earlier” moment: brush care matters more than you think.
The brush you don’t clean thoroughly becomes a brush with hidden dried paint near the ferrule.
That dried paint forces bristles to splay, and splayed bristles create fuzzy lines.
So when I started rinsing thoroughly, combing out the bristles, reshaping them, and letting the brush dry properly,
the next day’s cutting-in looked cleaner with the exact same technique.
Finally: don’t confuse “perfect” with “professional.”
Professionals don’t get perfect lines by being superhumanthey get them by using the right brush, loading it correctly,
moving steadily, and knowing when to stop brushing and let paint level.
Once you do those things, cutting in around trim goes from stressful to oddly satisfying…
like organizing a junk drawer, but with more bragging rights.


