Table of Contents >> Show >> Hide
- Why Roast and Peel Peppers in the First Place?
- Before You Hit “Record”: Prep and Safety Basics
- Trick #1: Dramatic Stovetop Flame Char
- Trick #2: Broiler Blitz for Big Batches
- Trick #3: Sheet-Pan Roast in a Hot Oven
- Trick #4: Smoky Grill Marks for Outdoor Flavor
- The Secret Sauce: Easy Peeling Hacks
- How to Use and Store Your Roasted Peppers
- Common Mistakes When Roasting and Peeling Peppers
- Bringing It to Life on Video: Simple Storyboard Idea
- Real-Life Roasted Pepper Lessons from the Kitchen (Experience Corner)
- Conclusion
If you’ve ever tried to roast and peel a pepper and ended up with a sad, half-skinned, half-raw veggie in your hand, this guide (and your future video) is for you. Charring peppers until their skins blister is one of those simple kitchen techniques that makes you feel like a pro chef without actually requiring pro-chef skills. The best part? Once you know how to roast and peel a pepper properly, you can turn them into smoky additions for sandwiches, salads, pasta, dips, and more.
In this article, we’ll break down four clever, video-ready tricks to roast and peel peppers using gear most home cooks already have: a gas burner, broiler, oven, and grill. We’ll pull tips from trusted cooking sources like Bon Appétit, Serious Eats, Food52, The Kitchn, Epicurious, and more to keep the info accurate and the vibe fun. By the end, you’ll not only know how to get perfectly roasted peppersyou’ll also have enough ideas to storyboard a seriously useful kitchen video.
Why Roast and Peel Peppers in the First Place?
Roasting transforms peppers from crunchy and grassy to soft, sweet, and smoky. High heat breaks down their cell structure, caramelizes natural sugars, and brings out deep flavor. Food writers consistently describe roasted peppers as tender, velvety, and slightly smoky, perfect for everything from homemade romesco and ajvar to marinated antipasto platters.
Peeling off the charred skin is equally important. The outer skin can be tough and a little bitter, especially on thick bell peppers. Removing it gives you silky strips of pepper that blend smoothly into sauces or sit nicely on crostini or pizza.
Before You Hit “Record”: Prep and Safety Basics
Choose Your Peppers
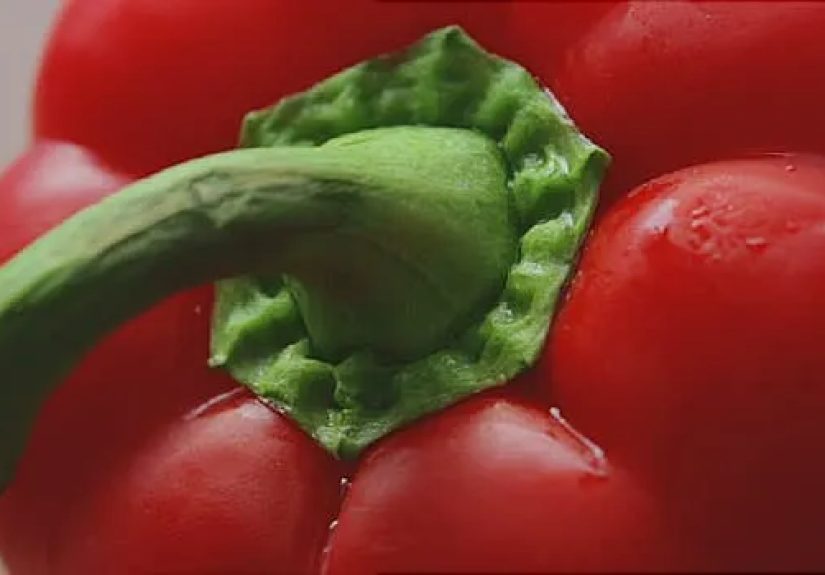
Most roasting guides focus on red bell peppers because they’re sweet, thick-fleshed, and show off gorgeous blistered skin on camera. But the same techniques work for yellow and orange bells, long sweet peppers, and even some chili peppers (just be mindful of the heat).
Prep Like a Pro
- Rinse and dry your peppers thoroughly. Damp skin doesn’t char as evenly.
- For broiler and oven methods, many pros recommend halving or quartering the peppers, removing stems and seeds, and laying them skin-side up so the heat hits them directly.
- For gas burners and grills, you can leave peppers wholethis makes them easier to turn with tongs.
Safety First (Especially with Hot Peppers)
If you’re working with hot chiles, food safety and cooking blogs strongly recommend wearing disposable gloves when handling and peeling them so you don’t accidentally rub capsaicin into your eyes. It’s not the kind of “spicy reaction” you want to capture on camera.
Trick #1: Dramatic Stovetop Flame Char
This method looks fantastic on video: big flames, sizzling skins, and quick results. It’s a favorite of many cookbook authors and technique guides for getting quick roasted peppers.
How to Do It
- Turn a gas burner to high.
- Place a whole pepper directly on the grate. Use tongs to turn it as the skin blisters and blackens. Most guides suggest 6–10 minutes total, turning frequently so all sides char.
- Once the pepper is deeply charred and slightly collapsed, transfer it to a heatproof bowl.
- Cover the bowl tightly with plastic wrap, a plate, or a lid to trap steam for 10–20 minutes.
- When cool enough to handle, slip off the skin with your fingers and remove the stems and seeds.
Why It’s Clever (and Great on Video)
- Fast and visual: Viewers see the transformation in real time, which makes for satisfying footage.
- Great for small batches: Ideal when you need just one or two peppers.
- Built-in teaching moment: You can talk about handling open flame safely and using tongs like a pro.
Tips for Success
- Turn the pepper often so it blisters evenly; any pale patches will be harder to peel.
- Don’t skip the covered “steam” stepthis loosens the skin so it practically slides off.
Trick #2: Broiler Blitz for Big Batches
If you’re roasting multiple peppers at once, the broiler method is a go-to for many food magazines and recipe developers. You spread peppers on a sheet pan, slide them under the broiler, and let high heat do the heavy lifting.
How to Do It
- Preheat your broiler and position a rack close under it.
- Halve or quarter the peppers, remove stems and seeds, and lay them skin-side up on a foil-lined sheet pan. Many sources suggest brushing or misting them lightly with oil to encourage even blistering.
- Broil until the skins are bubbling, blistered, and mostly blackusually about 8–14 minutes, depending on your oven and pepper size.
- Immediately cover the peppers: you can wrap the foil around them, transfer them to a bowl and cover with plastic wrap, or slide them into a paper or plastic bag to steam.
- Once cool, peel away the skin and scrape off any stubborn bits with a knife.
Why It’s Clever (and Efficient)
- Perfect for video “batch cooking” segmentsviewers see a tray full of peppers going from bright and glossy to deeply charred.
- Hands-off once they’re in the oven, but still visually dramatic when you open the door to a tray of blistered peppers.
- Easy to show a before/after comparison: raw vs. roasted vs. peeled strips.
Broiler Troubleshooting
- If only parts of the pepper are charring, rotate the tray midway through.
- If the skins are burning before the flesh softens, move the rack slightly farther from the heat source.
Trick #3: Sheet-Pan Roast in a Hot Oven
Not a fan of broilers or open flame? You can still get beautifully roasted peppers by using a hot oven. Many recipe developers recommend roasting whole or halved peppers at 400–450°F until the skins are wrinkled and charred and the flesh is soft.
How to Do It
- Preheat your oven to around 425–450°F.
- Place whole or halved peppers on a foil-lined or parchment-lined sheet pan. Toss with a little oil and salt if you like.
- Roast, turning occasionally, until the skins are deeply browned or charred in spots and the peppers have softened and collapsedoften 20–35 minutes.
- Transfer the hot peppers to a bowl and cover tightly, or tent them on the tray with additional parchment and a clean towel so they “sweat” for 10–20 minutes.
- Peel, stem, and seed as usual.
Why It’s Clever (and Beginner-Friendly)
- Low-drama, high-reliability method perfect for new cooks.
- Easy to film with time-lapse: show peppers gradually collapsing and browning in the oven.
- Works well for mixed traysroast peppers alongside onions, cherry tomatoes, or eggplant for an instant roasted veggie platter.
Trick #4: Smoky Grill Marks for Outdoor Flavor
Grilling peppers gives you the same blistered skin plus bonus smokiness, which is why grilled peppers show up in recipes for sauces, spreads, and marinated antipasti. It’s also incredibly photogenic on video: flames, grill marks, and outdoor vibes.
How to Do It
- Preheat a gas or charcoal grill to high. Clean and oil the grates to minimize sticking.
- Place whole peppers directly on the grill. Turn them every few minutes until blackened and blistered on all sides, usually 10–15 minutes.
- Move the peppers to a bowl, cover tightly, and let them steam until just warm.
- Peel off the skins, remove stems and seeds, and slice into strips or chunks.
Why It’s Clever (and Delicious)
- Delivers peak smoky flavor that store-bought jarred peppers struggle to match.
- Makes a great segment in a grilling, tailgating, or summer cooking video.
- Pairs naturally with other grilled itemsthink grilled halloumi, chicken, or sausages with a side of grilled pepper salad.
The Secret Sauce: Easy Peeling Hacks
All four roasting tricks rely on the same science for peeling: char the skin, then trap steam so it loosens and separates. From there, a few clever hacks make the job even easier.
1. Let Them “Sweat” in a Covered Bowl or Bag
Countless tutorials suggest transferring hot roasted peppers to a covered bowl or bag and letting them “sweat” for 10–30 minutes. That steam works under the charred skin and makes it slide off with just your fingers.
2. Wrap Them in Foil on the Sheet Pan
Some oven and broiler methods recommend using the same foil you roasted on to create a loose packet around the peppers. It’s minimal cleanup and looks satisfyingly “pro” on camera.
3. Peel in a Bowl of Water or Stock
Serious Eats offers a neat trick: instead of rinsing peppers under running water and washing away flavorful juices, dunk them in a bowl of water or stock and peel them there. The liquid catches bits of char while preserving more of the pepper’s flavorespecially handy if you’re turning that liquid into a soup or stew base.
4. Scrape with a Knife, Don’t Rinse Away Flavor
Many pros warn against peeling roasted peppers under running water because you lose flavorful oils and juices. Instead, scrape gently with a paring knife or your fingers over a bowl to catch every drop for sauces or marinades.
How to Use and Store Your Roasted Peppers
Once your peppers are roasted and peeled, you’ve got pure culinary gold. Cooking sites love using them in pasta, on bruschetta, in sandwiches, layered in casseroles, or blended into dips and sauces like romesco.
Storage Tips
- Short-term: Store roasted pepper strips in the fridge with a drizzle of olive oil for up to about a week.
- Marinated: Many recipes suggest covering roasted peppers with olive oil, herbs, and garlic to create a quick antipasto component that keeps in the fridge for around 1–2 weeks.
- Freezing: You can freeze roasted peppers (without the oil) in airtight containers or bags; thaw in the fridge and pat dry before using.
Common Mistakes When Roasting and Peeling Peppers
- Not charring enough: Lightly browned isn’t enough; the skin should be blistered and mostly black for easy peeling.
- Skipping the steam step: Trying to peel peppers as soon as they leave the heat is a fast track to frustration. Cover and wait.
- Rinsing under the tap: It’s tempting, but you’ll rinse away flavor and juices you could use in your dish.
- Forgetting gloves with hot chiles: Capsaicin can linger on your hands for hours. Respect the chile.
Bringing It to Life on Video: Simple Storyboard Idea
Because your title focuses on a video about four clever tricks, here’s a simple, viewer-friendly flow you can follow:
- Cold open: Quick montage of perfectly roasted, peeled peppers being sliced, tossed with olive oil, spooned over toast.
- Intro hook: “Tired of peppers that refuse to peel? Here are four easy ways to roast and peel them like a pro.”
- Trick 1: Gas burner char with sizzling close-ups.
- Trick 2: Broiler batch method with a big before/after sheet-pan reveal.
- Trick 3: Simple oven roast showing hands-off convenienceand maybe a multitask shot while they cook.
- Trick 4: Grill method with outdoor vibes and gorgeous char marks.
- Peeling montage: Show the covered bowl/bag, then rapid cuts of skins sliding off.
- Serving ideas: Quick flashes of roasted peppers on pasta, pizza, sandwiches, and in jars.
- Outro: “Once you learn these four tricks, roasted peppers go from ‘special occasion’ to ‘I do this every week.’”
Real-Life Roasted Pepper Lessons from the Kitchen (Experience Corner)
Everyone who falls in love with roasted peppers has a few “learning moments,” and those experiences can make your content more relatable. Here are some story-style insights you can weave into your video or blog voiceover.
The First Time I Forgot to Cover the Peppers
The first time many home cooks try to roast and peel a pepper, they do everything rightgreat char, perfect temperaturebut forget one crucial step: covering the peppers to let them steam. The result? Peppers that look roasted but cling to their skins like they’re in a long-term commitment.
Sharing that kind of moment in your video (even recreating it as a quick “what not to do” clip) can instantly make you more relatable. Then, when you fix it by tossing the peppers into a covered bowl and returning later to perfectly loosening skins, viewers feel the “aha” moment right alongside you.
The Gas Burner That Turned into a Mini Campfire
Gas-burner roasting can look intense. The first time you hold a pepper directly over the flame, it might feel like you’re about to set off the smoke alarmand if you’re not watching, you might actually do it. That’s part of the drama, and it’s why so many recipes emphasize constant turning, a good vent fan, and staying close by.
In practice, once you see how fast the pepper goes from glossy red to blackened and blistered, you realize this method is more controlled than it looks. It’s the perfect chance in your video to say, “Yes, it’s supposed to look burned. No, you didn’t ruin it.” That one line can calm down a lot of nervous home cooks.
The Tray of Peppers That Changed Meal Prep Forever
Another common experience: someone tries roasting a whole tray of red peppers on a weekend “just to see what happens”and suddenly roasted peppers become a weekly ritual. Once you’ve got a container in the fridge filled with roasted, peeled strips marinating in olive oil, garlic, and herbs, you start adding them to absolutely everything: scrambled eggs, grilled cheese, grain bowls, and even quick weeknight pizzas.
That story is a powerful way to convince viewers that learning these techniques isn’t just a one-off party trick. It’s a lifestyle upgrade. Roasted peppers become a flavor “cheat code” that makes almost any dish taste like you tried harder than you did.
Discovering the “Don’t Rinse Away the Flavor” Rule
Many cooks only learn this lesson the hard way: they spend time roasting and peeling peppers, then stand at the sink rinsing them under cold water to remove the last bits of charalong with about half the flavor.
Later, when they read or watch a chef calmly scraping off the skin over a bowl and saving all those juices for a sauce, they have that “oh no, I’ve been doing it wrong for years” moment. Calling that out in your content (“Whatever you do, don’t rinse your hard-earned flavor down the drain”) instantly positions your video as the thing that upgrades their technique for good.
The Joy of Perfect Slices
Finally, there’s the pure satisfaction of slicing a fully roasted, peeled pepper. It’s soft but not mushy, glossy but not greasy, and it falls into perfect strips with just a little pressure from the knife. You can literally see the payoff of patient roasting and proper peeling. That visual is gold for your videoand emotionally, it’s the moment that convinces viewers they want to try it themselves.
By weaving these experiences into your tutorialthrough quick anecdotes, on-screen text, or voiceoveryou turn a simple cooking how-to into a story. And that’s what keeps people watching to the end, hitting like, and sharing your “4 clever tricks to roast and peel a pepper” with their friends.
Conclusion
Whether you’re filming a step-by-step video or just cooking dinner, these four clever tricksgas burner, broiler, hot oven, and grillgive you reliable ways to roast and peel peppers at home. Combine them with smart peeling hacks, flavor-saving storage tips, and a few fun real-life lessons, and your viewers will walk away feeling confident, entertained, and hungry. Once they see how versatile roasted peppers are, they’ll never look at that humble bell pepper in the produce aisle the same way again.


