Table of Contents >> Show >> Hide
- Why a Handsaw Still Belongs in Your DIY Toolkit
- Know Your Handsaw: Types and What They Do
- How To Choose the Right Handsaw for Your Project
- Step-by-Step: How To Use a Handsaw for Straight, Clean Cuts
- Safety First: Handsaw Use Without Ouch Moments
- Basic Handsaw Maintenance and Care
- Handsaw-Friendly DIY Projects Around the House
- Handsaw Experiences: Lessons From Real-World DIY
- Conclusion
Power saws get all the glory, but every seasoned DIYer knows the truth:
the humble handsaw is the tool that quietly saves the day. It doesn’t need
batteries, doesn’t blow a fuse, and never wakes the baby when you’re doing
“just one quick cut” at 10 p.m. Used correctly, a handsaw can be fast,
accurate, and surprisingly satisfying. Think of it as the hand-powered
version of a laser sword… for wood.
In this guide, inspired by the practical, no-nonsense approach of
This Old House, we’ll walk through when a handsaw is the smartest
choice for your DIY projects, how to choose the right style, and step-by-step
techniques to get clean, safe, accurate cuts. We’ll also cover maintenance
and share real-world lessons that DIYers usually learn the hard wayso you
don’t have to.
Why a Handsaw Still Belongs in Your DIY Toolkit
Handsaws might look old-school, but they solve a lot of modern DIY
headaches. They’re portable, affordable, quiet, and safe enough for
beginners when used correctly. And unlike many power saws, they excel at
tight, awkward, “how am I supposed to get a tool in here?” situations.
When a Handsaw Is the Better Choice
-
Quick jobs and small cuts. Need to trim a 2×4, shorten
a piece of molding, or cut one shelf board? By the time you’ve found an
extension cord and set up a circular saw, the handsaw could be finished. -
Working in tight or awkward spaces. Handsaws shine when
you’re cutting in a closet, under stairs, or anywhere a bulky power tool
doesn’t fit. -
Indoor projects where noise is a problem. Apartment
living, sleeping kids, cranky neighborssometimes “silent mode” cutting
is priceless. -
Learning the basics of woodworking. Using a handsaw
teaches you how wood behaves, how grain direction matters, and how to
control a cut. Those skills make you better with power tools later. -
Backup for when power tools fail. Batteries die and
blades bind. A handsaw is the trusty Plan B that always works.
Know Your Handsaw: Types and What They Do
Not all handsaws are the same. Choosing the right style makes cutting easier
and your results cleaner. Here are the main players you’ll encounter in
typical home DIY work.
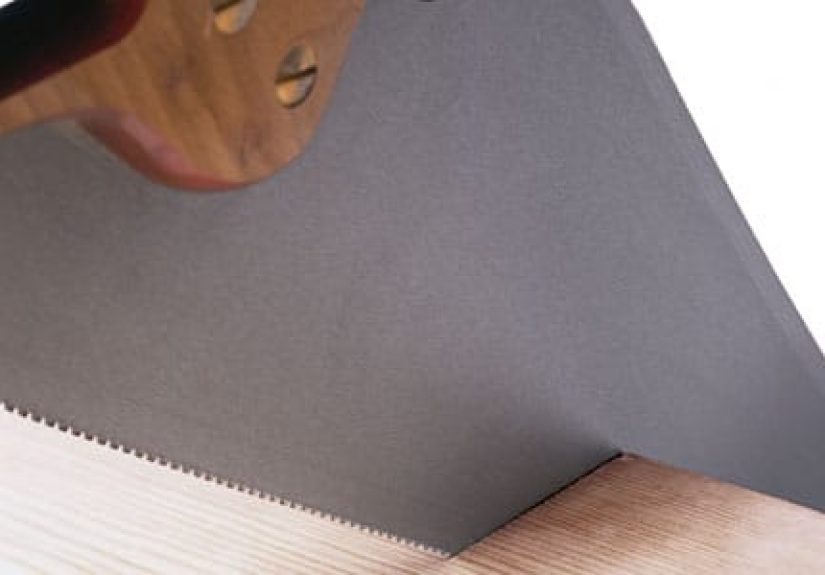
1. Crosscut Saw
A crosscut saw is the classic “toolbox saw” for cutting across the grain of
woodlike shortening a board. The teeth are shaped like tiny knives that
slice the fibers. Many general-purpose saws are actually crosscut saws with
medium tooth counts so they can handle both rough framing and basic
furniture projects.
2. Rip Saw
A rip saw is designed to cut with the grain, lengthwise, such as
turning a wide board into a narrower one. The teeth act more like tiny
chisels, scraping out wood as you push. For most casual DIYers, a dedicated
rip saw is nice but not essential unless you plan a lot of hand-tool
woodworking.
3. Backsaw and Miter Box
A backsaw has a stiff spine along the top of the blade. That spine keeps
the blade straight and helps you make precise cuts for trim, small parts,
and joinery. Paired with a miter box, a backsaw is perfect for cutting
picture frames, baseboards, and other moldings at common angles like 45°
and 90°.
4. Coping Saw and Keyhole Saw
These narrow-bladed saws are for curves and tight turns. A coping saw is
excellent for trimming inside corners of moldings and cutting decorative
shapes in thin material. A keyhole (or drywall) saw is made to plunge into
panels and cut holes or irregular openingshandy for electrical boxes and
vents.
5. Japanese Pull Saw
Japanese saws cut on the pull stroke rather than the push stroke. That
allows for very thin blades, fine teeth, and remarkably clean cuts with
little effort. They’re great for flush-cutting dowels, trimming shims, and
detail work where accuracy matters more than speed.
For most DIYers, a good general-purpose crosscut saw plus either a backsaw
or Japanese pull saw will handle 80–90% of typical home projects.
How To Choose the Right Handsaw for Your Project
Before you start sawing like a movie carpenter, take a minute to match the
saw to the job. A few simple specs make a big difference in how the saw
behaves.
Tooth Count (TPI)
TPI stands for “teeth per inch.” Lower TPI (fewer, larger teeth) cuts
faster but rougher. Higher TPI (more, smaller teeth) cuts slower but leaves
a smoother edge.
- 6–8 TPI: Fast, rough cutting in framing lumber.
- 9–11 TPI: Good all-purpose range for most DIY tasks.
- 12–14+ TPI: Fine work in trim, hardwoods, and thin stock.
Blade Length
Longer blades (20–26 inches) make long, efficient strokes and are great
for cutting bigger boards. Shorter blades (12–16 inches) are easier to
control in tight spaces and better for small pieces and delicate work.
Handle Comfort
If the handle feels awkward in the store, it will feel downright evil after
50 strokes. Look for a handle that fits your hand, with smooth edges and a
secure grip. Some modern saws add soft overmolds, but even a traditional
wooden handle works great if the shape is right.
Step-by-Step: How To Use a Handsaw for Straight, Clean Cuts
Here’s a simple, repeatable process you can use for most straight cuts in
2×4s, plywood edges, and trim boards.
1. Plan the Cut and Support the Workpiece
First, decide exactly where the board will be cut and how you’ll support
both pieces. Use sawhorses, a sturdy workbench, or a cutting table. The
part you’re keeping should be fully supported; the “waste” end can hang off
the edge so it can fall away safely as you finish the cut. Never cut where
the board is unsupported on both sidesyou’ll bind the blade and chew up
the wood.
2. Mark the Line Clearly
Use a sharp pencil and a square or combination square to mark your cut
line all the way across the face and slightly down the sides of the board.
For mitered cuts, use the miter markings on the square or a miter box.
A dark, continuous line is easier to follow and gives you a visual target
for keeping the saw true.
3. Position Your Body and Grip
Stand with your feet in a comfortable staggered stance: if you’re
right-handed, right foot back, left foot forward. Your shoulder, elbow, and
wrist should line up behind the saw. Grip the handle firmly but not like
you’re trying to defeat it in arm-wrestling. Point your index finger along
the handlethis naturally helps you aim the blade straight.
4. Start the Cut Gently
Place the saw’s teeth on the waste side of your line at the far corner of
the board. Use your thumb on your non-saw hand as a light guide, just
behind the teeth (not in frontyour thumb likes staying attached). Take a
few short, gentle strokes to create a shallow groove. This starter kerf
keeps the saw from wandering once you begin full strokes.
5. Set the Cutting Angle
For most crosscuts, tilt the blade to roughly a 45-degree angle to the
board’s surface. For rip cuts along the grain, a steeper angle closer to
60 degrees helps the teeth bite efficiently. Don’t obsess over the exact
numberjust stay in the general zone and keep that angle consistent.
6. Let the Saw Do the Work
Once the kerf is established, use smooth, full-length strokes. Keep your
eye on the line, not on the teeth. Apply only light downward pressure; too
much force makes the blade buckle or bind. A good handsaw should feel like
it’s gliding through the wood with a rhythmic “shhhk, shhhk” sound. If it
feels like punishment, the saw is dull, you’re forcing it, or your support
setup needs help.
7. Support the Offcut as You Finish
As you approach the end of the cut, slow down. Support the waste piece with
your free hand or a scrap block so it doesn’t snap off and tear out the
last bit of wood near your line. A couple of light finishing strokes will
give you a cleaner edge.
Common Mistakes to Avoid
-
Starting too aggressively. Jamming the saw into the
wood from the first stroke almost guarantees a crooked kerf. -
Rushing the cut. Fast, short strokes look dramatic in
movies but usually just burn calories and ruin accuracy. -
Ignoring grain direction. Cutting along the grain with a
crosscut saw is slow and frustrating; choose the right tooth pattern when
possible. -
Fighting a dull blade. If you’re sweating more than the
saw is working, it’s time to sharpen or replace.
Safety First: Handsaw Use Without Ouch Moments
Handsaws are safer than spinning blades, but they can still ruin your
weekend if you get careless. A few simple habits go a long way.
-
Wear eye protection. Little curls and chips of wood can
launch themselves at your face without warning. -
Keep hands out of the line of cut. Never hold the board
where the saw is headed. Use clamps, a vise, or a workbench instead. -
Check for nails and screws. Striking metal with a
handsaw can damage teeth and send vibrations through your arm that feel
like a cartoon. -
Use a stable work surface. Sawhorses or a workbench are
far safer than balancing a board on a random bucket. -
Respect fatigue. When your arms are tired, your accuracy
drops and your chances of slipping go up. Take breaks.
Basic Handsaw Maintenance and Care
A well-maintained handsaw cuts faster, straighter, and with less effort.
Fortunately, the maintenance routine is simple.
Clean the Blade
After use, wipe off dust and pitch (that sticky resin from softwoods) with
a rag. For stubborn buildup, a little mineral spirits on a cloth can help.
Dry the blade thoroughly afterward.
Protect Against Rust
Store the saw in a dry place. Lightly wipe the blade with tool oil, paste
wax, or a dedicated rust inhibitor now and then. This makes the saw glide
more easily through wood and keeps rust at bay.
Keep the Teeth Sharp
You can learn to file and set teeth yourself using a saw file and a saw
set, but many casual DIYers simply replace inexpensive saws when they get
dull. If a once-good saw suddenly needs much more force to cut or wanders
off line constantly, sharpening or replacement time has arrived.
Safe Storage
Don’t toss your handsaw into a random tool pile. Hang it on a wall peg,
keep it in a dedicated sleeve, or store it flat where the teeth won’t bash
into other tools. Protected teeth stay sharp longer and are less likely to
snag unsuspecting fingers.
Handsaw-Friendly DIY Projects Around the House
Once you’re comfortable with the basics, you’ll start seeing handsaw
opportunities everywhere. Here are a few projects where it really shines.
-
Cutting simple shelving. Mark and cut boards to length,
then sand the ends and mount them on brackets. No power tools required. -
Building a basic workbench or sawhorses. Cut 2×4s to
length and assemble with screws. The project builds your sawing skills
while giving you a better place to do future projects. -
Trimming door shims and casing. A fine-tooth backsaw or
pull saw makes clean, flush cuts that blend into the surrounding trim. -
Outdoor planter boxes. Cut cedar or pressure-treated
boards to size by hand, screw them together, and you’ve got a custom
planter without ever plugging in a tool.
Handsaw Experiences: Lessons From Real-World DIY
Reading about technique is one thing; living through a wobbly cut on your
last good board is another. Here are experience-based insights that seasoned
DIYers often share after a few projects with a handsaw.
First, almost everyone underestimates how important setup is. The difference
between a frustrating cut and a clean one is often just better support.
When the board is rock-steadyclamped to a bench or resting solidly on
sawhorsesyou suddenly discover you’re much better at sawing than you
thought. When the board shakes with every stroke, you get blamed,
but the real villain is the wobbly setup.
Another common lesson: focus on the line, not the saw. Beginners tend to
stare straight at the teeth, trying to micromanage every millimeter. More
experienced DIYers soften their gaze and track the pencil line just ahead
of the cut. It’s similar to driving a caryou stay straighter when you look
down the road instead of over the hood ornament. Once you trust the saw and
your body position, the cut naturally improves.
Many people also learn to respect grain direction the hard way. Cutting
across the grain in softwood is usually forgiving, but try ripping along
the grain with the wrong saw and you get binding, wandering, and a strong
desire to “just grab the circular saw instead.” Experience teaches you to
flip boards so the saw doesn’t have to push through knots, to switch to a
finer tooth pattern near the end of delicate cuts, and to accept that some
woods simply require more patience than others.
There’s also a confidence curve. At first, every cut feels like a test.
After a few projectscutting shelves, trimming studs, building a small
benchyou stop worrying about whether you can do it and start
thinking about how you can do it better. You experiment with
using a guide board clamped along your line, or practice starting cuts at
different corners for tricky grain. That curiosity is where real skill
develops.
Perhaps the biggest surprise for many DIYers is how enjoyable hand-sawing
can be. It’s quieter, more controlled, and oddly relaxing compared with
the adrenaline rush of a spinning blade. You can listen to music, chat
with someone in the room, or just zone out to the rhythm of the strokes.
The payoff is immediate: when the board separates and the cut is straight,
you feel like you built that result with your own muscles and coordination,
not just with a motor.
Over time, these experiences add up to a kind of “hand-saw intuition.”
You’ll know by feel when a blade is starting to dull, when a board needs an
extra clamp, or when it’s smarter to switch to a different style of saw.
And that’s exactly the spirit behind the best This Old House
projects: using simple, reliable tools with skill and patience to get
pro-level results right in your own home.
Conclusion
A handsaw may be one of the simplest tools in your shop, but it’s also one
of the most versatile. Learn when to use it, pick the right style for the
job, practice the basic technique, and treat the blade with a little care.
You’ll earn cleaner cuts, safer projects, and a new appreciation for quiet,
low-tech problem solving. The next time you reach for a power saw, pause
for a second and ask yourself: “Could a handsaw do this faster, quieter,
and with less drama?” More often than you’d expect, the answer is yes.


