Table of Contents >> Show >> Hide
- What You’ll Learn
- Before You Start: Get the Length Right (Because Measuring “Vibes” Doesn’t Work)
- Method 1: Classic Sewing-Machine Hem (Clean, Durable, Fast)
- Method 2: Hand-Sewn Invisible Hem (Quiet Luxury for Your Ankles)
- Method 3: No-Sew Hem Tape (When You Need Pants by 6 PM)
- How to Choose the Right Hem Method
- Common Hemming Mistakes (and How to Avoid Crying Into the Ironing Board)
- FAQ: Quick Answers to Common Hem Questions
- Real-Life Hemming Experiences (Pants, Pride, and Mild Panic)
- Conclusion
Pants are like relationships: when the length is off, everybody notices, and nobody wants to be the one to bring it up.
Whether your trousers are pooling on the floor like they’re auditioning for a mop commercial, or your jeans are hovering at “flood warning” height,
hemming is the quickest way to make your clothes look customwithout paying custom prices.
Below are three reliable ways to hem pants: a classic sewing-machine hem, a nearly invisible hand-sewn hem, and a no-sew hem tape option for when
you need presentable ankles by dinner. I’ll walk you through the tools, the steps, and the “please don’t do this” mistakes that can turn a simple hem
into a complicated life lesson.
Before You Start: Get the Length Right (Because Measuring “Vibes” Doesn’t Work)
The best hemming method in the world can’t save a hem that’s the wrong length. The goal is consistency, comfort, and a hemline that looks intentional.
Here’s the short checklist that keeps you from hemming twice (which is the sewing equivalent of rewatching a movie because you blinked).
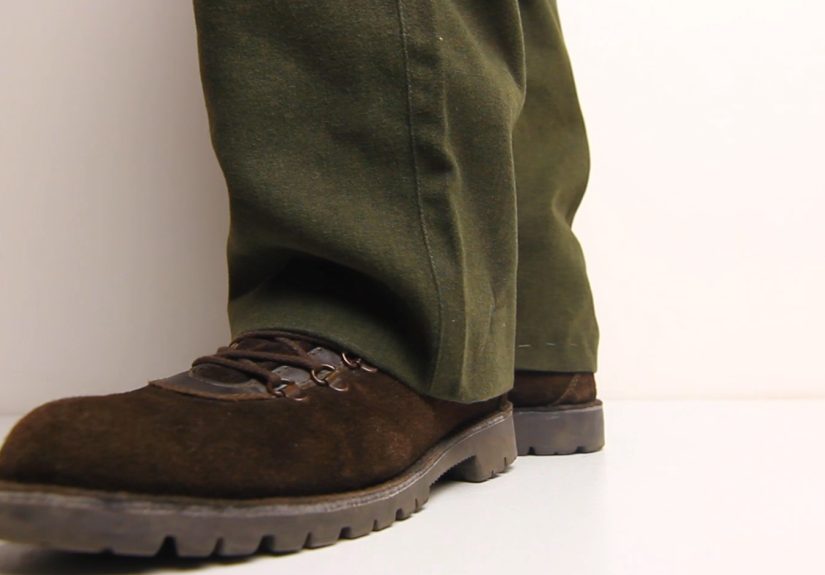
1) Wear the shoes you’ll actually wear
Hem length changes dramatically with footwear. Sneakers, loafers, boots, heelseach one shifts where the fabric should land.
If you hem dress pants while barefoot, you’re basically asking your future self to start a new hobby: stepping on hems.
2) Mark the length from the back of the heel
Here’s a tailor-ish trick: when you’re pinning/marking, pay attention to the back of your foot. The front of the pant leg can “break” over the shoe,
but the back is where you’ll see if the hem is too long (dragging) or too short (high-water drama).
3) Decide on hem depth (a.k.a. how much fabric folds inside)
Hem depth isn’t one-size-fits-all. Many dress slacks use a deeper, heavier hem allowance than a lightweight summer pant.
A deeper hem can help pants hang nicely; a tiny hem keeps bulk down on thin fabric.
If you’re hemming something thick (like denim), too much folded fabric can create a lump you’ll feel every steplike your pants are hiding snacks.
4) Pressing is not optional
The iron is the quiet hero of hemming. Pressing gives you crisp fold lines, accurate stitching, and a professional finish.
If you skip pressing, you’ll spend the rest of the project “encouraging” fabric into place with pins and wishful thinking.
Quick prep list
- Measuring tools: measuring tape, ruler, seam gauge, or a clear quilting ruler
- Marking tools: tailor’s chalk, washable marker, or pins
- Cutting tools: sharp fabric scissors (dull scissors cause jagged edges and emotional damage)
- Pressing tools: iron + ironing board (or a folded towel in a pinch)
- Optional but helpful: seam ripper (for “oops”), clips, and a hem gauge
Method 1: Classic Sewing-Machine Hem (Clean, Durable, Fast)
This is the workhorse method: fold, press, stitch. It’s ideal for casual pants, chinos, cotton trousers, and many styles of jeans.
The stitch shows on the outside (unless you’re using a specialty blind hem stitch), but that’s not a flawit’s often the look.
Best for
- Casual pants, chinos, work pants
- Many jeans (especially if you don’t care about preserving the original “factory” hem)
- Beginners who want a strong, predictable finish
What you’ll need
- Sewing machine
- Matching thread
- Pins or clips
- Iron
- Scissors
- Optional: seam finish (zigzag stitch, serger, or pinking shears), denim needle for thick jeans
Step-by-step: the straight-stitch hem
-
Try on and pin the new length.
Put the pants on with your usual shoes. Fold the excess fabric to the inside and pin where you want the finished hem to land.
Walk a few steps. Sit. Do a dramatic lunge if you’re feeling athletic. Comfort matters. -
Mark the fold line.
Take the pants off carefully (don’t stab yourselfpins have no mercy). Mark the fold line all the way around each leg.
Use a ruler or seam gauge to keep it consistent. -
Add hem allowance and trim.
Decide your hem depth. A common everyday hem is a double fold: fold the raw edge under, then fold again to the hemline.
Leave enough fabric to do that comfortably. Trim excess fabric if needed, but don’t get scissor-happy.
You can always cut more later; you cannot un-cut. -
Finish the raw edge (recommended).
If your fabric frays, finish the raw edge before folding: zigzag stitch along the edge, serge it, or use pinking shears.
This helps your hem survive laundry day like a champion. -
Fold, press, fold again, press again.
Turn pants inside out. Fold the raw edge up to your first fold (usually 1/4″–1/2″), press.
Fold again to your marked hemline, press. Pin or clip in place. -
Sew the hem.
Sew around the leg, starting at an inner seam so the backstitch is less noticeable.
Stitch slowly over bulky seams. If you hear your machine struggling, that’s not “character”that’s a warning. -
Press to finish.
Press the hem flat. This is where it transforms from “homemade” to “hey, where did you get those tailored?”
Bonus: Hem jeans while keeping the original hem
If you love the worn-in, slightly distressed edge on jeans, you can shorten them while preserving the factory hem.
The basic idea is to fold the jeans so the original hem is brought up to the new length, stitch near the original hem,
then press the extra fabric upward inside the leg. The outside keeps that authentic finish, and your jeans stop collecting sidewalk germs.
This “original hem” method is especially handy when the bottom edge has fading or whiskering you don’t want to lose.
Use a denim needle if the layers are thick, and go slowly near side seams (where denim becomes approximately as dense as your stubbornness).
Method 2: Hand-Sewn Invisible Hem (Quiet Luxury for Your Ankles)
For dress pants, suit trousers, and fabrics that shouldn’t show a visible stitch line, a hand-sewn blind hem (often called an invisible hem stitch)
is a go-to. It’s subtle, flexible, and looks surprisingly professional once you get the rhythm.
Best for
- Dress pants, wool trousers, suit pants
- Fabrics where a visible stitch would look “off” (or scream “I DIY’d this at midnight”)
- People who don’t mind a little slow, satisfying handwork
What you’ll need
- Hand sewing needle
- Thread that matches your fabric (this matters more here than anywhere)
- Pins
- Iron
- Scissors
- Optional: thimble (your fingers will thank you)
Step-by-step: the invisible hem stitch
-
Mark the new length and press the hem fold.
With pants inside out, fold to the new hemline and press. Pin all the way around. -
Finish the raw edge if needed.
Many dress pants have a finished edge already; if yours frays, finish it (zigzag by machine, or a neat hand overcast stitch).
Less fraying = less mess inside your hem. -
Set the hem depth and press again.
Fold the raw edge under (if using a double fold) or leave it as a single fold if the fabric is thick and already finished.
Press. This crease is your roadmap. -
Thread your needle and knot.
Use a comfortable thread lengthtoo long tangles; too short makes you re-thread every 14 seconds.
Knot the end. -
Start at a seam.
Begin at an inner seam so your knot is hidden. Take a small stitch into the hem fold first. -
Take tiny “bites” of the pant fabric.
Here’s the secret sauce: pick up just a few fibers from the pant leg (not a big visible stitch),
then take a longer stitch through the hem fold. Repeat around the leg. -
Check the outside frequently.
Flip the pants right-side out occasionally and look for any dots of thread showing through.
If you see them, you’re grabbing too much fabric on the “bite.” Smaller is better. -
Finish neatly.
When you get back to where you started, secure with a small knot hidden inside the hem.
Press lightly to set the hem.
Pro tips for a cleaner invisible hem
- Use matching thread. Invisible stitches become very visible when you choose “close enough.”
- Press gently. Especially on wool or synthetic blendstoo much heat can leave shine.
- Mind hem bulk. If the fabric is thick, consider a single-fold hem with a clean finished edge to reduce lumpiness.
Method 3: No-Sew Hem Tape (When You Need Pants by 6 PM)
No-sew hemming is real, it’s useful, and it’s not just for costume emergenciesthough it absolutely shines in costume emergencies.
Iron-on hem tape (sometimes called fusible hem adhesive) bonds fabric with heat. The results can look clean, especially on straight-leg pants.
The trade-off is durability: it’s strong, but it’s still adhesive, and heavy fabrics + frequent washing can test that bond over time.
Best for
- Quick hems on dress pants, uniforms, or travel fixes
- People without a sewing machine (or patience)
- Temporary or “let’s see if I like this length” hems
What you’ll need
- Iron-on hem tape (regular or heavy weight, depending on fabric)
- Iron (often recommended: medium heat, no steam)
- Measuring tape/ruler
- Scissors
- Pressing cloth (optional, but helpful on delicate fabrics)
Step-by-step: iron-on hem tape
-
Measure and press the new length.
Turn pants inside out. Fold to your new hemline, press to create a crisp fold. -
Place tape inside the fold.
Open the fold slightly and lay the hem tape so it will be fully enclosed between the layers once folded back up.
You want adhesive sandwiched between fabricno tape peeking out like a bad secret. -
Press (don’t iron-scrub).
Lift and press the iron down in sections. Don’t slide it around like you’re waxing a car.
Hold for the recommended time, then move to the next section. -
Let it cool before tug-testing.
Adhesives set as they cool. Give it a moment, then gently check the bond. -
Repeat for the second leg.
Measure twice. Hem once. (That’s the dream.)
Two no-sew upgrades
-
Use a pressing cloth on delicate fabrics:
It protects fabric from shine and prevents accidental scorching. -
Test first on scraps:
Some fabrics have finishes that don’t bond well with fusible adhesives, and some don’t love heat.
A 60-second test can save your pants from becoming a science experiment.
What no-sew hemming is not
It’s not always the best choice for very stretchy knits, super heavy denim, or fabrics that get a lot of friction at the hem.
It can also leave a slightly stiffer edge, which may or may not matter depending on the drape of the fabric.
Think of it as a powerful optionnot the only option.
How to Choose the Right Hem Method
Choosing a hem method is mostly about three things: the fabric, the look you want, and how quickly you need to be seen in public.
Here’s a simple comparison to help you decide.
| Method | Best for | How it looks | Durability | Time |
|---|---|---|---|---|
| Sewing-machine hem | Casual pants, chinos, many jeans | Clean, visible stitch (often intentional) | Very high | 30–60 minutes |
| Hand-sewn invisible hem | Dress pants, wool trousers | Nearly invisible on the outside | High | 45–90 minutes |
| No-sew hem tape | Quick fixes, uniforms, travel, testing length | Clean if pressed well | Medium (varies by fabric & washing) | 10–25 minutes |
Fabric-based recommendations
- Denim: Sewing machine is king. Consider the “keep original hem” trick if you want the worn edge.
- Wool dress pants: Hand-sewn invisible hem (or a machine blind hem stitch if you have it).
- Lightweight fabrics: Smaller, less bulky hems. Press carefully; avoid heavy adhesive that can stiffen the edge.
- Stretchy knits: You may need a stretch-friendly approach (special stitches/needles). If in doubt, test first.
Common Hemming Mistakes (and How to Avoid Crying Into the Ironing Board)
Mistake 1: Measuring without shoes
This is how “perfect length” becomes “why do my pants look shorter than my patience?” Always measure with your real-world shoes.
Mistake 2: Skipping pressing
Pressing gives you accuracy. Sewing without pressing is like trying to draw a straight line while riding a scooter. Possible? Sure. Peaceful? No.
Mistake 3: Cutting too much too soon
Trim conservatively. If you’re unsure, pin and press the hem first, then check the length again. You can always shorten more; you can’t grow fabric back.
Mistake 4: Using the wrong needle on thick fabric
Denim and heavy fabrics often need a denim/jeans needle (and sometimes a longer stitch length) to avoid skipped stitches and broken thread.
If your machine starts clunking over seams, slow down and consider changing the needle.
Mistake 5: Uneven legs
Many bodies are slightly asymmetrical. Many pants are slightly asymmetrical. Life is slightly asymmetrical.
Measure and mark each leg separately, even if you assume they’re identical twins.
FAQ: Quick Answers to Common Hem Questions
How long should pants be?
There’s style variation, but a good everyday baseline is: the hem shouldn’t drag on the ground, and it should look even when you’re standing naturally.
For jeans, some people prefer a slight break over the shoe; for dress pants, a clean break or slight break is common.
The “right” answer is: the one that matches your shoes and your style.
Can I hem pants without cutting them?
Yes. You can fold the fabric up inside and stitch (or tape) it in place without trimming. This is great for “testing” length.
Just know it can add bulkespecially in denimand may show as a ridge.
Is hem tape washable?
Many iron-on hem tapes are designed to be washable, but durability depends on fabric type, washing frequency, and how well it was fused.
Follow the product instructions, avoid excessive heat when applying, and consider gentler wash cycles when possible.
What if the pant leg is too narrow to fit around my sewing machine free arm?
Sew slowly, rotate carefully, and consider opening a side seam temporarily if you need better access (then resew it).
For very tight cuffs, hand sewing can be easier and cleaner than fighting your machine.
Real-Life Hemming Experiences (Pants, Pride, and Mild Panic)
I used to think hemming was one of those “adult skills” people pretended to havelike knowing how to fold a fitted sheet or remembering where you put your
measuring tape. Then I hemmed my first pair of pants and discovered two universal truths: (1) hemming is easier than it looks, and (2) it will humble you
at least once.
My first experience was a classic beginner move: I measured the length perfectly… while barefoot. I stitched a tidy, confident machine hem, pressed it like a
professional, tried the pants on, and instantly learned what “high waters” truly means. It wasn’t a disastermore like a surprise style choice.
I unpicked the hem with a seam ripper (slowly, like defusing a tiny thread bomb), and redid it with shoes on. It took longer, but the second hem actually
looked intentional, which is the main goal of clothing.
The next memorable moment happened before a trip. I was packing, realized my trousers were too long, and decided “no-sew hem tape” was going to be my
whole personality for the evening. I pressed the fold, placed the tape, and then made the mistake of sliding the iron back and forth like I was trying to
win a time trial. The tape shifted, the hem got slightly lopsided, and I had to peel it open while it was still warman activity I do not recommend if you
enjoy peace. On attempt two, I pressed in small sections and let it cool. Suddenly it looked crisp, flat, and weirdly impressive for something held together
by heat and determination.
Hand sewing came later, and it felt like leveling up. The first time I tried an invisible hem stitch on dress pants, I grabbed too much fabric with each “bite.”
On the outside, the stitches didn’t look invisiblethey looked like a dotted line screaming, “HELLO I AM THREAD.” The fix was simple: smaller bites, better
matching thread, and checking the outside more often. After ten minutes, the stitch rhythm clicked: tiny bite in the pant fabric, longer stitch in the fold,
repeat. It became oddly relaxinglike knitting, but with a clearer mission and fewer scarves.
The biggest practical lesson I’ve learned is that pressing is the difference between “DIY” and “tailored.” When you press each fold before you sew or fuse,
the fabric behaves. It stops shifting. The hem line stays even. You sew straighter because the crease guides you. Pressing also helps you spot problems early:
twist in the leg, uneven fold depth, or bulk at side seams. It’s like turning on the lights before you start rearranging furniture.
And finally: don’t underestimate the confidence boost of pants that fit your actual body and your actual shoes. A clean hem makes even inexpensive pants look
sharper. It’s one of the few wardrobe upgrades that costs almost nothing and pays you back every time you walk without stepping on your own clothing.
Hem once, press well, and enjoy the rare pleasure of a garment doing exactly what it’s supposed to do.


