Table of Contents >> Show >> Hide
- Why cutting board storage matters more than you think
- The 30-minute upgrade: pick your storage style
- How to do the 30-minute cutting board storage setup (step-by-step)
- Pro tips for small kitchens (where every inch has a day job)
- When to upgrade from “30 minutes” to “Saturday project”
- Common mistakes (and how to avoid them)
- Experiences from real kitchens (the “it looked easy on the internet” edition)
- Conclusion
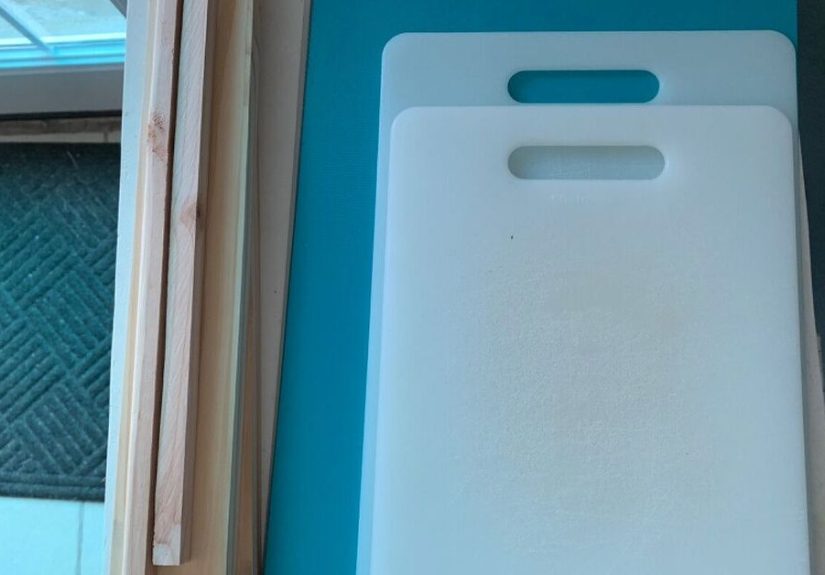
Cutting boards are the introverts of the kitchen: they want to be useful, they don’t want to be touched while wet,
and they absolutely do not want to live in a noisy pile where everything avalanches the moment you open a cabinet.
If your boards currently “nest” like a messy deck of cards, this quick upgrade is for you.
The goal isn’t to buy a whole new kitchen. It’s to give your cutting boards a real homeupright, easy to grab,
and able to dry properlyusing a few small parts and a little common sense. (Common sense is optional. The parts are not.)
Why cutting board storage matters more than you think
Great cutting board storage does three things at once: it frees up space, speeds up cooking, and helps your boards stay cleaner.
When boards are stacked flat, they trap moisture like a tiny sauna. When they’re stored upright with airflow, they dry faster,
stay fresher, and don’t pick up that mysterious “cabinet funk.”
And from a food-safety perspective, the fewer “raw chicken juice meets salad prep” moments, the better. Basic guidance is to wash
cutting boards and kitchen surfaces with hot, soapy water after useespecially after raw meatand to avoid cross-contamination by
keeping separate boards for foods that won’t be cooked again. [1][2]
The 30-minute upgrade: pick your storage style
You don’t need to commit to a single “forever system.” Start with a fast win, then upgrade later if you feel fancy.
Here are the most realistic options for normal humans with normal weekends.
Option A: The tension-rod “board corral” (fast + renter-friendly)
A couple of tension rods can turn a chaotic cabinet into a vertical parking lot. This works best in a base cabinet where you store
cutting boards, baking sheets, or serving trays together. No drilling, no dramajust measure, twist, and wedge.
[3]
Option B: A vertical rack inside the cabinet (zero tools, big payoff)
If you want “instant grown-up kitchen,” drop a vertical bakeware/cutting board rack into a cabinet. Look for adjustable dividers so
thick wood boards don’t bully the thin plastic ones. Multiple outlets have highlighted this style of organizer as an easy way to keep
boards and baking sheets upright and accessible. [7][8]
Option C: Use the cabinet door (because that space is just sitting there)
The inside of a cabinet door is prime real estate. You can mount a slim rack (DIY or store-bought) and slide boards in vertically.
DIY publications have even shown how to build a dedicated door rackmore of a weekend project, but it’s a solid long-term solution.
[6][11]
Option D: Display the pretty boards (your backsplash deserves hobbies)
If you have a gorgeous wooden board or charcuterie slab, you can store it on displayon a shelf, ledge, or standso it doubles as decor.
Design outlets often frame this as a “hide vs. display” choice: conceal boards for visual calm, or show them off to add warmth and texture.
[10]
How to do the 30-minute cutting board storage setup (step-by-step)
This walkthrough focuses on the easiest “real life” approach: a tension-rod corral with upright storage. It’s quick, adjustable,
and doesn’t require turning your kitchen into a construction zone.
What you’ll need
- 2–4 small tension rods (size that fits your cabinet depth/width)
- Measuring tape (or the classic “I eyeballed it” methoduse at your own risk)
- Optional: non-slip shelf liner, adhesive bumpers, or a slim bin to corral smaller boards
Step 1: Choose the cabinet and clear the chaos
Pick a base cabinet near your main prep area. Pull everything out. Wipe the cabinet down. Congratulationsyou’ve already improved your life.
Step 2: Decide your “upright flow”
The simplest layout is boards stored upright like files. You want the boards to slide in and out without scraping your knuckles
or requiring a three-point turn.
Step 3: Install tension rods to stop the lean-and-collapse
- Place one tension rod across the cabinet (side-to-side) a few inches from the cabinet floor. This becomes a low “bumper.”
- Place a second tension rod higher up (again side-to-side). Now you’ve created a gentle “fence” so boards stand upright without toppling.
- Test with your largest board first. Adjust rod height until boards feel stable but still easy to grab.
- Add a third rod if neededespecially if you’re storing tall trays, sheet pans, or long boards.
Tip: If boards still slide around, add a strip of non-slip liner under them. It’s the kitchen equivalent of giving your boards good shoes.
Step 4: Sort boards by “grab frequency”
Put the board you use daily in front. Specialty boards (bread boards, giant carving boards, holiday charcuterie monsters) go in back.
This sounds obvious… until you realize you’ve been lifting a 12-pound board just to slice one lime.
Step 5: Add one tiny rule that keeps everything clean
Only store boards when they’re fully dry. For everyday use, wash with hot, soapy water and let boards air-dry thoroughly; when you need
deeper sanitation (especially after raw meat), follow safe sanitizing guidance and then dry completely before putting them away.
[1][2][12]
Pro tips for small kitchens (where every inch has a day job)
Go vertical whenever possible
Storage pros and lifestyle editors repeat this because it works: vertical storage stops stacks, reduces clatter, and makes everything easier to see.
Some organizing guidance specifically calls out using simple rods or dividers to create vertical lanes for pans and cutting boards.
[3]
Steal ideas from “built-in” kitchens without paying built-in money
Design-focused remodel content often includes vertical dividers for trays and sheetsbasically the tidy, high-function version of what you’re doing
with tension rods. Same concept: keep flat items upright, separated, and easy to grab. [4]
Use weird spaces: toe-kick drawers and skinny gaps
If you’re remodeling (or daydreaming), toe-kick drawers can store flat items like cutting boards and trays in a space most kitchens ignore.
[5]
No remodel? Look for a narrow gap beside the fridge or between cabinetssometimes a slim vertical rack fits there beautifully.
When to upgrade from “30 minutes” to “Saturday project”
If you’ve got a lot of boards (or very thick ones), consider a more permanent system:
-
Drop-in adjustable rack: Great for bulky boards and sheet pans; adjustable dividers keep things from turning into a domino show.
[7][8] - Cabinet-door rack: Excellent use of dead space, especially if your cabinet has clearance. [6]
-
DIY door rack build: A detailed approach that creates a dedicated home for boards inside a cabinet door.
It takes longer than 30 minutes, but it’s a satisfying upgrade if you like tools and measuring twice (or three times). [11] -
Counter/shelf stand: Ideal if you want fast access and a tidy lookespecially for frequently used boards.
[9]
Common mistakes (and how to avoid them)
Mistake: Storing boards damp
Moisture trapped in stacks can lead to odors, warping, and “why does my cabinet smell like a wet dog?” Make drying non-negotiable.
Food safety guidance also emphasizes keeping surfaces and tools clean to reduce contamination risks. [1][2]
Mistake: One board for everything
Using separate boards for raw proteins and ready-to-eat foods is a straightforward way to reduce cross-contamination risk.
If you only have one board, your workaround is extra careful washing and sanitizingplus fully drying before storage. [1]
Mistake: Overstuffing the “board lane”
If you have to yank one board out like you’re starting a lawn mower, you’ve stored too many in one spot. Split them into two cabinets,
or move specialty boards to a less prime location.
Experiences from real kitchens (the “it looked easy on the internet” edition)
In a typical small apartment kitchen, the problem isn’t a lack of storageit’s that storage behaves like a chaotic roommate. You open the door,
something falls out, and suddenly you’re negotiating with a stack of boards like, “Hey, can we not do this today?” The tension-rod setup tends to
feel almost suspiciously simple at first. People twist the first rod into place, stand up a couple boards, and immediately realize the cabinet is
quieter. No clatter. No avalanche. Just… calm. It’s unsettling in the best way.
Another common experience: the “I own one giant board and three random skinny ones” household. The giant board is the alpha; it hogs space,
blocks access, and makes everything else feel useless. Upright storage changes the dynamic. With boards stored like files, the giant one can live
in the back lane while the everyday board sits in front where it belongs. People often discover they cook more because grabbing the board stops
feeling like a mini obstacle courseespecially on weeknights when energy is low and takeout is flirting hard.
Families tend to notice a different benefit: cleanup gets easier to enforce. When there’s a clear home for boards, it’s more obvious when someone
tries to shove a damp board back into the cabinet (usually because “it looks dry enough” and they have places to be). Once you’ve smelled the
aftermath of a not-quite-dry board, you become passionate about airflow. Many households end up with an unspoken rule: boards dry vertically first,
then go into their upright slot. It’s a small habit that keeps cabinets fresher and boards happier over the long run. [1][2]
People who entertain often have the “display vs. hide” debate with themselves. The everyday plastic board? Hide it. The beautiful wood board that
makes cheese look like it has a publicist? That one gets a stand or a shelf spot. The fun part is that display storage can feel like decorating
without committing to a full kitchen makeover. A couple boards leaned neatly on a shelf can add warmth, texture, and a “yes, I own olive oil worth
mentioning” vibewithout losing functionality. [10]
And then there’s the most relatable experience of all: the day you realize your “system” has quietly saved you time. Not dramatic timejust those
tiny moments that add up. You grab the board in one motion. You put it away without rearranging three pans. You don’t sigh before cooking. That’s
the win. The 30-minute project isn’t about perfection; it’s about making the kitchen feel less like a junk drawer with a stove attached.
Conclusion
A 30-minute cutting board storage upgrade is one of those rare home organization projects that actually feels as good as it sounds.
Store boards upright, keep them dry, and give them a dedicated “lane” so you’re not wrestling a noisy pile every time you cook.
Start renter-friendly with tension rods, level up with an adjustable rack, or reclaim dead space with a cabinet-door setup.
Your future selfmid-dinner, hands full, trying not to drop anythingwill be deeply grateful.


