Table of Contents >> Show >> Hide
- Before You Start: Identify Your Stovetop Type
- The Universal Rules (No Matter What You Cook On)
- The 2-Minute “Daily Reset” (Your Future Self Will Thank You)
- How to Clean a Gas Stovetop (Grates, Burners, and All)
- How to Clean an Electric Coil Stovetop (Coils + Drip Pans)
- How to Clean a Glass, Ceramic, or Induction Cooktop (Without Scratching It)
- The Stubborn Mess Playbook (Because Life Happens)
- How Often Should You Clean Your Stovetop?
- Quick Prevention Tips (Clean Less, Live More)
- FAQ: Common Stovetop Cleaning Questions
- Real-World Stovetop Cleaning Experiences (The “I’ve Been There” Edition)
- Conclusion
A stovetop is basically the kitchen’s “stage,” and grease is the glitter of cooking: it gets everywhere, it sticks around, and somehow it multiplies overnight. The good news? You don’t need a hazmat suit (or a cabinet full of fancy sprays) to get your cooktop clean again. You just need the right method for your stovetop type, a little patience for burnt-on messes, and one key superpower: cleaning before things turn into stove-top fossils.
This guide walks you through safe, effective ways to clean gas, electric coil, and glass/ceramic/induction stovetopsplus a “stubborn mess” playbook and prevention tips so you’re not deep-cleaning every time you boil pasta like it owes you money.
Before You Start: Identify Your Stovetop Type
Different surfaces need different tactics. Pick your lane:
- Gas stovetop: removable grates, burner caps, and visible flames.
- Electric coil stovetop: metal coil burners with removable drip pans/bowls underneath.
- Glass/ceramic (smooth-top) or induction: one flat, shiny surface (often glass-ceramic) with burner outlines.
The Universal Rules (No Matter What You Cook On)
- Let it cool completely. Cleaning a hot stovetop can bake on cleaner, cause streaks, or damage finishes.
- Start dry. Brush or wipe away crumbs first so you’re not turning them into gritty “cleaning paste.”
- Go gentle first. Mild dish soap + warm water solves more than you think.
- Avoid abrasives unless the manufacturer says otherwise. Scratches trap grime and make future cleaning harder.
- Don’t flood the surface. Too much liquid can seep into burners, controls, or electrical components.
- Never mix cleaning chemicals. (Especially anything involving ammonia or bleachjust don’t.)
The 2-Minute “Daily Reset” (Your Future Self Will Thank You)
If you do only one thing: do this quick reset after cooking (once the surface is cool). It keeps grease from polymerizing into that sticky, brown varnish that laughs at your sponge.
- Dry wipe: Use a microfiber cloth or paper towel to pick up crumbs and loose bits.
- Light wash: Wipe with warm water + a drop of dish soap on a soft sponge.
- Buff dry: Finish with a clean, dry microfiber cloth to prevent streaksespecially on glass tops.
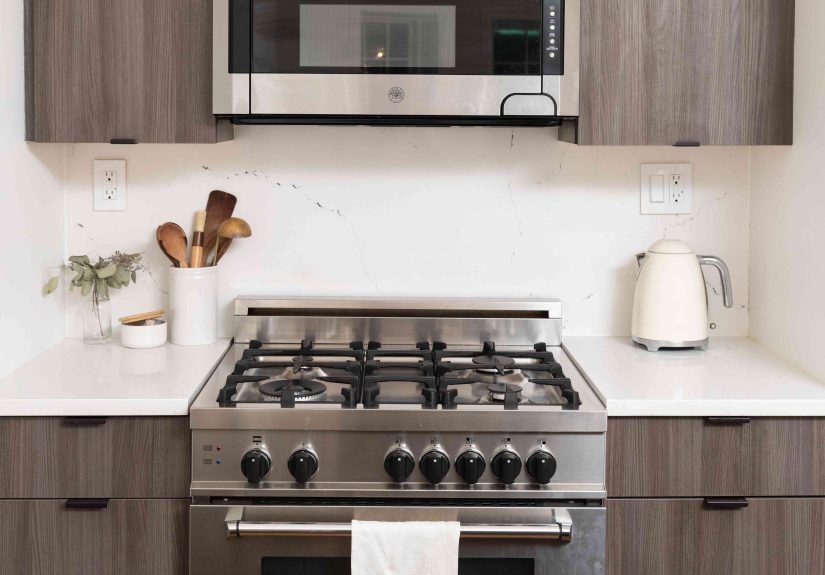
How to Clean a Gas Stovetop (Grates, Burners, and All)
Gas stoves get dirty in two places: the surface (where spills spread) and the hardware (where grease bakes onto grates and caps). The trick is to take it apart just enough to clean thoroughlythen dry everything well before reassembling.
What you’ll need
- Dish soap
- Warm water
- Baking soda
- White vinegar (optional but helpful)
- Non-scratch sponge or scrub pad
- Soft brush or old toothbrush
- Microfiber cloths
Step-by-step
- Remove grates and burner caps (when cool). Lift off grates and set them in a sink or large tub.
- Soak what’s safe to soak. Many enamel-coated grates/caps can soak in hot, soapy water for about 15–20 minutes to loosen grease. Important: if your grates are uncoated cast iron, don’t soak for long (or at all) because it can encourage rust.
- Make a baking soda paste for stuck-on grime. Mix roughly 3 parts baking soda to 1 part water into a spreadable paste. Coat greasy spots on grates/caps and let sit 15–30 minutes.
- Scrub, rinse, and dry completely. Use a non-scratch pad or brush. Rinse with clean water and dry thoroughly with towels to prevent rust and to keep burners lighting properly.
- Clean the stovetop surface. While parts soak, wipe the cooktop with warm soapy water. For greasy film, spray a 50/50 vinegar-water mix, let sit 5–10 minutes, then wipe.
- Detail the burner area (gently). Use a toothbrush for crevices. Avoid forcing water into igniters. If burner ports look clogged, use a soft brush and consult your manual for safe clearing.
- Reassemble only when everything is dry. Replace caps and grates correctlymisalignment can cause uneven flames or ignition issues.
If your grates are cast iron and looking sad
If you have uncoated cast iron, keep water minimal, dry immediately, and consider a light wipe with cooking oil after cleaning. If rust appears, scrub gently, dry thoroughly, then lightly oil and heat according to your manufacturer’s guidance (many cast-iron care routines use heat to set a protective layer).
How to Clean an Electric Coil Stovetop (Coils + Drip Pans)
Electric coil stoves are classicand they hide the mess under the burner. Your main targets are the drip pans/bowls and the surface around the coils. The rule here is: keep coils dry and focus the soaking on removable parts.
What you’ll need
- Dish soap
- Warm water
- Baking soda (optional)
- Non-scratch sponge
- Microfiber cloths
- For very grimy drip pans: ammonia solution (used carefully, with ventilation, per label directions)
Step-by-step
- Power off and cool down. Make sure burners are off and completely cool.
- Remove coils and drip pans (if designed to be removable). Lift coils gently and unplug if applicable. Set coils asidedo not soak them.
- Wash drip pans. Start with hot, soapy water and a non-scratch scrub. For stubborn baked-on grease, soak longer. Some manufacturer guidance allows soaking chrome drip bowls in a diluted ammonia solution (follow instructions carefully, ventilate well, and never mix products).
- Wipe the cooktop base. Use a damp (not dripping) soapy sponge to wipe the surface. Avoid pushing liquid into openings.
- Dry everything and reassemble. Drip pans must be fully dry. Coils should be wiped clean with a barely damp cloth and dried thoroughly before reinstalling.
How to Clean a Glass, Ceramic, or Induction Cooktop (Without Scratching It)
Smooth-top cooktops are gorgeousuntil a boil-over turns into a crunchy black badge of honor. The secret is using non-abrasive tools, the right cleaner, and a scraper made for glass when needed.
What you’ll need
- Dish soap + warm water
- Microfiber cloths
- Baking soda
- White vinegar (optional)
- Non-scratch pad (safe for cooktops)
- Glass cooktop cream/cleaner (optional but great for shine)
- Cooktop scraper/razor tool designed for glass (for burnt-on residue)
Step-by-step
- Cool completely. Cleaning on heat can cause staining and streaks.
- Remove loose debris. Dry wipe crumbs so you don’t grind them into the surface.
- Degrease gently. Wipe with warm soapy water, then wipe again with a clean damp cloth to remove soap residue.
- For cloudy film or light stains: Sprinkle baking soda lightly, spritz with vinegar-water (or use a damp cloth), let sit 10–15 minutes, then wipe and buff dry.
- For burnt-on messes: Use a cooktop scraper held at about a 45-degree angle and gently shave residue off the glass. Wipe away debris, then finish with cooktop cleaner or a final soapy wipe and buff dry.
- Buff until it squeaks (almost). Any leftover cleaner residue can bake on laterso rinse/wipe clean, then buff with microfiber for a streak-free finish.
Big “don’ts” for glass tops
- No steel wool or abrasive scrubbers.
- Don’t use ammonia-based glass cleaners on a cooktop, especially when warm.
- Don’t slide heavy cookware (like cast iron) across the surface.
- Don’t ignore sugary spills. Melted sugar can permanently damage glass-ceramic surfaces if it cools and bondsclean it as soon as safely possible.
The Stubborn Mess Playbook (Because Life Happens)
1) Burnt-on grease and “mystery crust”
- Soften first: Apply a baking soda paste and let it sit 15–30 minutes.
- Gentle pressure wins: Use a non-scratch pad or soft brush.
- For glass tops: Use a cooktop scraper designed for glass instead of brute-force scrubbing.
2) Greasy film that won’t quit
That sticky, dull layer is usually aerosolized cooking oil plus heat. Use warm soapy water first, then a vinegar-water wipe to cut the film, then buff dry. If it still looks hazy on glass, a cooktop cream can help restore shine.
3) Boil-overs (tomato sauce, starch, milk)
Wipe up once cool. If a ring remains, use a short soak time: lay a hot, wrung-out towel over the spot for 10–15 minutes, then wipe and finish with your normal method for that surface.
4) Melted plastic (the spatula that got too close)
If plastic melts on a smooth-top cooktop, follow your manufacturer’s safety guidance. Many recommend carefully scraping it off with a cooktop scraper while the surface is still slightly warm (not hot), using oven mitts for protection. Then clean and polish the area.
5) Funky smells from gas burners
Old spills can smell every time you cook. Regularly wash grates/caps, wipe under them, and make sure everything is fully dry before reassembling. Grease + heat = odor encore.
How Often Should You Clean Your Stovetop?
- Daily (or after messy cooking): the 2-minute reset.
- Weekly: a deeper wipe-down; wash grates/caps or drip pans if you cook often.
- Monthly (or as needed): detail cleaning around burners, knobs, and edges where grime builds up.
Quick Prevention Tips (Clean Less, Live More)
- Wipe spills sooner. The longer they sit, the more they bake on.
- Use a splatter guard when pan-frying to reduce grease mist.
- Match pot size to burner size to reduce boil-overs and scorched food.
- Lift cookwaredon’t drag it on glass/induction tops.
- Keep a microfiber cloth handy so “quick wipe” is truly quick.
FAQ: Common Stovetop Cleaning Questions
Can I use baking soda and vinegar on any stovetop?
Baking soda is a mild abrasive and is generally helpful for stuck-on messes. Vinegar helps cut grease and can lift residue. On delicate surfaces (especially glass cooktops), use baking soda gently and avoid heavy scrubbinglet time do the work.
Why does my glass cooktop look streaky even after cleaning?
Usually it’s leftover cleaner or soap residue. Do a final wipe with clean water, then buff dry with a fresh microfiber cloth. On induction, residue matters even more because it can heat up and bake on later.
Should I line drip pans with foil?
Some people do, but it can interfere with fit, airflow, or heat in certain models. If you choose to use liners, use products designed for your stove and follow your manufacturer’s guidance.
Real-World Stovetop Cleaning Experiences (The “I’ve Been There” Edition)
Let’s talk about the moments that turn a normal kitchen into a crime sceneand what actually works when you’re staring at your stovetop thinking, “I swear I cleaned you… in 2019.”
Experience #1: The “I only looked away for a second” boil-over. You set pasta to boil, you glance at your phone, and suddenly your pot is reenacting a foam volcano. The spill runs down the burner and dries into a chalky ring that feels welded on. The fix isn’t elbow greaseit’s softening. Once everything is cool, a hot, wrung-out towel laid over the mess for 10–15 minutes loosens starch and sauce. After that, a gentle wipe with soapy water usually clears most of it, and any leftover spots come off with a baking soda paste. The lesson: for starchy spills, moisture + time beats aggressive scrubbing every day of the week.
Experience #2: The greasy film you don’t noticeuntil the sunlight does. Some messes don’t announce themselves as “spills.” They float through the air as tiny oil droplets and settle like a shiny, sticky veil over everything. You might not see it at night, but morning light will absolutely roast you. A simple dish-soap wipe removes the top layer, but the secret weapon is a second pass: a clean damp cloth to remove soap residue, then a microfiber buff. On glass, that final buff is the difference between “nice and clean” and “why does it look worse?”
Experience #3: The burner cap that refuses to look normal again. Gas burner caps can develop that brownish baked-on halo that laughs at quick wipes. This is where a baking soda paste earns its keep. Coat the cap, wait 20–30 minutes, then scrub with a soft brush. If you try to scrub immediately, you work harder for less payoff. If you wait, the grime lets go like it suddenly remembered it has somewhere else to be. The key detail people forget: dry the cap completely before putting it back. Damp parts can cause ignition issues and weird flames, which is not the vibe you want when you’re making dinner.
Experience #4: The smooth-top “crunch zone.” Smooth cooktops can make a tiny burned-on splash feel like a mountain. The mistake is scrubbing harder and harder with something roughbecause scratches create more places for residue to cling next time. A cooktop scraper (made for glass) feels intimidating at first, but it’s often the safest way to remove hardened residue without destroying the surface. Gentle angle, patient strokes, wipe debris, repeat. Follow with a cooktop cream (or a careful wash and buff), and the surface looks normal again. The emotional lesson: the right tool is less stressful than a heroic sponge battle.
Experience #5: The “sweet spill” that becomes permanent if you ignore it. Sugary spillsthink jam, caramel, or syrupcan bond to glass-ceramic surfaces and may cause lasting damage if they cool and harden. If you catch it early (and safely), you can often remove it with a scraper while the surface is slightly warm, then clean and polish. If you don’t, you may end up with marks that never fully disappear. The lesson: sugar isn’t just stickyit’s sneaky.
If you’ve had any of these happen, congratulations: you are a normal human who cooks food. The goal isn’t perfectionit’s a routine that keeps messes small enough that cleaning feels like maintenance, not a weekend event.
Conclusion
Cleaning a stovetop is less about one magic product and more about matching the method to the surface: soak and scrub removable parts for gas and coil stoves, stay gentle and scrape smart on glass tops, and always finish by removing residue and drying thoroughly. Keep up with a quick daily wipe, tackle the hardware weekly if you cook often, and you’ll spend more time cookingand less time negotiating with burnt-on sauce.


