Table of Contents >> Show >> Hide
- Why Filled Cupcakes Are So Popular
- Before You Start: Filling Rules That Make Life Easier
- Way 1: Core the Center and Spoon in the Filling
- Way 2: Inject the Filling from the Top with a Piping Bag
- Way 3: Fill the Cupcake from the Bottom
- Way 4: Bake the Filling Inside from the Start
- Best Fillings for Different Cupcake Styles
- Common Mistakes to Avoid When Filling Cupcakes
- Which Method Is Best?
- Practical Experiences: What Bakers Usually Learn After Filling a Lot of Cupcakes
- Final Thoughts
Plain cupcakes are lovely. Respectable. Polite. But filled cupcakes? Filled cupcakes arrive like they own the bakery case. They have drama. They have mystery. They have that magical moment when someone takes a bite and suddenly finds lemon curd, chocolate ganache, raspberry jam, or fluffy cream hiding inside like a sweet little plot twist.
If you have ever wondered how to add filling to a cupcake without turning your kitchen into a frosting crime scene, you are in the right place. The good news is that there is not just one way to do it. In fact, there are several reliable methods, and each one works best with different fillings, cupcake styles, and patience levels. Some are fast and tidy. Some are old-school and foolproof. Some make you feel like a bakery wizard. All of them can help you create moist, flavorful, bakery-style filled cupcakes at home.
In this guide, you will learn four practical ways to add filling to a cupcake, how to choose the right method for different fillings, what mistakes to avoid, and how to make the whole process easier. Whether you are baking vanilla cupcakes for a birthday, chocolate cupcakes for a holiday table, or a random Tuesday because life is hard and butter helps, these methods will get the job done.
Why Filled Cupcakes Are So Popular
There is a reason bakers love filled cupcakes. A good filling adds moisture, contrast, and surprise. It turns a simple chocolate cupcake into a chocolate-peanut-butter situation. It upgrades a vanilla cupcake into a lemon-berry celebration. It also lets you play with flavor combinations without changing the whole cake batter.
Filled cupcakes are also flexible. You can use pastry cream, buttercream, fruit preserves, marshmallow fluff, caramel, ganache, pudding, cream cheese filling, cookie butter, or even cheesecake-style centers. That makes them perfect for birthdays, showers, holidays, bake sales, and the kind of gathering where people say, “I’ll just have one,” and then suspiciously hover near the dessert table fifteen minutes later.
Before You Start: Filling Rules That Make Life Easier
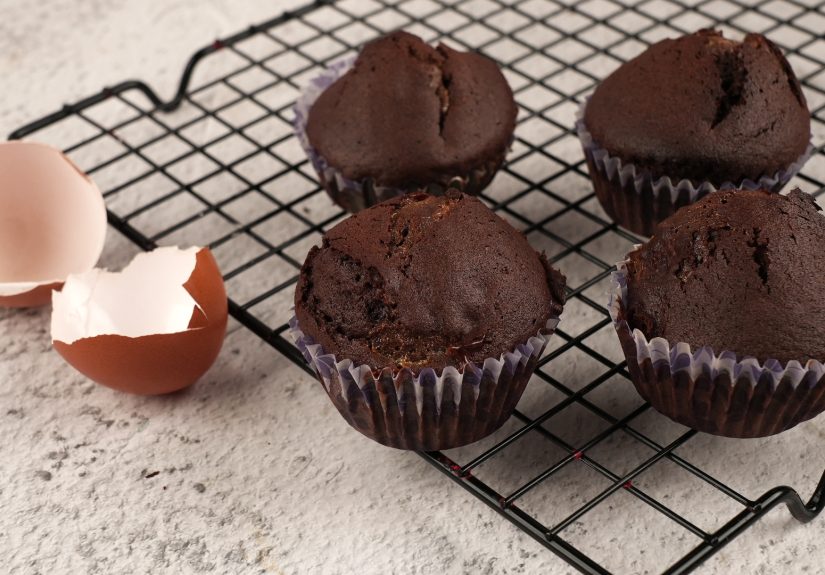
1. Cool the cupcakes completely
This is nonnegotiable. Warm cupcakes and soft fillings do not form a beautiful partnership. They form a sticky emotional breakdown. If the cupcakes are still warm, the filling can melt, soak in too far, or make the crumb gummy.
2. Choose the right filling texture
Thicker fillings like buttercream, peanut butter frosting, pastry cream, and stabilized whipped fillings are easy to pipe. Looser fillings like caramel sauce, fruit compote, lemon curd, or jam are often easier to spoon in. Super runny fillings can leak, so chill them first if needed.
3. Do not overfill the cupcake
A filled cupcake should still be a cupcake, not a tiny lava event. Usually, about 1 to 2 tablespoons of filling is enough for a standard cupcake, depending on the size of the cavity and the richness of the filling.
4. Start with evenly baked cupcakes
If some cupcakes are domed like mountains and others are flat as parking lots, filling them evenly becomes harder. Try to fill liners consistently and avoid overbaking. A tender, level cupcake is easier to core, fill, and frost.
Helpful tools
- Paring knife or cupcake corer
- Melon baller or small spoon
- Piping bag or zip-top bag
- Round piping tip or Bismarck tip
- Small cookie scoop or teaspoon
- Offset spatula for frosting
Way 1: Core the Center and Spoon in the Filling
This is the classic method for making filled cupcakes. You remove a small section from the middle of the cupcake, add the filling, and either leave it open under frosting or replace part of the cake plug on top. It is simple, visual, and beginner-friendly.
How to do it
- Use a paring knife, cupcake corer, or melon baller to cut a small cone or cylinder from the center of the cooled cupcake.
- Do not cut all the way to the bottom. Leave a little cake base so the filling stays inside.
- Spoon or scoop the filling into the cavity.
- Trim the removed cake piece and place a thin layer of it back on top if you want a flatter surface.
- Frost as usual.
Best for
This method works beautifully with chunky or spoonable fillings such as fruit preserves, chopped strawberry filling, cookie butter, pastry cream, peanut butter filling, cream cheese mixtures, and lemon curd. It is especially handy when the filling is too thick or textured to move smoothly through a piping tip.
Why bakers love it
You can actually see how much filling you are adding, which makes it easier to keep the cupcakes consistent. It is also great for beginners because it does not require special decorating skills. If you can cut a neat little hole and operate a teaspoon without panic, you are qualified.
Watch out for this
Do not remove too much cake. If the cavity gets too wide, the cupcake can become fragile, and the filling-to-cake ratio gets wildly aggressive. Delicious, yes. Structurally sound, maybe not.
Way 2: Inject the Filling from the Top with a Piping Bag
If you want a cleaner, faster, more bakery-style method, piping the filling directly into the cupcake is a smart move. Instead of cutting out the center first, you push a round tip or filling tip into the cupcake and squeeze the filling inside.
How to do it
- Fill a piping bag with your filling.
- Fit it with a round piping tip or a filling tip.
- Insert the tip into the top center of the cupcake.
- Squeeze gently while pulling up slightly to distribute the filling.
- Stop before the cupcake splits or the filling starts pushing out of the top.
- Frost or glaze the cupcake.
Best for
This method is ideal for smooth fillings like buttercream, pudding, whipped cream-style filling, marshmallow creme, pastry cream, and ganache. It is perfect when you want a neat surface and do not want to cut a visible hole in the cake.
Why it works so well
Piping is quick, efficient, and easy to repeat across a big batch. If you are filling two dozen cupcakes for a party, this method feels much less fussy than coring every single one. It also keeps the top intact, which makes the finished cupcake look polished.
Watch out for this
If the filling is too stiff, you will need Olympic-level hand strength. If it is too thin, it may shoot into the cupcake and then immediately attempt an escape. Aim for a texture that is smooth but not watery.
Way 3: Fill the Cupcake from the Bottom
This method is a little sneaky, and that is exactly why so many bakers like it. Instead of filling from the top, you turn the cupcake over and pipe the filling through the bottom. The top stays perfectly smooth, and the filling remains hidden under the crumb.
How to do it
- Turn the cooled cupcake upside down.
- Insert a round piping tip into the bottom center.
- Pipe in the filling slowly.
- Stop when the cupcake feels slightly heavier or when you see the first sign of expansion.
- Set it upright and frost the top.
Best for
This is great for soft cupcakes and smooth fillings such as cream filling, vanilla custard, chocolate cream, caramel, and mousse-like fillings. It is also excellent when you want a super clean top for elaborate piping or decorations.
Why this method is underrated
The bottom-fill technique is tidy and surprisingly effective. It helps prevent a visible opening on top, which is useful if you want the frosting design to be the star. It is also a fun way to serve cupcakes with a secret center that no one sees coming.
Watch out for this
Be gentle. Cupcakes are not stress balls. If you jam the tip in too aggressively, the paper liner can tear or the cake can crack.
Way 4: Bake the Filling Inside from the Start
This method skips post-bake filling altogether. Instead, you add some batter, place the filling in the center, then cover it with more batter before baking. The filling cooks right into the cupcake.
How to do it
- Add a small amount of batter to each cupcake liner.
- Place a spoonful or piece of filling in the center.
- Top with more batter until the liner is about two-thirds full overall.
- Bake as directed and cool completely.
Best for
This method works well with sturdy fillings that can handle baking, such as cream cheese filling, cheesecake cubes, chocolate pieces, cookie dough-style centers made for baking, fruit pie filling, or thick nut spreads. It is a favorite for black bottom cupcakes, cheesecake-stuffed cupcakes, and other self-filled cupcake recipes.
Why bakers use it
It saves time after baking and creates a center that feels fully integrated into the cupcake. It also gives a more natural look when the filling is supposed to be part of the cake rather than a separate creamy layer.
Watch out for this
Not every filling can survive the oven. Delicate whipped fillings, pudding, and many frostings should be added after baking, not before. Also, if you add too much filling, the batter may overflow or bake unevenly.
Best Fillings for Different Cupcake Styles
- Vanilla cupcakes: lemon curd, strawberry jam, pastry cream, cookies-and-cream filling
- Chocolate cupcakes: peanut butter filling, ganache, marshmallow creme, raspberry filling
- Red velvet cupcakes: cream cheese filling, vanilla cream, chocolate mousse-style filling
- Spice or carrot cupcakes: cheesecake filling, apple butter, cinnamon cream cheese
- Lemon cupcakes: blueberry compote, raspberry preserves, vanilla pastry cream
The easiest way to choose a filling is to think in contrasts. Pair rich cake with a bright fruit center. Pair a light vanilla cake with a creamy or tangy filling. Pair chocolate with almost anything, because chocolate has never been known for turning down a good time.
Common Mistakes to Avoid When Filling Cupcakes
Filling warm cupcakes
This can melt the filling and ruin texture.
Using a filling that is too loose
Thin fillings can leak out the sides, soak the crumb, or disappear into the cake.
Adding too much filling
A cupcake should still hold together when someone peels back the liner. That is a low but important standard.
Cutting too deep
If you remove too much of the center, the cupcake can collapse or feel hollow.
Ignoring flavor balance
Very sweet frosting plus very sweet filling plus sweet cake can become a sugar stampede. Add acidity, salt, cocoa, fruit, or tangy cream cheese to keep the flavor balanced.
Which Method Is Best?
If you want the easiest beginner method, core and spoon is the winner. If you want speed and a polished finish, pipe from the top. If you want a flawless surface for decorating, fill from the bottom. If you want the center built right into the cupcake, bake it in from the start.
In other words, the best way to add filling to a cupcake depends on your filling, your timeline, and your tolerance for tiny pastry engineering projects.
Practical Experiences: What Bakers Usually Learn After Filling a Lot of Cupcakes
Anyone who has made filled cupcakes for a party, school event, family dinner, or holiday tray tends to learn the same lessons pretty quickly. The first is that confidence arrives about six cupcakes after you needed it. The earliest cupcakes often look a little experimental. The filling may land off-center. One cupcake gets overfilled and becomes a sticky cautionary tale. Another gets almost no filling and ends up emotionally supportive but not especially exciting. Then, somewhere around cupcake seven, your hands figure it out. The cuts get cleaner. The piping gets smoother. Suddenly you are moving like a person who absolutely meant to do this all along.
Another common experience is discovering that filling texture matters more than people think. A thick peanut butter frosting behaves very differently from raspberry jam. Lemon curd might need a spoon, while marshmallow filling practically begs for a piping bag. Caramel can be glorious, but only if it is thick enough to stay put. Many bakers learn this the fun way, which is to say by watching a beautiful cupcake quietly ooze like it has secrets.
There is also the matter of timing. Filled cupcakes are often easiest to assemble when the cupcakes are baked one day and filled the next. That gives the cake time to cool completely and makes the whole process calmer. On the other hand, some fillings, especially fresh whipped ones, are better added closer to serving time. So the real-life experience of making filled cupcakes often turns into a mild scheduling puzzle: bake now, fill later, frost when sensible, refrigerate what needs chilling, and try not to store onion leftovers in the same fridge without excellent containers.
Bakers also learn that different occasions call for different methods. For a birthday party with lots of frosting and decorations, bottom-filling is wonderfully neat because the tops stay pretty. For a casual weekend bake, coring and spooning feels relaxed and forgiving. For bake sales or classroom treats, a sturdy baked-in filling is often the least messy option. And for fancy holiday cupcakes, piped fillings can give that polished bakery look that makes people think you own far more specialty equipment than you actually do.
One of the nicest things about the experience of making filled cupcakes is how easy it is to customize a single batch. You can bake one tray of vanilla cupcakes and split the fillings: strawberry for kids, lemon for citrus lovers, chocolate cream for the people who never met a cocoa-based decision they did not support. That flexibility is part of the fun. It makes cupcakes feel personal. They are not just dessert. They are tiny edible personalities in paper jackets.
And finally, bakers often learn that filled cupcakes do not need to be perfect to be memorable. A slightly crooked center does not ruin anything. A little extra jam under the frosting is not a disaster. In fact, some of the most charming homemade cupcakes look less like they came from a display case and more like they came from a real kitchen, where real people were trying to make something joyful. That is part of their appeal. They are impressive without being impossible, playful without being childish, and fancy enough to feel special without demanding a four-hour decorating marathon and a soundtrack of personal regret.
So if your first batch is a little uneven, welcome to the club. You are not failing. You are having the authentic cupcake-filling experience.
Final Thoughts
Learning how to add filling to a cupcake is one of those small baking skills that makes a big difference. With the right method, a basic cupcake becomes more flavorful, more memorable, and much more fun to eat. Whether you core and spoon, pipe from the top, fill from the bottom, or bake the filling right into the batter, the goal is the same: create a cupcake that delivers a sweet surprise in the center.
Start with one method, match it to the right filling, and do not overthink it. Cupcakes are supposed to bring joy, not paperwork. Once you get the hang of it, you will have an easy way to create bakery-style desserts at home whenever the mood strikes.


