Table of Contents >> Show >> Hide
- Before You Start: What You Need to Make Ribbon Hair Bows
- Way 1: Make a Simple Classic Hair Bow
- Way 2: Make a No-Sew Boutique Loop Bow
- Way 3: Make a Stacked Ribbon Hair Bow
- Way 4: Make a Mini Ribbon Bow with a Fork
- How to Attach a Hair Bow to a Clip or Headband
- Common Mistakes to Avoid When Making Ribbon Hair Bows
- How to Style and Customize Your Ribbon Hair Bows
- Experiences and Lessons Learned from Making Ribbon Hair Bows
- Final Thoughts
- SEO Tags
If your hair accessories drawer looks like it lost a fight with a unicorn, welcome. You are among friends. The good news is that learning how to make a hair bow out of ribbon is much easier than it looks, and you do not need a couture studio, a dramatic soundtrack, or magical bow-making ancestry. With a few basic supplies, a little patience, and a willingness to hot-glue with confidence, you can create bows that look sweet, polished, playful, or downright boutique-level fancy.
This guide walks you through four easy ribbon hair bow methods, from a simple classic bow to a layered style that looks like it costs way more than it should. Along the way, you will learn which ribbon works best, how to keep the ends from fraying, how to attach the bow to a clip, and what to do when your masterpiece comes out looking less “darling accessory” and more “confused butterfly.”
Whether you are making bows for kids, gifts, school outfits, party favors, or your own inner craft goblin, these step-by-step ideas will help you get there without losing your scissors under a pile of ribbon scraps.
Before You Start: What You Need to Make Ribbon Hair Bows
Most ribbon bow tutorials use the same small toolkit, so once you gather your supplies, you can make several styles without starting from scratch every time.
Basic supplies
- Ribbon
- Sharp scissors
- Hot glue gun or fabric glue
- Needle and thread, floral wire, zip tie, or pipe cleaner for securing the center
- Alligator clip, barrette, nylon headband, or ponytail elastic
- Ruler or measuring tape
- Lighter, fray-check liquid, or another fray-prevention method for synthetic ribbon
Best ribbon types for hair bows
Grosgrain ribbon is the easiest option for beginners because it has a ribbed texture and holds its shape beautifully. It is the go-to choice for everyday hair bows, school bows, stacked bows, and boutique-style designs.
Satin ribbon gives a smoother, shinier, dressier look. It is perfect when you want something soft and elegant, though it can slip around more while you work.
Velvet, organza, and specialty ribbon can create gorgeous statement bows, but they are usually better once you are comfortable with basic shaping.
How wide should the ribbon be?
For most standard hair bows, ribbon that is 7/8 inch to 1.5 inches wide works beautifully. Narrower ribbon is great for tiny bows and baby clips. Wider ribbon makes fuller bows with more drama. That can be good drama, not reality-show drama.
How to stop ribbon from fraying
If you are using polyester or another synthetic ribbon, you can lightly seal the cut ends with heat. Do this carefully and only for appropriate ribbon types. You can also use fray-check liquid or fold and glue the ends for a cleaner finish. A neat cut makes a huge difference in how professional your final bow looks.
Way 1: Make a Simple Classic Hair Bow
This is the easiest method and the best place to start if you are new to DIY ribbon hair bows. Think of it as the “little black dress” of bows: classic, useful, and surprisingly versatile.
What you need
- One piece of ribbon, about 18 to 24 inches long
- Small piece of matching ribbon for the center wrap
- Alligator clip or barrette
- Hot glue or thread
How to make it
- Cut your ribbon to your desired length. For a medium bow, start with about 20 inches.
- Form two loops just like tying shoelaces, making sure both sides are even.
- Pull the loops gently until the center sits neatly and the tails hang evenly.
- Trim the tails. You can cut them straight, diagonally, or into a V-shape.
- Wrap a small ribbon strip around the center if you want a more polished finish.
- Glue or stitch the bow onto your hair clip.
Why this method works
This style is quick, cute, and easy to customize. Use satin ribbon for a soft, dressy bow or grosgrain for a crisp everyday version. It is a great option for school outfits, holiday accessories, gift toppers, and matching sibling sets.
Best use case
If you want a simple ribbon hair bow in under five minutes, this is your winner. It is also the bow most likely to save you when you remember a school event approximately twelve minutes before leaving the house.
Way 2: Make a No-Sew Boutique Loop Bow
If you have ever seen those polished boutique hair bows with crisp loops and neat tails, this method is for you. It looks impressive, but it is beginner-friendly and does not require sewing if you use glue and a center tie.
What you need
- 1.5-inch grosgrain ribbon, about 24 inches long
- Small center strip of ribbon
- Zip tie, floral wire, or thread
- Alligator clip
- Hot glue gun
How to make it
- Lay the ribbon flat and make a figure-eight or double-loop shape, crossing the ribbon in the center.
- Adjust the loops so both sides look balanced and the tails hang evenly.
- Pinch the center accordion-style to create those signature boutique folds.
- Secure the center tightly with thread, a zip tie, or floral wire.
- Wrap a small ribbon strip around the center to hide the tie.
- Glue the finished bow onto a lined alligator clip.
How to make it look better instantly
Use grosgrain ribbon if you want that structured, full shape. Trim the tails with a clean angle or V-cut, and take an extra ten seconds to fluff the loops evenly. That little adjustment is what moves the bow from “cute homemade” to “wait, you made that?”
Best use case
This is an excellent bow for toddlers, older kids, cheer-style accessories, and small handmade business products. It looks polished, stays in shape well, and pairs nicely with uniforms, dresses, and holiday outfits.
Way 3: Make a Stacked Ribbon Hair Bow
Now we are entering fancy territory. A stacked bow uses multiple layers of ribbon to create extra volume and dimension. It is not hard, but it does ask you to slow down and keep your pieces organized. In other words, it rewards calm hands and punishes “close enough” energy.
What you need
- Two or three ribbons in coordinating colors or patterns
- Ribbon widths between 7/8 inch and 1.5 inches
- Scissors
- Thread, wire, or zip tie
- Hot glue
- Clip, barrette, or headband base
How to make it
- Cut several pieces of ribbon in different lengths. For example, use one 24-inch piece, one 20-inch piece, and one 16-inch piece.
- Create a looped bow shape with each piece individually.
- Stack the largest loop on the bottom, medium loop in the middle, and smallest loop on top.
- Line up the centers carefully and pinch them together.
- Secure the center with thread, a zip tie, or wire.
- Wrap the center with a narrow ribbon strip and glue it in place.
- Attach the finished bow to a clip or headband.
Design ideas for stacked bows
- Use solid ribbon on one layer and polka dots or stripes on another
- Try holiday color palettes like red and green, pastel spring tones, or school colors
- Add a felt circle or small embellishment in the center for extra personality
Best use case
This is perfect for birthdays, photo shoots, cheer bows, special events, and big statement hair accessories. It is also a fun way to use leftover ribbon pieces without pretending you were totally going to organize that craft bin this weekend.
Way 4: Make a Mini Ribbon Bow with a Fork
Yes, a fork. The same utensil that usually minds its own business at dinner can become a tiny bow-making tool. This method is great for mini bows, baby clips, doll accessories, gift toppers, and delicate accent bows for layered projects.
What you need
- Narrow ribbon, around 1/4 inch to 3/8 inch wide
- A standard fork
- Scissors
- Glue
- Small clip, snap clip, or headband
How to make it
- Cut a narrow piece of ribbon long enough to wrap around the fork and tie.
- Wrap the ribbon around the fork tines, crossing it through the center.
- Tie a knot in the middle using the gap between the fork tines to hold it in place.
- Slide the tiny bow off the fork and tighten it gently.
- Trim the tails to size.
- Glue the mini bow onto a small clip or use it to decorate a larger stacked bow.
Why crafters love this trick
The fork keeps the bow centered and symmetrical, which is especially useful when working with tiny ribbon. It is simple, surprisingly satisfying, and kind of addictive. You may start by making one. You may end with twelve. This is normal.
Best use case
Mini bows are ideal for baby accessories, pigtail clips, party favors, and detailed layered designs. They also look adorable attached to cards, gift boxes, and handmade ornaments.
How to Attach a Hair Bow to a Clip or Headband
A beautiful bow is only useful if it actually stays in the hair. If the clip slips out after six seconds, the bow is just decorative emotional damage.
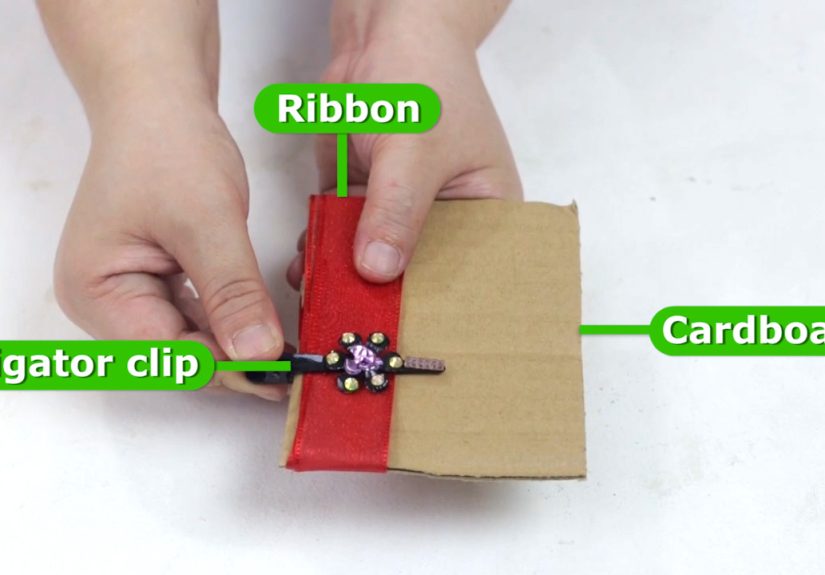
Option 1: Alligator clip
This is the most common option. Many crafters line the clip with ribbon first, which helps it grip fine hair better and gives it a cleaner finished look. Once the clip is lined, glue the bow securely on top.
Option 2: Barrette
Barrettes work well for larger bows and older children or adults. They provide a flatter base, which is useful for wide or layered designs.
Option 3: Nylon headband
For babies, soft nylon headbands are a popular choice. Glue the bow onto a felt circle first, then attach the felt circle to the headband for a softer, more flexible finish.
Option 4: Ponytail elastic
If you want a bow for a ponytail or bun, attach it to a strong elastic. This works especially well for cheer bows and school spirit accessories.
Common Mistakes to Avoid When Making Ribbon Hair Bows
- Using dull scissors: Ragged cuts make the bow look messy fast.
- Skipping fray protection: Clean edges matter more than most beginners expect.
- Making uneven loops: Measure if needed. Eyeballing works until it absolutely does not.
- Not tightening the center enough: A loose center makes the whole bow collapse.
- Using too much glue: A little glue secures a bow. Too much glue creates a crunchy craft fossil.
How to Style and Customize Your Ribbon Hair Bows
Once you know the basic methods, customization becomes the fun part. Try these easy upgrades:
- Add rhinestones, pearls, buttons, or felt shapes to the center
- Mix textures like grosgrain and satin for contrast
- Use seasonal prints for holidays and school events
- Create matching sets in different sizes
- Make themed bows for birthdays, team spirit, or baby showers
You can also build a small color library of ribbon spools. Neutral shades, school colors, metallics, and soft pastels will cover most occasions. Then when you need a last-minute accessory, you can make one instead of panic-buying a flimsy bow that sheds glitter into your car forever.
Experiences and Lessons Learned from Making Ribbon Hair Bows
One of the funniest things about learning to make a hair bow out of ribbon is how quickly it turns from “I’ll try one little project” into “Why do I suddenly own seventeen spools of grosgrain?” Ribbon bow making has that effect. It looks small and simple, but it teaches you a lot about patience, proportions, texture, and finishing details.
At first, many beginners assume the ribbon does all the work. You cut it, tie it, glue it, done. Then the first bow comes out lopsided, one tail is mysteriously longer than the other, and the center looks like it was pinched during a minor earthquake. That is usually the moment when the real lesson begins: tiny adjustments matter. A quarter inch matters. The direction of the fold matters. The difference between “pretty cute” and “surprisingly polished” is often just symmetry and a neatly wrapped center.
Another common experience is discovering that ribbon has opinions. Grosgrain is cooperative. It holds shape, behaves well, and generally wants you to succeed. Satin is gorgeous but slippery, like a glamorous friend who shows up late and still looks amazing. Beginners often fall in love with satin first because it is shiny, then switch to grosgrain after realizing they want the bow to keep its shape without constant negotiations.
There is also a special kind of satisfaction in learning how to finish the edges neatly. The first time you trim tails into a clean V-cut and stop the ends from fraying, the bow suddenly looks intentional. Finished. Grown-up. It is one of those small crafting wins that makes you feel wildly capable for no obvious reason.
Making bows for real life adds another layer of experience. A bow for a baby headband needs softness and a lightweight feel. A bow for a school uniform needs durability. A bow for a holiday dress can be dramatic and shiny. A bow for daily wear needs to survive backpacks, playgrounds, snack crumbs, and at least one dramatic car-seat nap. Over time, you start to match the bow style to the occasion automatically.
People also learn that clips matter almost as much as the bow itself. A beautiful bow on a slippery clip is frustrating. A lined alligator clip or well-secured barrette can make a simple bow feel much more professional and wearable. It is one of those behind-the-scenes details nobody compliments directly, but everybody notices when it fails.
Perhaps the best part of this craft is that it is forgiving. If a bow turns out too small, it becomes a mini clip. If it turns out extra dramatic, congratulations, it is now a statement piece. If the loops are uneven, fluff them and call it whimsical. Ribbon bows give you plenty of second chances, and that is part of why so many crafters stick with them.
In the end, the experience of making hair bows is not just about the final accessory. It is about learning to work carefully with your hands, experimenting with color and shape, and enjoying a project that is practical, affordable, and genuinely fun. Plus, it is hard to stay in a bad mood while holding a tiny sparkly bow. Science may not have published that yet, but the craft table knows.
Final Thoughts
Once you learn these four ways to make a hair bow out of ribbon, you can create everything from tiny everyday clips to oversized boutique bows. Start simple, pick a ribbon that is easy to handle, and focus on neat cuts, a secure center, and balanced loops. After that, it is mostly a matter of practice, personality, and how much ribbon you are willing to let take over your house.
The best part is that ribbon hair bows are affordable, customizable, and surprisingly giftable. Make one for yourself, make three for a friend, and make a few extra because once people find out you can do this, they absolutely will start making requests.


