Table of Contents >> Show >> Hide
- Why This $7 Dryer Vent Cleaning Kit Keeps Selling Out
- What Lint Buildup Actually Costs You
- How to Use a Dryer Vent Cleaning Kit Safely and Effectively
- How Often Should You Clean a Dryer Vent?
- What to Look for in a Dryer Vent Cleaning Kit
- DIY vs Pro Cleaning: Which One Is Better?
- Common Mistakes That Reduce Dryer Efficiency
- Does a Dryer Vent Kit Actually Save Money?
- Quick FAQ
- Final Takeaway
- Extended Reader Experiences (500+ Words): Real Laundry Room Stories
Some deals feel like a little “nice-to-have” moment. This one feels like an adulting power move.
A dryer vent cleaning kit dropping to $7 sounds small, but the value is surprisingly big: better
drying performance, lower energy waste, and a safer laundry setup. Not bad for less than the price
of a fast-food combo.
If you’ve ever run a load twice because jeans came out damp, noticed your laundry room feels hotter
than usual, or wondered why your dryer suddenly sounds like it’s working overtime, lint buildup in
the vent may be the hidden villain. That’s why this “boring” tool keeps trending in Amazon deal
roundups: it solves a real problem fast, without requiring a toolbox the size of a garage.
In this guide, we’ll break down why a low-cost dryer vent kit is getting so much attention, what
makes a kit actually useful, how to use one safely, how often to clean your system, and when it’s
smarter to call a pro. You’ll also get practical examples and real-life experiences so this doesn’t
read like a generic product pitch. Let’s pull lint out of the shadows.
Why This $7 Dryer Vent Cleaning Kit Keeps Selling Out
1) It fixes a high-friction household problem for pocket change
Most people don’t think about dryer vents until clothes take too long to dry. A cheap cleaning kit
removes the “I should really do this someday” barrier. For about $7, you get an easy entry point to
dryer maintenance, which is a lot more approachable than a service call.
2) The tool design is beginner-friendly
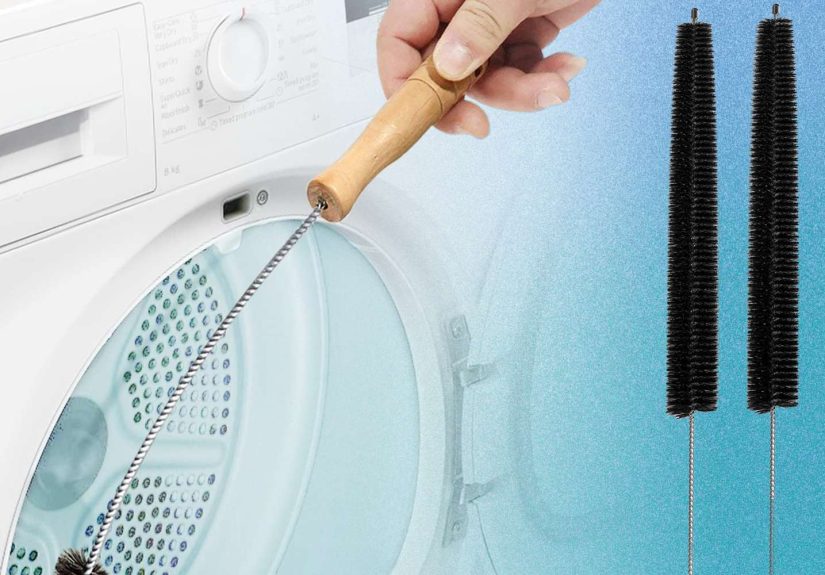
The popular kits usually include two simple pieces: a long flexible lint brush and a vacuum hose
attachment. Translation: one part loosens lint, one part removes lint. You don’t need pro-level
skills, and in many laundry rooms you can finish the core cleanup in under 20 minutes.
3) It’s multi-use beyond the dryer
Shoppers often use the same narrow brush around refrigerators, under stoves, and in tight gaps where
dust parties happen after midnight. A tool that works in multiple places feels like a smarter buy,
especially when the price is low.
4) It taps into practical “prevent-now, save-later” psychology
People love products that feel preventative. Spending $7 today to avoid bigger hassle later is an
easy yes. Even if the exact sale price fluctuates, the value logic remains strong: tiny cost, useful
maintenance, visible before-and-after results.
What Lint Buildup Actually Costs You
Dryer lint looks harmless. It is not harmless in quantity. Lint accumulation can reduce airflow,
trap heat, and make a dryer work longer and harder than necessary. That affects three things most
households care about:
- Time: Loads take longer, especially towels, denim, and bedding.
- Money: Longer cycles can mean higher energy use.
- Safety: Lint and poor airflow are established fire-risk factors.
Here’s the practical version: if your dryer used to finish a normal mixed load in one cycle but now
needs another 20–40 minutes, don’t assume your machine is “just getting old.” Airflow restriction in
the vent system is often the first thing to check.
Warning signs of a clogged or partially blocked vent include:
- Clothes are still damp at the end of a regular cycle.
- The dryer or laundry area feels unusually hot.
- A faint burning smell appears during drying.
- Lint appears around the dryer hose, vent opening, or floor area.
- The outside vent flap opens weakly while the dryer runs.
None of these signals guarantee a disaster, but they are strong reminders to clean the system soon.
Think of it like changing your car’s air filter: routine maintenance that protects performance and
prevents expensive headaches.
How to Use a Dryer Vent Cleaning Kit Safely and Effectively
Before you start
- Unplug electric dryers. For gas dryers, shut off gas first.
- Move the dryer out gently (use help if needed).
- Wear a dust mask if you’re sensitive to lint and dust.
- Keep a vacuum nearby for cleanup.
Step-by-step cleaning workflow
-
Clean the lint filter and housing first. Remove the screen, clear visible lint, and
vacuum inside the filter cavity. - Disconnect the vent hose. Loosen clamp or tape connecting the dryer to ductwork.
- Use the flexible brush. Insert and rotate gently to loosen packed lint from the duct.
- Use vacuum attachment. Pull loosened debris out from both ends where possible.
- Check the exterior vent cap. Confirm flap/slats move freely and remove visible buildup.
- Reconnect and secure. Reattach ducting and ensure there are no leaks or kinks.
- Test run. Run an empty 10–15 minute cycle and verify strong airflow outdoors.
Safety notes that matter
Avoid forcing stiff tools around tight bends. Slow, controlled passes are better than aggressive
pushing. If you encounter deep obstruction, unusual duct routing, or heavy compacted lint, it may be
time for professional service. Also, avoid flimsy foil or crushed transition ducts where possible;
better airflow and fewer lint traps can improve long-term performance.
How Often Should You Clean a Dryer Vent?
There isn’t one universal schedule because households use dryers differently. A smart baseline:
- Lint screen: clean after every load.
- Lint-screen scrub: monthly if you use dryer sheets (film can reduce airflow).
- Vent deep clean: at least once a year for average use.
For high-use homes (large families, pet-heavy homes, frequent bedding/towel loads), twice-yearly or
quarterly vent checks can be worth it. If you’re drying multiple loads daily, treat vent cleaning as
a routine task, not an emergency response.
What to Look for in a Dryer Vent Cleaning Kit
Reach and flexibility
A short stiff brush may clean the first section but miss deeper buildup. Look for long, flexible tools
that can navigate gentle turns without damaging duct connections.
Vacuum compatibility
Many kits include adapters that fit common vacuums but not all models. Check compatibility before
checkout. If your vacuum doesn’t fit the adapter, you’ll lose half the kit’s benefit.
Manual + drill-friendly options
Some kits allow manual turning or drill-assisted rotation. Manual mode gives control for beginners.
Drill mode can speed up cleaning in longer runs, but careful handling is essential.
Durable connection points
Weak joints can unscrew or detach in ducts. Favor kits with secure connectors and clear instructions.
Better hardware means less frustration and fewer “where did that piece go?” moments.
DIY vs Pro Cleaning: Which One Is Better?
A $7 kit is excellent for regular upkeep. But “best” depends on your setup.
DIY is great when:
- Your vent run is short and accessible.
- You can safely move the dryer.
- You’re doing routine maintenance, not major unclogging.
- You want a fast, low-cost tune-up.
Call a professional when:
- Vent routing is long, vertical, or complex.
- You suspect severe blockage after years without cleaning.
- Burning smell persists after DIY cleaning.
- You’re uncomfortable disconnecting gas/electrical components.
Typical pro-cleaning pricing varies by location and complexity, but many homeowners still use a
low-cost kit between service visits to keep buildup manageable.
Common Mistakes That Reduce Dryer Efficiency
- Cleaning only the lint screen. Great habit, but it doesn’t replace vent maintenance.
- Ignoring the outside vent cap. Exterior obstruction can choke airflow too.
- Crushing the duct when pushing the dryer back. One hard shove can undo your cleanup.
- Overstuffing loads. Heavier moisture + restricted airflow = longer dry times.
- Waiting for a burning smell. That’s a late warning sign, not a reminder app.
Does a Dryer Vent Kit Actually Save Money?
In many households, yesindirectly and consistently. Here’s why:
- Improved airflow can shorten cycle times.
- Shorter cycles can reduce wear on dryer components.
- Routine cleaning may help avoid service calls caused by preventable clogs.
- A better-maintained system often feels more predictable week to week.
It’s less about dramatic instant savings and more about maintenance economics. One small tool supports
efficiency and lowers the odds of expensive surprises. That’s a good trade.
Quick FAQ
Is a $7 dryer vent cleaning kit enough by itself?
For light-to-moderate buildup, often yes. For deep or complex clogs, pair DIY with occasional pro
service.
Can I use the kit without moving the dryer?
You can clean from the exterior in some setups, but interior access usually improves results.
Will one cleaning fix all long-dry problems?
Not always. Heating element issues, moisture sensor faults, or overloaded cycles can also contribute.
But vent cleaning is a smart first step because it’s low cost and high impact.
Can I damage the vent with a brush?
If used aggressively, yes. Use gentle passes and avoid forcing tools around sharp bends.
Final Takeaway
“Amazon’s best-selling dryer vent cleaning kit is now $7” sounds like a simple deal headline, but the
real story is bigger: small preventive habits can meaningfully improve laundry performance, household
safety, and day-to-day convenience.
If your dryer has been taking forever lately, this is one of the easiest maintenance wins you can buy.
Low effort, low cost, and immediate peace of mind. In a world full of expensive home upgrades, that’s
refreshingly practical.
Extended Reader Experiences (500+ Words): Real Laundry Room Stories
Experience 1: “I thought my dryer was dying”
Carla, a busy teacher and mom of two, was convinced her seven-year-old dryer was on its last legs.
Her towels came out damp, athletic clothes smelled musty, and drying time had quietly stretched from
one cycle to almost two. She was already researching replacement models when she saw a low-cost vent
kit on Amazon and decided to try the cheap fix before spending hundreds.
The first cleaning shocked her. She pulled out enough lint to fill half a grocery bag, mostly from the
vent section behind the machine and near the outside flap. After reassembling the duct and running a
test cycle, airflow felt noticeably stronger. Over the next week, her normal loads dried faster, and
she stopped running repeat cycles. Her quote: “I didn’t buy a new dryer. I bought 20 minutes of my
evening back.”
Experience 2: “Pet hair was the hidden multiplier”
Marcus lives with two golden retrievers and one fluffy cat. His lint screen looked full after every
load, but he assumed that was normal. What he didn’t realize: hair and lint together can form dense
clumps farther down the vent path. He used a flexible brush and vacuum adapter kit after noticing his
laundry room getting hot during back-to-back loads.
He now has a simple routine: clean lint screen every load, inspect vent monthly, deep clean quarterly.
He also switched to smaller load sizes for pet bedding. His biggest takeaway wasn’t dramaticit was
consistency. “I used to treat dryer cleaning like random spring cleaning. Now it’s just maintenance,
like replacing air filters.”
Experience 3: “Rental turnover taught me a lesson”
A small landlord, Nina, started cleaning dryer vents between tenants after one unit had recurring
moisture complaints. The washer was fine, the dryer heated fine, but clothes took forever. During
turnover, she used a vent brush kit and removed thick lint buildup plus dust near the external cover.
The issue disappeared without replacing appliances.
She now includes vent inspection on every turnover checklist. It helped reduce “dryer doesn’t work”
messages and added a safety check she felt better about. Her words: “It’s one of those tiny tasks that
quietly prevents bigger problems. Tenants don’t see it, but they feel it when laundry actually dries.”
Experience 4: “The $7 tool that ended our laundry arguments”
Dylan and Priya had a recurring household debate: one thought the dryer was underpowered, the other
thought loads were too big. Both were partially right. They cleaned the vent with a budget kit,
reduced load size slightly, and made one ruleno skipped lint-screen cleaning, ever.
Result: fewer reruns, fewer late-night “why is this still damp?” moments, and less heat in the laundry
nook. Dylan joked that the best feature of the kit wasn’t the brush; it was “relationship maintenance.”
Funny line, true result.
Experience 5: “From neglect to routine in 10 minutes”
Jenna is honest about home maintenance: “If it’s not obvious, I forget it exists.” Her dryer vent fell
into that category for years. She finally cleaned it after reading a short safety reminder online and
setting a phone calendar alert for future checks.
She uses a minimal system now: annual deep clean, monthly quick inspection, and a reminder pinned in
her laundry app notes. “I don’t need perfect. I need repeatable.” That’s probably the smartest mindset
for dryer care. The goal isn’t perfection; it’s preventing buildup before buildup becomes a problem.
Across all these stories, the pattern is clear: the biggest win isn’t just buying a low-cost tool.
It’s building a simple cleaning habit. The kit starts the process; routine creates the results.


