Table of Contents >> Show >> Hide
- Before You Start: Know Your Blind Type
- Option 1: Quick Dusting for “Everyday Clean” Blinds
- Option 2: Deep Clean While Blinds Are Still Hanging
- Option 3: The Bathtub Treatment for Heavily Soiled Blinds
- Cleaning Different Materials the Right Way
- How Often Should You Clean Your Blinds?
- Smart Shortcuts and Blind-Cleaning Hacks
- Real-Life Experiences: What Actually Works Day to Day
- Final Thoughts: Choose the Best Method for Your Blinds
If you’ve ever opened your blinds on a sunny morning and watched a tiny dust storm sparkle across the slats, congratulationsyou’ve discovered the universal truth of homeownership: blinds are dust magnets. The good news? You don’t need a professional cleaning crew or a chemistry degree to get them looking fresh. With a few simple methods (and maybe a rubber glove or two), you can clean blinds quickly, safely, and without losing your mind.
Drawing on classic tips from Bob Vila–style home care plus modern cleaning advice, this guide walks you through the three best ways to clean blinds: a fast dusting method, a deeper clean while they’re hanging, and a full-on “bathtub spa day” for your dirtiest blinds. We’ll also talk about how to handle wood, faux wood, aluminum, and fabric blinds so you don’t accidentally warp, stain, or discolor them.
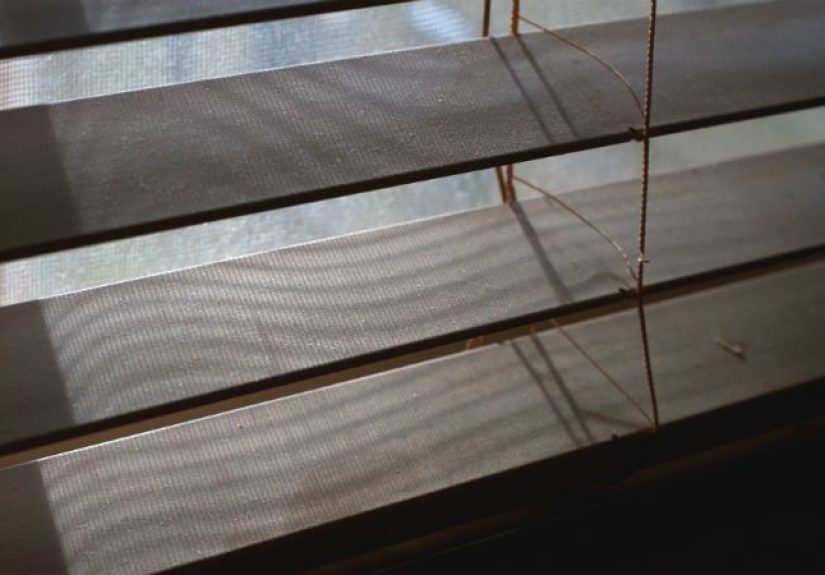
Before You Start: Know Your Blind Type
Not all blinds are created equal, and they definitely don’t like to be cleaned the same way. Step one is to figure out what you’re dealing with, because the wrong cleaner can ruin the finish or warp the slats.
Common Types of Blinds
- Faux wood blinds: Usually PVC or a composite material. They’re tougher than real wood and can handle mild water-based cleaning and even a vinegar solution in many cases.
- Real wood blinds: Beautiful but picky. They hate excess moisture. Think “lightly damp cloth” and wood-safe cleaners only.
- Aluminum or vinyl mini blinds: These are the workhorses. They can usually handle water, mild detergent, and even a soak in the tub if they’re really grimy.
- Fabric blinds or shades: Roman shades, pleated shades, and some vertical blinds use fabric. They typically need vacuuming and spot cleaning rather than soaking.
Pro tip: If you still have the manufacturer’s care instructions tucked into a drawer (or can find them online), check them before you break out the bucket. A quick look can save you from warped wood, peeling finish, or discolored fabric.
Option 1: Quick Dusting for “Everyday Clean” Blinds
Think of this as your “I have 10 minutes before guests arrive” method. You won’t deep clean, but you’ll knock out the dust and make the blinds look presentable.
What You’ll Need
- Microfiber cloth, dusting mitt, or blind duster tool
- Optional: vacuum cleaner with a soft brush attachment
- Optional: a clean, dry sock to slip over your hand (the DIY hero)
Step-by-Step Quick Dusting
- Close the blinds. Tilt the slats so they’re mostly closed but still slightly angled. You want a flat surface to dust, but a small gap helps you reach overlapping edges.
- Dust from top to bottom. Starting at the top slat, gently wipe or vacuum across each slat. Working top-down keeps loosened dust from landing on areas you’ve already cleaned.
- Flip and repeat. Tilt the slats the other way and repeat the dusting. This gets the underside and any spots you missed.
- Hit the hardware. Don’t forget the headrail, strings, and window framethey collect dust too.
This method is safe for almost every blind type, including wood. You’re not using water or cleanersjust removing surface dust. If you can make this a weekly habit, deep cleaning your blinds becomes rare instead of terrifying.
When Quick Dusting Is Enough
- Your blinds just look a little dull or dusty.
- You don’t see sticky spots, splatters, or grease (looking at you, kitchen blinds).
- No one has touched the blinds with peanut-butter-covered hands.
Bonus hack: A trendy tool right now is the damp duster sponge or reusable ridged sponge. Lightly dampen it with water, squeeze out excess, and swipe across slats. It grabs dust without leaving them wetperfect for faux wood and aluminum blinds.
Option 2: Deep Clean While Blinds Are Still Hanging
When dusting isn’t cutting it anymoremaybe the blinds feel sticky, look gray instead of white, or have splattersit’s time for a deeper clean. The good news is you can clean many blinds right where they hang, no unhooking required.
What You’ll Need
- Bowl or bucket of warm water
- A few drops of mild dish soap
- Soft microfiber cloth or sponge
- Optional: white vinegar for non-wood blinds (faux wood, vinyl, aluminum)
- Dry towel for buffing and drying
General Method (Non-Wood Blinds)
- Mix your cleaner. Fill a bowl or bucket with warm water and add a small squirt of mild dish soap. For faux wood, vinyl, or aluminum blinds, you can mix equal parts white vinegar and warm water instead of soap if you prefer a more natural cleaner.
- Test a small area. Especially for darker or colored blinds, test your solution on a hidden corner to make sure no fading or streaking occurs.
- Wring out your cloth well. The cloth should be damp, not dripping. Too much water can cause streaking on metal and potential issues for nearby wood trim.
- Wipe each slat. Close the blinds and wipe each slat from end to end. Focus on sticky spots or stains. Then flip the slats the other way and repeat.
- Rinse and refresh. If the water gets visibly dirty, swap it out for a clean batch so you’re not just smearing grime around.
- Dry the slats. Go back over the blinds with a dry cloth or towel to remove excess moisture and help prevent water marks.
Special Rules for Real Wood Blinds
Real wood blinds are like hardwood furniture hanging on your windowsthey need gentler treatment:
- Use a barely damp cloth, not a wet one.
- Avoid vinegar and harsh chemicals that can strip finish or discolor the wood.
- Consider a wood-safe cleaner or a drop of gentle soap in water, followed by a dry cloth.
- Never soak wood blinds or leave moisture sitting on the slats.
If your wood blinds are seriously grimy, you may want to call in a pro or follow the manufacturer’s specific instructions. Over-wetting wood can lead to warping or permanent damage, which is way more expensive than buying a bottle of proper cleaner.
When This Option Is Best
- Blinds feel sticky, greasy, or look visibly dirty.
- You have faux wood, vinyl, or aluminum blinds that can handle moisture.
- You want to deep clean but don’t want the hassle of removing the blinds.
Option 3: The Bathtub Treatment for Heavily Soiled Blinds
Sometimes blinds cross the line from “dirty” to “what happened here?” Maybe they’ve sat in a smoky room for years, guarded a kitchen window against bacon splatter, or lived through a renovation. For blinds that are truly caked in grime, the easiest way to clean them is to take them down and give them a bathjust like classic Bob Vila–style advice.
What You’ll Need
- Bathtub or large utility tub
- Warm water
- Mild dish soap
- Soft sponge or soft-bristle brush
- Old towels for drying
- Optional: vinegar for non-wood blinds
Step-by-Step Tub Method (Non-Wood Blinds Only)
- Remove the blinds. Carefully take the blinds down from the window, following the hardware design. Lay them gently in the tub.
- Fill the tub with warm, soapy water. Add a small amount of dish soap. For greasy kitchen blinds, a bit of degreasing dish soap helps cut through buildup.
- Soak for several minutes. Let the blinds sit so the water can loosen dust, grease, and grime. You don’t need to leave them for hoursusually 10–20 minutes is plenty.
- Gently scrub. Use a soft sponge or brush to clean each slat, moving along the length. Be careful not to bend or twist the slats.
- Rinse thoroughly. Drain the dirty water, then rinse the blinds with clean water until no soap remains. Soap residue can attract more dirt.
- Dry completely. Lay the blinds on old towels or hang them over the tub or shower rod to air dry. Make sure they’re fully dry before reinstalling to avoid water spots or rust on metal parts.
Important: Do not use this soak method on real wood blinds or on blinds with sensitive mechanisms that the manufacturer says should never be immersed. For those, stick with dusting and gentle spot cleaning only.
When the Tub Treatment Is Worth It
- There are greasy stains that won’t budge with simple wiping.
- The blinds live in a kitchen or bathroom with lots of moisture and airborne gunk.
- You’d rather clean them thoroughly once than keep fighting the same dirt over and over.
Cleaning Different Materials the Right Way
Because blinds come in so many materials, here’s a quick cheat sheet so you know the best method for each type.
Faux Wood Blinds
- Great candidates for all three options: dusting, in-place deep cleaning, or tub soaking (if manufacturer allows).
- Safe with mild soap and water; many can handle diluted vinegar for cutting grease.
- Dry thoroughly to prevent water spots or buildup around cords and headrails.
Real Wood Blinds
- Stick mainly to Option 1 (dusting) and a very gentle version of Option 2 (lightly damp cloth).
- Never soak and never use harsh or acidic cleaners (like straight vinegar) on real wood.
- Think of them as furniture: if you wouldn’t soak your dining table, don’t soak your blinds.
Aluminum or Vinyl Mini Blinds
- Very forgivingdust, wipe, or soak depending on how dirty they are.
- A mild soap solution or diluted vinegar works well for stuck-on grime.
- Be gentle with pressure so you don’t bend the thin slats.
Fabric Blinds and Shades
- Vacuum with a hose and upholstery brush to remove dust.
- Spot clean with a fabric-appropriate cleaner or mild soap solution if the label allows.
- Some may require professional cleaningcheck the manufacturer’s tag.
How Often Should You Clean Your Blinds?
Blinds don’t need daily attention, but they do appreciate a little routine love:
- Light dusting: Every 1–2 weeks, especially in high-traffic rooms or if anyone in the home has allergies.
- Deep cleaning: Every 3–6 months, or sooner if blinds are in a kitchen, bathroom, or near frequently opened windows.
- Heavy-duty soak: As needed, when blinds are visibly stained, greasy, or have been ignored since… that one holiday you don’t talk about.
Regular maintenance keeps your blinds from reaching the “I’m just going to pretend these are gray now” stage and makes your whole room look brighter and cleaner.
Smart Shortcuts and Blind-Cleaning Hacks
- Use a glove or sock: Put a microfiber cloth, sock, or cleaning glove over your hand. Pinch each slat between your fingers and slide alongcleaning both sides at once.
- Try a specialty blind duster: Those multi-prong tools that clean several slats at a time can speed up the job.
- Spray the cloth, not the blinds: When using glass cleaner or other sprays near blinds, spray onto your cloth first to avoid overspray that can damage finishes.
- Pair tasks: Dust blinds on the same day you dust furniture or vacuum. It fits right into your cleaning routine and keeps dust from piling up.
Real-Life Experiences: What Actually Works Day to Day
Cleaning blinds is one of those chores most people avoid… until sunlight exposes every dust bunny in 4K resolution. Over time, homeowners and pro cleaners figure out what works best in the real worldnot just in theory. Here are some practical, experience-based insights that can help you choose the best way to clean your own blinds.
The “Five-Minute Friday” Routine
Many people find success with what you might call a “Five-Minute Friday” habit. Every Friday (or whatever day you usually tidy up), they pick one or two windows and quickly dust the blinds with a microfiber cloth or vacuum brush. It’s fast, painless, and keeps dust from becoming a thick layer that requires a full scrub.
Over a month, that routine usually hits every room at least once, without ever dedicating a whole afternoon just to blinds. It also pairs nicely with other tasks like dusting shelves or wiping baseboards, since all of these are dust-prone surfaces that benefit from regular attention.
The Kitchen Blind Reality Check
If there is one place in the house where blinds get truly scary, it’s the kitchen. Even if you don’t fry food constantly, a fine layer of grease tends to drift and settle on nearby surfacesincluding blinds above the sink or stove. People often realize this only when they try to dust and discover the dust is basically glued on.
For these blinds, experience shows that a simple dry dusting almost never works. A damp cloth and a little dish soap are the real heroes here. The soap cuts through grease, while warm water loosens stuck-on grime. Many homeowners report that after one good deep clean, a quick monthly wipe-down is enough to keep kitchen blinds from turning into sticky dust traps again.
Why the Tub Method Feels Like a Big Win
The first time you take blinds down and give them a bath in the tub, it can feel like overkill. But people who have tried it on very dirty aluminum or vinyl blinds often say the same thing: “I should have done this sooner.” The water turns an alarming shade of gray or brown, and the blinds look noticeably brighter afterward.
The key is not to rush the process. Letting the blinds soak for a bit does a lot of the hard work for you. Then a gentle scrub with a soft brush finishes the job. As long as the blinds are the right material (no real wood!) and you dry them well, the tub method can be a game-changer for blinds that feel beyond saving.
Learning the Hard Way with Wood Blinds
Plenty of homeowners have shared stories about accidentally ruining wood blinds with too much water or the wrong cleaner. Maybe they soaked a spot instead of lightly dampening it, or tried a harsh degreaser that stripped the finish. The blinds ended up warped, streaked, or blotchy.
The takeaway from these experiences is simple: treat wood blinds like real wood furniture. If you wouldn’t use a certain product on your dining table, don’t use it on your wood blinds. A soft cloth, a gentle touch, and a tiny bit of wood-safe cleaner go a long wayand cost far less than replacing a full set of slats.
The Allergy Angle
For people with allergies or asthma, blinds are more than just a visual issuethey’re a health concern. Dust and dander tend to settle on horizontal slats, and every time you open or close the blinds, some of it gets stirred up into the air.
Homeowners with allergies often learn that frequent, light cleaning works better than occasional heavy cleaning. A quick wipe or vacuuming session once a week can dramatically cut down on dust buildup and help reduce sneezing fits. Pairing a blind-cleaning routine with regular HVAC filter changes and vacuuming makes a noticeable difference in how “fresh” the house feels.
Why “Good Enough” Is Often the Goal
Finally, real-world experience teaches another important lesson: you don’t have to clean blinds perfectly every single time. It’s okay for your goal to be “looks noticeably better” instead of “display-home flawless.” Most people don’t want to spend an entire day on a single task, and that’s completely understandable.
If you adopt a layered approachregular dusting, occasional deep cleaning in place, and rare tub treatments for the worst casesyou’ll keep your blinds in good shape without feeling like they own your weekend. Over time, this balanced routine becomes a habit, and clean blinds become just another part of a comfortable, well-cared-for home.
Final Thoughts: Choose the Best Method for Your Blinds
The best way to clean blinds really depends on two things: what they’re made of and how dirty they are. For light dust, a quick microfiber wipe is enough. For sticky or stained blinds, a deeper clean with mild soap or vinegar solution (for non-wood blinds) will bring them back to life. And when blinds are truly grimy, the classic bathtub soak for aluminum, vinyl, or faux wood blinds can give you a dramatic before-and-after.
Channel your inner Bob Vila: use the right tools, respect the materials, and don’t be afraid to tackle the job. With these three options in your cleaning toolkit, you can keep your blinds looking fresh, bright, and worthy of all that lovely natural light.


