Table of Contents >> Show >> Hide
- Why Mini Mason Jars Make Great Spice Containers
- Plan Your Rack: Size, Capacity, and Placement
- Materials and Tools
- Build Steps: A Simple, Sturdy Mini Mason Jar Spice Rack
- Fill and Label Your Mini Mason Jars
- Keep Spices Fresh: Small Changes, Big Flavor
- Customizations That Make the Rack Even Better
- Troubleshooting and Maintenance
- Real-World Lessons From Building a Mini Mason Jar Spice Rack (The “Experience” Part)
- Conclusion
Spices have a special talent: they can make a Tuesday night chicken breast taste like you have your life together.
The problem is that spices also love to multiply. One day you own “salt” and “pepper,” and the next day you’re
storing “smoked paprika” in a mug because you’ve run out of cabinet space and dignity.
Enter the mini mason jar spice rack: a compact, good-looking DIY project that keeps your most-used
seasonings visible, organized, and easy to grab. This guide walks you through a sturdy wall-mount rack that holds
mini mason jars (typically 4 oz) in neat rowsplus smart tips for labels, placement, spice freshness,
and a few “learn from other people’s mistakes” moments so you don’t have to make them yourself.
Why Mini Mason Jars Make Great Spice Containers
Mini mason jars hit the sweet spot between “cute” and “actually practical.” They’re glass (so they don’t hold odors),
they seal well, and they’re small enough that you’re more likely to use up what’s inside before it turns into
flavorless, dusty sadness. Most 4 oz mini jars are also wide enough to scoop with a measuring spoon without
performing wrist yoga.
Bonus: They Make Your Spices Easier to See (and Use)
A rack of uniform jars helps you spot what you have at a glance, which makes meal prep faster and reduces duplicate
purchases. Because yes, you absolutely already own cumin. Possibly three times.
Plan Your Rack: Size, Capacity, and Placement
Before you cut wood, decide where your rack will live and how many jars you want it to hold. Most people are happy
with 12–16 jars for “daily-driver” spices (salt, pepper, garlic powder, onion powder, paprika,
chili flakes, oregano, basil, cinnamon, cumin, etc.).
Example Rack Dimensions (Holds 15–16 Mini Jars)
- Width: ~16 inches (fits 4 mini jars per shelf comfortably)
- Height: ~12–14 inches (4 rows of shelves)
- Depth: ~3 to 3.5 inches (enough for the jar diameter plus a little breathing room)
Where Should You Hang It?
- Near your prep zone: convenient, but keep it away from direct splatter.
- Not above the stove: heat + steam = faster flavor loss and clumping.
- Inside a pantry: best for freshness, great for small kitchens.
- On a blank wall: turns “unused space” into “I’m an organized adult.”
Materials and Tools
Materials
- Mini mason jars: 12–16 (4 oz is the most common “mini” size)
- 1×3 board (pine is budget-friendly; poplar is smoother; any straight board works)
- 1/4-inch plywood or paneling for the back (optional but recommended for rigidity)
- Wood glue
- Finish nails or small wood screws
- Sandpaper (120 and 220 grit)
- Finish: paint, stain + topcoat, or clear water-based polyurethane
- Mounting hardware: keyhole hangers, D-rings, or a small French cleat
- Labels: label maker tape, waterproof pantry labels, chalk marker labels, or vinyl decals
Tools
- Miter saw or hand saw (a miter box works fine)
- Drill/driver
- Brad nailer (optional, speeds things up)
- Measuring tape + pencil + square
- Clamps (helpful, not mandatory)
- Sander (optional)
Safety note: If you’re a teen or new to tools, get an adult to help with cutting and mounting.
Wear eye protection, go slow, and measure twicebecause wood is expensive and regret is forever.
Build Steps: A Simple, Sturdy Mini Mason Jar Spice Rack
Step 1: Measure Your Jars (Yes, Really)
Mini jars vary slightly by brand. Measure one jar’s diameter and height. Most 4 oz
minis are roughly 2–3 inches wide and 2–3.5 inches tall. That measurement tells you how deep each shelf needs to be
and how far apart your shelf rows should sit.
Quick spacing rule: shelf height spacing should be “jar height + 1/2 inch” so you can lift jars out
without scraping knuckles. If your jars are 3 inches tall, plan about 3.5 inches between shelves.
Step 2: Cut Your Wood (Sample Cut List)
Here’s a reliable sample layout for a rack around 16 inches wide with 4 rows:
- Sides: (2) pieces, ~12–14 inches tall (1×3)
- Shelves: (4) pieces, ~11–12 inches long (1×3)
- Top/Bottom rails (optional): (2) pieces, same length as shelves
- Back panel: 1/4-inch plywood/paneling cut to match your outer frame
Want more jars per row? Increase the overall width. Want fewer jars? Keep it narrower. The goal is a rack that fits
your space and your spice habitsnot a museum display for saffron you never use.
Step 3: Dry-Fit and Mark Shelf Locations
Lay the two side pieces parallel on a flat surface. Mark where each shelf will sit. Use a square so your shelf lines
are level and consistent. This is the boring step that makes the finished rack look crisp instead of “handmade in a
hurry.”
Step 4: Assemble the Frame
- Apply a thin bead of wood glue to the ends of your first shelf board.
- Press it onto your shelf marks on one side piece.
- Secure with brad nails or predrilled screws.
- Repeat for all shelves.
- Attach the second side piece to complete the frame.
Pro tip: If you don’t have a nailer, predrill small holes for screws to prevent splittingespecially
with pine.
Step 5: Add the Back Panel (Recommended)
A back panel makes the rack sturdier and keeps it from racking (that annoying diagonal wobble). Cut the panel to fit
the outer dimensions of your frame, add glue around the edges, and nail or screw it on.
Step 6: Sand and Finish
Sand everything smooth (120 grit, then 220). If you’re staining, wipe off dust thoroughly first. If you’re painting,
a quick primer coat can improve coverage.
- Clear-coat option: Water-based polyurethane keeps a natural wood look and is easy to clean.
- Paint option: Great if you want labels and jars to “pop.”
- Stain option: Classic, warm, and hides small dings.
Let your finish fully cure before loading spices. “Dry to the touch” isn’t the same as “ready for kitchen life.”
Step 7: Mount It Securely
A fully loaded rack can weigh more than you expect. Use mounting hardware that matches your wall type:
- Best: Screw into studs.
- If studs don’t line up: Use heavy-duty drywall anchors rated for the load.
- Extra-sturdy option: A small French cleat spreads weight and keeps the rack level.
Placement tip: Hang it where you can reach it with one hand while your other hand is stirring a pot.
If you have to do a full-body lunge for cinnamon, something has gone wrong.
Fill and Label Your Mini Mason Jars
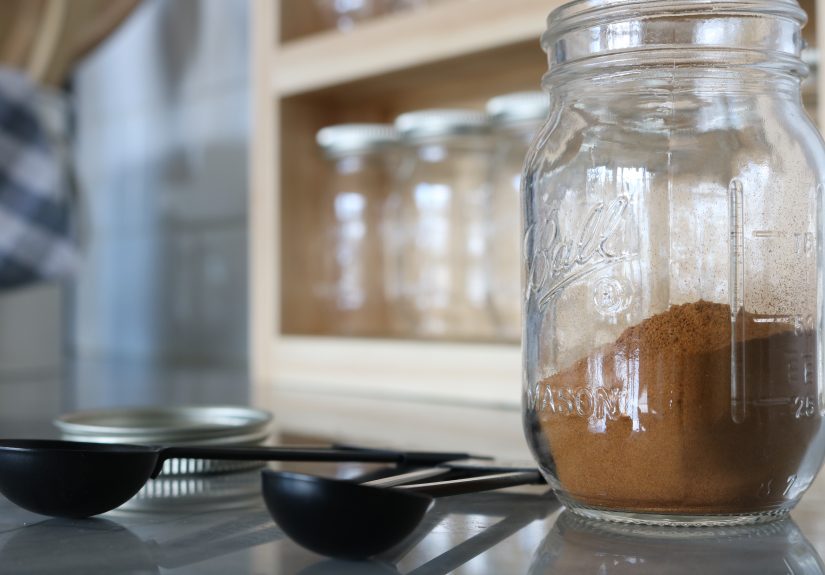
Wash, Dry, Then Fill
Wash jars and lids in warm soapy water, rinse, and dry completely. Moisture is the enemy of free-flowing spices.
When filling, use a small funnel or a folded index card as a “spice slide” to avoid turning your counter into a
paprika crime scene.
Labeling Styles That Actually Work
- Front labels: Best for wall racks where you face the jars.
- Lid-top labels: Best if your jars ever move into a drawer or cabinet.
- Chalkboard labels: Cute and flexible, but can smudge if handled a lot.
- Waterproof vinyl: Most durable and easiest to wipe clean.
Add Dates (Future You Will Thank You)
Add a small “opened” date to the bottom of the jar or the back label. Spices don’t usually become dangerous in normal
pantry use, but they do lose strength over time. Dating helps you refresh what’s faded and keep flavors bright.
Keep Spices Fresh: Small Changes, Big Flavor
The goal of a spice rack isn’t just organizationit’s better cooking. A few storage habits protect the oils that give
spices their punch:
- Keep lids tight: Air is a slow leak for flavor.
- Avoid heat and sunlight: Store away from windows and hot appliances.
- Don’t shake over steam: Steam sneaks moisture into the jar and causes clumping.
- Use a dry spoon: Water droplets turn garlic powder into a rock with commitment issues.
How Long Do Spices Stay “Good”?
Shelf life depends on the spice and how it’s stored. As a general guideline, whole spices typically keep flavor
longer than ground spices, and leafy dried herbs fade sooner than seeds. When in doubt, do the sniff test: rub a
pinch between your fingersif the aroma is weak, it’s time to replace.
Customizations That Make the Rack Even Better
1) Add a Front Lip (If You Have Curious Pets or Kids)
If your rack will live in a high-traffic area, add a thin trim piece along each shelf edge to prevent jars from
sliding off. It’s a small detail that saves you from an unexpected “cinnamon avalanche.”
2) Build a Matching Salt-and-Pepper Mini Shelf
Keep your most-used seasonings (salt, pepper, garlic powder) on a tiny top shelf or side ledge. This turns the rack
into a mini “seasoning station” near your prep zone.
3) Go Magnetic (Optional Upgrade)
If wall space is limited, a magnetic setup can workespecially on a fridge side panel or a mounted metal sheet.
Many DIYers use magnets attached to jar lids or jars and arrange them on a metal surface. If you choose this route,
make sure magnets are strong enough and adhesives are rated for the environment (kitchens get warm and humid).
4) Color-Code by Cuisine
This sounds extra until you try it. Put a tiny colored dot on labels:
green for herbs, red for spicy, blue for baking, yellow
for curry/Indian blends. When you’re cooking fast, your eyes find what your brain can’t.
Troubleshooting and Maintenance
Problem: Spices Clump
- Move the rack away from steam and heat.
- Make sure jars are fully dry before filling.
- Use a dry spoon and avoid sprinkling into steaming pots.
Problem: Labels Peel
- Wipe jars with rubbing alcohol before labeling to remove oils.
- Choose waterproof labels or vinyl for long-term durability.
- Seal paper labels with clear tape if you’re on a budget.
Problem: Rack Feels Wobbly
- Add a back panel if you skipped it.
- Check that screws are tight and the rack is anchored properly.
- Consider a French cleat if you want maximum stability.
Real-World Lessons From Building a Mini Mason Jar Spice Rack (The “Experience” Part)
If you’ve ever done a DIY project, you already know the truth: the build is only half the story. The other half is
the tiny collection of habits and “ohhhh, that’s why people do it that way” moments you pick up after you start
using the thing.
First, the labeling decision feels cosmeticuntil you’re cooking and you grab cumin when you meant
cinnamon. They look surprisingly similar in certain lighting, and your tacos will not appreciate a dessert-themed
identity crisis. Many home cooks end up labeling both the front and the lid because jars migrate: a few end
up on the counter during meal prep, then someone (maybe you) shoves them in a drawer “for now,” and suddenly your
organized system has become an escape room.
Second, there’s the humidity factor. In real kitchens, steam travels. You might hang your rack “near
the stove but not too near,” and still find onion powder turning into a single, impressive boulder. The fix usually
isn’t fancy: shift the rack a couple feet away from the heat source, stop sprinkling directly into steaming pots, and
keep lids snug. The funniest part is that once you solve clumping, you realize your spices smell stronger toobecause
you’re finally storing them like you want them to taste good, not like you’re trying to punish them.
Third, your spice rack will quietly change how you shop. When spices are visible, you stop buying duplicates. You
notice which jars empty fast (hello, garlic powder) and which ones never seem to move (looking at you, “pumpkin pie
spice” from 2019). A mini jar system encourages buying smaller amounts more often, which is great for flavor and also
saves you from hoarding giant containers that go dull before you finish them.
Fourth, don’t underestimate the joy of a “reset” routine. People who love their spice racks tend to
do a quick monthly reset: wipe shelf dust, tighten lids, and rotate jars so the most-used ones live at eye level.
It’s the kitchen equivalent of making your bedsmall effort, big “my life is together” energy.
Finally, the most unexpected experience is how often guests notice it. A tidy row of matching mini mason jars reads
as “intentional,” even if the real reason you built it was because your cabinet was staging a spice uprising. And if
you give one as a gift, it’s the kind of handmade item people actually useespecially if you include a starter set
of essentials (salt, pepper, garlic powder, cumin, paprika) and leave a couple jars empty for their favorites. The
best DIY projects aren’t the ones that look perfect on day one. They’re the ones that make everyday cooking easier
on day one hundred.
Conclusion
Building a mini mason jar spice rack is one of those rare projects that checks every box: it’s simple, affordable,
customizable, and it makes your kitchen feel calmer immediately. Keep it sturdy with a back panel, mount it safely,
label like you mean it, and store spices away from heat and steam so your seasonings stay bold. Then enjoy the best
part: cooking without digging through a chaotic cabinet like you’re searching for buried treasure.


