Table of Contents >> Show >> Hide
- Before You Start: Quick Crack Triage (So You Don’t Fix the Wrong Thing)
- What You’ll Need (DIY-Friendly Tools & Materials)
- DIY Driveway Crack Repair in 5 Simple Steps
- Common DIY Mistakes (So You Don’t Join the “Why Is It Peeling?” Club)
- FAQ: Quick Answers Homeowners Actually Want
- Real-World Experiences: What DIY Driveway Crack Repair Is Actually Like (500+ Words)
- Conclusion
Driveway cracks are like that one sock that keeps escaping the laundry: you can ignore it for a while, but eventually it becomes a whole situation.
The good news? Most driveway cracks are absolutely a DIY jobif you pick the right repair method and don’t try to “fix” everything with leftover
paint and positive vibes.
This guide walks you through a reliable, weekend-friendly process for DIY driveway crack repair in five simple steps, with tips for
both concrete driveway crack repair and asphalt driveway crack repair. You’ll also learn how to judge crack severity,
choose the right materials, and avoid the most common “why is it still sticky?” mistakes.
Sources consulted for background: Home Depot, Lowe’s, Family Handyman, Bob Vila, Concrete Network, Quikrete, Sakrete, Sashco, PROSOCO, FHWA, ACPA, NRMCA, Asphalt Kingdom
Before You Start: Quick Crack Triage (So You Don’t Fix the Wrong Thing)
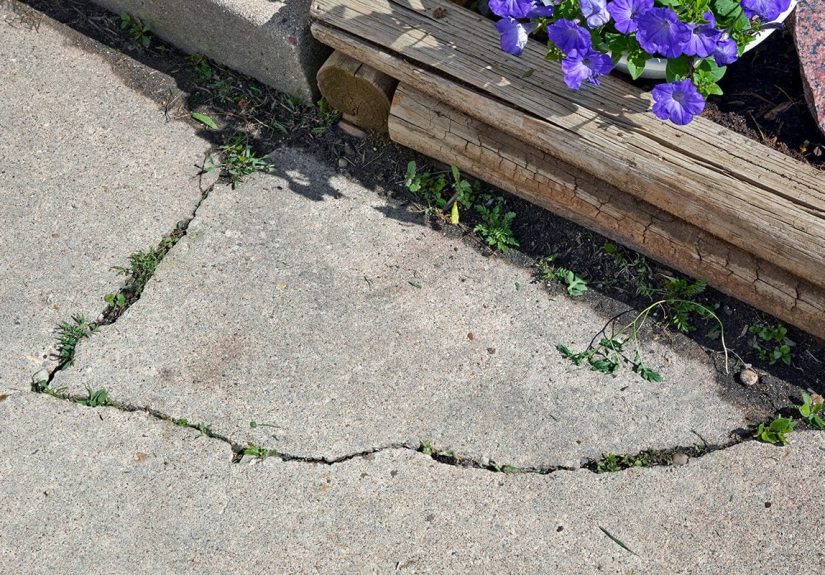
Not all cracks are created equal. Some are cosmetic. Some are warnings. Some are your driveway politely asking for retirement.
Here’s how to tell what you’re dealing with:
1) Hairline cracks (thin, shallow, not changing much)
These often come from shrinkage, surface drying, or normal aging. They’re great candidates for a flexible crack sealant or thin crack filler.
If your driveway is otherwise solidno sinking, heaving, or crumblingyou can usually treat these as a maintenance project.
2) Medium cracks (wider, deeper, starting to hold dirt)
These are the “fix-me-now” cracks. Water gets in, freezes, expands, and turns a small problem into a bigger one. Medium cracks typically need
careful cleaning, proper depth control (hello, backer rod), and a flexible sealant that can handle movement.
3) Big cracks, vertical displacement, or “alligator” cracking
If the two sides of a crack aren’t level (one side is higher), or the surface looks like a reptile’s skin (lots of interconnected cracks),
you’re likely dealing with base issuessettlement, poor drainage, heavy loads, or a failing surface. You can still do short-term repairs,
but the long-term solution may involve patching sections, resurfacing, or professional repair.
When to call a pro
- Cracks that keep widening quickly or reappear in weeks, not months
- Heaving/sinking, trip hazards, or pooling water that won’t drain
- Large crumbling edges, spalling, or missing chunks along the crack
- Cracks that run through structural areas (like near a garage slab edge) and show ongoing movement
What You’ll Need (DIY-Friendly Tools & Materials)
The exact supplies depend on whether you have concrete or asphalt. But the basics are similar: clean, control depth, fill, smooth, cure.
Tools
- Stiff wire brush and/or broom
- Shop vacuum or leaf blower (dust is the enemy of adhesion)
- Putty knife or margin trowel
- Caulk gun (for tube sealants)
- Utility knife and scissors
- Gloves, eye protection, and kneepads (optional but highly morale-boosting)
- Optional: pressure washer (great for prep), crack chaser blade/grinder (for concrete), torch/heat gun (for asphaltonly if you know what you’re doing safely)
Materials (choose based on surface)
- Backer rod (foam rod) for deeper/wider cracks to control sealant depth
- Concrete: self-leveling polyurethane sealant for horizontal cracks; non-sag sealant for slopes/verticals; patching compound for spalled edges
- Asphalt: pourable crack filler or tubed crack filler; asphalt patch for larger voids; optional sealer after repairs cure
DIY Driveway Crack Repair in 5 Simple Steps
These five steps work for most DIY driveway crack repairs. Where concrete and asphalt differ, you’ll see notes under each step.
Step 1: Measure, Diagnose, and Pick the Right Repair Method
Start by checking three things: width, depth, and movement.
Use a tape measure or even a coin for quick sizing. Then choose the repair approach:
- Hairline to small cracks: flexible crack sealant or thin filler (great for routine maintenance).
- Wider/deeper cracks: backer rod + sealant (controls depth and prevents sealant from sinking).
- Missing chunks/spalling: patching compound first, then seal edges.
- Asphalt “alligators” or large damaged zones: patch/resurface may be more realistic than endless filling.
Also check the forecast. Crack repair loves dry conditions. If rain is coming, your sealant will be sadand it will show.
Concrete tip: If you’re repairing a joint (like an expansion joint), you typically want a flexible sealantnot a rigid cement patch.
Asphalt tip: For cracks that open and close with seasons (temperature movement), flexible crack sealant performs better than brittle patch material.
Step 2: Clean Like You Mean It (Because Adhesion Is Everything)
Most crack repairs fail for one boring reason: dirt. Dust, sand, moss, and loose bits keep sealant from bonding.
Cleaning is the unglamorous hero of DIY driveway crack repair.
- Pull out weeds and scrape off visible debris.
- Wire-brush the crack to knock loose material free.
- Vacuum or blow out dust until the crack looks “clean enough to eat off.” (Don’t eat off it.)
- If you wash it, let it dry completely. Many sealants need dry surfaces for best results.
If your driveway has oil stains near the crack, clean them first. Oil can interfere with bonding and may cause repairs to peel or pop.
Step 3: Prep the Crack Opening and Control the Depth
This step is where DIY repairs start looking professional. Your goal is to create a crack shape that the repair material can grab onto
and to avoid using a gallon of sealant where a few inches would do.
For concrete driveways
For larger cracks, lightly “open” the crack edges to remove weak, crumbling concrete and create a more stable repair channel.
Some people use a chisel; others use a crack chaser blade on a grinder. You’re not carving the Grand Canyonjust removing fragile edges.
For asphalt driveways
Asphalt cracks often work best when you remove loose aggregate and create a clean channel. Don’t widen aggressively; just clean thoroughly.
Backer rod: the secret weapon for deep cracks
If the crack is deep enough that sealant would disappear into it, push in backer rod so the sealant sits on top at the correct depth.
This saves material, improves flexibility, and helps create the right sealant shape.
- Choose backer rod slightly larger than the crack width so it fits snugly.
- Press it down with a putty knifedon’t puncture it or shred it.
- Leave space above it for the sealant to form a smooth top layer.
Step 4: Fill the Crack the Right Way (And Don’t Overfill)
Now it’s time to apply your filler or sealant. Read the product labelyes, even if you’re “not a manual person.”
Different materials have different cure times and temperature limits.
Concrete application tips
- Self-leveling sealant is ideal for flat, horizontal driveway cracks because it flows and settles smoothly.
- Non-sag sealant works better on slopes or where you don’t want runny material escaping.
- Smooth the top with a putty knife for a neat finish and to prevent water pockets.
- If edges are spalled (broken), patch the edge first with a concrete patching compound, then seal the crack/joint afterward.
Asphalt application tips
- Pourable fillers work well for narrower cracks; tubed products help with control.
- Fill steadily, then squeegee or trowel to level.
- For larger voids or missing chunks, use asphalt patch material, compact it well, and then seal the surface after it cures.
Pro-looking trick: When using a sealant, aim for a smooth, slightly concave finish instead of a tall “speed bump.”
A tall bead can catch snow shovels, tires, and your patience.
A specific example (so you can picture the process)
Let’s say you have a 12-foot crack that’s about 3/8-inch wide in a concrete driveway, and it’s deep enough that your screwdriver disappears.
You’d clean it, let it dry, push backer rod down to leave room for a flexible sealant, apply self-leveling sealant along the full length,
and then lightly tool the surface for a tidy, watertight seal.
Step 5: Let It Cure, Then Protect It (Maintenance = Longer Life)
Curing isn’t exciting, but it’s where the repair actually becomes strong and durable. Don’t drive over fresh sealant just because it “looks dry.”
Many products skin over quickly but need more time to cure fully.
- Block off the driveway area if possible (cones, tape, a dramatic handwritten signwhatever works).
- Keep water off the repair during the early curing window.
- Once cured, consider sealing the driveway surface if appropriate (especially asphalt) to reduce future moisture intrusion.
Preventing repeat cracks
- Control water: Improve drainage so water doesn’t pool and seep into cracks.
- Skip harsh de-icers when you can: Use sand for traction, and shovel early to reduce ice bonding.
- Inspect twice a year: Spring and fall checks catch small cracks before they become big repairs.
Common DIY Mistakes (So You Don’t Join the “Why Is It Peeling?” Club)
Mistake 1: Sealing over dust
If there’s dust in the crack, sealant bonds to the dustnot the driveway. Then the dust lets go. Your repair leaves. Everyone’s unhappy.
Mistake 2: Skipping backer rod in deep cracks
Deep cracks need depth control. Without it, the sealant can sink, shrink, or split as it cures and moves.
Mistake 3: Repairing in bad weather
Too cold, too wet, or too humid can cause poor curing and weak bonding. Choose a dry stretch with mild temperatures for best results.
Mistake 4: Using the wrong material for the surface
Concrete and asphalt behave differently. Asphalt is more flexible and temperature-sensitive. Concrete is rigid and often needs a repair that either
bonds strongly (patch) or flexes appropriately (joint sealant).
FAQ: Quick Answers Homeowners Actually Want
How long does DIY driveway crack repair last?
A well-prepped repair can last years, especially if you keep water off the base and reseal when needed. Poor prep can fail fastsometimes within a season.
Should I seal my driveway after crack repair?
For asphalt, sealing after repairs have cured can help protect against UV and moisture. For concrete, sealing can help reduce water absorption and winter damage.
Always follow the repair product’s guidance on when (or whether) to seal.
Can I fix cracks and then immediately drive on it?
Usually no. Some products allow foot traffic sooner than vehicle traffic. Treat cure time like a recipeif you skip it, the results get weird.
What if the crack comes back?
If it returns quickly, that’s a clue: there may be movement below the slab or a drainage/base issue. You can re-seal, but also consider fixing the root cause.
Real-World Experiences: What DIY Driveway Crack Repair Is Actually Like (500+ Words)
Here’s the part most tutorials skip: the driveway has opinions. And it will express those opinions the second you start working.
After watching plenty of “five-minute fixes,” many DIYers expect crack repair to be a quick squeeze-and-go. In reality, the application might be quick,
but the prep is where the time goesand where the success lives.
The first surprise is how much debris a crack can hide. A crack that looks “pretty clean” often has a compacted layer of dust, tiny stones, and old filler
that behaves like it’s been paying rent. When you wire-brush and vacuum it out properly, the crack usually looks wider and deeper than you thought.
That’s not bad newsit’s useful information. It tells you whether you need backer rod, whether you’re dealing with crumbling edges, and whether a patching compound
is needed before sealant.
The second surprise is how much weather matters. People underestimate temperature and dryness because the driveway is outside and looks tough.
But crack fillers and sealants are chemistry projects with strong preferences. If you try repairing on a chilly morning, then the afternoon turns humid,
you may end up with sealant that skins over on top but stays soft underneath. It can look “done” until a tire rolls over it and leaves a permanent autograph.
The best DIY results usually come from picking a day when it’s dry, mild, and boringboring is good in driveway repair.
Another real-world lesson: you don’t need to “fill every line you can see” in one weekend. It’s tempting to chase every hairline crack like a detective in a mystery novel,
but a smart strategy is to prioritize the cracks that actively invite water insidewider openings, cracks near downspouts, and areas where water pools.
Some homeowners do a “big cracks now, fine cracks later” approach, which is honestly how most successful maintenance routines work. Fix the biggest pathways for water first,
then circle back with a thinner filler for the smaller cracks when you have time.
One more thing people learn fast: backer rod feels like an unnecessary purchase until you use it. Then it becomes the MVP.
Without it, you can burn through tubes of sealant and still end up with a sunken repair that needs another pass. With it, the sealant stays where it belongs,
the top profile looks cleaner, and the repair tends to move better with seasonal expansion and contraction. In other words, it makes your DIY job look like you knew what
you were doing on purpose.
Finally, the “experience” part includes managing expectations. Even excellent crack repair won’t magically make an old driveway look brand new if the surface is heavily worn.
What it will do is stop the crack from feeding water into the base, reduce weed growth, improve appearance, and slow down future damage.
That’s a huge win for a weekend project. The best mindset is to treat driveway crack repair like dental care: you’re preventing a bigger, more expensive problem,
not trying to create a perfect runway for a private jet. (Unless you have one. In that case, congratulationsand also please don’t land it on your driveway.)
If you keep up with seasonal inspections and tackle small cracks early, the next repair day will be quicker, cheaper, and far less dramatic.
And your driveway will have fewer opportunities to surprise youbecause it already used them up the first time.


