Table of Contents >> Show >> Hide
- What Is a Galvanized Bucket Sink?
- Why Use a Galvanized Bucket as a Bathroom Sink?
- Best Places to Use a Galvanized Bucket Sink
- Choosing the Right Galvanized Bucket
- Tools and Materials You May Need
- Planning the Vanity and Faucet
- Drain and Overflow: The Detail People Forget
- Step-by-Step Overview: How to Make a Galvanized Bucket Sink
- How to Waterproof the Countertop Area
- Cleaning and Maintenance
- Design Ideas for a Galvanized Bucket Bathroom Sink
- Common Mistakes to Avoid
- Is a Galvanized Bucket Sink Practical?
- Extra Experience Notes: What Real DIYers Learn From This Project
- Conclusion
A galvanized bucket as a bathroom sink sounds like something a clever farmhouse would invent after drinking one strong cup of coffee and staring at an old metal pail for too long. And honestly? That is exactly why people love it. It is rustic, practical, affordable, a little unexpected, and far more charming than another plain white basin that looks like it came from the same showroom as everyone else’s.
This DIY project turns a galvanized bucket, tub, or washtub into a vessel-style bathroom sink. The finished look can feel farmhouse, cabin, industrial, cottage, vintage, or even modern-rustic depending on the faucet, vanity, mirror, lighting, and wall finish you choose. It is especially great for powder rooms, guest baths, garden bathrooms, cabins, workshops, mudrooms, and small spaces where personality matters as much as polish.
But before you grab a bucket, drill a hole, and declare yourself the Michelangelo of plumbing, there are a few things to understand. A galvanized bucket was not originally designed to be a bathroom fixture. That means you need to think carefully about drainage, waterproofing, sharp edges, overflow, faucet height, cleaning, and local plumbing rules. Done thoughtfully, it can be a stylish and functional sink. Done carelessly, it can become a tiny indoor pond with attitude.
What Is a Galvanized Bucket Sink?
A galvanized bucket sink is a repurposed metal bucket or tub modified to work as a bathroom basin. Galvanized steel is coated with zinc to help protect the metal from corrosion, which is why these buckets are often used outdoors, in gardens, on farms, and around utility spaces. That protective coating gives the bucket its classic silver-gray finish and slightly mottled texture.
In bathroom design, the galvanized bucket usually sits on top of a vanity like a vessel sink. A drain is installed through the bottom, a faucet is mounted behind it or on the wall, and the plumbing below connects to a standard P-trap and waste line. The result is a custom sink that looks intentionally collected rather than mass-produced.
The appeal is obvious: it is budget-friendly, visually interesting, and highly customizable. You can pair it with reclaimed wood, butcher block, painted cabinetry, black pipe accents, brass hardware, beadboard walls, or concrete countertops. It is the kind of bathroom detail that makes guests say, “Wait, is that a bucket?” followed by, “Why do I like it so much?”
Why Use a Galvanized Bucket as a Bathroom Sink?
It Adds Instant Character
A galvanized bucket sink gives a bathroom a handmade story. Instead of looking like a builder-grade afterthought, the sink becomes the focal point. It feels collected, creative, and relaxed. For farmhouse and rustic interiors, it fits naturally. For modern spaces, it can add contrast and texture.
It Can Be Budget-Friendly
A new vessel sink can be expensive, especially if you want something unique. A galvanized tub or bucket is often much cheaper, especially when sourced from a farm supply store, garden center, flea market, salvage shop, or online marketplace. You will still need proper plumbing parts, a bathroom-rated faucet, sealant, and possibly professional help, but the basin itself can be surprisingly affordable.
It Works Well in Small Bathrooms
Because buckets and small tubs come in different shapes, they can be useful in tight rooms. A round bucket may work well on a narrow vanity, while an oval galvanized tub can create more handwashing space without feeling bulky. Just remember: cute is not the same as practical. The basin must be deep enough to reduce splash and wide enough for comfortable use.
It Is a Great Upcycling Project
If you enjoy repurposed home decor, this project checks all the satisfying boxes. You take something humble and utility-based, give it a new job, and create a bathroom feature that looks expensive in a “don’t ask me what boutique hotel I stole this idea from” kind of way.
Best Places to Use a Galvanized Bucket Sink
A galvanized bucket sink is best for light-to-moderate bathroom use. It shines in powder rooms, guest bathrooms, cabins, pool houses, garden sheds, workshops, barndominiums, farmhouse bathrooms, and laundry-adjacent wash areas. It may not be the best choice for a high-traffic family bathroom where three people brush teeth at once, someone is always dropping toothpaste caps, and the sink is expected to perform like a commercial workhorse.
The reason is simple: most buckets do not have sloped bottoms like manufactured sinks. Water may not drain perfectly unless the bucket shape helps guide water toward the drain. A flatter bottom can leave small puddles, which means more wiping and maintenance. That is not a deal-breaker, but it is something to know before you fall in love with the look.
Choosing the Right Galvanized Bucket
The best bucket for a DIY bathroom sink is new, watertight, sturdy, and large enough for comfortable use. Vintage buckets look fantastic, but they may have pinholes, weak seams, rust, dents, or coatings that are not ideal for bathroom plumbing. If you use an antique piece, inspect it carefully and consider it more of a decorative basin unless it can be safely sealed and fitted.
Size Matters
For a small bathroom sink, look for a bucket or tub with enough diameter for handwashing without constant splash. A basin around 16 to 22 inches wide often works well, depending on vanity depth and faucet placement. The depth should be comfortable, but not so deep that users feel like they are washing their hands in a feed bucket at a county fair.
Shape Matters Too
Round buckets are charming and compact. Oval tubs feel more like traditional sinks and may offer more elbow room. Rectangular galvanized containers can look industrial, but they require careful drain placement and may be harder to seal neatly. Whatever shape you choose, test it on the vanity before cutting anything. Dry-fitting saves heartbreak, money, and dramatic sighing.
Check the Bottom
The drain should sit at the lowest practical point. If the bottom is completely flat, expect some water to remain after use. You can reduce this issue by choosing a bucket with a slightly curved or sloped base, placing the drain in the true center or lowest point, and wiping the basin dry after use.
Tools and Materials You May Need
Every bathroom is different, but a typical galvanized bucket sink project may involve a new galvanized bucket or tub, vessel sink drain without overflow, rubber gaskets, silicone sealant, bathroom faucet, supply lines, P-trap, tailpiece, mounting ring if needed, plumber’s putty where appropriate, adjustable wrench, measuring tape, marker, drill, metal hole saw, file or deburring tool, safety glasses, gloves, and a stable vanity or countertop.
Because cutting metal creates sharp edges, this project is not a “wing it while barefoot” situation. Use proper eye and hand protection, work slowly, and get adult or professional help if you are not experienced with tools. If any water supply or drain line needs to be moved, a licensed plumber is the smart call. Rustic style is great. Rustic leaks are less adorable.
Planning the Vanity and Faucet
A galvanized bucket sink usually works like a vessel sink, which means it sits above the countertop. That affects vanity height. A standard vanity plus a tall bucket can make the sink rim too high, especially for children or shorter users. Before installing anything, mock up the final height. Place the bucket on the vanity and check whether the rim feels comfortable.
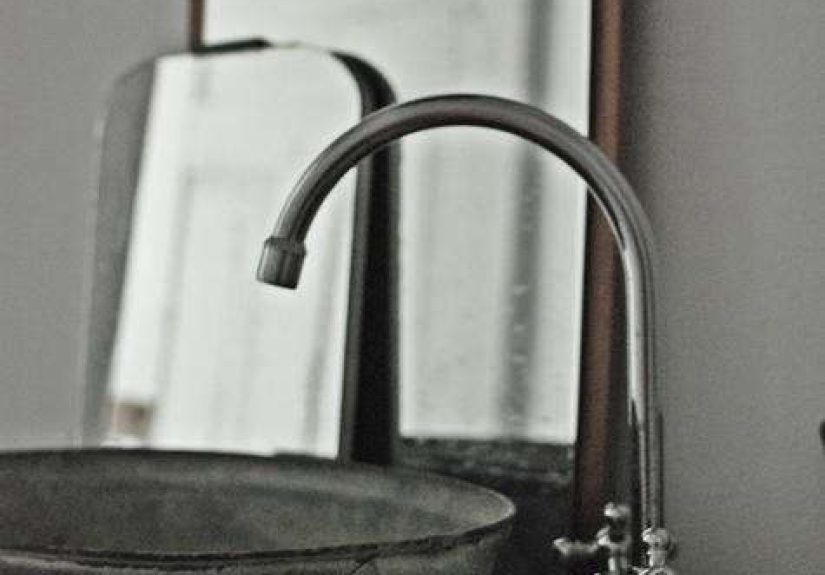
Faucet choice is equally important. Vessel sinks often need a tall counter-mounted faucet or a wall-mounted faucet. The spout should reach toward the center of the basin without blasting water against the side. If the faucet is too short, users will scrape their hands near the back rim. If it is too tall or too forceful, the sink may splash like a tiny water park.
Choose a bathroom-rated faucet that meets modern plumbing safety standards. Look for lead-free labeling and recognized certifications when shopping for faucets and fittings. Even though this sink may be decorative and unique, the water delivery parts should be safe, reliable, and designed for plumbing use.
Drain and Overflow: The Detail People Forget
Many galvanized buckets do not have an overflow hole. That means you generally need a drain made for a sink without overflow. Using the wrong drain can cause poor sealing or drainage problems. Grid drains and pop-up drains without overflow are common choices for vessel-style basins.
A no-overflow sink also requires common sense during use. You should not fill it and walk away. For a guest bathroom, consider a free-flowing grid drain instead of a stopper so the basin cannot easily be filled. If you prefer a pop-up drain, make sure everyone understands that this sink does not have a backup overflow channel.
Step-by-Step Overview: How to Make a Galvanized Bucket Sink
Step 1: Dry-Fit Everything
Place the bucket on the vanity or countertop. Set the faucet in its intended position. Check hand clearance, splash risk, faucet reach, and overall height. Open the vanity doors and make sure there is room for the drain assembly, tailpiece, P-trap, and supply lines.
Step 2: Mark the Drain Hole
Mark the lowest practical point of the bucket bottom. Usually this is the center, but not always. Use the drain hardware as a guide and follow the manufacturer’s size requirements. A standard bathroom sink drain hole is often around 1 1/2 to 1 3/4 inches, but always confirm with the specific drain you purchased.
Step 3: Cut the Opening Carefully
Use a metal-rated hole saw to cut the drain opening. Secure the bucket so it does not spin or jump. Wear safety glasses and gloves. After cutting, smooth the edge with a file or deburring tool because raw metal can be sharp. This is one of the most important safety steps in the whole project.
Step 4: Seal and Install the Drain
Install the drain according to its instructions. Most drain assemblies use a gasket above or below the basin, plus a locknut underneath. Depending on the product, silicone sealant or plumber’s putty may be recommended. Do not overtighten the drain, because metal buckets can flex. Tighten enough to seal, then test.
Step 5: Mount the Bucket
Some DIYers leave the bucket sitting on the counter with the drain holding it in place. Others use a mounting ring, silicone bead, or hidden supports. The goal is simple: the bucket should not wobble, shift, rattle, or feel like it might go on vacation when someone bumps it.
Step 6: Connect the Plumbing
Connect the tailpiece to the P-trap and the trap to the wall drain. Make sure the P-trap remains accessible for cleaning. Water supply lines connect the shutoff valves to the faucet. Turn the water on slowly and check every connection with a dry paper towel. Even a tiny leak deserves attention before you call the project finished.
Step 7: Test Like a Skeptical Home Inspector
Run water for several minutes. Test hot and cold. Watch the drain. Check underneath. Splash water around the basin rim and countertop. Look for seepage, drips, slow drainage, wobble, and pooling. If anything feels wrong, fix it before daily use.
How to Waterproof the Countertop Area
Waterproofing is not optional. A bucket sink may look casual, but bathroom moisture is relentless. If the vanity top is wood, seal it with a water-resistant finish before installation. Around the drain and base of the bucket, use the correct sealant for the materials involved. Keep the seam clean and avoid messy caulk lines that make the whole project look like it was frosted with a butter knife.
If you are using reclaimed wood, be extra careful. Old wood may be uneven, cracked, or porous. Seal all cut edges, especially around the drain opening and faucet holes. Water loves unfinished edges. It sees them and thinks, “Finally, a place to cause drama.”
Cleaning and Maintenance
Galvanized metal has a protective zinc coating, but that does not mean it enjoys harsh cleaners. Avoid abrasive pads, acidic cleaners, bleach-heavy products, and anything that can scratch or dull the surface. Use mild soap, warm water, and a soft cloth. Dry the basin after use when possible, especially if water tends to pool.
Over time, the finish may develop a softer patina. That is part of the charm. However, rust spots, flaking, sharp edges, or leaks are signs that the basin needs repair or replacement. A bathroom sink handles soap, toothpaste, cosmetics, and cleaning products, so gentle maintenance will help the galvanized finish last longer.
Design Ideas for a Galvanized Bucket Bathroom Sink
Farmhouse Powder Room
Pair an oval galvanized tub with a reclaimed wood vanity, matte black faucet, white shiplap walls, and a round mirror. Add a woven basket and warm lighting. The result is cozy without looking like a staged barn wedding.
Industrial Guest Bath
Use a deeper round bucket, black pipe-style faucet, concrete-look countertop, and dark metal mirror. Keep accessories minimal. The galvanized texture brings character while the dark fixtures sharpen the design.
Cottage Garden Bathroom
Choose a smaller bucket with a wall-mounted faucet, floral wallpaper, beadboard, and vintage hooks. This look feels charming in a guest bath near a garden entrance or mudroom.
Cabin or Lake House Sink
A galvanized bucket sink works beautifully in a cabin bathroom with wood walls, stone accents, and simple hardware. It feels relaxed, practical, and slightly nostalgic, as if the sink has already heard several fishing stories.
Common Mistakes to Avoid
The first mistake is choosing a bucket only because it looks cute. It also needs to be watertight, stable, appropriately sized, and compatible with a drain. The second mistake is using the wrong drain type. If the bucket has no overflow, buy a no-overflow drain. The third mistake is ignoring faucet reach and water pressure. A powerful faucet hitting a shallow metal basin can splash everywhere.
Another mistake is forgetting about maintenance. A galvanized bucket sink is not a porcelain sink. It needs gentler cleaning and occasional inspection. Finally, do not ignore local plumbing codes. Bathrooms need proper traps, venting, drainage, and safe water connections. When in doubt, ask a plumber before cutting, sealing, or connecting anything permanent.
Is a Galvanized Bucket Sink Practical?
Yes, but with limits. It can be very practical in a powder room, cabin, guest bath, or decorative wash area. It may be less practical as the only sink in a busy primary bathroom. Think of it as a design-forward vessel sink with farmhouse roots. It is useful, but it asks for a little care in return.
The best version of this project balances beauty and function. Choose a new or sound bucket, install proper plumbing parts, seal carefully, and test thoroughly. When the technical details are handled well, the result feels charming instead of improvised.
Extra Experience Notes: What Real DIYers Learn From This Project
The first real-world lesson is that the bucket always looks smaller in the store than it does on the vanity. A galvanized tub sitting on a shelf may seem modest, but once it is placed on a countertop, it suddenly has main-character energy. Before buying, measure the vanity depth, faucet clearance, mirror placement, and the walking space in front of the sink. A bathroom sink should not make users feel like they are negotiating with a farm animal trough every morning.
The second lesson is that drainage deserves more attention than style. A bucket with a flat bottom can leave standing water around the edges. Some people do not mind wiping it dry, especially in a guest bath. Others find it annoying after the third handwashing. If you want easier drainage, look for a basin with a slight curve toward the center. Even a small slope can make the sink feel more polished in daily use.
The third lesson is that faucet pressure can make or break the project. Metal basins can be splashy because water bounces differently than it does in ceramic. A faucet with a gentle aerated flow is usually better than a high-pressure stream. The spout should aim toward the drain area, not the side wall of the bucket. If water hits the wall of the bucket too directly, it may splash onto the counter, the mirror, your shirt, and possibly your confidence.
The fourth lesson is that sealing takes patience. Many DIYers want to rush the final step because the project finally looks finished. Do not rush. Let sealants cure according to the product instructions before heavy use. Test for leaks slowly. Fill a small amount of water, drain it, check underneath, then repeat. A leak discovered during testing is a minor inconvenience. A leak discovered after it has soaked a wood vanity is a personal attack.
The fifth lesson is that exposed plumbing becomes part of the design. If the vanity is open, the drainpipe, P-trap, and supply lines will be visible. Chrome, brass, matte black, or brushed nickel plumbing can look intentional. Random mismatched pipes can look like the sink was assembled during a garage cleanout. Plan the finish of the visible plumbing just like you plan the faucet and cabinet hardware.
The sixth lesson is that not every vintage bucket should become a sink. Old metal containers may have charm, but they can also have rust, weak seams, mystery coatings, or tiny holes. A decorative vintage bucket can inspire the look, while a new galvanized tub may provide better reliability. If you absolutely love an antique piece, consider using it in a low-use powder room and inspect it often.
The seventh lesson is that this project looks best when the rest of the bathroom supports the story. A galvanized bucket sink can feel awkward in a glossy, ultra-modern bathroom unless the contrast is deliberate. It tends to shine with natural wood, vintage mirrors, simple tile, warm lighting, woven textures, black or brass fixtures, and earthy colors. The sink is bold, so let it have friends.
The final lesson is that DIY charm should never replace basic plumbing sense. The sink should drain well, stay stable, resist leaks, and be easy to clean. A successful galvanized bucket bathroom sink is not just a cute photo; it is a working fixture. When function and style meet, the result is memorable, useful, and just quirky enough to make the bathroom feel personal.
Conclusion
A DIY galvanized bucket as a bathroom sink is a creative way to turn a simple utility object into a standout design feature. It can be affordable, rustic, space-friendly, and full of personality. The key is treating it like a real plumbing project, not just a craft. Choose the right bucket, use a compatible no-overflow drain when needed, plan faucet height carefully, waterproof the vanity, and test every connection before regular use.
This project is perfect for homeowners who love farmhouse style, vintage-inspired bathrooms, cabin decor, and custom details that do not look copied from a catalog. With careful planning and safe installation, a galvanized bucket sink can bring charm, function, and a little wink of humor to your bathroom. After all, not every sink needs to be porcelain and predictable. Some sinks are born to hold toothbrushes with a country accent.


