Table of Contents >> Show >> Hide
- Why Grain Sack Style Works So Well on a Folding Chair
- Before You Paint: Decide What Kind of Folding Chair You Have
- Supplies for an Easy Grain Sack Style Painted Folding Chair Makeover
- Step 1: Clean Like You Mean It
- Step 2: Sand, Scuff, and Smooth
- Step 3: Repair the Little Things
- Step 4: Prime for Durability, Not Just Optimism
- Step 5: Paint the Base Coat
- Step 6: Add the Grain Sack Stripes
- Step 7: Distress With Restraint
- Step 8: Seal and Cure
- Where This Chair Looks Best
- Mistakes to Avoid
- What Makes This Makeover Feel So Satisfying
- Extra DIY Experiences and Real-World Lessons From This Makeover
- Conclusion
Some DIY projects whisper, “I am tasteful.” This one politely clears its throat, puts on a linen apron, and says, “I have rustic charm and excellent posture.” An easy grain sack style painted folding chair makeover is one of those rare home projects that looks expensive, feels personal, and does not require a degree in furniture restoration or a dramatic playlistthough a dramatic playlist certainly helps.
If you have an old folding chair collecting dust in the garage, hiding in a closet, or moonlighting as a laundry holder, this is your sign. With the right prep, a durable paint finish, and a few well-placed stripes, you can turn a humble chair into a charming accent piece that looks right at home in a farmhouse dining nook, craft room, entryway, guest room, or covered porch.
This makeover style borrows from the classic look of vintage grain sacks: neutral backgrounds, simple stripes, old-world practicality, and just enough imperfection to feel warm instead of stiff. The good news is that you do not need an actual antique French grain sack or a trust fund. You just need a chair, paint, patience, and a willingness to admire painter’s tape like it is fine art.
Why Grain Sack Style Works So Well on a Folding Chair
A folding chair already has one thing going for it: a straightforward shape. Grain sack style loves simple silhouettes. The look is clean, symmetrical, and unfussy, which means it can make even a very ordinary chair feel curated. That is a win for anyone who wants a budget-friendly furniture makeover without ending up with something that screams, “I was crafted during a caffeine event.”
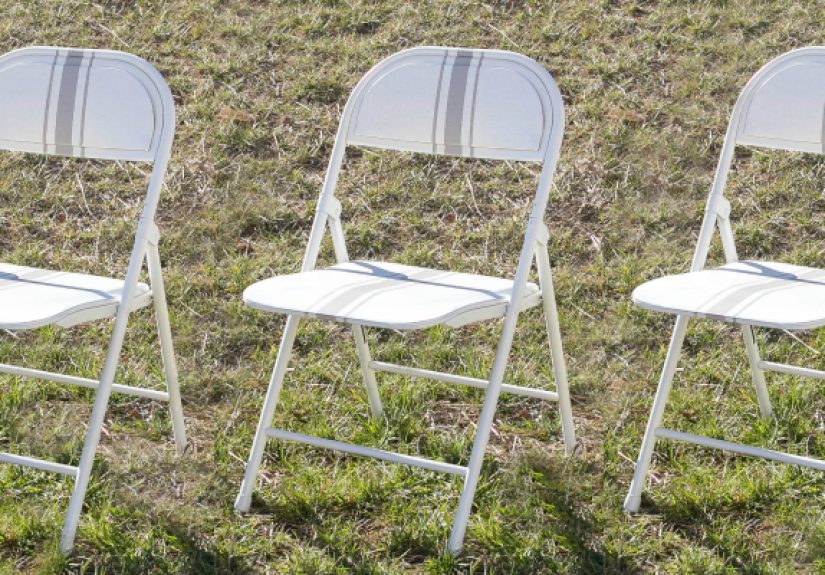
The beauty of this style is contrast. The base color is usually soft and understatedthink creamy white, warm ivory, greige, oatmeal, flax, or light taupe. Then come the stripes: navy, charcoal, faded black, muted blue, olive, or deep gray are classic choices. On a folding chair, that contrast can appear on the seat, the backrest, or both. The result feels vintage-inspired, a little European, and pleasantly practical.
It also plays nicely with current decorating trends. Grain sack style works with farmhouse interiors, cottage style, transitional spaces, Scandinavian-inspired rooms, and even modern homes that need one item with soul. In other words, it is the decor equivalent of a person who somehow looks good in both sneakers and loafers.
Before You Paint: Decide What Kind of Folding Chair You Have
Not all folding chairs are built the same, and the smartest makeover starts with knowing your material. A wood folding chair gives you the most traditional painted-furniture look. A metal folding chair can still be beautiful, but it needs the right primer and paint system. If your chair has a mix of materialssuch as a metal frame with a wooden seattreat each surface according to its needs rather than assuming one paint can magically fix everything.
Also, check the chair’s condition before you get attached to the makeover fantasy. Tighten loose screws, inspect the hinges, and make sure the chair opens and closes properly. If the frame is badly bent, unstable, or rusted through, paint will not save it. Paint is talented, but it is not a structural engineer.
Supplies for an Easy Grain Sack Style Painted Folding Chair Makeover
Core Materials
You will need a folding chair, drop cloth, microfiber cloths, mild degreaser or furniture cleaner, sandpaper in medium and fine grits, painter’s tape, primer, furniture paint or spray paint, a small angled brush or foam roller, and a clear topcoat if your paint system calls for one. A tack cloth is useful for dust removal, and wood filler or metal filler can help with small cosmetic flaws.
For the Signature Grain Sack Look
Add a measuring tape, ruler, level, pencil, and stripe color paint. If you want a softer or more aged look, keep a fine sanding block nearby for controlled distressing. You can also use a stencil brush for dry-brushed stripes if you prefer something less crisp and more timeworn.
Step 1: Clean Like You Mean It
If furniture painting has a villain, it is not the wrong color. It is grime. Old chairs collect oils from hands, dust, kitchen residue, mystery stickiness, and the general emotional baggage of daily life. Clean the chair thoroughly before doing anything else. Use a degreasing cleaner or a paint-prep cleanser, then wipe it dry.
This step matters more than people think. Paint bonds best to a clean surface. Skip cleaning, and your beautiful new finish may peel, chip, or fisheye later. Nothing humbles a DIY project faster than a paint bubble appearing exactly where you keep staring.
Step 2: Sand, Scuff, and Smooth
Once the chair is dry, sand the surface to remove gloss and help the new finish grip. On wood, sand lightly but thoroughly, paying special attention to arms, seat edges, and high-touch areas. On already-painted surfaces, you are not necessarily trying to strip everything down to bare material; you are creating tooth so primer and paint can hold on.
For a folding chair with curves and corners, a sanding sponge is easier to manage than a big sheet of paper. After sanding, wipe away all dust with a damp cloth or tack cloth. If the chair still feels slick or shiny, it needs more prep. Your paint should be entering a relationship with the chair, not sliding off it like a bad first date.
Step 3: Repair the Little Things
Fill minor dents, gouges, or nail holes with wood filler if you are working on a wooden chair. For metal, remove flaky rust and smooth rough areas. Let repairs dry fully, then sand flush. This is one of those small steps that separates a decent chair makeover from one that looks polished and intentional.
If the chair has a cracked seat or major damage around the hinges, repair that before painting. A pretty chair that pinches your finger every time it folds is not charming. It is a betrayal.
Step 4: Prime for Durability, Not Just Optimism
Primer is not the glamorous part of the project, but it is often the reason the glamorous part lasts. For wood folding chairs, a good bonding primer helps create an even, durable base. For metal folding chairs, use a primer designed to prevent rust and promote adhesion. If the chair has a glossy factory finish, primer becomes even more important.
Apply thin, even coats and let them dry according to the product instructions. If you are using spray primer, work in a well-ventilated area and keep the can moving. If you are brushing, follow the grain on wood and keep an eye out for drips around joints and edges. Once dry, do a very light sanding if needed, then remove dust again.
Step 5: Paint the Base Coat
Now the makeover starts looking exciting. Choose a base color that feels soft, neutral, and slightly weathered. True bright white can work, but many grain sack-inspired projects look richer in warm whites, creamy tones, pale mushroom, stone, or washed flax colors.
Apply the paint in thin coats. That phrasethin coatsdeserves a standing ovation. Thin coats dry better, level better, and chip less dramatically than thick ones. Two to three coats are usually enough depending on the paint and the original surface color. Let each coat dry before adding the next.
For wood chairs, a brush and small foam roller combo often gives the best balance of coverage and control. For metal folding chairs, spray paint can be especially helpful because it reaches tight corners and hinge zones more evenly. Whatever method you use, do not rush. A chair has a surprising number of angles once you are responsible for all of them.
Step 6: Add the Grain Sack Stripes
This is the moment the chair stops being “painted” and starts being “styled.” Traditional grain sack designs usually feature one bold center stripe flanked by thinner stripes, or a simple triple-stripe arrangement. You can place the design down the center of the chair back, across the seat, or both. Centered stripes feel classic. Slightly off-center stripes feel more casual and collected.
How to Tape the Design
Measure the seat or backrest carefully and mark your layout with pencil. Use painter’s tape to mask the stripes. Press the tape edges down firmly so paint does not creep underneath. If you want crisp lines, remove the tape while the stripe paint is still slightly wet. If you want a softer, worn look, let it dry fully and then distress the edges later.
Best Stripe Colors
Navy is the classic crowd-pleaser, but charcoal, faded black, slate blue, forest green, and soft black-brown all work beautifully. Keep the palette grounded and slightly muted. The goal is “vintage textile,” not “football tailgate cooler.”
Step 7: Distress With Restraint
Grain sack style often looks best with a gently aged finish. The key word is gently. Sand very lightly along edges, corners, and natural wear pointsareas where real use would have softened the paint over time. High-contact spots like the front seat edge, top rail, and outer corners are the most believable places to distress.
Do not sand random bald patches into the middle of the chair unless you want it to look like it survived an argument with a belt sander. Subtle distressing gives the piece authenticity. Overdoing it gives the chair a backstory nobody asked for.
Step 8: Seal and Cure
Whether you need a topcoat depends on the paint you choose and where the chair will live. Some furniture paints are self-sealing enough for light indoor use. But for folding chairs that will be moved often, stacked, used at a table, or placed on a porch, added protection is a smart move. A clear matte or satin topcoat can help preserve the paint without making the finish look too shiny.
Just as important as dry time is cure time. Dry means the paint feels dry to the touch. Cure means it has hardened enough for regular use. That difference matters. If you fold, stack, or scrub the chair too soon, you can damage the finish even if it looked dry yesterday. Let it cure fully before putting it into heavy rotation. Yes, patience is annoying. It is also cheaper than repainting.
Where This Chair Looks Best
A grain sack style folding chair is surprisingly versatile. Use it as extra dining seating that does not look like emergency seating. Tuck it into a home office corner for a soft vintage accent. Place it in a guest room beside a small writing desk. Use it in an entryway as a pretty drop zone for a bag or folded throw. For parties, showers, or holiday dinners, it adds charm without demanding attention like a diva centerpiece.
It is also a smart option for small homes. Folding chairs are practical by nature, but practical does not have to mean bland. This makeover lets the chair earn its keep while looking like it belongs in the room rather than apologizing for being there.
Mistakes to Avoid
Skipping Prep
If you remember only one thing, let it be this: most paint failures begin before the paint can is even opened. Dirt, gloss, and loose old finish are the enemies.
Using Thick Coats
Heavy paint tends to drip, pool, and chip. Thin coats may test your patience, but they reward you with a smoother, stronger finish.
Choosing the Wrong Products
Wood and metal do not always want the same products. Use a primer and paint system suited to the chair’s material, especially for outdoor or high-use chairs.
Forgetting the Folding Action
Do not let paint build up around hinges and moving parts. Open and close the chair carefully during the process to make sure nothing sticks.
Over-distressing
A little age looks elegant. Too much looks like the chair was rescued from a dramatic barn fire scene in a period film.
What Makes This Makeover Feel So Satisfying
The best DIY projects are not always the biggest ones. Sometimes the most satisfying transformation comes from taking an everyday object and giving it personality. That is exactly what happens with an easy grain sack style painted folding chair makeover. It is affordable, approachable, and full of visual payoff. More importantly, it teaches a useful decorating lesson: a piece does not have to be expensive to feel beautiful, thoughtful, and lasting.
One plain folding chair can become a charming accent, a conversation starter, or your favorite “extra” seat in the house. It can hold guests during dinner, sit quietly in a bedroom corner, or save the day during holidays when the seating chart gets ambitious. And every time you look at it, you get the tiny thrill of knowing you made something ordinary look special. That is the kind of home improvement magic worth keeping.
Extra DIY Experiences and Real-World Lessons From This Makeover
What surprises many people about this project is how emotional it can feel for such a practical object. A folding chair is not usually the star of the room. It is the backup singer of furniture. It shows up when needed, works hard, and then disappears into a closet. But once you paint it and add those grain sack stripes, it suddenly has presence. It stops looking temporary. It starts looking intentional. That shift is oddly satisfying, especially if you enjoy decorating on a real-world budget instead of a fantasy-TV-show budget.
There is also a confidence boost that comes with a project like this. A large dresser or dining table can feel intimidating because every mistake looks expensive. A folding chair, on the other hand, is manageable. You can carry it outside, turn it upside down, repaint a section if needed, and learn as you go. That makes it an excellent project for beginners who want to understand furniture prep, primer, paint behavior, striping, and finishing without risking a family heirloom or a paycheck.
Many DIYers also discover that this kind of makeover changes how they shop secondhand. After you finish one chair successfully, thrift stores and garage sales begin to look different. You stop seeing scratched surfaces and strange colors as deal-breakers. You start seeing shape, structure, and potential. It is a little dangerous, honestly. One painted folding chair can quickly become, “Well, maybe I also need that side table, those mismatched stools, and possibly the weird bench with personality.”
Another real experience tied to this project is learning the value of restraint. People often begin with grand visions: heavy distressing, five stripe colors, decorative script, maybe a wax finish, maybe decoupage, maybe a small family crest for no particular reason. Then the project teaches a calmer lesson. The charm of grain sack style comes from simplicity. A soft base color, clean stripes, and light wear usually look more expensive than piling on extra effects. In home decor, just because you can add more does not mean your chair wants that life.
This makeover also tends to make people notice the textures and tones already in their homes. Suddenly you are comparing whites. Is the chair creamy white? Linen white? Antique white? White with a whisper of oatmeal? Welcome to the wonderfully unhinged world of paint undertones. Once you start, you realize why a neutral folding chair can actually feel warm, relaxed, and collected rather than sterile. That awareness often carries into future decorating choices, from pillows and curtains to wall paint and tabletop styling.
Most of all, this project proves that usefulness and style do not have to fight each other. A folding chair is about function. Grain sack style is about character. Put them together, and you get a piece that works hard and looks good doing it. That is a combination worth celebrating. Not every chair makeover needs to be dramatic. Sometimes the best transformations are the ones that quietly improve a room, support daily life, and make you smile every time company comes over and you do not have to say, “Sorry about the ugly extra chair.”
Conclusion
An easy grain sack style painted folding chair makeover is proof that smart prep, classic color choices, and a few simple stripes can completely change how a piece feels in your home. Start with a sturdy chair, clean and sand it properly, use the right primer and paint, and finish with measured detail instead of overworked fuss. The final result is charming, durable, and functionala rare DIY trifecta. Best of all, it lets you create something that looks collected and custom without spending a fortune. That is the kind of makeover that deserves a seat at the table.


