Table of Contents >> Show >> Hide
- Cleaning vs. Sanitizing vs. Disinfecting (the 60-second version)
- The Best Easy Homemade Non Toxic Toy Cleaner Recipe (Everyday Use)
- Optional Boosters (When You Want “A Little Extra” Without Going Full Hazmat)
- When You Actually Need to Sanitize or Disinfect Toys
- Safer “Stronger” Choices (If You Need Them)
- The Toy-Type Playbook (Because One Method Does Not Fit All)
- A Simple Cleaning Schedule You’ll Actually Follow
- Safety Rules (Non-Negotiable, Even If TikTok Says Otherwise)
- FAQ: Quick Answers to the Stuff Everyone Googles at Midnight
- Conclusion
Toys live a hard life. One minute they’re a beloved dinosaur, the next they’re a pacifier, a drumstick, and somehow… a napkin.
If you’ve ever peeled a sticker off a block and wondered what new species you just discovered, welcome. This guide is for you.
You’ll get an easy homemade non toxic toy cleaner recipe (actually, a few options), plus a simple “what to clean, how to clean it,
and when to bring out the big guns” plan. The goal is clean toys without turning your kitchen into a chemistry lab or leaving harsh
residues on the stuff your kid immediately puts in their mouth (because of course they do).
The approach here is practical: in most homes, regular cleaning with soap and water is often enough for toys, especially if nobody’s sick.
When illness is in the house (or you’re dealing with daycare-level germ Olympics), you may want to sanitize or disinfect selected items
with extra attention to safety and proper use.
Cleaning vs. Sanitizing vs. Disinfecting (the 60-second version)
These words get tossed around like LEGO bricks (painful and everywhere), but they’re not the same:
- Cleaning removes dirt, sticky mystery goo, and a lot of germs by physically washing them away.
- Sanitizing reduces germs to a safer level (common for items kids mouth).
- Disinfecting kills germs more aggressively and is most useful after illness, bodily fluids, or outbreaks.
Here’s the key: clean first. Sanitizers and disinfectants don’t work well through grime, and toys are basically grime magnets.
The Best Easy Homemade Non Toxic Toy Cleaner Recipe (Everyday Use)
This is your go-to for day-to-day cleaning: quick, gentle, and realistically doable while someone is yelling “SNACK!” behind you.
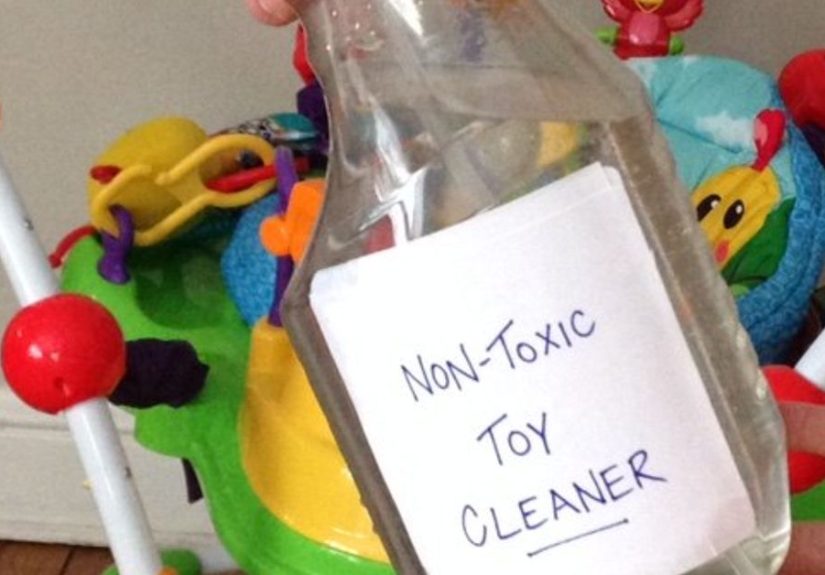
Everyday Toy Cleaner Spray (Soap + Water)
Makes: about a 16 oz spray bottle
- 2 cups warm water
- 1/2 teaspoon mild, unscented dish soap or 1 teaspoon fragrance-free liquid Castile soap
- Optional: 1 tablespoon white vinegar for non-mouthed, non-porous toys (see the vinegar notes below)
How to Make It
- Add warm water to your clean spray bottle.
- Add soap (go easymore soap = more rinsing = more sighing).
- Swirl gently. Don’t shake like a protein drink unless you enjoy foam parties.
- Label the bottle: “Toy Cleaner (Soap + Water)” and the date.
How to Use It
- Spray the toy lightly or spray onto a cloth first (best for toys with seams or electronics nearby).
- Wipe with a microfiber cloth or clean rag.
- Rinse mouthed toys with clean water (important if babies chew them).
- Air-dry fully before returning to play.
Why this works: Soap breaks up oils and lifts grime so it can be wiped away. It’s simple, low-residue when used correctly,
and doesn’t rely on harsh fumes.
Optional Boosters (When You Want “A Little Extra” Without Going Full Hazmat)
Option A: Vinegar Wipe for Hard, Non-Porous Toys (Not for Chew Toys)
Vinegar is popular because it’s cheap and can cut through residue and odors. But it’s not magic, and it’s not appropriate for every surface.
Think of it as a helpful supporting actor, not the lead.
Simple vinegar wipe:
- 1 cup water
- 1 cup distilled white vinegar
Use on: hard plastic, sealed surfaces, some rubber items (test first). Avoid: natural stone, unsealed wood, and surfaces that vinegar can etch or dull.
Also avoid using vinegar on toys your baby constantly mouths unless you rinse very well and you’re confident the material tolerates it.
Pro tip: If the vinegar smell lingers, wipe once more with plain water and dry thoroughly.
Option B: Baking Soda Paste for Sticky Spots
- 2 tablespoons baking soda
- 1 tablespoon water (add more as needed)
Make a paste, gently scrub sticky spots (like sticker residue or dried-on “art projects”), then wipe with your soap spray and rinse.
Baking soda is mildly abrasive, so go gentleespecially on painted toys.
When You Actually Need to Sanitize or Disinfect Toys
Most of the time, routine cleaning is enough. Consider sanitizing/disinfecting selected toys when:
- Someone in the home has vomiting/diarrhea, flu-like illness, or a contagious infection.
- Toys were in contact with bodily fluids (yes, drool countsjust less dramatically).
- You’re rotating toys between kids or playdates.
- Bath toys show signs of mold or musty odor (more on that below).
Important: Many disinfectants are not “non-toxic” if swallowed. If you disinfect, follow the product instructions, keep items out of reach while wet,
and rinse items that will go into a child’s mouth.
Safer “Stronger” Choices (If You Need Them)
If you want a stronger approach, you have two common pathways: choose a safer commercial product (look for third-party safety programs)
or use a properly diluted disinfectant with strict safety habits. Either way, keep it boring and rule-following. Boring is safe.
Hydrogen Peroxide (3%) for Some Hard Surfaces
Household hydrogen peroxide (3%) is sometimes used for disinfecting. Use it cautiously:
- Spot-test first (it can lighten fabrics and affect dyes).
- Keep it in its original bottle or a dark, labeled bottlelight breaks it down.
- Do not mix it with vinegar or bleach.
For chew toys and baby items, you’re usually better off with thorough soap-and-water cleaning and hot-water washing methods when the material allows,
unless a pediatrician or public health guidance indicates otherwise.
If You Use Bleach for Sanitizing (Use It Correctly, Use It Rarely, Store It Safely)
Some public health guidance for childcare settings uses a weakened bleach solution to sanitize certain items. If you choose this route at home,
treat it like medicine: measure accurately, label, ventilate, and keep away from kids. Never mix bleach with vinegar, ammonia, or other cleaners.
If bleach is used, follow reputable instructions for dilution and contact time, and keep surfaces wet for the required time to work.
Always store chemicals in original containers and out of children’s reach.
The Toy-Type Playbook (Because One Method Does Not Fit All)
Hard Plastic Toys (Blocks, Figurines, Kitchen Sets)
- Daily/weekly: Soap + water spray, wipe, rinse if mouthed, air-dry.
- Deep clean: A basin of warm soapy water + a soft brush for crevices.
- Dishwasher: If the toy is dishwasher-safe and has no batteries, a top-rack cycle can be effective. Check manufacturer guidance.
Silicone and Rubber Toys (Teethers, Bath Toys, Squeezies)
- Soap + warm water works well; rinse thoroughly.
- Watch for tiny holes that trap water (classic bath toy problem).
- If a bath toy smells musty or shows black spots inside, replacement is often the safest and least exhausting option.
Wooden Toys (Blocks, Puzzles, Trains)
Wood hates being soaked. Keep it simple:
- Use a barely damp cloth with mild soapy water.
- Wipe with a clean damp cloth to remove soap residue.
- Dry immediately and let air-dry completely.
Skip vinegar for most wood and finished surfaces unless the manufacturer explicitly allows it. Vinegar can damage certain materials and finishes over time.
Plush Toys and Cloth Books
- Machine washable? Toss in on the warmest safe cycle, then dry thoroughly.
- Not washable? Spot clean with your soap spray on a cloth and let air-dry fully.
- If illness is circulating, rotate plush toys out temporarily and launder them in batches.
Electronic Toys (Buttons, Speakers, “Sing-Along Forever” Toys)
- Never soak.
- Use a cloth lightly dampened with soap-and-water solution.
- Use cotton swabs for seams and button edges.
- Dry immediately.
A Simple Cleaning Schedule You’ll Actually Follow
- Daily-ish: Quick wipe of frequently mouthed toys and high-touch favorites.
- Weekly: Bin-clean a batch (dump toys in a basin, wash, rinse, dry).
- After sickness: Clean then sanitize/disinfect the highest-contact items (chew toys, bath toys, handles).
- Seasonal reset: Rotate toys, wipe storage bins, and retire anything that can’t be cleaned safely.
Safety Rules (Non-Negotiable, Even If TikTok Says Otherwise)
- Never mix cleaners. Especially never mix bleach with vinegar, ammonia, or alcohol. Also do not mix hydrogen peroxide with vinegar.
- Label everything (even your “just soap and water” bottlefuture you will forget).
- Ventilate when using stronger products.
- Store up high and lockedkids explore with confidence and zero fear.
- Rinse mouth-contact toys after cleaning, and especially after disinfecting.
FAQ: Quick Answers to the Stuff Everyone Googles at Midnight
Is vinegar a safe disinfectant for toys?
Vinegar can help clean and deodorize, but it’s not a one-size-fits-all disinfectant and it can damage certain materials.
For everyday use, soap and water is the most reliable “safe and simple” method. If you need disinfecting, use a product designed for that purpose
and follow directions carefully.
Should I add essential oils to make it “more natural”?
For toysespecially anything a baby chewsskip it. Essential oils can irritate skin and airways, and “natural” doesn’t automatically mean child-safe.
If you want a pleasant scent, let toys air out near an open window instead.
How do I remove sticky residue (stickers, syrup, mystery goo)?
Start with warm soapy water. If needed, use baking soda paste for gentle scrubbing. For truly stubborn sticker residue on hard plastic,
a little cooking oil on a cloth can help lift adhesivethen wash again with soap to remove the oil.
Conclusion
The best non toxic toy cleaner recipe is the one that’s effective, safe, and realistic: soap + water for routine cleaning,
plus smart upgrades (like spot-scrubbing and occasional deeper sanitation) when life gets extra germy.
Keep the process simple, avoid chemical mixing, and remember that “clean” is usually the winespecially when the toys are headed straight back
into tiny mouths at top speed.
If you take only one thing from this article, make it this: clean first, rinse what gets mouthed, and don’t try to invent new chemistry.
Your home will smell fine, your toys will be safer, and your stress level will drop at least one notch (which counts as a major victory in parenting math).
Experiences & Real-World Lessons (An Extra of “Been-There Energy”)
If you ask a group of parents what “cleaning toys” looks like in real life, you’ll get the full rangefrom color-coded systems to
“I wiped it on my shirt and called it a day.” And honestly? Both camps are doing their best.
One common pattern: people start with ambitious plans (a dedicated spray, a drying rack, maybe even a schedule) and then reality shows up
wearing muddy shoes and holding a slobbery plush unicorn. The trick is to design a routine that survives chaos. That’s why the simplest recipe
wins: warm water + a small amount of mild soap. It’s the cleaning equivalent of comfortable sneakersnothing fancy, but you’ll actually use it.
Another thing families learn quickly is that “non-toxic” doesn’t mean “drinkable” or “safe to leave on the coffee table.”
Many parents have had the moment where a toddler grabs the spray bottle like it’s a microphone and starts announcing their tour dates.
Labels and out-of-reach storage stop that show before it goes on the road.
People also tend to overdo the soap at first. It’s a totally reasonable assumption: more soap = more clean. In practice, more soap often
equals a sticky film that attracts even more grime. The sweet spot is surprisingly smalljust enough to break up oils and lift mess without
leaving residue behind. If your toys feel squeaky-clean but also weirdly tacky later, you’ve basically invented a dirt magnet.
Dial the soap back, rinse more, and your future self will thank you.
Bath toys are where optimism goes to retire. Families try hot water soaks, vinegar soaks, fancy brushes, and interpretive dance. Sometimes it works,
but sometimes the toy is basically a tiny swamp ecosystem with a squeaker. The most “non-toxic” choice can be replacementespecially if mold is visible
and you can’t clean the inside. It feels wasteful, but it’s also practical and safer than endlessly battling something you can’t fully reach.
Finally, there’s a lesson about timing: cleaning is easiest right after play, before the peanut butter becomes a permanent building material.
A quick wipe while the mess is fresh saves you from chiseling dried gunk later like an archaeologist uncovering artifacts from the Snack Age.
When families shift from “big clean once in a while” to “tiny clean more often,” everything gets easierand the house smells less like
“mysterious dairy product.”


