Table of Contents >> Show >> Hide
- First, the truth about under-sink storage: it’s not a cabinet, it’s an obstacle course
- My 60-minute reset plan (with one optional “why is this sticky?” bonus round)
- How I planned the space (the measurement step that saves money and sanity)
- The exact setup that doubled my storage space
- 1) A waterproof base liner (the unsung hero)
- 2) Two pull-out bins (my “double the space” moment)
- 3) A tension rod for spray bottles (the hack that feels like cheating)
- 4) Door-mounted hooks and a slim pocket organizer
- 5) One small caddy (for “grab and go” cleaning)
- 6) Labels (because I am not smarter than my future self)
- What I store under the sink now (and what I don’t)
- Small bathroom under-sink cabinet? Same method, different zones
- Maintenance: the 2-minute habit that keeps it from turning into a haunted cabinet again
- “Real life” experiences from my under-sink makeover (the messy, honest version)
- Conclusion
The cabinet under my sink used to be a tiny haunted house. You know the one: half-used cleaners, a mysterious sponge fossil, three nearly-empty bottles of the same spray (because I couldn’t find the first two), and a roll of trash bags doing yoga around the plumbing like it’s auditioning for Cirque du Soleil.
Then one day, I opened the door and a microfiber cloth fell out like it was trying to escape witness protection. That was my sign. I was going to declutter under my sink and make the space work on purpose. Not “shove-and-hope” purpose. Real, adult, “I can find the dishwasher tabs in under five seconds” purpose.
The result: I doubled my usable storage space (without adding a single square inch), made everything easier to grab, andunexpected bonusstopped buying duplicates because I could finally see what I owned. Here’s exactly how I did it, with the real-life details that matter: pipes, moisture, safety, and those awkward cabinet corners where small items go to disappear.
First, the truth about under-sink storage: it’s not a cabinet, it’s an obstacle course
Under-sink cabinets are tricky for three reasons:
- Plumbing steals your best real estate. Pipes, valves, and garbage disposal hoses create weird shapes and unusable dead zones.
- Moisture happens. Even “not leaking” cabinets get humidity and drips. Anything absorbent or delicate is living dangerously.
- Safety matters. Many people store cleaners here, but this is also a kid-and-pet-accessible zoneand sometimes the warmest, dampest cabinet in the kitchen.
The goal isn’t to cram in more stuff. The goal is to build a system that fits around the plumbing, stays dry-ish, and lets you access everything without doing cabinet gymnastics.
My 60-minute reset plan (with one optional “why is this sticky?” bonus round)
I did this in one focused session. If you can’t spare a full hour, you can break it into two 30-minute blocks: Day 1 = declutter and clean; Day 2 = organize and set up.
Step 1: Pull everything out (yes, all of it)
I mean everything. Nothing gets organized while it’s still hiding. I put a towel on the floor, then emptied the cabinet completely. If you have a trash can, recycling bin, or compost bin under there, move it tootemporarily.
As I pulled items out, I sorted into four quick piles:
- Use weekly: dish soap refills, dishwasher pods, trash bags, sponge backups
- Use monthly/seasonally: stainless polish, drain cleaner, special appliance cleaner
- Doesn’t belong here: paper towels, spare lightbulbs, pantry items, random tools
- Trash/recycle: empty bottles, crusty sponges, dried-up products, “why do I have four half caps?”
Step 2: Clean like you’re moving in tomorrow
Under-sink cabinets collect grime the way socks collect static in winter: aggressively and without asking permission. I vacuumed crumbs, wiped down the walls and base with warm soapy water, then did a final wipe with an all-purpose cleaner.
Before I put anything back, I checked for:
- Leaks or corrosion around the P-trap, shutoff valves, and supply lines
- Warped cabinet floor (a sign there’s been water in the past)
- That “damp towel” smell (hello, moisture)
If you find an active leak, pause the project and address it first. Organizing on top of a leak is like putting fresh sheets on a bed that’s on fire.
Step 3: Edit ruthlessly (a.k.a. stop storing your “maybe someday” personality under the sink)
This is where the space doubledbecause clutter eats volume. I asked three questions for each item:
- Do I use this? If I hadn’t used it in a year and it wasn’t seasonal, it had to justify its rent.
- Do I have duplicates? Multiple half bottles became one “working bottle” and one backupmax.
- Is it safe here? Anything sensitive to moisture or unsafe for under-sink storage got relocated.
Quick note on what I stopped storing under the sink: paper products (they absorb moisture), food/pet food, small appliances/electronics, and anything flammable or likely to corrode. That move alone prevented future “why is this soggy?” surprises.
How I planned the space (the measurement step that saves money and sanity)
Step 4: Measure the cabinet like you’re buying jeans online
I measured:
- Width of the cabinet interior
- Depth from door frame to back wall
- Height from base to underside of the sink
- Pipe footprint (where the pipes sit and how far they stick out)
This matters because the best under-sink organizers aren’t “one size fits all.” If you don’t measure around plumbing first, you end up with a beautiful organizer that fits perfectly… in someone else’s kitchen.
Step 5: Create zones (so items stop migrating like they’re avoiding commitment)
I decided what truly belonged under my kitchen sink. My categories:
- Daily cleaning (dish soap, dishwasher pods, sponges, brushes)
- Trash & recycling (bags, small bin wipes)
- Occasional cleaners (glass cleaner, disinfectant, stainless polish)
- “Gross but necessary” (drain snake, gloves, scrub pads)
I also made one rule: only kitchen-related items live here. Bathroom cleaners went to the bathroom. Laundry stuff went to laundry. Random cords went to… a better life.
The exact setup that doubled my storage space
I didn’t buy a complicated system. I used a few smart, affordable pieces designed to work with pipes and vertical space. Think: “stack and slide,” not “build a tiny warehouse.”
1) A waterproof base liner (the unsung hero)
First, I added a waterproof mat on the cabinet floor. It’s not glamorous, but it protects against drips and makes wipe-downs easy. If you’ve ever discovered a sticky ring under a cleaner bottle, you know why this matters.
2) Two pull-out bins (my “double the space” moment)
Pull-out bins were the game changer. Instead of stacking items in a dark pile, I created two sliding “drawers”:
- Front pull-out: daily items I reach for constantly
- Back pull-out: backups and less-used supplies
Why this works: the back of the cabinet becomes usable. Without pull-outs, the back is basically a storage graveyard. With pull-outs, it’s accessible real estate.
3) A tension rod for spray bottles (the hack that feels like cheating)
I installed a simple tension rod across the cabinet (above the bins but below the sink basin) and hung spray bottles by their trigger handles. Instantly, I freed up floor space and made every bottle visible. No more “I swear we own glass cleaner” debates.
Bonus: hanging bottles reduces tipping and leaking because they’re not wedged sideways in a pile.
4) Door-mounted hooks and a slim pocket organizer
The inside of the cabinet door is premium storageespecially for small items that disappear in bins. I added:
- 2 adhesive hooks for gloves and a small scrub brush
- A slim pocket organizer for sponges, dishwasher tabs, microfiber cloths, and magic-eraser-style pads
Key detail: keep anything on the door thin. If the door won’t close, you’ll hate the system and abandon it, probably while muttering words unfit for a home-and-garden blog.
5) One small caddy (for “grab and go” cleaning)
I keep a small handled caddy under the sink with my everyday “wipe down the counters” kit: all-purpose cleaner, cloths, and a tiny brush. The caddy prevents rummaging, and it’s easy to carry if I’m cleaning the table or stove area.
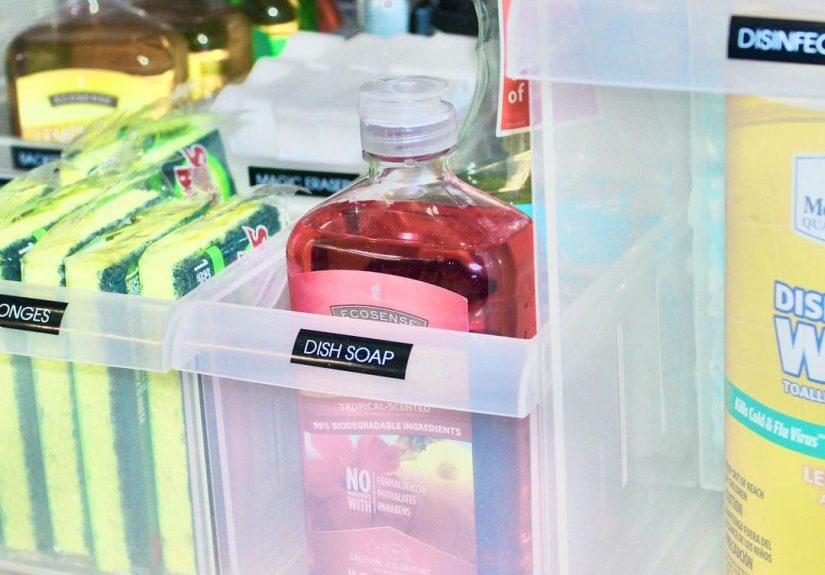
6) Labels (because I am not smarter than my future self)
I labeled bins by zone: Daily, Backups, Trash, Tools. Labels aren’t about aesthetics. They’re about returning things to the right spot when you’re tired, busy, or hungry. (So, always.)
What I store under the sink now (and what I don’t)
Yes, store these (if they fit your household)
- Dish soap, dishwasher pods, and rinse aid
- Trash bags and recycling bags
- Sponges, scrubbers, gloves, small brushes
- Non-flammable, well-sealed cleaners you use in the kitchen
- A small bin for compost liners or sink-related accessories
No, I don’t store these under the sink anymore
- Paper towels or napkins (moisture magnets)
- Food or pet food (heat/humidity risks and pests)
- Small appliances/electronics (moisture + electricity = nope)
- Anything flammable (better stored in a cooler, safer place)
- Fire extinguisher (needs to be accessible and dry, not buried behind a mop)
If you have kids or pets, take extra care with cleaning supplies. “High and locked” is the safest approach. Consider childproof latches, store products in original containers, and avoid leaving anything hazardous where little hands can reach quickly.
Small bathroom under-sink cabinet? Same method, different zones
The bathroom version of this system works just as wellswap the categories:
- Daily: face wash backups, cotton rounds, floss, refills
- Occasional: hair tools (only if dry), skincare extras, travel items
- Cleaning: bathroom-safe cleaners, gloves, spare sponges
In bathrooms, moisture tends to be even higher. Waterproof bins and a liner are especially helpful, and I avoid storing anything that rusts, swells, or hates humidity.
Maintenance: the 2-minute habit that keeps it from turning into a haunted cabinet again
I don’t “reorganize” under the sink every week. I do one tiny habit:
- Once a week (2 minutes): I put back anything that drifted and toss anything empty.
- Once a month (5 minutes): I wipe the liner, check for drips, and make sure backups haven’t multiplied.
The system stays neat because it’s easy. If organization requires a spreadsheet, it will be abandoned the first time someone burns garlic bread.
“Real life” experiences from my under-sink makeover (the messy, honest version)
Here’s the part I wish someone had told me before I started: decluttering under the sink is not just an organizing project. It’s a tiny emotional documentary about how you live.
I learned this the moment I pulled out three nearly-identical cleaners. One was “all-purpose,” one was “multi-surface,” and one was “kitchen & bath.” This wasn’t variety. This was evidence of a repeating pattern: I couldn’t find what I had, so I bought a new one, and then I shoved it under the sink like it was going to solve future me’s problems through vibes alone.
The first surprise was how much space I gained just by removing the “doesn’t belong here” stuff. I found a random candle, a screwdriver, a battery pack, and a takeout menu (which, honestly, felt like a cry for help). Once those items left, the cabinet instantly looked bigger. Not because the cabinet changed, but because the chaos stopped impersonating necessity.
The second surprise: the cabinet was gross in a very specific waysticky dust. It’s that combination of cleaner residue, tiny crumbs, and humidity that forms a thin film you only notice once you’re brave enough to look. Cleaning it felt weirdly satisfying, like hitting refresh on a cluttered desktop. Also, I discovered a drip ring that explained why one bottle always felt like it had been lightly marinated in sadness.
The third surprise was how important measuring turned out to be. I was this close to ordering a popular two-tier organizer that would have collided directly with my pipes. When I actually measured the pipe footprint, I realized I needed something narrower, plus a layout that treated the pipes as a permanent roommate instead of an inconvenience. Planning around plumbing sounds boring until you realize it saves you from returning products and rage-cleaning at midnight.
The biggest “wow” moment was installing the tension rod. It took about 45 seconds, and suddenly the spray bottles had a home that wasn’t “wherever they land.” Hanging them made the cabinet feel taller, clearer, and calmerlike the storage version of finally hanging up coats instead of draping them over a chair. I didn’t just gain space; I gained visibility, which is what actually stops duplicate-buying.
And yes, there was a humbling moment: I realized I’d been storing things under the sink that absolutely shouldn’t be there. It’s such a common habitbecause it’s convenientyet it’s also the cabinet most likely to get damp. After the reset, I moved absorbent items out, kept only what made sense for a kitchen zone, and made sure everything that stayed was sealed, stable, and easy to grab.
The real reward came a week later, when I needed trash bags and found them instantly. No digging. No avalanche of bottles. No negotiating with a cabinet door that barely closes. Just: open, grab, done. That’s when I realized “doubling storage” wasn’t the point. The point was lowering daily frictiontiny annoyances that add up and turning one chaotic spot into a calm one.
If you’re staring at your own under-sink cabinet right now, here’s my honest encouragement: you don’t need perfection. You need a system that fits your pipes, respects moisture, and matches how you actually live. A couple of bins, a rod, a door hook, and a label can make the space feel twice as bigand your brain feel ten times less annoyed.
Conclusion
Decluttering under my sink worked because I stopped treating it like a junk portal and started treating it like a high-traffic storage zone. I emptied it, edited hard, measured around the plumbing, created simple zones, and used a few tools that made the back of the cabinet accessible. The payoff wasn’t just “more space”it was less stress, fewer duplicates, and a cabinet that finally behaves like it’s on my team.


