Table of Contents >> Show >> Hide
- Why a Bookcase Stairs Makeover Is Worth Doing
- What “Cute” Actually Looks Like
- Can You Really Do It for $50?
- Before You Start: Prep Is the Difference Between “Wow” and “Why Is It Peeling?”
- Step-by-Step: How to Make a Cute Bookcase Stairs Makeover Happen
- How to Style It So It Looks Finished
- Common Mistakes That Make Cheap Makeovers Look Cheap
- Ideas for Different Spaces
- Final Thoughts
- Experience and Lessons Learned from a Budget Bookcase Stairs Makeover
If you have a plain little bookcase near your stairs, a stair-step shelf, or one of those “I bought this because it was cheap and now it judges me from the corner” storage pieces, good news: you do not need a designer budget to make it adorable. A cute bookcase stairs makeover can absolutely happen on a tiny budget, and in many cases, around $50 is enough to pull off a dramatic glow-up.
The secret is not magic. It is prep, paint, and a few clever details that make budget furniture stop looking budget. That means cleaning off grime, lightly sanding slick surfaces, patching dents, using the right primer, and adding one or two decorative touches that make the whole piece feel intentional. Translation: less “college leftovers,” more “tiny boutique reading corner.”
This guide walks you through a realistic, beginner-friendly makeover that looks charming, functions better, and does not require a workshop, a contractor, or emotional support from a carpenter cousin. Whether your bookcase sits beside a staircase, mimics a stair-step design, or helps fill that awkward under-stair zone, these steps will help you make it cute without making your wallet cry.
Why a Bookcase Stairs Makeover Is Worth Doing
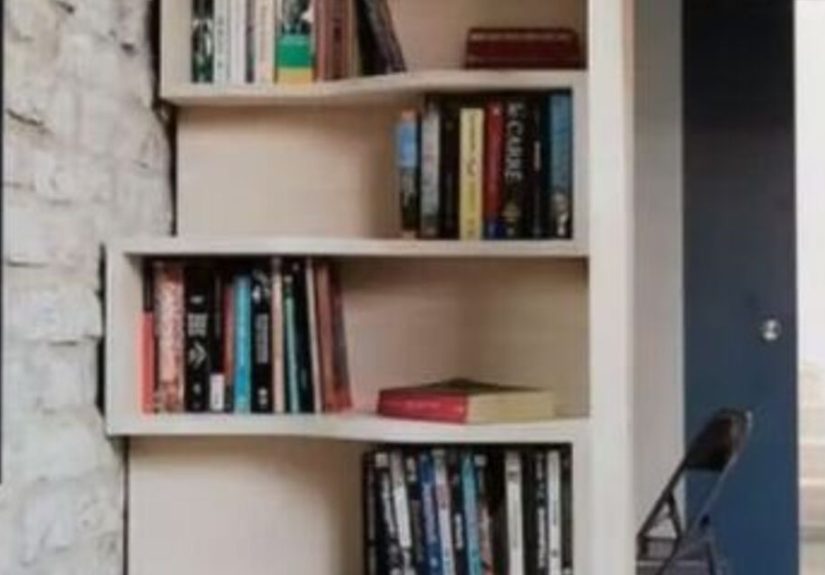
A makeover like this is cheap, practical, and surprisingly high-impact. Bookcases near stairs often become visual dead zones. They collect random shoes, tangled chargers, old mail, and exactly one mysterious screw. A fresh makeover turns that clutter magnet into storage that actually looks styled.
It also works because bookcases are makeover-friendly. Even inexpensive laminate, particleboard, or MDF shelves can look far better with a little surface prep and the right finish. Add a pretty background, baskets, or a cute color, and suddenly the piece looks less like flat-pack survival furniture and more like a custom home detail.
If your goal is “cute,” this is one of the easiest places to get there. Shelves give you instant opportunities for color, pattern, texture, and styling. In other words, they are basically begging for a makeover.
What “Cute” Actually Looks Like
Before you open a paint can like a DIY cowboy, decide what “cute” means in your space. Cute can be soft and cottagey, bright and playful, or neat and modern with just a hint of charm. A few budget-friendly directions work especially well:
- Cottage cute: warm white or cream paint, floral or toile peel-and-stick backing, woven baskets, and a tiny lamp.
- Modern cute: soft greige, sage, dusty blue, or muted blush with clean lines and a few framed prints.
- Kid-friendly cute: cheerful color on the outside, patterned shelf backs, labeled bins, and low shelves for books and toys.
- Vintage cute: antique-inspired hardware, scalloped storage bins, brass accents, and layered thrifted decor.
If the bookcase sits beside the stairs, try choosing a color that relates to nearby trim, the wall color, or the stair runner. That keeps the piece from looking random. If you want it to feel built in, paint it the same color as the wall or trim. If you want it to pop, go one shade darker or choose a soft statement color.
Can You Really Do It for $50?
Yes, if you are smart about materials. No, if you buy every shiny gadget in the paint aisle like you are starring in a home makeover montage. The $50 version works best when you already own a couple of basics, such as scissors, a screwdriver, and maybe one old brush you are emotionally prepared to wash.
A realistic low-budget plan usually includes a sample-size or quart-size paint, a small bonding primer or leftover primer you already have, sandpaper or a sanding sponge, wood filler or lightweight patch product, a tube of paintable caulk if there are gaps, and one decorative extra such as peel-and-stick wallpaper, contact paper, ribbon trim, or cute baskets from a discount store.
The trick is this: do not try to replace the furniture. Refresh it. You are upgrading the look, not building the Library of Congress.
Before You Start: Prep Is the Difference Between “Wow” and “Why Is It Peeling?”
1. Clean Everything First
Dust, greasy fingerprints, and mystery residue can ruin paint adhesion. Wipe the whole piece down with a degreasing cleaner or mild soap and water, then dry it well. Pay extra attention to edges, corners, and shelf fronts where hands touch most often.
2. Lightly Sand the Surface
If the bookcase is laminate, particleboard, or factory-finished MDF, do not sand like you are trying to erase its past. You only need to scuff the glossy finish so primer can grip. Use a fine or medium sanding sponge and go gently, especially on edges.
3. Patch the Ugly Bits
Fill nail holes, dents, chips, and small gouges with wood filler or patching compound. Once it dries, sand it smooth. If your bookcase has visible seams or trim gaps, a thin line of paintable latex caulk can make the finished piece look cleaner and more custom.
4. Prime Like You Mean It
This is the step budget DIYers most want to skip and later regret. Primer helps paint stick, especially on slick or previously finished surfaces. A good bonding primer is your best friend here. Without it, even the prettiest color can chip faster than your patience.
Step-by-Step: How to Make a Cute Bookcase Stairs Makeover Happen
Step 1: Empty the Shelves and Remove Anything Removable
Take off knobs, hooks, baskets, and any accessories. If the shelves are adjustable, remove them so painting is easier. Label the hardware in a bag so you do not spend 20 minutes later asking one tiny screw where it went.
Step 2: Prime the Piece
Apply primer with a small foam roller on broad surfaces and a brush in corners. Thin, even coats are better than thick, drippy drama. Let it dry fully according to the label. If the surface still feels rough, lightly sand the primer once dry and wipe off dust.
Step 3: Paint the Outside
Use cabinet, trim, or furniture paint if possible. These finishes tend to dry harder and look smoother than cheap wall paint. Two thin coats usually beat one thick one. A satin or semi-gloss finish works well because it is easier to wipe clean and gives the piece a polished look.
For a truly cute finish, choose one of these crowd-pleasing colors:
- soft white for a clean cottage look
- sage green for cozy charm
- dusty blue for a calm reading-nook vibe
- warm beige or mushroom for understated style
- muted blush for playful but grown-up sweetness
Step 4: Dress Up the Back Panel
This is where the makeover starts flirting with “custom.” Cover the back panel with peel-and-stick wallpaper, contact paper, or shelf liner. Floral prints, subtle stripes, tiny geometrics, and simple toile patterns work beautifully. Busy patterns can be cute too, but only if the rest of the shelf styling stays calm.
If you do not want pattern, paint the back panel a contrasting color. A cream bookcase with a dusty blue back, or a sage bookcase with a soft ivory interior, can look expensive in the best possible sneaky way.
Step 5: Add Trim or Small Details if Needed
If the piece still looks too plain, add a tiny detail that changes the whole vibe. Try stick-on wood trim, scalloped edge trim, brass label holders, or new knobs if the unit has cabinet doors. One thoughtful detail is often more effective than five random ones.
Step 6: Let It Cure Before Styling
Dry and cured are not the same thing. Paint may feel dry to the touch well before it hardens enough for books, baskets, and decor. Give it proper time so your cute makeover does not end up with scuffed shelf outlines on day one.
Step 7: Anchor It for Safety
If the bookcase is tall, narrow, or near family traffic by the stairs, anchor it to the wall. This is especially important in homes with kids or pets. Safety is not the glamorous part of a makeover, but neither is a tipping bookcase, so let us call this the hottest responsible decision you will make all weekend.
How to Style It So It Looks Finished
A freshly painted bookcase can still look unfinished if you throw everything back on it like a clearance bin exploded. Styling matters. The goal is not perfection. The goal is to make the shelf look intentional.
- Mix vertical books with horizontal stacks.
- Add baskets on lower shelves for shoes, cords, or toys.
- Use one small plant, one framed print, and one decorative object per section rather than stuffing every shelf.
- Repeat a color two or three times so the arrangement looks cohesive.
- Leave some breathing room. Empty space is part of the design, not a sign you forgot to buy more stuff.
If the bookcase is near the stairs, make the lower shelves practical and the eye-level shelves pretty. That gives you the best mix of function and charm. Think labeled baskets below, books and decor above, and maybe a small lamp or LED puck light if there is an outlet nearby.
Common Mistakes That Make Cheap Makeovers Look Cheap
Skipping Primer
This is the classic mistake. Paint on slick laminate without proper prep is basically a breakup waiting to happen.
Using Too Much Paint at Once
Heavy coats drip, pool, and dry unevenly. Thin coats look smoother and more professional.
Ignoring Gaps and Dents
Little flaws become very visible once fresh paint goes on. Fill, sand, and caulk first.
Picking a Pattern That Fights the Room
That adorable wallpaper may be cute in isolation but chaotic next to a bold stair runner or busy wall art. Let the bookcase support the room, not start an argument with it.
Styling It with Too Much Tiny Clutter
Cute is not the same thing as crowded. You are making a shelf look polished, not recreating a yard sale in vertical form.
Ideas for Different Spaces
For an Entry by the Stairs
Use bins for shoes, umbrellas, and seasonal grab-and-go items. Add labels and a tray for keys. A pretty wallpaper backing keeps it from looking too utilitarian.
For a Kid’s Reading Nook
Paint it a cheerful but soft color, use low shelves for books, and add toy bins on the bottom. Consider a washable finish and rounded decor pieces that are less breakable than your optimism.
For an Under-Stair Storage Zone
Choose a deeper moodier tone, add matching baskets, and keep the styling simple. Under-stair areas often look best when they feel organized rather than overly decorated.
For a Small Apartment
Paint the bookcase the same color as the wall to make it visually blend in. This creates a built-in effect and helps the room feel calmer and less cluttered.
Final Thoughts
A cute bookcase stairs makeover for just $50 is not only possible, it is one of the smartest small-space projects you can do. It gives you storage, personality, and a custom look without the custom price tag. More importantly, it proves a lovely little home update does not have to begin with demolition or end with financial regret.
If you clean the surface well, lightly sand it, use primer, choose a durable paint, and add one thoughtful decorative touch, the whole piece can feel brand new. That is the real win. You are not just painting a shelf. You are changing how that part of your home works and feels.
And for roughly fifty bucks, that is a very cute return on investment.
Experience and Lessons Learned from a Budget Bookcase Stairs Makeover
One of the biggest surprises people have during a makeover like this is how much the prep changes the result. At first, it feels boring. Cleaning? Sanding? Filling holes? Very unglamorous. But that quiet prep work is exactly what makes the final piece look intentional instead of rushed. Many DIYers start out convinced paint color is the star. After one real makeover, they usually realize surface prep is the unpaid lead actor who carried the entire production.
Another common experience is underestimating how much “cute” comes from contrast and texture rather than expensive materials. A plain white bookcase can still look flat. But a plain white bookcase with a soft patterned back panel, a basket on the bottom shelf, a stack of colorful books, and one tiny brass-framed print? Suddenly it looks styled. That is why so many budget makeovers succeed when they include even one decorative layer beyond paint.
People also learn quickly that small shelves near stairs tend to become drop zones unless they are assigned a job. Once the makeover is done, the space often works better when each shelf has a role. Maybe the bottom holds baskets for shoes or pet gear, the middle holds books or folded throws, and the top shelves carry lighter decor. Without that plan, clutter returns like it pays rent.
There is also a very real emotional payoff. A tired shelf can quietly make a space feel unfinished. Giving it a proper makeover often changes the whole mood of the staircase area. It can make the home feel more cared for, more cohesive, and a little more “you.” That is especially true in rentals, starter homes, and smaller spaces where every piece of visible furniture matters more.
Most people who try this project also discover that patience saves money. Rushing the dry time, piling books back too early, or skipping primer usually leads to scuffs, peeling, and a second round of work. Waiting an extra day is cheaper than repainting. Not exciting, but extremely true.
And perhaps the best lesson of all is this: a budget makeover does not need to fool anyone into thinking it cost a fortune. It just needs to look clean, charming, and well considered. That is what makes it successful. If it suits your space, feels useful, and makes you smile every time you pass the stairs, then the project did its job beautifully.


