Table of Contents >> Show >> Hide
- Why Cleaning Your Nespresso Machine Actually Matters
- What You’ll Need
- Step 1: Turn the Machine Off and Empty the Usual Messy Spots
- Step 2: Wash the Removable Parts
- Step 3: Wipe the Exterior and Brew Area
- Step 4: Run a Rinse or Cleaning Cycle
- Step 5: Descale the Machine
- Step 6: Clean the Milk System if Your Machine Has One
- A Simple Nespresso Cleaning Schedule to Keep You Honest
- Common Mistakes to Avoid
- Signs Your Nespresso Machine Is Begging for Help
- Final Thoughts
- Related Experiences: What Cleaning a Nespresso Machine Is Really Like in Real Life
If your Nespresso has started acting like a dramatic little espresso gremlindripping slowly, tasting a bit off, or blinking at you like it knows secretsit probably needs a proper cleaning. The good news is that cleaning a Nespresso machine is not a full-contact sport. You do not need a toolbox, a chemistry degree, or an emotional support latte. You just need a few easy steps, a little patience, and the willingness to face the pod graveyard hiding in the capsule bin.
Regular cleaning keeps your machine tasting better, running more smoothly, and living a longer, happier countertop life. Coffee oils, stray grounds, old water, and mineral buildup all collect over time. If you ignore them for too long, your espresso can taste flat, bitter, or weirdly sad. And since the water reservoir is a dark, damp place, it is exactly the kind of environment that grime enjoys a little too much.
This guide breaks the process into simple, realistic steps for both Nespresso Original and Vertuo machines. Since exact buttons and light patterns can vary by model, always check your manual for the precise rinse or descaling sequence. But the overall cleaning routine is wonderfully consistent: empty, wash, wipe, rinse, descale, and get back to pretending your kitchen is a tiny café in Manhattan.
Why Cleaning Your Nespresso Machine Actually Matters
Let’s start with the obvious: coffee tastes better when the machine making it is not coated in old coffee residue. Over time, coffee oils can cling to the brew area, the spout, and the pod chamber. Minerals from tap water can also build up inside the machine. That buildup, called limescale, can affect water flow, brewing temperature, and the flavor of your espresso.
Cleaning and descaling are not the same thing, and Nespresso owners often lump them together like they are identical twins. They are not. Cleaning removes surface grime, splashes, stale coffee residue, and old water from the removable parts and visible areas. Descaling is the deeper maintenance job that removes mineral deposits from the machine’s internal water system. One keeps your machine tidy; the other keeps it from slowly turning into a limestone cave with a power cord.
What You’ll Need
- Mild dish soap
- Warm water
- A soft sponge or non-abrasive cloth
- A microfiber cloth or soft towel
- A large mug or container
- Nespresso descaling solution
- A soft brush or clean toothbrush for tight corners if needed
- Your model’s manual for the exact cleaning or descaling button sequence
One important note before we go any further: resist the temptation to grab vinegar just because it works for some standard drip coffee makers. Nespresso’s own guidance says not to use vinegar for descaling because it can damage the machine or leave behind unwanted residue and odor. In other words, save the vinegar for salad dressing and household science experiments.
Step 1: Turn the Machine Off and Empty the Usual Messy Spots
Start by turning off the machine and unplugging it if your model allows easy disassembly while unplugged. Make sure there is no capsule inside. Then remove and empty the used capsule container, drip tray, and water tank. If you have been “meaning to clean it later” for three weeks, prepare yourself. The drip tray may be auditioning for a swamp documentary.
Discard any standing water and old coffee drips. This part matters more than people think. Letting water and coffee residue sit for too long creates odor, staining, and buildup. Even if you do not do a full cleaning today, emptying these parts regularly goes a long way.
Step 2: Wash the Removable Parts
Wash the drip tray, capsule bin, and water tank with warm water, mild dish soap, and a soft sponge. Rinse everything thoroughly so there is no soapy residue left behind. Soap that lingers in the tank or tray can absolutely turn your next espresso into a strangely floral mistake.
Let the parts air-dry completely or dry them with a soft towel. Some parts on some models may be dishwasher safe, but that depends on the machine. If your manual does not clearly say “dishwasher safe,” assume hand-washing is the safer route.
If you have a machine with a milk container or milk frother attachment, wash that after every use. Milk residue is not a “deal with it tomorrow” situation. It is more of a “deal with it before it turns into a science fair” situation.
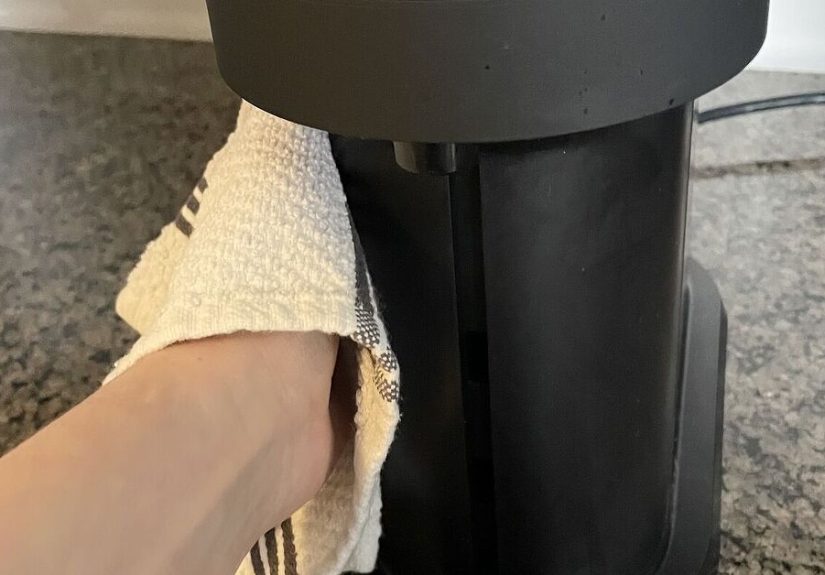
Step 3: Wipe the Exterior and Brew Area
Use a damp microfiber cloth to wipe down the outside of the machine, including the spout area, lever, buttons, and any place where coffee splashes tend to land. For sticky spots, add a drop of mild dish soap to warm water and wipe again. Then follow with a clean damp cloth to remove any soap film.
Do not rinse the main machine body under the faucet. Do not soak it. Do not treat it like a casserole dish. Nespresso machines have electrical components, and those components prefer to remain dry and employed.
If you notice coffee residue near the capsule head or spout, gently clean the area with a soft cloth or a soft brush. Be careful around puncture points and internal components. This is a clean, not a cage match.
Step 4: Run a Rinse or Cleaning Cycle
Once the removable parts are back in place, fill the reservoir with fresh water and run the machine’s rinse or cleaning cycle if your model has one. Many Vertuo models benefit from a weekly cleaning cycle or rinse cycle using fresh water only. This helps flush out lingering coffee residue and keeps the brew path cleaner between descales.
If you do not know how to trigger your machine’s cleaning cycle, check your manual. On many Nespresso models, the process involves holding down certain buttons or moving the lever in a set pattern. It sounds fussy, but once you do it once, it becomes easy. Think of it as teaching the machine a tiny dance.
Place a large mug or container under the spout before you start. The rinse water may look lightly brown at first if the machine has been overdue for cleaning. That is not the machine making coffee. That is history leaving the building.
Step 5: Descale the Machine
If routine cleaning is the skincare routine, descaling is the deep facial your machine did not ask for but desperately needs. Mineral deposits from water build up inside the machine over time, especially if you use hard water. That buildup can slow the flow, change the brew temperature, and make your coffee taste off.
How Often Should You Descale?
For many Nespresso machines, the recommended schedule is about every three months or after roughly 300 capsules, whichever comes first. If you use your machine heavily or have hard water, you may need to descale sooner. If your machine starts pouring slowly, tastes dull, or throws a descaling alert, do not treat it like a suggestion from a passive-aggressive roommate. Go descale it.
How to Descale in Easy Steps
- Empty the used capsule container and drip tray.
- Fill the water tank with fresh water and the correct amount of Nespresso descaling solution, following the package instructions for your model.
- Place a large container under the coffee outlet.
- Activate descaling mode according to your machine manual.
- Run the descaling cycle completely.
- Empty and rinse the container, drip tray, and water tank.
- Refill the tank with clean water only.
- Run the rinse cycle one or two times, as directed by your model instructions, to flush out the solution.
- Wipe the machine dry and let it rest for a few minutes before brewing again.
Do not rush the rinse step. Nobody wants espresso with notes of “industrial citrus cleaner” or “mild regret.” A thorough rinse is what stands between you and a very confusing first cup.
Step 6: Clean the Milk System if Your Machine Has One
If your Nespresso machine includes a milk frother, steam wand, or attached milk system, clean it after every use. Milk residue dries quickly, smells awful, and can clog small openings fast. Wipe steam wands immediately after steaming, purge them if your model allows it, and wash removable milk containers according to the manufacturer’s directions.
For standalone frothers like the Aeroccino, rinse and wash the interior after each use with mild soap and water, being careful with the whisk and interior coating. Let it dry fully before reassembling. Milk-based drinks are delightful. Dried milk sludge is not.
A Simple Nespresso Cleaning Schedule to Keep You Honest
| Task | Suggested Frequency |
|---|---|
| Empty used capsule container | Every 1–2 days or after heavy use |
| Rinse drip tray | Weekly or sooner if full |
| Wash water tank | About once a month |
| Wipe exterior and spout area | Weekly, or whenever splashes appear |
| Run rinse or cleaning cycle | Weekly on many models |
| Clean milk system | After every use |
| Descale machine | About every 3 months or 300 capsules |
Common Mistakes to Avoid
- Using vinegar instead of Nespresso descaling solution
- Forgetting to rinse after descaling
- Letting used capsules sit too long in the machine
- Ignoring the drip tray until it becomes a tiny coffee pond
- Using abrasive scrubbers that can scratch plastic or coated surfaces
- Soaking or rinsing the electrical base under running water
- Skipping milk-system cleanup after making lattes or cappuccinos
Signs Your Nespresso Machine Is Begging for Help
If your machine starts brewing more slowly than usual, tastes bitter, leaks around the tray, makes odd noises, or flashes a maintenance light, it is probably overdue for attention. Another clue is inconsistent crema or a cup that tastes strangely weak even though you have not changed pods. A good clean and descale can often fix performance issues that seem bigger than they really are.
That said, if cleaning does not improve anything, the issue may be mechanical rather than maintenance-related. At that point, it is worth checking the manual or contacting Nespresso support. Sometimes the machine needs more than a spa day. Sometimes it needs actual customer service.
Final Thoughts
Cleaning a Nespresso machine is one of those chores that sounds annoying until you actually do it and realize it takes far less effort than drinking bad espresso for a month. The key is consistency. Empty the capsule bin before it becomes a coffee museum. Rinse the removable parts before they get funky. Run a cleaning cycle weekly if your model recommends it. And descale on schedule so the inside of your machine does not slowly calcify like an ancient relic discovered under a volcano.
A clean Nespresso machine rewards you with better flavor, smoother operation, and fewer mysterious blinking lights. That means better mornings, better coffee, and a much lower chance of angrily Googling “why does my espresso taste like cardboard?” before 8 a.m. In the grand hierarchy of adult responsibilities, this is a very manageable win. Your future self, and your next espresso shot, will thank you.
Related Experiences: What Cleaning a Nespresso Machine Is Really Like in Real Life
There is a very specific kind of optimism that happens when someone buys a Nespresso machine. For the first few weeks, everything feels cinematic. You press a button, a beautiful little cup appears, and suddenly you are the kind of person who says things like “I think I’ll do a double espresso today.” Then life happens. The machine keeps working, so you keep using it, and the small maintenance tasks start slipping down the to-do list. The drip tray can wait. The water tank looks fine. The used capsule bin is technically full, but maybe “coffee architecture” is a thing now.
Then one morning, the magic gets weird. The coffee pours slower. The sound changes. The flavor is not terrible, but it is not that smooth, rich cup you remember. This is usually the moment people realize that Nespresso machines are a lot like nice white sneakers: easy to enjoy, less magical when neglected.
One of the most common experiences people describe is surprise at how much better the machine works after a proper cleaning cycle and descale. The first rinse can be mildly horrifying in a useful way. Water comes out looking a little cloudy or tinted, and suddenly the whole machine-cleaning project feels less optional. Afterward, though, the difference is obvious. The brew is stronger, the crema looks more normal, and the machine sounds less strained. It is the appliance version of finally cleaning your glasses and realizing the world has leaves on trees again.
Another relatable experience is learning that the water tank and capsule container can get gross faster than expected. Since these are easy to ignore, they are also easy to underestimate. People often assume the machine is “mostly clean” because the coffee still comes out hot. But standing water, damp interiors, and old drips do not need much time to get unpleasant. Once you make a habit of rinsing these parts regularly, the whole machine feels easier to maintain, and the deep cleans stop feeling so dramatic.
If you have a milk frother or milk-based Nespresso setup, the experience gets even more real. Milk waits for no one. Owners who love lattes often discover very quickly that cleaning right after use is the difference between a two-minute rinse and a deeply annoying scrub session later. It is one of those lessons that only needs to be learned once.
There is also the oddly satisfying experience of getting back in control of the machine. A blinking light stops blinking. The brew speed returns. The coffee tastes like it should. The whole thing feels less like troubleshooting a moody robot and more like taking care of a tool that actually takes care of you in return. That is why simple maintenance sticks once people see the payoff. It is not just about hygiene. It is about protecting the daily ritual. A clean Nespresso machine makes the first cup of the day feel easy again, and honestly, that is a pretty great return on ten or fifteen minutes of effort.


