Table of Contents >> Show >> Hide
- Why Cleaning Your Wrist Brace Matters
- Before You Wash: Check the Care Label First
- Supplies You Need to Clean a Wrist Brace
- How to Clean a Wrist Brace by Hand
- Can You Machine Wash a Wrist Brace?
- How Often Should You Wash a Wrist Brace?
- How to Remove Odor from a Wrist Brace
- How to Clean Different Wrist Brace Materials
- What Not to Do When Cleaning a Wrist Brace
- When Should You Replace a Wrist Brace?
- Extra Tips to Keep Your Wrist Brace Cleaner Longer
- Real-World Experience: What Cleaning a Wrist Brace Is Actually Like
- Conclusion
Fresh, supportive, and not secretly plotting to smell like a gym bag. A wrist brace can be a small hero when your hand needs stability, whether you are dealing with carpal tunnel discomfort, a sprain, tendon irritation, arthritis flare-ups, or post-injury support. But because it sits directly against your skin, absorbs sweat, rubs against fabric, and collects daily grime, it also needs regular cleaning.
The good news? Cleaning a wrist brace is usually simple. The slightly less glamorous news? You cannot just toss every brace into the washing machine and hope for the best. Some wrist braces have removable metal splints, hook-and-loop straps, foam padding, neoprene, elastic, plastic inserts, or delicate stitching. The safest method is almost always gentle hand washing, but machine washing can work for some braces if the care label allows it.
This guide explains how to clean a wrist brace by hand, when machine washing is safe, how to dry it properly, how to remove odor, and how to keep it comfortable against your skin. Think of it as a spa day for the hardest-working accessory on your wrist.
Why Cleaning Your Wrist Brace Matters
A wrist brace spends hours wrapped around a warm, moving part of your body. That means sweat, dead skin cells, body oils, lotion, dust, and lint can build up quickly. Over time, this buildup can lead to odor, skin irritation, weakened elastic, less effective Velcro, and a brace that feels less like medical support and more like a damp sock with straps.
Regular cleaning helps your wrist support last longer and feel better. It also helps reduce residue that may irritate sensitive skin. If you wear your brace during work, exercise, sleep, cooking, cleaning, or commuting, it is exposed to more than you might think. Even if it looks clean, the inner lining may be holding onto moisture and bacteria-friendly grime.
Cleaning is especially important if you wear the brace daily, sweat heavily, use hand lotion, have sensitive skin, or wear it while healing from an injury. A clean wrist brace is not just nicer to smell; it supports better hygiene and comfort.
Before You Wash: Check the Care Label First
Before washing a wrist brace, look for the care label, packaging, or manufacturer instructions. This tiny tag is the boss of the laundry room. Some braces are labeled “hand wash only,” while others may allow machine washing on a gentle cycle. Many wrist braces with metal splints, hinges, rigid inserts, or foam padding should not be machine washed.
If there is no label, use the safest method: hand wash in cool or lukewarm water with mild soap, rinse thoroughly, and air dry. Avoid hot water, bleach, fabric softener, dry cleaning, ironing, and tumble drying unless the manufacturer specifically says otherwise. Heat and harsh chemicals can weaken elastic, warp plastic, damage foam, and shorten the life of hook-and-loop closures.
Look for Removable Parts
Many wrist braces include a removable metal or plastic splint. This insert keeps your wrist stable, but it should usually be taken out before washing. If you leave it inside, water can cause rust, trapped moisture, or damage to the fabric pocket. Remove splints, detachable pads, and any removable rigid pieces before washing. Keep them nearby so you do not accidentally turn brace-cleaning day into “Where did I put that tiny metal bar?” day.
Close All Straps
Before washing, close every Velcro or hook-and-loop strap. This prevents the fasteners from snagging the fabric, collecting lint, or sticking to everything in sight like an emotionally needy cactus. Closing the straps also helps the brace keep its shape.
Supplies You Need to Clean a Wrist Brace
You do not need a laboratory, a pressure washer, or an ancient cleaning ritual. For most wrist braces, these basic supplies are enough:
- Mild laundry detergent or gentle hand soap
- Cool or lukewarm water
- A clean sink, bowl, or basin
- A soft cloth or sponge
- A soft-bristled toothbrush for Velcro and seams
- A clean towel
- A mesh laundry bag if machine washing is allowed
Choose fragrance-free detergent if you have sensitive skin. Avoid strong cleaners, bleach, fabric softeners, stain removers with harsh chemicals, and anything that smells like it could remove paint from a garage floor. Your brace needs cleaning, not an exorcism.
How to Clean a Wrist Brace by Hand
Hand washing is the safest and most recommended method for most wrist braces. It is gentle on elastic, foam, stitching, and fasteners while still removing sweat and odor.
Step 1: Remove the Brace and Inspect It
Take off the brace and check it carefully. Look for removable splints, frayed seams, peeling Velcro, cracked plastic, or areas that smell stronger than they have any right to. If your brace is damaged, washing may not fix the problem, and replacement may be safer.
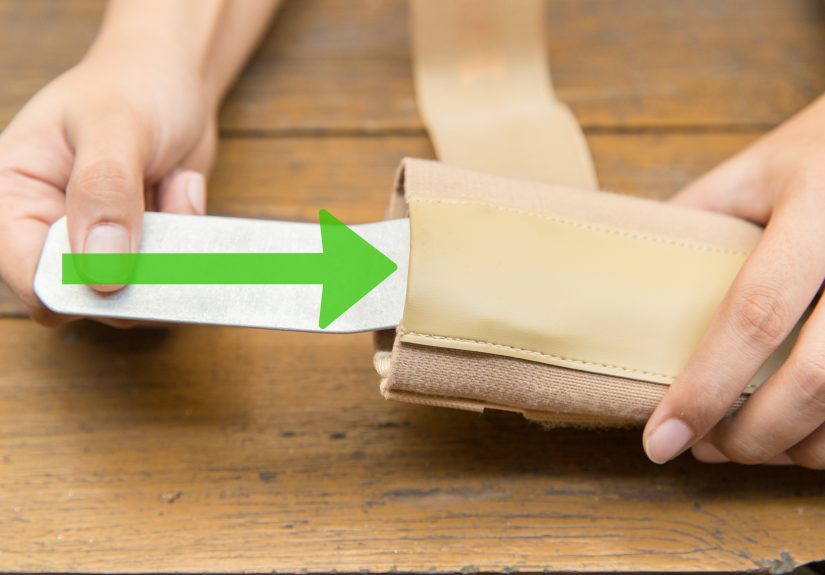
Step 2: Remove Splints or Inserts
Slide out any metal or plastic support pieces if the brace design allows it. Wipe these pieces separately with a damp cloth and mild soap. Dry them completely before putting them back. Never soak metal splints unless the manufacturer says it is safe.
Step 3: Close the Straps
Fasten all straps before washing. This protects the fabric and keeps the Velcro from collecting lint. If the hook side is clogged with fuzz, gently brush it with a soft toothbrush before washing.
Step 4: Prepare Soapy Water
Fill a clean basin or sink with cool or lukewarm water. Add a small amount of mild detergent or gentle soap. You want lightly soapy water, not a bubble bath dramatic enough for a shampoo commercial.
Step 5: Soak and Gently Wash
Place the fabric part of the wrist brace into the water. Let it soak for 5 to 10 minutes if it is mildly dirty, or up to 15 minutes if it has sweat buildup. Gently squeeze the brace in the water to move soap through the fabric. Use a soft cloth or sponge to wipe the inside lining, straps, seams, and edges.
Do not twist, wring, aggressively scrub, or stretch the brace. Elastic fibers can lose their snap, and foam padding can become misshapen. Treat the brace like something you want to keep useful, not like a kitchen rag that insulted your family.
Step 6: Clean the Velcro Carefully
Velcro is where lint, hair, and dust like to throw a party. Use a soft toothbrush to loosen debris from the hook-and-loop areas. Brush gently in one direction. If the Velcro is packed with lint, you can also use tweezers to remove stubborn pieces. Clean fasteners help the brace stay secure, which matters for both comfort and support.
Step 7: Rinse Thoroughly
Drain the soapy water and rinse the brace under cool running water until no soap remains. This step matters. Soap residue can irritate skin, especially if the brace is worn for several hours. Keep rinsing until the water runs clear and the brace no longer feels slippery.
Step 8: Press Out Water
Place the brace on a clean towel and press gently to remove excess water. Do not wring it. Rolling the brace in a towel can help pull out moisture without damaging the shape.
Step 9: Air Dry Completely
Lay the brace flat on a dry towel or hang it in a well-ventilated area. Let it air dry completely before wearing it again. Avoid dryers, heaters, radiators, hair dryers on hot settings, direct high heat, and ironing. Heat can damage elastic, shrink fabric, warp plastic, and make foam padding sad beyond repair.
Can You Machine Wash a Wrist Brace?
Sometimes, yesbut only if the care label says machine washing is allowed. Many wrist braces are hand wash only, especially those with removable splints, rigid stabilizers, foam layers, or delicate fasteners. When in doubt, hand wash.
If machine washing is permitted, use the gentlest approach possible. Remove metal or plastic splints, close all straps, place the brace in a mesh laundry bag, and wash it on a gentle or delicate cycle with cool water and mild detergent. Wash it with soft items like towels, not jeans, zippers, hooks, or heavy clothing that can batter the brace like it owes them money.
Machine Washing Steps
- Read the care label to confirm machine washing is allowed.
- Remove splints, hinges, or rigid inserts.
- Close all Velcro straps and fasteners.
- Place the brace in a mesh laundry bag.
- Use cool water and a gentle cycle.
- Add a small amount of mild detergent.
- Skip bleach, fabric softener, and stain boosters.
- Air dry completely after washing.
Never Put Most Wrist Braces in the Dryer
Even if your brace survives the washing machine, the dryer is usually a bad idea. High heat can ruin elastic and deform synthetic materials. Air drying takes longer, but it is the safer option. If you need your brace daily, consider buying a second brace so one can dry while the other handles wrist duty.
How Often Should You Wash a Wrist Brace?
The right cleaning schedule depends on how often you wear it and what you do while wearing it. A brace worn only at night may need washing once a week. A brace worn daily for work may need washing every few days. A brace worn during workouts, yard work, or sweaty summer errands should be cleaned after each sweaty use.
Here is a practical schedule:
- Occasional use: Wash every 1 to 2 weeks.
- Nightly use: Wash weekly.
- Daily use: Wash every 2 to 4 days.
- Heavy sweat or odor: Wash after each use.
- Visible dirt or skin irritation: Wash before wearing again.
Between washes, let the brace air out after each wear. Do not stuff it into a gym bag, drawer, purse, or backpack while damp. Moisture trapped in fabric is the express lane to odor.
How to Remove Odor from a Wrist Brace
If your wrist brace smells bad even after washing, it may need a deeper freshening routine. Start with a longer soak in cool water and mild detergent. Gently squeeze the brace several times during soaking to help release sweat and oils from the inner padding.
For odor control, you can sprinkle a small amount of baking soda on the dry brace, let it sit for a few hours, and shake or brush it off before washing. Baking soda can help absorb odors without the harshness of bleach. However, do not pack powder deep into seams or Velcro, because residue can be hard to remove.
Avoid perfume sprays, strong disinfectant sprays, essential oils, and deodorizing products not intended for skin-contact materials. A brace that smells like lavender-covered chemicals is not necessarily clean, and fragrance residue can irritate skin.
How to Clean Different Wrist Brace Materials
Neoprene Wrist Braces
Neoprene is flexible and supportive, but it can hold odor. Wash neoprene braces by hand in cool water with mild soap. Rinse thoroughly and air dry away from strong heat. Do not wring neoprene because it can crease or weaken.
Elastic Wrist Supports
Elastic supports can stretch out if washed too roughly. Use gentle hand washing or a machine wash only if the label allows it. Avoid hot water and fabric softener, both of which can reduce elasticity.
Foam-Padded Braces
Foam padding needs careful drying. Press water out with a towel and allow extra drying time. Wearing foam padding while damp can feel clammy and may encourage odor.
Braces with Metal Splints
Remove the splint before washing whenever possible. Wipe metal parts separately and dry them immediately. Once the brace is completely dry, reinsert the splint in the correct direction so the support still matches your wrist shape.
Velcro Strap Braces
Velcro closures lose grip when clogged with lint. Brush them gently and close them before every wash. If the Velcro no longer holds after cleaning, the brace may need replacement.
What Not to Do When Cleaning a Wrist Brace
Cleaning mistakes can shorten the life of your brace or make it uncomfortable to wear. Avoid these common problems:
- Do not use bleach. It can damage fabric and irritate skin.
- Do not use fabric softener. It can coat fibers and reduce breathability.
- Do not tumble dry. Heat can damage elastic, plastic, and foam.
- Do not iron. A wrist brace is not a dress shirt.
- Do not wring aggressively. Twisting can deform the brace.
- Do not wear it damp. Damp fabric can cause discomfort and odor.
- Do not soak non-removable rigid parts unless approved. Moisture may cause rust or material damage.
When Should You Replace a Wrist Brace?
Even the best cleaning routine cannot make a worn-out brace young again. Replace your wrist brace if the elastic is stretched, the straps no longer hold, the splint is bent, the fabric has permanent odor, the padding is flattened, or the brace no longer provides steady support.
You should also stop wearing a brace and speak with a healthcare professional if it causes numbness, tingling, increased pain, swelling, skin breakdown, or a rash. A brace should feel supportive, not like it is auditioning to be a medieval hand trap.
Extra Tips to Keep Your Wrist Brace Cleaner Longer
Wash and dry your wrist before putting on the brace. Let lotions or creams absorb fully before wearing it, because oily residue can cling to fabric. After removing the brace, open it fully and let it air out. If you wear a brace at work, keep it away from food spills, cleaning chemicals, and dusty surfaces.
If you wear a wrist brace every day, owning two braces can make life much easier. Rotate them so each one has time to dry fully after washing. This is especially useful for people who wear braces overnight for carpal tunnel symptoms or during long computer sessions.
Real-World Experience: What Cleaning a Wrist Brace Is Actually Like
The first thing most people notice about cleaning a wrist brace is that it probably needed washing sooner than they thought. A brace can look perfectly normal on the outside while the inside lining has quietly collected sweat, skin oils, and that mysterious “I wore this through a stressful Tuesday” smell. The moment warm water hits it, the truth comes out. This is not a reason to panic. It is simply proof that the brace has been doing its job.
In everyday use, the biggest challenge is drying time. A wrist brace may feel almost dry on the surface but still hold moisture inside the padding or seams. That is why washing it right before bed can be a mistake if you need to wear it overnight. A better routine is to wash it early in the day, press it with a towel, reshape it, and leave it somewhere with good airflow. Placing it near a fan can help. Putting it on a heater can hurt the brace. The fan is the helpful friend; the heater is the reckless cousin.
Another common experience is realizing how much Velcro affects comfort. When lint builds up in the hook-and-loop straps, the brace may start popping open or feeling uneven. A quick brushing with a soft toothbrush can make the straps grip better. It is a small step, but it can make an old brace feel more secure. If the Velcro still refuses to hold, cleaning will not perform miracles. That is usually a sign that replacement is coming.
People who wear wrist braces during computer work often deal with desk grime. The brace may brush against keyboards, mouse pads, notebooks, coffee cups, and lunch containers. Over time, the palm area and wrist edge can become darker than the rest of the fabric. Gentle hand washing usually handles this better than aggressive scrubbing. Scrubbing too hard can roughen the surface and make the brace less comfortable.
For nighttime brace users, odor may build slowly because the brace is worn for hours against warm skin. A weekly wash can make a big difference. It also helps to let the brace air out each morning instead of tossing it into a drawer. A brace needs breathing room. It may not have lungs, but it absolutely has opinions about being trapped while damp.
The best habit is simple: clean the brace before it becomes unpleasant. A quick hand wash every few days is easier than rescuing a deeply funky brace later. Mild soap, cool water, patience, and proper air drying are usually enough. Once the brace is clean, dry, and reshaped, it feels better against the skin and does its job without announcing itself to the entire room.
Conclusion
Learning how to clean a wrist brace is mostly about being gentle, consistent, and patient. Hand washing with mild soap and cool or lukewarm water is the safest method for most wrist braces. Remove splints when possible, close straps before washing, rinse thoroughly, and let the brace air dry completely. Machine washing should only be used when the care label clearly allows it, and even then, a gentle cycle and mesh laundry bag are your best friends.
A clean wrist brace feels better, smells better, and may last longer. It also helps protect your skin from residue and irritation. Whether you wear your brace for work, sleep, recovery, or daily support, regular cleaning turns it from “necessary but questionable” into “fresh, functional, and ready for duty.”


