Table of Contents >> Show >> Hide
- What’s Actually on Your Roof?
- Safety First (Because Gravity Is Undefeated)
- Tools and Materials Checklist
- Pick a Roof Cleaner That Won’t Wreck Your Roof
- How to Clean Roof Shingles: 13 Steps
- Choose the right day
- Inspect from the ground first
- Check gutters and downspouts
- Protect plants, siding, and anything you like
- Set up ladder safely (and don’t step on the roof if you can avoid it)
- Remove loose debris the gentle way
- Mix your cleaning solution responsibly
- Test a small, hidden area
- Apply solution from the bottom edge upward (to control streaking)
- Let it dwelldon’t let it dry
- Gently rinse with low pressure, top to bottom
- Spot-treat stubborn areas (instead of scrubbing everything)
- Clean up: rinse plants again, then clear gutters
- Aftercare and Prevention: Keep Roof Shingles Cleaner Longer
- What Not to Do (A Short List of Expensive Mistakes)
- When It’s Smarter to Call a Professional
- Conclusion
- Bonus: of Real-World Roof-Cleaning Experiences (So You Don’t Learn the Hard Way)
Roof shingles aren’t supposed to look like a zebra. Yet somehow, black streaks, green fuzz, and mystery “roof confetti” (aka leaves) show up right when you’re trying to sell the house, host a barbecue, or simply exist in peace. The good news: most roof staining is fixable (or at least dramatically improved) with the right approach. The bad news: the wrong approach can strip protective granules, shorten shingle life, and turn your Saturday into a “call my insurance agent” kind of day.
This guide walks you through a safe, industry-aligned way to clean asphalt roof shingles using a low-pressure, “soft wash” mindsetno roof-sandblasting, no sketchy chemistry experiments, and no “hold my beer” ladder moves. You’ll get a clear 13-step process, plus prevention tips so the streaks don’t return like an unwanted sequel.
What’s Actually on Your Roof?
Most “dirty roof” situations fall into three buckets:
- Black streaks (algae staining): Often caused by blue-green algae/cyanobacteria (commonly referenced as Gloeocapsa magma) that thrives in humid conditions and loves shaded, north-facing slopes. The streaks are usually cosmetic, but they can make your roof look older than it is.
- Moss: The green, plush stuff that looks like it belongs on a woodland fairy cottage. Moss can hold moisture and interfere with water sheddingmeaning it’s more than a beauty issue.
- Debris and grime: Leaves, pine needles, dirt, and pollen can trap moisture, invite growth, and clog gutters. It’s not glamorous, but it’s a big contributor.
Safety First (Because Gravity Is Undefeated)
Cleaning shingles is less like washing a car and more like washing a car… on a steep, slippery ramp… while holding chemicals. In other words: don’t underestimate it.
- If the roof is steep, high, wet, icy, or you feel unsure: hire a pro.
- Wet algae and cleaning solution make roofs slick: slipping risk increases fast.
- Choose ladder safety over bravado: stable footing, correct angle, and a spotter if possible.
- Wear eye/skin protection: even “household” bleach can irritate and damage tissues, and runoff can harm landscaping.
Tools and Materials Checklist
Before you start, gather:
- Extension ladder (and a ladder stabilizer if you have one)
- Pump sprayer or garden sprayer (dedicated for outdoor/chemical use)
- Garden hose with spray nozzle (low-pressure rinse)
- Protective gear: gloves, safety goggles, long sleeves, non-slip shoes
- Plastic sheeting/tarps to protect plants and collect runoff
- Optional: soft-bristle brush on an extension pole (use gently and sparingly)
- Gutter scoop or small trowel (for the “after” part you’ll thank yourself for)
Pick a Roof Cleaner That Won’t Wreck Your Roof
The biggest principle: low pressure + the right cleaner + time. Many manufacturers and industry groups warn against pressure washing asphalt shingles because it can dislodge protective granules and lead to premature wear.
Common cleaner options
- Bleach + water (industry-standard for algae): Often recommended as a diluted solution applied via sprayer, allowed to dwell briefly, then rinsed with low pressure. You’ll see ratios vary by source and manufacturer, so always defer to your shingle maker when available.
- Bleach + water + (optional) TSP substitute: Some manufacturer bulletins include a recipe that adds a small amount of cleaner (like TSP or an approved substitute) for stain liftingagain, follow product directions and local rules.
- Oxygen bleach (sodium percarbonate): Often marketed as a gentler alternative, typically slower but friendlier to landscaping when used correctly.
A chemistry warning you should actually take seriously
Never mix bleach with ammonia (or ammonia-containing cleaners). That combination can create toxic fumes. If you’re adding anything besides water to bleach, you must be sure it’s compatibleand ideally follow a manufacturer recipe rather than improvising.
How to Clean Roof Shingles: 13 Steps
These steps assume asphalt shingles (the most common U.S. residential roof type). If you have wood shakes, slate, clay tile, or specialty roofing, cleaning methods can differcheck manufacturer guidance or hire a specialist.
-
Choose the right day
Pick a dry day with mild temps and light wind. Avoid blazing sun that can dry cleaner too fast and increase residue. The goal is controlled dwell time, not a chemical bake-off.
-
Inspect from the ground first
Use binoculars if needed. Note where staining is worst (often shaded or north-facing areas). If you see missing shingles, curling edges, soft spots, or heavy granule loss, pause and consider professional repair before cleaning.
-
Check gutters and downspouts
If gutters are packed, rinsing will turn into a “waterfall in the wrong place” situation. Clear obvious clogs and make sure downspouts send water away from foundations and landscaping.
-
Protect plants, siding, and anything you like
Pre-wet shrubs and grass with plain water, then cover delicate plants with plastic sheeting if possible. Runoff mattersespecially with bleach-based mixes. Also close windows and protect outdoor furniture.
-
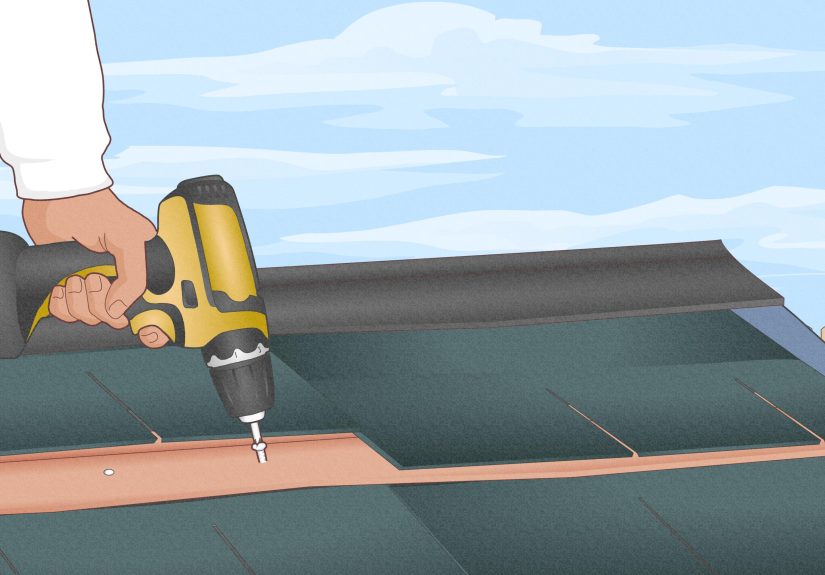
Set up ladder safely (and don’t step on the roof if you can avoid it)
Position the ladder on stable ground, use a spotter if possible, and keep your weight centered. Many pros do as much as possible from the ladder to reduce slip risk and shingle wear.
-
Remove loose debris the gentle way
Use a leaf blower directed down-slope or a soft broom very lightly. Avoid aggressive brushing that scuffs granules. This step improves cleaner contact with the stains instead of with yesterday’s oak leaves.
-
Mix your cleaning solution responsibly
Follow manufacturer instructions when available. If you’re using a bleach-and-water approach, use a clearly labeled outdoor sprayer and mix only what you’ll use. Keep kids and pets away from the area.
Tip: If you’re uncertain about ratios, choose a milder dilution and repeat a second application later rather than going nuclear on the first try.
-
Test a small, hidden area
Apply the solution to a small patch and wait the recommended dwell time. Make sure there’s no weird discoloration or unexpected runoff issues before you commit to the whole roof.
-
Apply solution from the bottom edge upward (to control streaking)
Lightly mist the stained area; don’t blast it. Working from the lower edge upward helps prevent dirty “racing stripes” as solution runs down over dry shingles.
-
Let it dwelldon’t let it dry
Dwell time is where the magic happens. Typically this is around 15–20 minutes, but it varies by product and stain severity. If the surface starts to dry, lightly mist with water to keep it damp (without washing it away too soon).
-
Gently rinse with low pressure, top to bottom
Rinse using a garden hose on low pressure, directing water down the slope. Avoid forcing water up under shingle edges. The goal is to remove residue while leaving shingles intact.
-
Spot-treat stubborn areas (instead of scrubbing everything)
If stains persist, reapply solution to those areas and repeat dwell/rinse. If you must use a brush, use a soft-bristle brush with very light pressurethink “polite persuasion,” not “tile grout rage.”
-
Clean up: rinse plants again, then clear gutters
When you’re done, rinse shrubs and grass thoroughly. Once the roof is dry, remove loosened debris from gutters and check downspouts. This prevents the next rain from pushing gunk into clogs.
Aftercare and Prevention: Keep Roof Shingles Cleaner Longer
Cleaning is step one. Preventing repeat growth is how you save time (and reduce how often you need to do this).
Practical prevention moves
- Trim back overhanging branches: More sun and airflow = less moisture = less growth.
- Keep gutters and roof valleys clear: Debris traps moisture and feeds moss.
- Improve drainage: Make sure downspouts don’t dump onto lower roof sections.
- Consider algae-resistant shingles or metal strips: Some products release algae-inhibiting metals over time, which can reduce streaking in high-humidity regions.
What Not to Do (A Short List of Expensive Mistakes)
- Don’t pressure wash asphalt shingles. It can dislodge granules and shorten roof life.
- Don’t scrub aggressively. Shingle granules are not “dirt.” They’re protection.
- Don’t ignore safety. Roof cleaning creates slippery surfaceseven when the roof looks “dry.”
- Don’t mix random chemicals. Especially anything that could contain ammonia.
When It’s Smarter to Call a Professional
DIY makes sense when the roof is low-slope, easily accessible, and lightly stained. But call a pro if:
- The roof is steep, high, or hard to reach safely
- You see damaged shingles, flashing issues, or signs of leaks
- Moss is thick and rooted (especially in shaded, damp climates)
- You’re concerned about warranty requirements or product compatibility
Conclusion
Cleaning roof shingles is all about the soft-wash approach: gentle application, proper dwell time, and low-pressure rinsingplus smart prevention so the stains don’t boomerang back. If you protect your landscaping, avoid pressure washers, and keep safety non-negotiable, you can brighten your roof’s appearance without beating up the shingles that protect your home.
Bonus: of Real-World Roof-Cleaning Experiences (So You Don’t Learn the Hard Way)
Homeowners tend to have the same three “first-time roof cleaning” experiences, and none of them involve feeling like an action hero. Experience #1: You realize your roof isn’t “dirty,” it’s alive. Those black streaks aren’t soot from a chimney or shadow lines from your attic beams; they’re biological staining that grows where moisture hangs around the longest. People often notice the worst staining on the north-facing slope or under a big shade tree and assume the shingles are failing. In most cases, they’re just hosting tiny squatters. Once you treat the biology, the roof usually looks years youngereven if it’s the same roof with the same miles on it.
Experience #2: The ladder becomes the main character. Plenty of DIYers start with a simple plan“I’ll be done before lunch”and then discover that moving a sprayer, controlling runoff, and keeping footing stable takes patience. The most common “oops” moment is rushing setup: placing the ladder on uneven ground, skipping the spotter, or working when the roof is slightly damp. Another common surprise is just how slippery shingles get when you apply cleaner. Even if you never step onto the roof, overspray can drip onto the ladder rungs or splash onto shoes. The people who have the best experience treat the project like a mini job site: shoes with grip, deliberate movements, and a refusal to multitask while climbing.
Experience #3: Plants are drama queens (and they’re not wrong). Even careful application can send runoff onto shrubs and grass. First-timers often protect the roof and forget the landscapingthen wonder why the azaleas look personally offended the next day. The best “pro-style” habit is simple: soak plants with water before you start, cover what you can, and rinse everything again after you finish. It’s also wise to work in smaller sections rather than coating the entire roof at once, which helps keep dwell time controlled and reduces the chance of solution drying or pooling.
One more common experience: stains don’t always disappear instantly. Some algae staining lightens significantly right away, while other roofs improve more gradually over the next few rains as residues finish washing away. That’s why patient homeowners tend to be happiestthey avoid over-scrubbing and over-strong mixtures, and they’re willing to repeat a mild treatment if needed. Finally, the best long-term lesson is that roof cleaning isn’t just a one-time event; it’s part of roof maintenance. Trim trees, keep gutters clear, and reduce shaded, damp zones. Do that, and the roof stays cleaner longerwithout you needing to reenact a home-improvement reality show every year.


