Table of Contents >> Show >> Hide
- Before You Start: A 20-Second Reality Check
- Step 1: Open Discord and Select Your Server
- Step 2: Open the Channel List and Pick a Category
- Step 3: Tap the Plus (+) to Create a Channel
- Step 4: Choose the Channel Type (Text or Voice)
- Step 5: Name the Channel and Set Key Options
- Step 6: Tap “Create” and Do a 30-Second Test
- Troubleshooting: Common “Why Can’t I Create a Channel?” Issues
- Pro Tips: Make Your Channels Actually Work (Not Just Exist)
- Experiences: What It’s Like Creating Channels on Android (The Real-World Moments)
- Conclusion
You know that moment when your Discord server starts feeling like a group chat that ate a filing cabinet?
Messages everywhere. Important stuff buried. “Where do I post memes?” turning into a philosophical debate.
The cure is simple: create channelson your Android phone, in minutes, without needing a laptop or a computer science degree.
This guide walks you through six easy steps to create a Discord channel on Android, plus smart setup tips
(so your shiny new channel doesn’t instantly become the digital equivalent of a junk drawer).
Before You Start: A 20-Second Reality Check
-
You must have permission. If you’re the server owner, you’re good. If not, you’ll typically need a role with
Manage Channels enabled. If you don’t see the option to create channels, permissions are the usual culprit. -
Know what you’re creating. Most servers use Text channels (for messages) and Voice channels
(for talking). Some servers also use special channel types like Announcement, Forum, or Stage,
which may require “Community” features to be enabled. -
App layouts change. Discord occasionally updates its mobile interface. The labels might move, but the flow stays basically the same:
open server → open channel list → tap the plus → name it → create it.
Step 1: Open Discord and Select Your Server
Launch the Discord app on your Android device and tap the server where you want to create a new channel.
If you manage multiple servers, double-check you’re in the right onebecause nothing says “oops” like creating
#book-club inside your gaming server.
Quick tip
If you can’t find the server’s channels right away, look for the server’s channel list icon or menu (often near the top of the screen),
or swipe/tap to reveal the channel list. Discord’s mobile navigation can vary by version, but the channel list is always there.
Step 2: Open the Channel List and Pick a Category
Channels usually live inside categoriesthink of them as folders. Examples:
INFO, GENERAL, VOICE, EVENTS, STAFF.
If your server already has categories, decide where the new channel should go.
Not using categories yet? That’s okay, but once your server grows past “three friends and a bot,” categories
keep everything from becoming a never-ending scroll of chaos.
Example category structure (simple and effective)
- START HERE: #rules, #announcements, #introductions
- CHAT: #general, #memes, #help
- VOICE: General Voice, Study Room, Music (if you use it)
- STAFF (private): #mod-chat, #reports
Step 3: Tap the Plus (+) to Create a Channel
In the channel list, look for a plus (+) icon next to a category name (or a “Create Channel” option in the server/channel menu).
Tap it. This opens the channel creation screen where you’ll choose the channel type and set it up.
Not seeing the plus? That usually means you don’t have channel management permissions in that server.
Ask a server admin to grant your role Manage Channels (or create the channel for you).
Step 4: Choose the Channel Type (Text or Voice)
Now pick your channel type. Here’s how to choose without overthinking it:
Text channel (most common)
Best for ongoing conversations, questions, resources, or anything you want people to be able to search later.
Examples: #general, #homework-help, #patch-notes, #pet-pictures.
Voice channel
Best for live conversation, coworking sessions, game nights, or “we need to talk for five minutes that becomes two hours.”
Examples: General Voice, Raid Team, Study Room.
Other channel types you may see
- Announcement: Great for one-way updates (often paired with Community features).
- Forum: Good for structured Q&A and posts (also commonly tied to Community settings).
- Stage: Ideal for events where some people speak and others listen (typically requires Community features).
If you’re just learning, start with Text or Voice. You can always add the fancy stuff later.
Step 5: Name the Channel and Set Key Options
This is where you turn “a channel” into a useful channel. Add a name and configure a few options so the channel behaves the way you want.
Channel naming best practices
- Keep it short and obvious. People should instantly know what goes there.
- Use hyphens for text channels (common Discord style): #movie-recs, #garden-tips.
- Avoid inside jokes unless everyone is in on it. Future members won’t understand “#the-place-we-do-the-thing.”
- Consider emojis sparingly. One emoji can help scanning; five emojis can look like your channel name fell into a sticker drawer.
Optional settings worth using
-
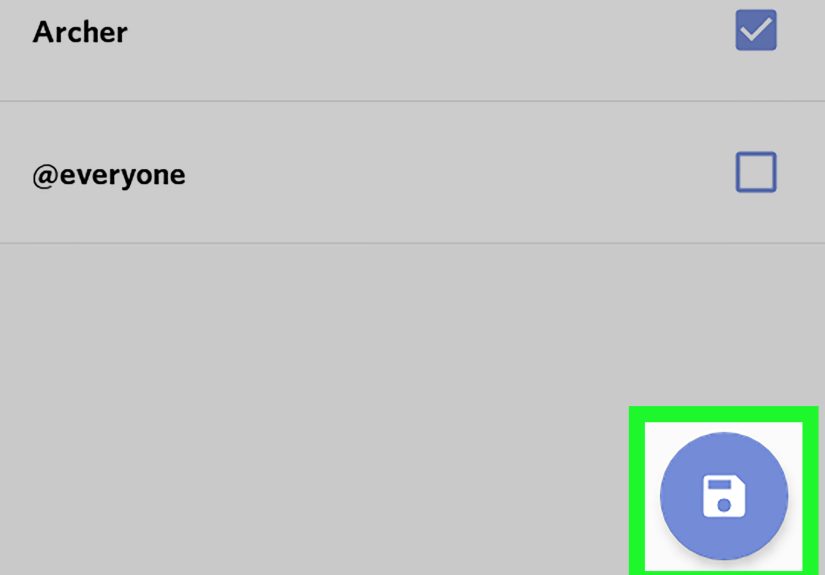
Private Channel toggle (if available): Use this for staff channels, VIP areas, or anything not meant for the whole server.
You’ll typically pick which roles or members can view it. -
Permissions: If you need “read-only” behavior, you’ll adjust permissions so most users can view the channel but not post.
(Great for #announcements or #rules.) - Slowmode (text): Helpful in high-traffic channels to reduce spam and keep discussions readable.
- NSFW marking (if relevant): If a channel contains adult content, mark it correctly for safety and compliance.
Concrete examples (copy these ideas)
- #announcements: read-only for members, posting allowed for mods/admins only
- #help-desk: normal chat, slowmode on during busy times
- #resources: tighter posting permissions so it stays clean and searchable
- Study Room (voice): “push-to-talk recommended,” quiet vibe, optional text chat for links
Step 6: Tap “Create” and Do a 30-Second Test
Once everything looks right, tap Create. Your new channel should appear immediately in the channel list.
Now do a quick test so you don’t discover problems later in front of your entire server (because Discord has a sense of humor, too).
Fast test checklist
- Can you see the channel in the list?
- Can you send a test message (text) or join (voice)?
- If it’s private, can the intended role/member access it?
- If it’s read-only, are regular members blocked from posting?
If something’s off, open the channel, tap the channel name at the top (or the settings/gear icon),
and adjust permissions or settings. Most fixes take less time than arguing about what the channel should be called.
Troubleshooting: Common “Why Can’t I Create a Channel?” Issues
You don’t have the right permissions
If the create option is missing, ask an admin to grant your role Manage Channels.
If you can create channels but can’t edit them afterward, it may be a permission syncing issue with category settings.
You’re trying to create a channel type your server doesn’t support yet
Announcement, Forum, and Stage channels often depend on server features like “Community.”
If you don’t see those options (or they fail to create), your server may need Community enabled or you may need additional permissions.
Your app needs an update
Discord’s mobile UI evolves. If your screen looks wildly different from a friend’s, update the app and try again.
The core steps remain the same, but menus can move around.
Pro Tips: Make Your Channels Actually Work (Not Just Exist)
1) Create channels with a purpose, not a mood
“Let’s make a channel for everything!” is how you end up with a server that looks like a kitchen drawer full of tangled chargers.
Start small: one main chat channel, one announcements/rules channel, and one voice channel. Expand when needed.
2) Use categories to reduce scrolling
Categories keep your server readable. Think of them as signs in a store: “INFO,” “CHAT,” “VOICE,” “STAFF.”
People should be able to find what they need without going on a scavenger hunt.
3) Lock down #announcements and #rules
Channels meant for official updates should be clean. Make them read-only for most members and allow posting for moderators/admins.
You’ll instantly reduce noise and keep important info easy to find.
4) Give voice channels a “why”
A single “General” voice channel is fine. But if your server does different activities, separate channels help:
Game Night, Study Room, AFK. People self-sort naturally, and everyone’s happier.
5) Add a short channel topic/pinned message
In high-traffic text channels, pin a message like: “Post questions here. Keep memes in #memes.”
It saves you from repeating the same instruction 400 times (and keeps you from slowly turning into a grumpy wizard).
Experiences: What It’s Like Creating Channels on Android (The Real-World Moments)
If you’re doing all of this from an Android phone, you’ll quickly learn a funny truth: creating a Discord channel is easydeciding what to
name it and what goes inside it is the part that makes people stare at their screen like it just asked them to solve a riddle.
Most first-time server builders have the same experience: you start with one channel, feel powerful, and suddenly want to create twelve more.
Then you pause and think, “Wait… do we really need #general-2?”
A common “Android moment” is hunting for the channel list when Discord’s interface feels different after an update.
You tap around, you swipe, you open a menu, and thenboomthe channel list appears like it was there the whole time,
quietly judging you. Once you find it, the plus icon becomes your best friend (or your biggest temptation).
People often report that the first channel they create is something practical, like #announcements or #general,
and the second is something emotionally necessary, like #memes or #pets. Balance is important.
Another real-world experience: permissions are where confidence goes to get humbled. You’ll create a channel, set it to private,
and feel like a responsible community leader… until someone messages you saying, “I can’t see it.”
Or worse: “Everyone can see it.” This is normal. Channel permissions are powerful, and they can be fiddly on mobile
because you’re working in a smaller space. The best approach is what many moderators naturally end up doing:
create the channel first, then do a quick test with a trusted friend or a second account (or simply verify role access if you can),
and adjust settings immediately.
On Android, voice channels can be especially satisfying because you can create them on the fly.
People often use this in real life when a conversation outgrows text. You’re chatting in #general,
plans start forming, and suddenly typing feels slowso you create “Game Night Voice” or “Planning Room” and everyone jumps in.
The “aha” moment is realizing you don’t need to over-engineer: one voice channel for casual talk, one for focused sessions,
and maybe an AFK channel if your server is active. That’s enough to make your server feel organized without feeling stiff.
There’s also a very relatable phase where you learn what channels don’t work. For example, a brand-new server might create
six separate chat channels#music, #movies, #food, #fitness, #random, #memesand then
discover everyone still posts everything in #general. That’s not failure; it’s feedback.
Many communities settle into a rhythm where only a few channels are “hot” daily, and the rest are purpose-built:
a help channel for questions, a resources channel for links, an announcements channel for updates.
Over time, you’ll naturally prune or rename channels based on what people actually use.
Finally, one of the best experiences people describe is the moment a new member joins and instantly understands your server.
They find #rules and #announcements first, then wander into #introductions, then land in #general
without asking, “Where do I post?” That’s the payoff. Creating channels on Android isn’t just a mobile convenienceit’s a way
to shape how your community feels. When channels are clear, people participate more, moderators repeat themselves less,
and your server stops feeling like a noisy hallway and starts feeling like a well-run hangout spot.
Conclusion
Creating a Discord channel on Android comes down to a simple flow: open your server, tap the plus icon, pick a channel type,
name it, set the right options, and test it. The real magic is using channels intentionallyso your server stays welcoming,
searchable, and easy to navigate as it grows.
Start with the basics, watch how your community behaves, and adjust. Your future self (and your members) will thank you
and your server will feel less like a messy group chat and more like a place people actually want to return to.


