Table of Contents >> Show >> Hide
- What a Transparent Background Actually Means
- Why People Use Transparent Backgrounds
- Why Pixlr Is a Smart Choice for This Job
- Before You Start: Choose the Right Image
- Method 1: Use Pixlr’s AI Background Removal Tool
- Method 2: Manually Create a Transparent Background in Pixlr Editor
- How to Get Cleaner Edges
- Best Use Cases for Transparent Backgrounds in Pixlr
- Common Mistakes to Avoid
- Troubleshooting: If Your Transparent Background Is Not Working
- Pixlr Tips for Better Results
- Final Thoughts
- Extended Experience: Real-World Lessons from Using Pixlr for Transparent Backgrounds
- SEO Tags
Some images arrive in your life like tiny divas. They look great on their original background, but the second you try to place them on a website banner, product page, presentation slide, or social post, they bring an awkward white box along for the ride. That is where transparent backgrounds save the day.
If you want a logo that floats cleanly over any color, a product photo that looks polished in an online store, or a cutout portrait that does not scream “I was copied from a screenshot at 2 a.m.,” Pixlr is a practical tool for the job. It runs in the browser, works fast, and gives you both automated and manual ways to remove a background without needing a heavyweight desktop editor.
In this guide, you will learn exactly how to create transparent backgrounds using Pixlr, when to use the fast AI route, when to switch to manual cleanup, how to avoid jagged edges, and why exporting in the right file format matters more than most people realize. We will also cover common mistakes, troubleshooting tips, and real-world examples so you can turn messy cutouts into clean, usable graphics.
What a Transparent Background Actually Means
A transparent background means the background pixels are removed rather than painted white, black, or any other color. When done correctly, your subject, logo, icon, or object can sit naturally on top of another design without a visible box around it.
In editors like Pixlr, transparency is usually shown as a gray-and-white checkerboard. That checkerboard is not part of the image. It is simply a visual cue that says, “Congratulations, there is nothing here.” Think of it as the digital version of empty space wearing a plaid jacket.
Why People Use Transparent Backgrounds
Transparent PNGs are useful in far more places than people expect. If you run a website, manage social media, create classroom materials, sell products online, or build presentations, you will probably need them sooner rather than later.
- Logos: Place the same logo on white, black, gradient, or photographic backgrounds.
- Product images: Make items look cleaner in catalogs, listings, and ads.
- Profile cutouts: Create team bios, event graphics, or speaker cards.
- Watermarks: Add branding without a clunky background block.
- Design assets: Reuse icons, stickers, and decorative elements across projects.
Why Pixlr Is a Smart Choice for This Job
Pixlr is popular because it gives you two useful paths. First, it offers quick background-removal tools powered by AI, which are great when you need speed. Second, it also gives you editing controls for the moments when the AI gets a little too enthusiastic and removes part of a sleeve, a curl of hair, or the outer edge of a mug handle.
That combination matters. Fast tools are wonderful until they confidently delete the exact thing you wanted to keep. Pixlr helps you move from quick automation to hands-on correction without switching platforms.
Before You Start: Choose the Right Image
Your final result depends heavily on the image you begin with. A clean background, strong contrast, and sharp subject edges will make the process easier. If your subject blends into the background like a beige cat on a beige couch, expect to do more manual editing.
Images that work best
- Logos on solid white or solid-color backgrounds
- Product shots with clear separation from the background
- Portraits with good lighting and simple backdrops
- Icons and illustrations with defined edges
Images that are trickier
- Hair blowing in the wind
- Glass, smoke, shadows, and semi-transparent objects
- Busy backgrounds with similar colors
- Low-resolution screenshots or blurry photos
Method 1: Use Pixlr’s AI Background Removal Tool
If you want the fastest path to a transparent background, start here. This method is ideal for product photos, simple portraits, and most everyday graphics.
Step 1: Open Pixlr and upload your image
Launch Pixlr in your browser and upload the image you want to edit. If you are using a background-removal tool directly, Pixlr will typically process the image automatically after upload.
Step 2: Let the tool remove the background
Pixlr’s AI detects the main subject and removes the surrounding background. In many cases, it is surprisingly fast and accurate. For logos, objects, and simple portraits, this may get you 80 to 95 percent of the way there in one click.
Step 3: Inspect the edges closely
Zoom in and check the outline of your subject. Pay special attention to hair, ears, fingers, product handles, transparent packaging, and curved edges. This is where small flaws love to hide like tiny gremlins.
Step 4: Fine-tune the cutout
If Pixlr offers a fine-tune or touch-up option, use it to restore parts that were removed by mistake or erase leftover background fragments. This is the difference between “good enough for a quick mockup” and “clean enough to publish.”
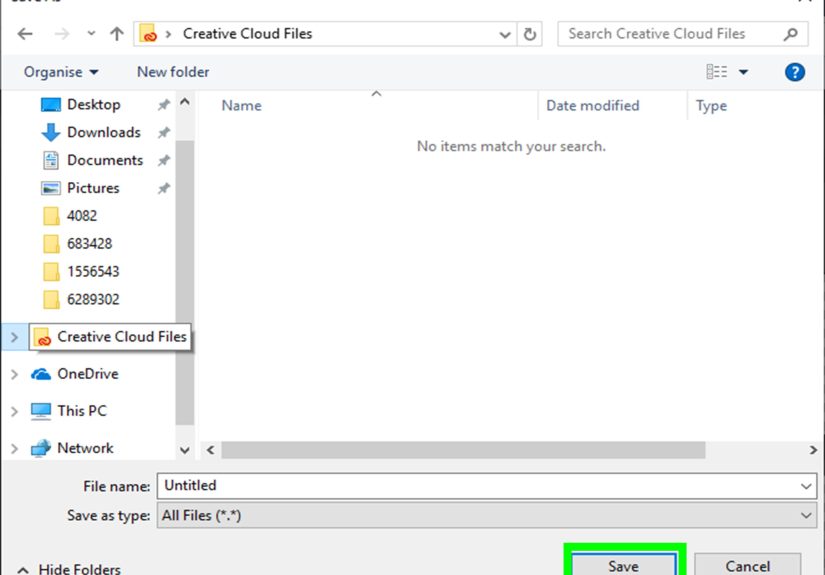
Step 5: Export as PNG
This step is critical. Save or export the finished image as a PNG so the transparency stays intact. If you export as JPG, the transparent area will not remain transparent. It will usually turn white, which is the digital equivalent of locking yourself out of your own apartment.
Method 2: Manually Create a Transparent Background in Pixlr Editor
Sometimes the quick tool gets close but not perfect. When that happens, switch to manual editing inside the Pixlr editor. This gives you more precision and is especially useful for logos, simple objects, and high-contrast images.
Step 1: Open the image in Pixlr Editor
Upload your image to the main editor so you can work with selections, layers, and deletion tools.
Step 2: Unlock the layer if needed
If your image is sitting on a locked background layer, unlock it first. You cannot delete the background cleanly if the layer is fixed like a museum exhibit.
Step 3: Use a selection tool
For simple backgrounds, the magic wand is often the fastest choice. Click the background area to select it. If the background is not selected perfectly in one click, adjust tolerance or add to the selection.
For more complex images, try lasso-style selection tools or combine multiple selections. The goal is to isolate the background without shaving off parts of the subject.
Step 4: Delete the selected background
Once the background is selected, delete or cut it. If the area behind your subject turns into a checkerboard, that means transparency has been created successfully.
Step 5: Clean up leftovers
Zoom in and remove stray pixels around the subject using eraser or brush-based correction tools. You can also reselect stubborn patches and delete them in smaller sections.
Step 6: Save as PNG
Again, use PNG. Transparent work lives and dies by this decision.
How to Get Cleaner Edges
The most common problem after removing a background is rough edges. A subject may technically be isolated, but the result still looks choppy, fuzzy, or surrounded by a pale halo. That is not a transparent-background problem. That is an edge-quality problem.
Use zoom generously
Work close. Editing at a tiny zoom level is like trying to cut wrapping paper with oven mitts on.
Remove halos
If the original image had a white background, you may see white fringing around the subject after removal. Carefully erase or refine those border pixels so the subject blends naturally on dark or colorful backgrounds.
Do not over-erase
Many beginners get aggressive and carve out parts of the subject itself. If a shoulder edge starts looking brittle or hair suddenly resembles burnt noodles, you have gone too far.
Test on multiple backgrounds
Place your cutout on both a dark background and a light background. A cutout that looks fine on white may reveal edge problems immediately on black, blue, or patterned designs.
Best Use Cases for Transparent Backgrounds in Pixlr
1. Making a logo transparent
This is one of the easiest and most useful jobs. If your logo sits on a solid white background, Pixlr can usually remove it quickly. Once saved as a transparent PNG, the logo becomes much more flexible for websites, packaging mockups, and social media.
2. Cleaning up product photos
Transparent backgrounds make product images feel cleaner and more modern. They are especially useful for ecommerce listings, comparison graphics, and ad creatives where consistency matters.
3. Creating speaker or team headshots
Need a row of polished staff images on a landing page? Transparent headshots are far more versatile than rectangle portraits. They feel less stiff and blend better into custom page designs.
4. Building marketing graphics
Once you have isolated objects, you can layer them over promotional banners, thumbnails, flyers, or email graphics without awkward background boxes getting in the way.
Common Mistakes to Avoid
- Saving as JPG: This is the classic self-own. JPG does not preserve transparency.
- Ignoring edge cleanup: One-click removal is not always one-click perfection.
- Using low-quality images: Blurry inputs create sloppy outputs.
- Forgetting to unlock the layer: Locked layers can stop proper editing.
- Assuming the checkerboard will show online: It is only a transparency indicator.
- Not testing the cutout: Always preview the image on different backgrounds before publishing.
Troubleshooting: If Your Transparent Background Is Not Working
The image still has a white background
Check the file format first. If you exported as JPG, that is the problem. Re-export as PNG.
The checkerboard disappeared after saving
That is normal. Many image viewers display transparency differently. Open the file in a design editor or place it over a colored background to confirm the transparent area is still there.
Edges look jagged
Return to the editor, zoom in, and refine the outline manually. The first cutout is often the draft, not the final version.
The subject looks cut off
Undo the last steps or restore erased sections if possible. AI and selection tools are helpful, but they are not mind readers.
Pixlr Tips for Better Results
- Start with the highest-resolution image you have.
- Use AI removal first, then clean up manually.
- For solid backgrounds, try selection tools for faster manual work.
- Preview the result on dark and light colors before exporting.
- Keep a copy of the original image in case you need to redo the cutout.
Final Thoughts
Learning how to create transparent backgrounds using Pixlr is one of those skills that keeps paying off. It is useful for logos, product images, website graphics, social posts, thumbnails, presentations, and pretty much any project where you want an image to look clean and professional.
The good news is that Pixlr makes this process approachable. You can start with AI for speed, move into manual editing for precision, and export the final image as a transparent PNG that works almost anywhere. Once you understand the difference between a white background and a truly transparent one, your design workflow gets much easier.
So yes, transparent backgrounds are practical. They are also a little addictive. After you make your first clean cutout, you may start looking at every image on your computer thinking, “You know what would improve your attitude? Losing that background.”
Extended Experience: Real-World Lessons from Using Pixlr for Transparent Backgrounds
One of the most interesting things about using Pixlr for transparent backgrounds is how quickly it becomes part of everyday content creation. At first, most people use it for a single task, such as removing the background from a logo. Then they realize the same technique helps with product collages, profile images, blog graphics, YouTube thumbnails, event flyers, and presentation slides. It is one of those small skills that quietly turns into a repeatable advantage.
In practical use, the biggest lesson is that speed and quality are not always enemies, but they do negotiate. Pixlr’s AI tools can give you a strong starting point in seconds, which is perfect when deadlines are tight. For example, if you are updating an online store and need several product cutouts fast, the automated tool can save a huge amount of time. But the best results usually come from spending an extra minute or two on cleanup. That tiny bit of patience often separates an image that looks “fine” from one that looks professionally prepared.
Another common experience is discovering that transparent backgrounds reveal mistakes you never noticed before. A white logo on a white page can hide rough edges. Put that same logo on a dark banner, and suddenly every leftover pixel becomes embarrassingly visible. This is why experienced users test their cutouts against different colors before publishing. It is a simple habit, but it catches a surprising number of flaws.
Users also learn that not every image deserves the same workflow. A clean product bottle on a white background is easy. A portrait with loose curls, eyeglass reflections, and a busy outdoor background is a very different story. In those cases, Pixlr still helps, but expectations need to be realistic. The goal is not always perfect hair-by-hair extraction. Sometimes the smart move is to use the best cutout possible, place it on a forgiving background, and focus on the overall design rather than microscopic perfection.
There is also a confidence factor that comes with repetition. The first time someone sees the checkerboard background, they often wonder whether they broke the image. After a few projects, that checkerboard starts to feel like a victory lap. It means the background is gone, the image is flexible, and the design can move forward. Over time, Pixlr becomes less of a “photo editing tool” and more of a cleanup station for visual content. That is probably the best way to describe the experience: efficient, practical, and surprisingly satisfying when done well.


