Table of Contents >> Show >> Hide
- What Makes a Wine Cork Tree So Easy (and So Cute)
- Supplies and Tools
- Prep Your Corks (The Part That Makes Everything Easier)
- Pick a Style
- How to Make a Tabletop Wine Cork Christmas Tree
- Step 1: Choose your cone size and estimate corks
- Step 2: Optional–wrap the cone to hide gaps
- Step 3: Decide on cork orientation
- Step 4: Glue the first row (this sets the whole vibe)
- Step 5: Build upward with staggered rows
- Step 6: Deal with gaps as you go
- Step 7: Finish the top cleanly
- Step 8: Add a base and final details
- How to Make a Wine Cork Christmas Tree Ornament
- Design Ideas That Look "Store-Bought Cute"
- Safety Tips (Because Hot Glue Is a Sneaky Villain)
- Troubleshooting
- Conclusion
- Experience-Based Notes (About of "What People Actually Learn Doing This")
Wine corks are basically tiny, thumb-sized souvenirs. One might be from a holiday dinner, another from a “just one glass” night that somehow turned into karaoke. Instead of letting them rattle around in a drawer forever, turn them into a cute wine cork Christmas tree that looks festive, feels personal, and quietly says, “Yes, I recycle–and I’m adorable about it.”
This in-depth tutorial covers two easy styles (a tabletop cone tree and a quick ornament), plus the safety, sizing math, and design tricks that make your finished piece look polished–without needing a workshop, a sewing machine, or the patience of a saint.
What Makes a Wine Cork Tree So Easy (and So Cute)
A wine cork Christmas tree is a “forgiving” craft. Corks are lightweight, naturally textured, and slightly imperfect by nature–so minor spacing differences read as charming rather than sloppy. The basic construction is simple: you attach corks to a cone (or to each other) using strong adhesive, then dress it up with paint, ribbon, garland, or tiny ornaments.
- Budget-friendly: Many of the materials are already in your home (or easy to collect).
- Eco-minded: It’s a fun upcycling project that keeps corks out of the trash.
- Customizable: Rustic, glam, farmhouse, minimalist–cork fits all aesthetics.
- Giftable: Mini versions make great hostess gifts or holiday party favors.
Supplies and Tools
Gather your supplies first so you’re not holding a hot glue gun in one hand while rummaging for ribbon with the other (ask any crafter–this is how glue ends up on the dog).
For a tabletop cone tree
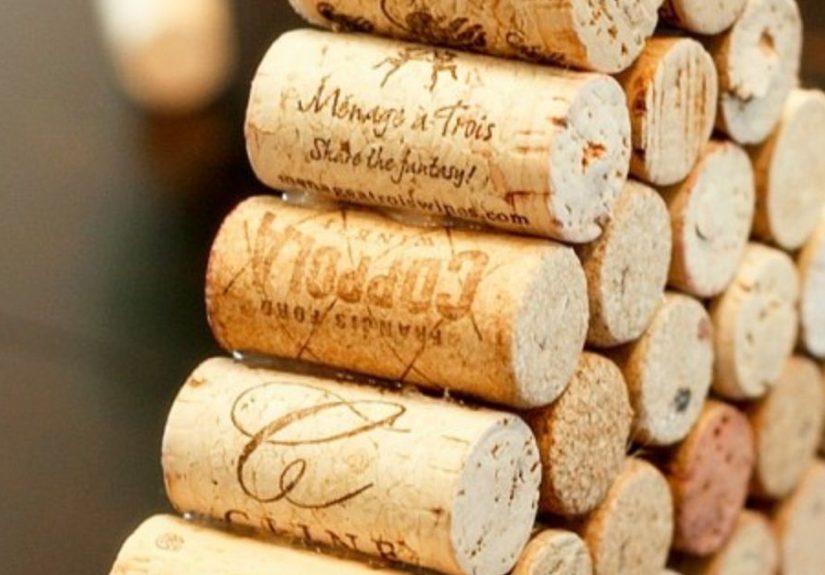
- Wine corks: natural cork is easiest to cut and paint; composite and synthetic can work too.
- Foam cone: floral foam or Styrofoam (common craft-store item) in your preferred height.
- Hot glue gun + glue sticks (low-temp is friendlier for beginners).
- Cutting setup: serrated knife, craft saw, or small fine-tooth saw; cutting board; and a clamp or grippy towel.
- Work surface protection: wax paper, cardboard, or a silicone mat.
- Optional base: wood slice, sturdy coaster, or small planter for a “finished” look.
For a quick ornament tree
- 6-10 whole wine corks
- Hot glue gun + glue sticks
- Small eye hook (or ornament hanger) and ribbon/twine
- Optional: scrapbook paper circles, buttons, paint, glitter, mini pom-poms
Decorating extras
- Acrylic paint (white, gold, green, or a color that matches your home)
- Ribbon, twine, bead garland, mini ornaments, bells, faux greenery
- Topper: mini star, bow, pinecone, or bottle-brush tree topper
- Clear craft sealer (optional) to protect paint and reduce shedding
Prep Your Corks (The Part That Makes Everything Easier)
If your corks are dirty or crumbly, the project gets frustrating fast. A little prep keeps your cuts cleaner and your glue bonds stronger.
1) Clean and dry
Remove foil bits and wipe corks with a dry cloth. If they’re sticky, use a slightly damp cloth, then air-dry completely. Glue loves dry surfaces.
2) Soften corks before cutting (highly recommended)
Cutting corks in half lengthwise can be surprisingly tough because cork is springy and wants to roll. Many crafters soften corks first by steaming them briefly (think: “spa day,” but for cork). After steaming, let the corks cool until they’re safe to handle, then slice.
Important: Let warmed corks dry before gluing. Damp cork plus hot glue can lead to weak bonds later.
3) Stabilize while you cut
Don’t freehand a rolling cork. Use a clamp, a miter box, or even a folded kitchen towel to keep it from sliding. Work slowly, keep fingers out of the blade path, and aim for consistent halves more than “perfect” halves.
Pick a Style
Option A: Tabletop cone tree (classic centerpiece)
This is the most popular version: cork halves (or whole corks) glued around a foam cone, building upward in rows like shingles. It’s ideal for mantels, coffee tables, bar carts, and holiday centerpieces.
Option B: Cork ornament tree (fast and giftable)
This is the speedy option: whole corks glued into a simple tree shape, finished with an eye hook and ribbon. Great for gifts, classroom crafts (with adult help), or a quick holiday-night project.
How to Make a Tabletop Wine Cork Christmas Tree
Step 1: Choose your cone size and estimate corks
Instead of guessing, do a quick estimate based on the base circumference. Wrap a string around the bottom of your cone, measure that length, then divide by how wide each cork half appears on the cone (often about 0.75-1 inch).
- Corks per row ≈ base circumference ÷ visible cork width
- Total cork halves ≈ corks per row × number of rows (more rows if you overlap tightly)
Typical ranges: a 6-inch cone often uses about 40-70 cork halves. A 12-inch cone can use 120-200 cork halves, depending on overlap and cork size.
Step 2: Optional–wrap the cone to hide gaps
Foam cones are bright white, and tiny gaps can show as you work upward. For a cleaner look, wrap the cone with kraft paper, felt, or scrap fabric and glue it down lightly. This also makes gap “fixes” disappear without extra effort.
Step 3: Decide on cork orientation
- Halves (flat side to cone): easier coverage, less bulk, and you can display winery logos.
- Whole corks: chunkier, more 3D, but you’ll need more corks and a bigger cone to keep it proportional.
- Vertical vs. horizontal: vertical corks feel “tree-like”; horizontal corks create a stacked, sculptural look.
Step 4: Glue the first row (this sets the whole vibe)
Protect your surface with wax paper or a silicone mat. Place the cone upright and begin gluing corks at the bottom edge. Apply hot glue to the back of a cork half, press it onto the cone, and hold for a few seconds until it grabs.
Work all the way around to create a complete base ring. If the first row is even, the rest of the tree becomes dramatically easier (and less “why is my tree leaning like it had two eggnogs?”).
Step 5: Build upward with staggered rows
For the next row, overlap seams so joints don’t line up–like brickwork. This staggered pattern hides gaps and gives the tree a fuller, more professional look. Rotate the cone as you work so you’re always gluing at a comfortable angle.
Step 6: Deal with gaps as you go
Gaps happen because corks vary in size and cones taper. Don’t panic; you have options:
- Trim corners: shave a small angle off a cork half so it nests better near the top.
- Use wedges: slice thin cork slivers to fill narrow spaces.
- Design your way out: add ribbon, bead garland, or faux greenery over any “problem zones.”
Step 7: Finish the top cleanly
As the cone narrows, switch to smaller cork pieces: short segments, tapered bits, or a single “cap” cork at the tip. Then add a topper–star, bow, pinecone, or mini bottle-brush tree. A topper gives the eye a satisfying finish and makes the whole piece look intentional.
Step 8: Add a base and final details
Gluing your tree to a base instantly upgrades it. A wood slice looks rustic; a small planter looks modern; a coaster keeps it neat and minimal. Wrap the bottom with ribbon or twine to hide the foam edge and make it gift-ready.
How to Make a Wine Cork Christmas Tree Ornament
This is the “I want something cute in 20 minutes” version.
- Arrange corks into a tree shape on your work surface (example: 3 on the bottom, 2 above, then 1, plus a “trunk” cork if you like).
- Hot glue corks where they touch and let the structure cool completely.
- Twist in a small eye hook at the top cork and thread ribbon through it for hanging.
- Optional: glue festive scrapbook paper circles onto cork ends or paint the edges for contrast.
Design Ideas That Look “Store-Bought Cute”
Rustic farmhouse
- Leave corks natural; add twine and a burlap bow.
- Dry-brush white paint on edges for a subtle “snow” effect.
Glam holiday
- Paint cork edges gold or champagne.
- Add a thin bead garland and a glittery star topper.
Modern minimalist
- Paint everything one matte color (white or deep green).
- Finish with a clean ribbon spiral–no extra ornaments needed.
Memory tree
- Write dates, places, or tiny notes on cork ends (“First house,” “Napa trip,” “Holiday 2025”).
- Add a few corks each year and turn it into a tradition.
Safety Tips (Because Hot Glue Is a Sneaky Villain)
- Low-temp glue guns reduce burn risk and give you a little more working time.
- Use wax paper or a silicone mat to protect your table and make cleanup easier.
- Don’t touch the metal nozzle and keep the gun on a stand when not in use.
- Stabilize corks while cutting; slow and steady beats “I can do this quickly.”
- Ventilate if you paint or seal; let everything dry fully before displaying.
Troubleshooting
My corks slide down the cone
Use a little less glue and hold each cork for a few extra seconds. Too much glue can act like a slip-and-slide before it sets.
I can see foam through the gaps
Wrap the cone first (kraft paper or felt), or fill with thin cork wedges. Garland is also an excellent “strategic distraction.”
The top looks messy
Trim cork corners near the top and switch to smaller segments. Then add a topper so the eye reads “cute finishing detail,” not “cork traffic jam.”
Conclusion
A wine cork Christmas tree is one of those rare DIYs that’s easy, personal, and genuinely useful as decor. The method stays simple–prep corks, glue from the bottom up, and finish with a topper–but the results can look surprisingly polished. Best of all, every cork has a little story, and now those stories get to show up on your holiday table instead of hiding in a drawer with mystery keys and expired coupons.
Experience-Based Notes (About of “What People Actually Learn Doing This”)
When people make a cute wine cork Christmas tree for the first time, the biggest surprise is usually not the gluing–it’s the prep. Corks are tough little cylinders, and slicing them cleanly can feel like trying to butter frozen toast. Makers who enjoy the process treat cutting as its own mini-step: soften corks (brief steaming is popular), stabilize them so they don’t roll, and aim for consistent halves more than “perfect” halves. It also helps to sort corks by size once they’re cut; using similar pieces in the same row makes the tree look smoother without any extra effort.
The next lesson is that hot glue has a personality. If you squeeze out a big blob, corks can slide before the glue sets, and you’ll spend extra time holding pieces in place. People who get cleaner results usually use less glue than expected–just a short bead–then press and hold for a few seconds until it grabs. A low-temperature glue gun is a favorite for this craft because it reduces burn risk and gives you slightly more working time. Many crafters keep silicone finger caps (or use the back of a spoon) so they can press corks firmly without touching hot glue.
Almost everyone agrees the first row at the base is the make-or-break moment. If the bottom ring is uneven, the whole tree can lean, and you’ll spend the rest of the build quietly negotiating with gravity. A simple fix is a quick dry fit: place cork halves around the base without glue to see how they naturally space out. Some makers draw a light guideline around the cone and glue the first ring slowly, checking alignment every few corks. Once the base is solid, the next rows feel much easier because they have a clear edge to sit on.
Then comes the cone’s “narrow zone” near the top–where corks suddenly stop behaving like matching puzzle pieces. Experienced DIYers handle this by trimming tiny angles off cork corners, switching to shorter cork segments, and refusing to obsess over microscopic gaps. The real secret is the topper. A star, bow, pinecone, or mini bottle-brush tree acts like a visual full stop, and your eye reads the whole piece as finished and intentional. In other words, the topper isn’t just decoration–it’s clever camouflage with holiday spirit.
People who repeat this project year after year swear that tiny details create the biggest “cute” upgrade. A ribbon spiral can hide gaps and add structure. A bead garland instantly adds sparkle and makes the tree look styled. Dry-brushing white paint on cork edges gives a snowy, textured effect without turning the entire project into a paint marathon. And if you want the tree to feel personal, writing dates, places, or short notes on cork ends transforms it into a memory piece that gets better over time–one cork per holiday, one tiny story per season.
The most common post-holiday regret is storage. Cork trees are lightweight, but toppers get squished if you toss the tree into a bin under heavier ornaments. The easy solution is to store it upright in a small box, or wrap it gently in tissue and wedge it so it can’t rattle around. If you used glitter or delicate embellishments, a quick coat of clear sealer can reduce shedding and keep your “Christmas sparkle” from lingering into April. Do that, and your cork tree becomes a repeatable tradition, not a one-season craft.


