Table of Contents >> Show >> Hide
- What “Expand Heat Shrink Tubing” Really Means
- Tools and Materials You May Need
- How to Expand Heat Shrink Tubing: 9 Steps
- Step 1: Measure the Largest and Smallest Diameters
- Step 2: Choose the Right Shrink Ratio and Tubing Type
- Step 3: Cut the Tubing to Length Before You Do Anything Else
- Step 4: Inspect the Tubing and Pick a Safe Expansion Aid
- Step 5: Gently Pre-Open the Tubing Just Enough
- Step 6: Slide the Tubing Into Position
- Step 7: Use a Heat Gun, Not Random Chaos
- Step 8: Shrink From the Correct Starting Point
- Step 9: Let It Cool and Inspect the Finish
- Common Mistakes to Avoid
- Best Uses for Expanded Heat Shrink Tubing
- Conclusion
- Real-World Lessons and Experiences With Expanding Heat Shrink Tubing
- SEO Tags
If you have ever tried to slide heat shrink tubing over a connector that looks like it has been hitting the gym, you already know the problem: the tubing fits the wire, but the connector says, “Absolutely not.” That is usually when people start bargaining with physics, poking the tubing with pliers, and making choices future-them will regret.
The good news is that expanding heat shrink tubing is not black magic. The bad news is that brute force is not the answer. In real-world wiring, “expanding” heat shrink tubing usually means one of three things: choosing tubing with a larger supplied diameter, using a higher shrink ratio like 3:1 or 4:1, or gently pre-opening the tube just enough to clear a connector before shrinking it into place. In other words, you are not trying to permanently stretch the tubing into a new lifestyle. You are trying to get it over the largest part of the assembly without damaging it.
This guide walks you through exactly how to expand heat shrink tubing in 9 practical steps, with safety tips, sizing advice, and real-world troubleshooting. Whether you are repairing automotive wiring, sealing a marine splice, organizing a harness, or cleaning up a DIY electronics project, the goal is the same: get the tubing on cleanly, shrink it evenly, and avoid turning a simple job into a tiny polymer tragedy.
What “Expand Heat Shrink Tubing” Really Means
Before you grab a tool, it helps to understand what heat shrink tubing is designed to do. Heat shrink tubing is supplied in an expanded state and shrinks back toward its recovered size when heat is applied. That means the smartest way to “expand” it for installation is usually not aggressive stretching. It is proper selection.
For example, if the tubing has to pass over a bulky crimp, terminal, backshell, cable lug, or plug body, a standard 2:1 tube may not have enough range. In that case, a 3:1, 4:1, or overexpanded product is often the better choice. Adhesive-lined tubing is also helpful when you need environmental sealing, strain relief, or moisture protection.
Translation: if the tubing is fighting you like a stubborn pickle jar, the sizing may be wrong. Good installation should feel controlled, not like a wrestling match in miniature.
Tools and Materials You May Need
- Heat shrink tubing in the correct size and shrink ratio
- Heat gun with controlled airflow
- Scissors or a sharp flush cutter
- Calipers or a tape measure
- Smooth-jaw pliers, a rounded mandrel, or a tapered insertion aid
- Heat-resistant gloves
- Safety glasses
- A clean, dry work surface
A quick note on tools: use smooth, rounded tools if you need to open the tubing slightly. Sharp plier teeth, awls with burrs, or anything that can nick the wall of the tubing are a bad idea. Tiny cuts become big failures once heat is applied.
How to Expand Heat Shrink Tubing: 9 Steps
Step 1: Measure the Largest and Smallest Diameters
Start by measuring the largest part the tubing must pass over, not just the wire itself. This could be a crimp terminal, solder joint, connector shoulder, or cable lug. Then measure the smallest area the tubing must recover onto, such as the insulated wire or cable jacket.
This is the whole game. The supplied inner diameter needs to be large enough to clear the biggest section, and the recovered diameter needs to shrink tightly enough around the smallest section. If you skip this step, the rest of the job turns into highly avoidable improvisation.
For odd shapes, measure the widest point and add a little tolerance. Real assemblies are rarely perfect cylinders. Connectors love bulges, corners, and general inconvenience.
Step 2: Choose the Right Shrink Ratio and Tubing Type
Now match the job to the tubing:
- 2:1 tubing works well for simple wire repairs and neat bundling when there is not a big diameter jump.
- 3:1 tubing is a better option when you need to go over moderate connector transitions.
- 4:1 or higher is ideal when the tubing must pass over bulky terminations and still recover tightly on a smaller cable.
- Overexpanded tubing is especially useful for large cable lugs, awkward transitions, and assemblies with major diameter differences.
- Adhesive-lined tubing is best when you want sealing, strain relief, and protection from moisture.
If you are expanding heat shrink tubing because it will not fit over the connector, the best fix is often choosing tubing with more usable range instead of trying to physically stretch undersized tubing beyond reason. That is the difference between “professional result” and “mystery failure six weeks later.”
Step 3: Cut the Tubing to Length Before You Do Anything Else
Cut the tubing to a practical length before installation. Leave enough length to cover the repair area and overlap onto the existing insulation or jacket on both sides. If you are covering a splice, center coverage matters. If you are covering a connector transition, make sure the tube extends far enough to support both the connector end and the cable side.
Also remember that heat shrink tubing can shrink slightly in length as it recovers. So do not cut it with the optimism of someone packing for a weekend and assuming one T-shirt is enough. Give yourself a little margin.
Make the cut square and clean. Jagged ends do not look great and can make positioning harder.
Step 4: Inspect the Tubing and Pick a Safe Expansion Aid
Before you try to open the tubing, inspect it. Look for cracks, flattened areas, or storage damage. Tubing that is old, brittle, or nicked should not be trusted on an important repair.
If you need to pre-expand it slightly, choose a smooth tool. Good options include:
- a rounded mandrel
- a blunt tapered insertion cone
- smooth-jaw pliers opened gently inside the tube
- a polished, rounded screwdriver handle used carefully as a temporary form
The rule is simple: smooth is good, sharp is bad. You are easing the tube open, not punching a new vent hole into it.
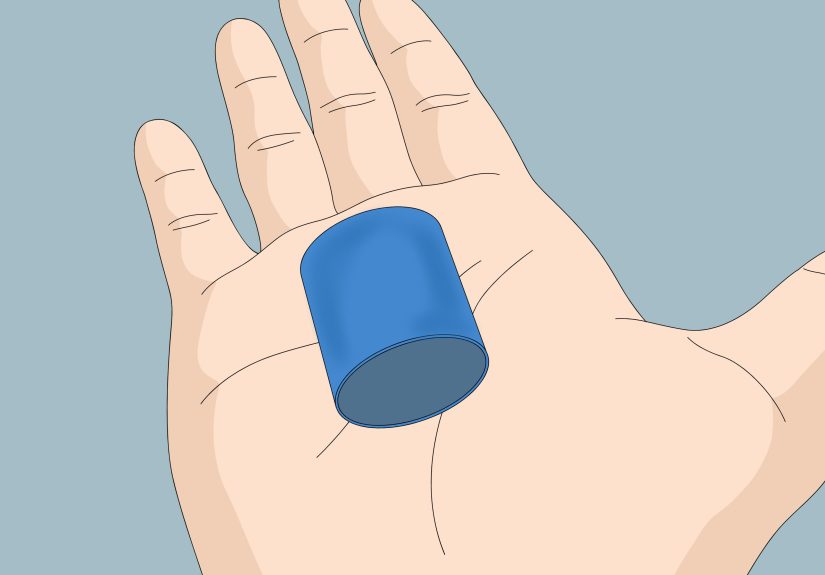
Step 5: Gently Pre-Open the Tubing Just Enough
Insert your rounded tool into the tubing and gently widen the opening only as much as needed to get over the oversized part. Do not crank the tube open dramatically. Do not twist it aggressively. Do not try to turn 2:1 tubing into 9:1 tubing through sheer confidence.
The safest technique is gradual expansion. Open a little, test fit, and stop as soon as the tubing can slide over the obstruction. If the tube develops whitening, stress marks, tearing, or obvious distortion, stop immediately and switch to a higher-ratio or overexpanded product.
This step is a positioning trick, not a permanent modification. Think “gentle persuasion,” not “polymer boot camp.”
Step 6: Slide the Tubing Into Position
Once the tubing opening is adequate, slide it over the connector or splice and move it into its final position. Make sure it is centered where it needs to be. For splices, equal overlap on both sides usually gives the cleanest result. For connector transitions, the tubing should bridge the diameter change smoothly without leaving one side barely covered.
If the tubing keeps snagging, remove it and check for burrs, sharp crimp wings, or rough solder points. The problem may not be the tubing at all. Sometimes the connector itself is the drama queen in the room.
At this point, double-check the orientation. Once you apply heat, the “I’ll just fix it after it shrinks” plan becomes fantasy literature.
Step 7: Use a Heat Gun, Not Random Chaos
Use a heat gun with controlled airflow. This gives you more even heating and lowers the risk of scorching, bubbling, or uneven recovery. In many common applications, an open flame is not recommended because uncontrolled heat can damage the tubing, the adhesive lining, or the insulation underneath.
Keep the heat source moving. Stay far enough away to avoid charring. Rotate the work so the tubing shrinks evenly around the full circumference. The goal is uniform recovery, not one side looking factory-finished while the other side looks like it went through a small weather event.
If the tubing specification lists minimum shrink or full recovery temperature, follow that product data. Different materials recover at different temperatures, so do not assume all heat shrink behaves the same way.
Step 8: Shrink From the Correct Starting Point
The best shrinking pattern depends on the tubing type and the job.
For adhesive-lined tubing, starting near the center and working toward the ends often helps push the adhesive outward and reduce trapped air. This is especially helpful when sealing splices and connector transitions.
For long thin-wall coverage, starting at one end and progressing steadily to the other can work well, as long as you keep the heating even and avoid trapping air pockets.
Watch for the visual signs of proper recovery: the tubing should conform closely to the substrate, the surface should look smooth, and the ends should sit neatly without splits or scorched edges. With adhesive-lined products, you may see a slight bead of adhesive at the ends. That is usually a good sign that the seal has formed.
Step 9: Let It Cool and Inspect the Finish
After heating, let the tubing cool naturally before flexing or stressing the assembly. Then inspect it carefully. Look for:
- uniform shrink all the way around
- tight recovery over the wire or cable jacket
- no cracks, bubbles, or burn marks
- proper overlap and coverage
- clean end transitions
If the tubing is loose after cooling, it was probably oversized or the shrink ratio was insufficient. If it is scorched or brittle, the heat was too aggressive. If it split, it may have been damaged during pre-expansion or forced over a connector that was simply too large.
And there you have it: a finished repair that looks intentional, reliable, and refreshingly free of electrical tape wrapped like a panic response.
Common Mistakes to Avoid
- Using the wire size alone to choose tubing: always size for the biggest obstruction and the smallest recovery point.
- Overstretching undersized tubing: if it needs excessive force, pick a better size or higher shrink ratio.
- Using sharp tools to expand it: tiny nicks can become splits during heating.
- Overheating: brittle, blistered, or charred tubing is a sign the heat source was too intense or held too long in one place.
- Skipping overlap: too little overlap weakens strain relief and sealing performance.
- Shrinking before final positioning: a classic mistake, usually followed by silence and a second piece of tubing.
Best Uses for Expanded Heat Shrink Tubing
Knowing how to expand heat shrink tubing properly is useful in all kinds of jobs:
- automotive harness repair
- marine wiring and moisture sealing
- electronics assembly and cable management
- speaker wire and low-voltage installations
- connector backshell protection
- strain relief on custom cable builds
- repairing damaged cable jackets without removing connectors
In many of these cases, high-ratio or overexpanded tubing makes the work faster and cleaner because it reduces the need for awkward manual stretching. Your future self will appreciate that very much.
Conclusion
If you want the cleanest answer to the question “How do you expand heat shrink tubing?” here it is: measure carefully, choose the right tubing, pre-open it only gently if needed, and shrink it with controlled heat. That combination gives you a snug fit, a professional finish, and a repair that actually holds up in the real world.
The biggest takeaway is that good installation starts before the heat gun comes out. Smart sizing beats brute force every time. A little planning saves a lot of frustration, and it also keeps your tubing from ending up looking like it lost an argument with a toaster.
Real-World Lessons and Experiences With Expanding Heat Shrink Tubing
People usually learn heat shrink tubing the same way they learn many workshop skills: by getting one small detail wrong and then pretending the result was “good enough” until it clearly was not. The most common real-world lesson is sizing. A lot of beginners buy tubing that matches the wire diameter perfectly, then discover it has to pass over a crimp terminal, solder blob, or connector shoulder first. Suddenly the tubing is technically correct and practically useless. After that happens once, most people become very loyal to calipers and higher shrink ratios.
Another common experience is discovering how different tubing types behave. Thin-wall tubing feels easy and forgiving for light-duty work, but once moisture, abrasion, or strain relief become part of the job, adhesive-lined tubing feels like a major upgrade. It gives the repair a more finished look and a more durable seal. The first time someone sees a properly recovered adhesive-lined tube grip both the connector and the cable jacket, they usually stop treating heat shrink as “just fancy plastic.” It starts to feel like a real protective component.
There is also the heat source lesson, and it tends to arrive dramatically. New users often assume more heat equals faster success. In reality, too much heat in one spot creates bubbles, scorching, brittleness, or uneven shrink. Experienced installers learn to keep the gun moving, rotate the work, and let the tubing recover gradually. The job actually goes faster when you stop trying to rush it. Heat shrink tubing responds well to patience and very badly to panic.
Many hobbyists and technicians also discover that manual pre-expansion has limits. Gently opening the tubing with a smooth, rounded aid can help it slip over a slightly oversized shape, but it is not a miracle cure for bad sizing. The moment a job starts requiring a lot of force, the lesson becomes obvious: the right product would have saved time, tubing, and colorful language. That is usually when people start keeping a few sizes of 3:1 or 4:1 tubing in the drawer instead of relying on one “universal” tube that turns out to be universal for almost nothing.
One more real-world takeaway is cosmetic value. A neatly shrunk tube does more than insulate and protect. It makes the repair look deliberate. In automotive work, audio installs, marine wiring, and custom electronics, that matters. Clean cable transitions, even recovery, and tidy overlap signal that the job was done with intention. Messy tape wraps may still function for a while, but properly installed heat shrink looks like someone actually respected the project.
In short, experience teaches the same thing every solid guide teaches: measure first, choose tubing with enough range, expand gently only when necessary, and use controlled heat. Once those habits become routine, heat shrink tubing stops being fussy and starts being one of the most satisfying materials on the bench.


